This post may contain affiliate links.
It’s time to head to the woodshop!
If you’ve seen our review of European motorhomes, you’ll remember that one of the nice touches that I really liked was the inclusion of wooden shower mats. They feel better on the feet than cold plastic, they look great, and they help keep the shower floor from flexing. But mostly, they look great – kind of like a yacht – and I just wanted one. Since RV showers come in unusual shapes and sizes, and North American RV manufacturers don’t offer this amenity, you can’t just buy one. So what do you do?
Well, if you’re me, you make one! This isn’t really an RV project. It’s more of a woodworking project that just happens to be an RV application. Whatever. It was fun! Stef stuck around to take pictures. Let’s get started!
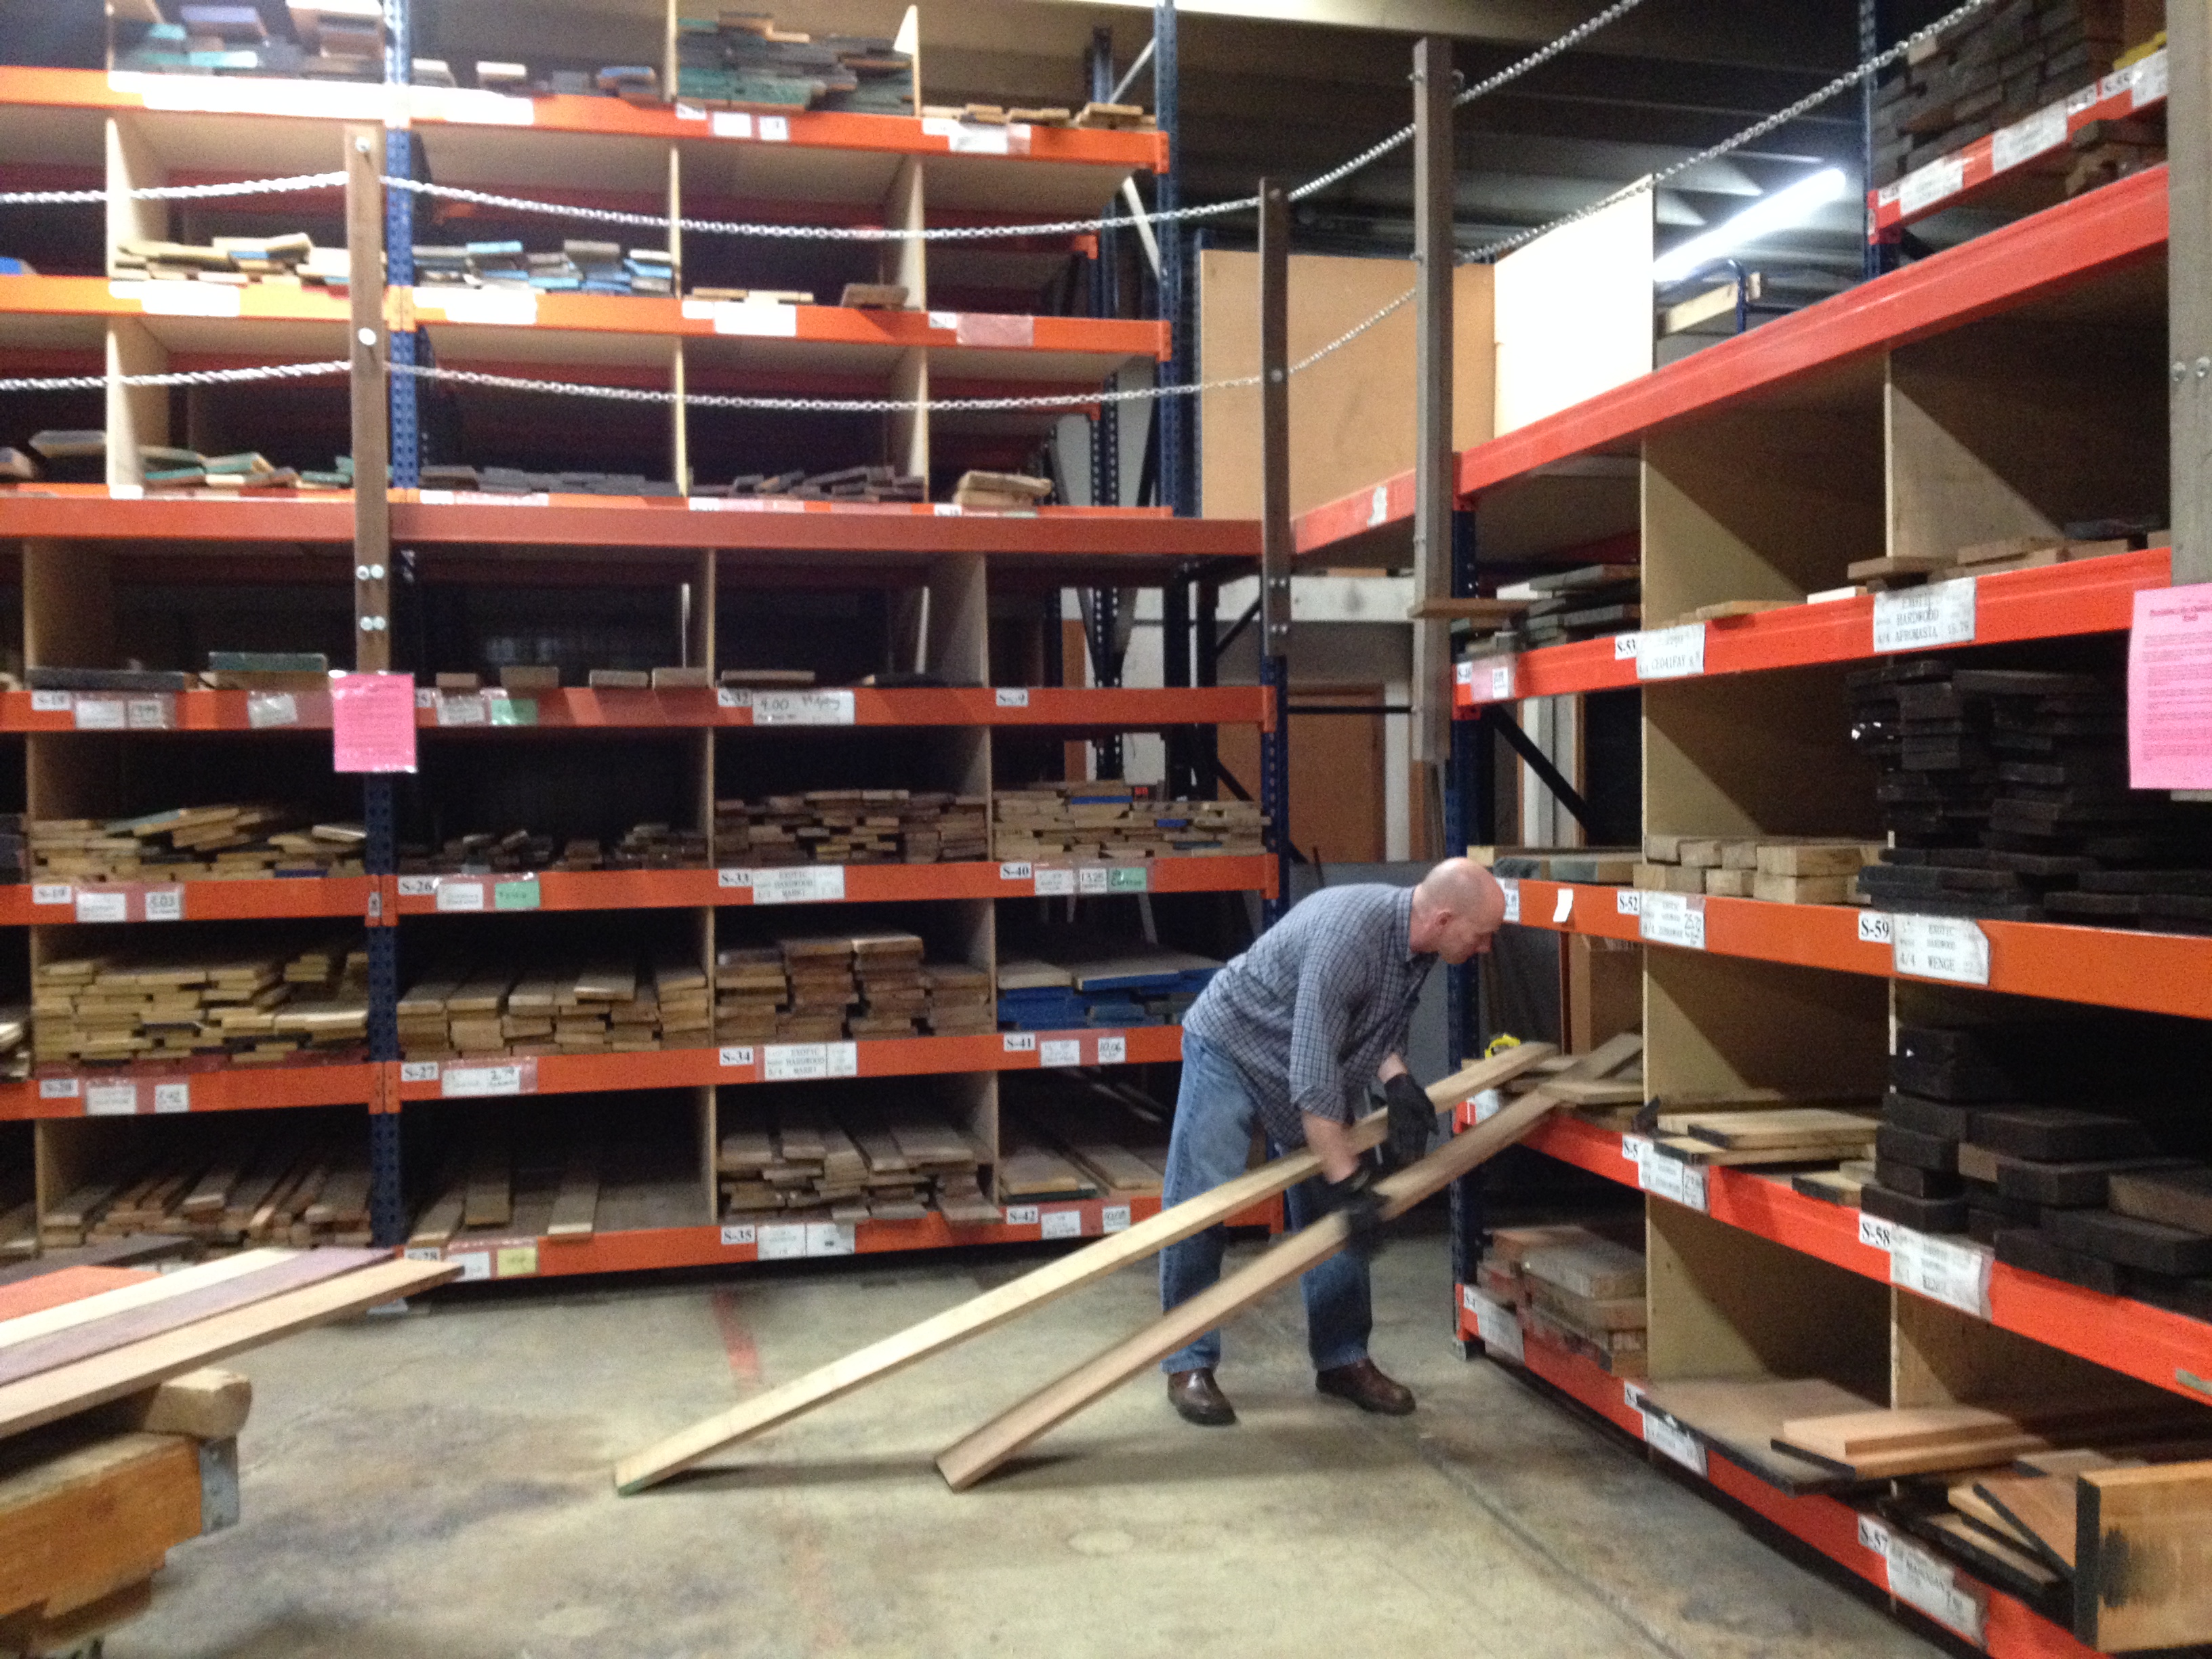
First – we had to head to the wood store to buy some appropriate wood. I had originally wanted Teak, but the only Teak I could get on a Saturday afternoon on a whim was $40 per board foot. I needed about 5 board feet, and Stef immediately vetoed a $200 shower mat. So we wound up selecting Iroko instead. Though not related to Teak, Iroko has similar coloring, feel, and decay resistance. It’s often called “African Teak”. But the main feature of Iroko as far as Stef was concerned is that it cost about one-fourth what actual Teak costs. Here I am selecting our Iroko plank.
The next task was to make a full-size template of our shower floor from cardboard. Our shower floor isn’t exactly rectangular, and the shower pan curves significantly toward the bottom. I thought a template would be more accurate than measuring. I worked with the cardboard template until it was sitting on the bottom just as I wanted it.

With that done, it was time to get to work on the Iroko. First I surfaced one face and edge on the jointer.
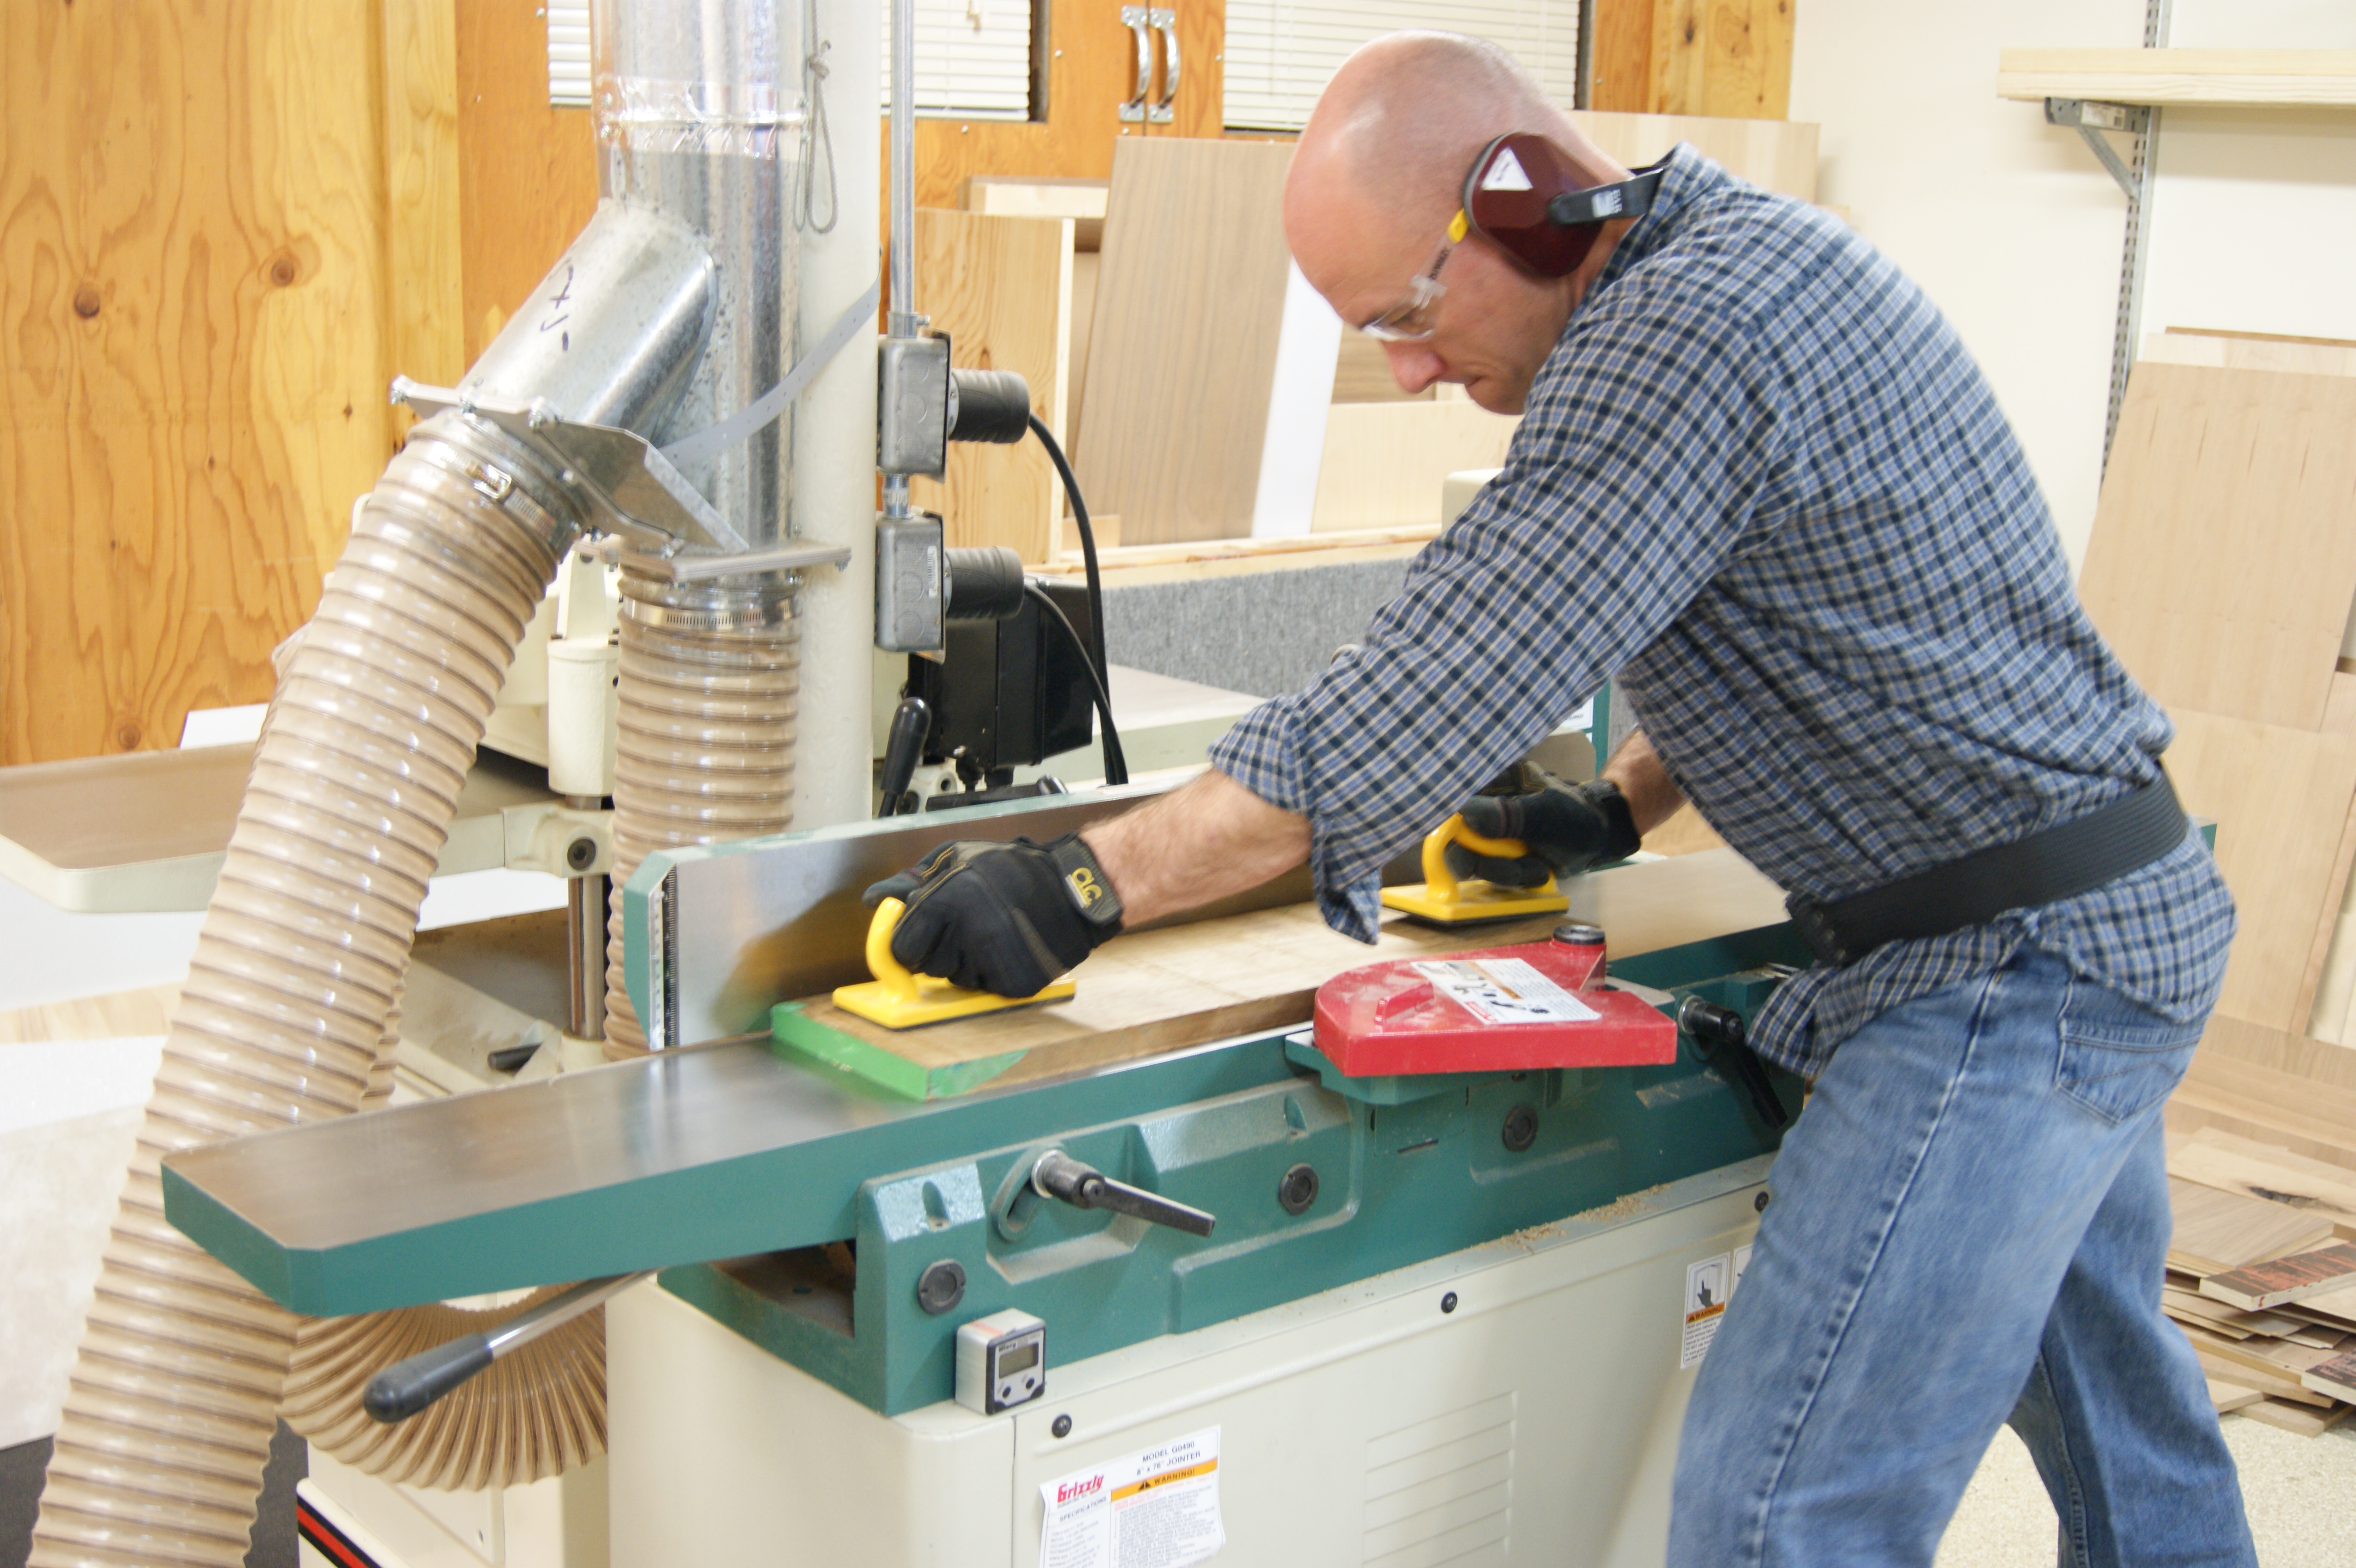
Next came planing it to thickness on the planer. I just went with a standard ¾ inch (you’ll see why later).

I had decided to use 2 inch wide slats to form the mat. Once the stock was planed to final thickness, I ripped all the slats to width.

With all the slats roughly to size, I went back to my full size drawing to refine the layout, and I made some spacers to give me consistent gaps.
Once I had things straight in my mind, it was time to trim and crosscut the Iroko slats to final length using a sled on the table saw.
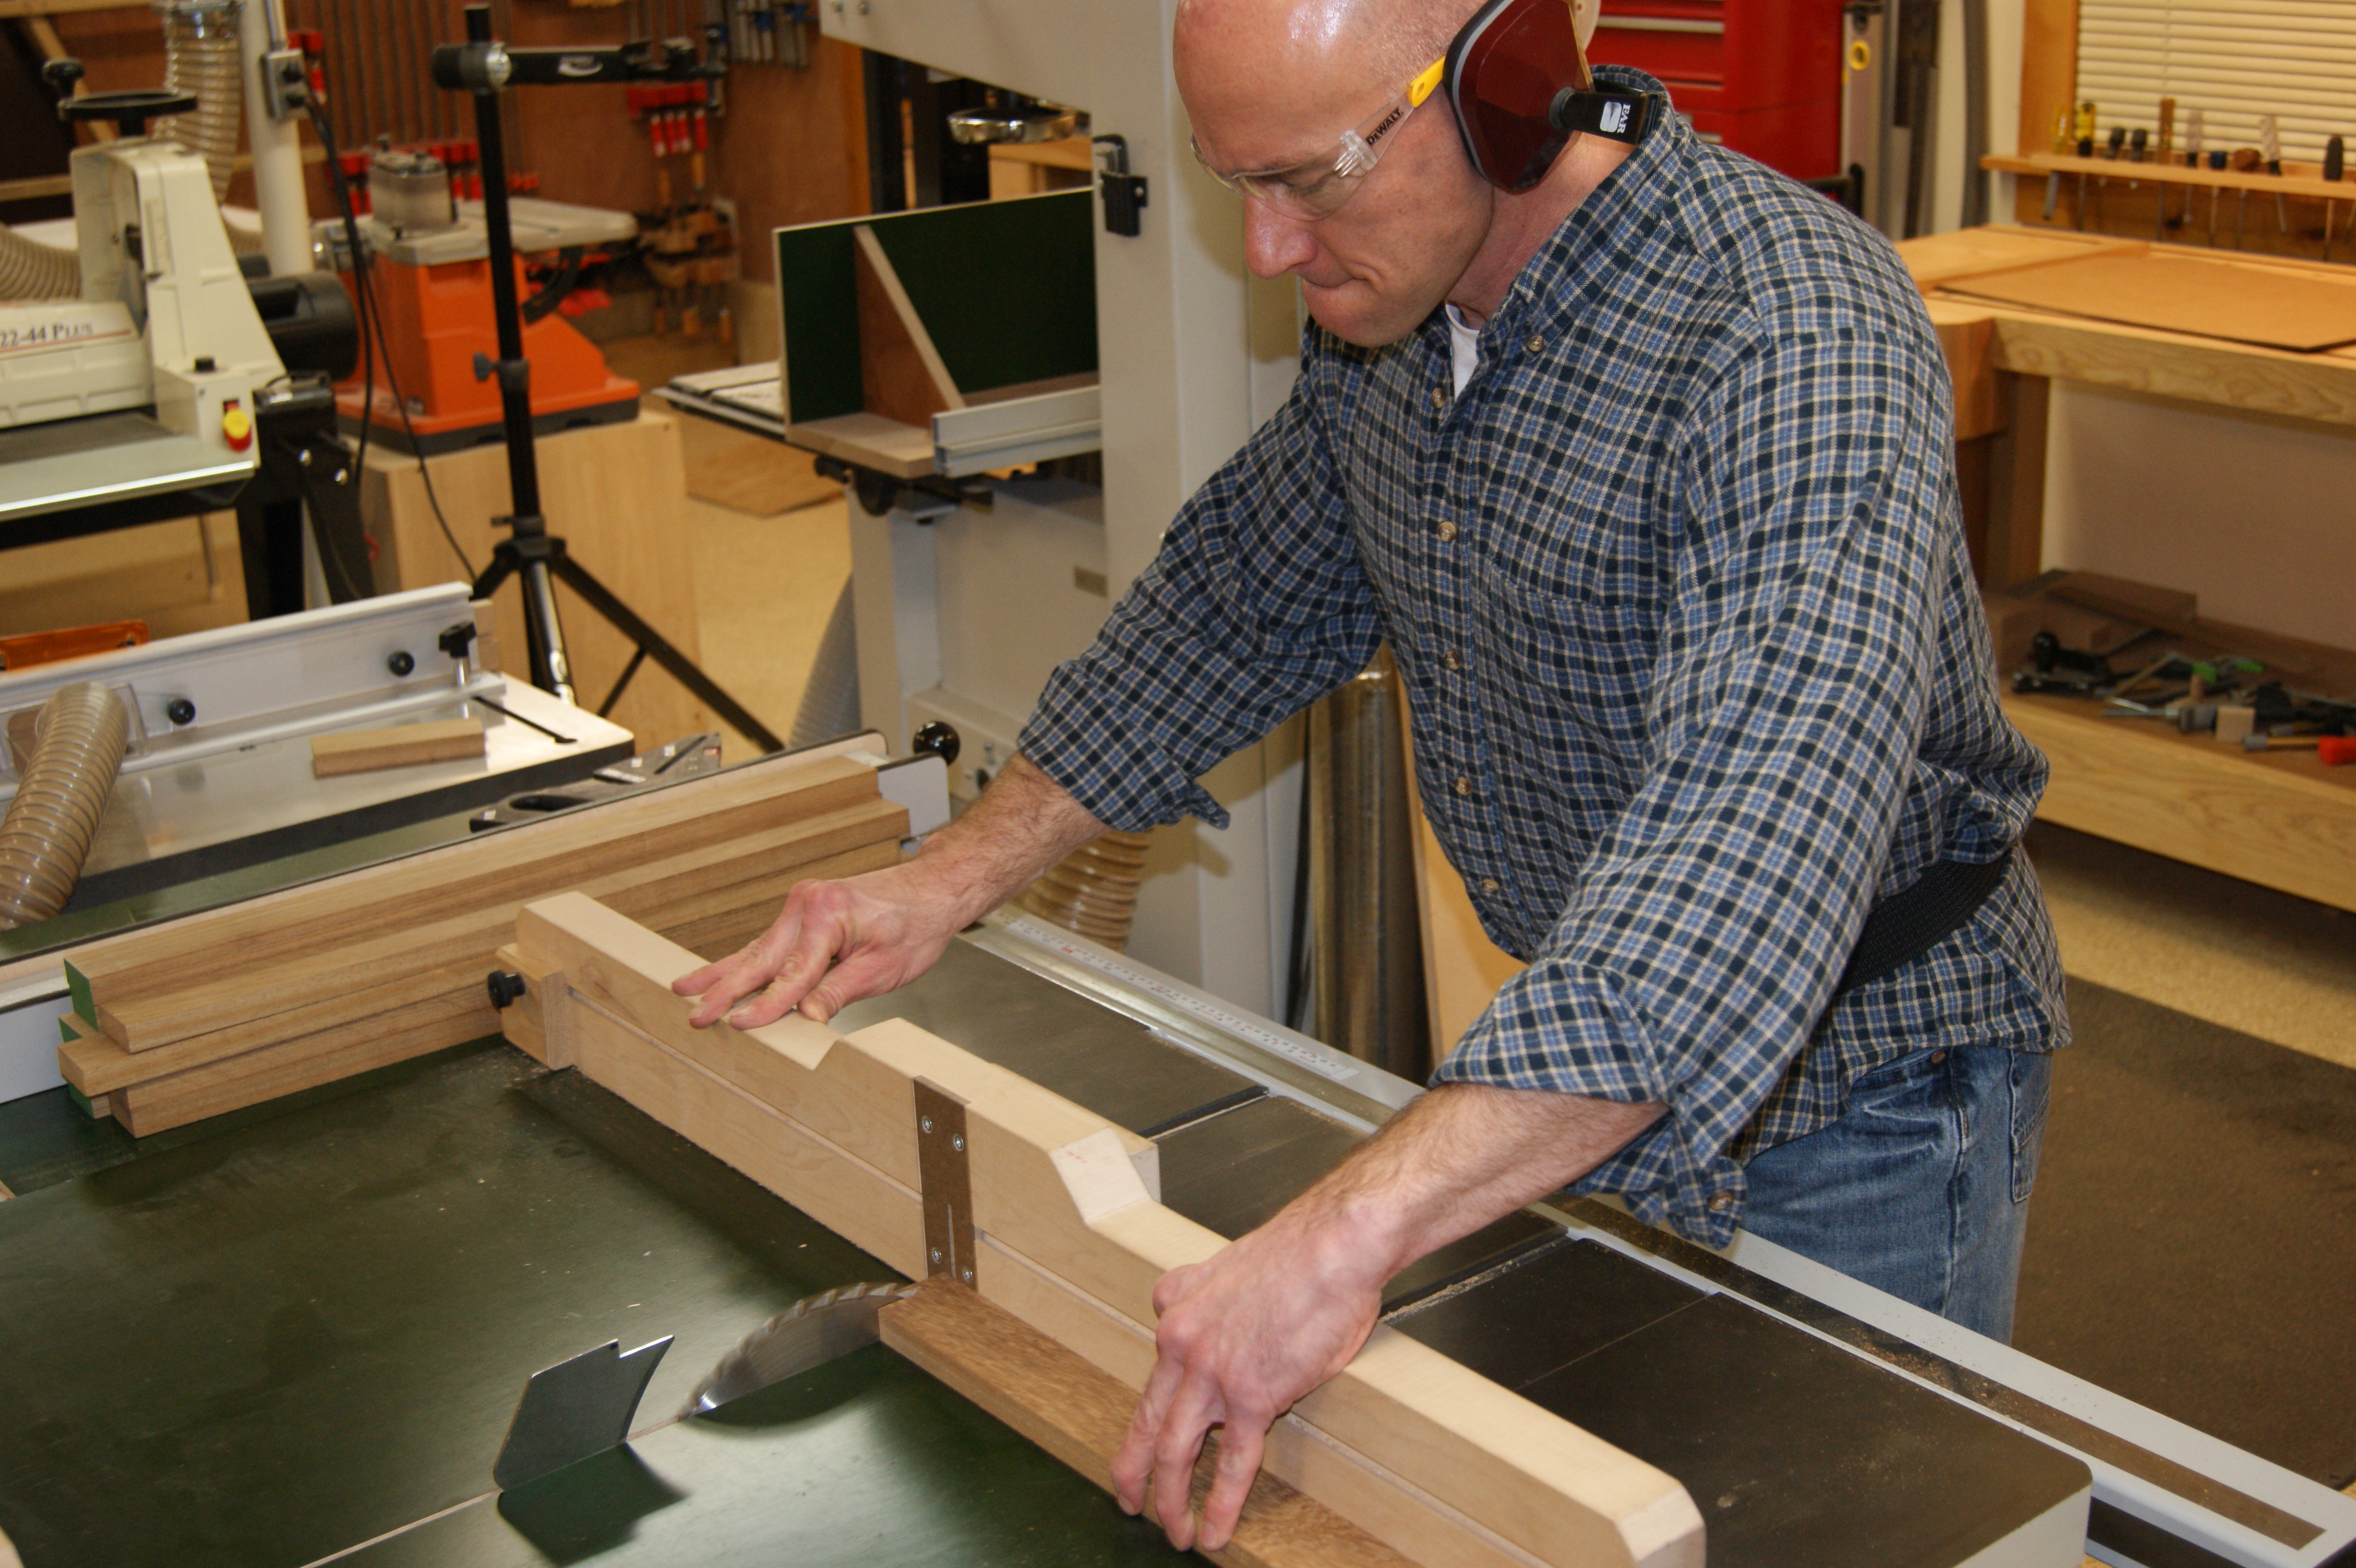
Next, I rounded over the edges and ends on the router table. (It is a shower mat, after all. Nobody wants to step on a sharp corner barefoot…)
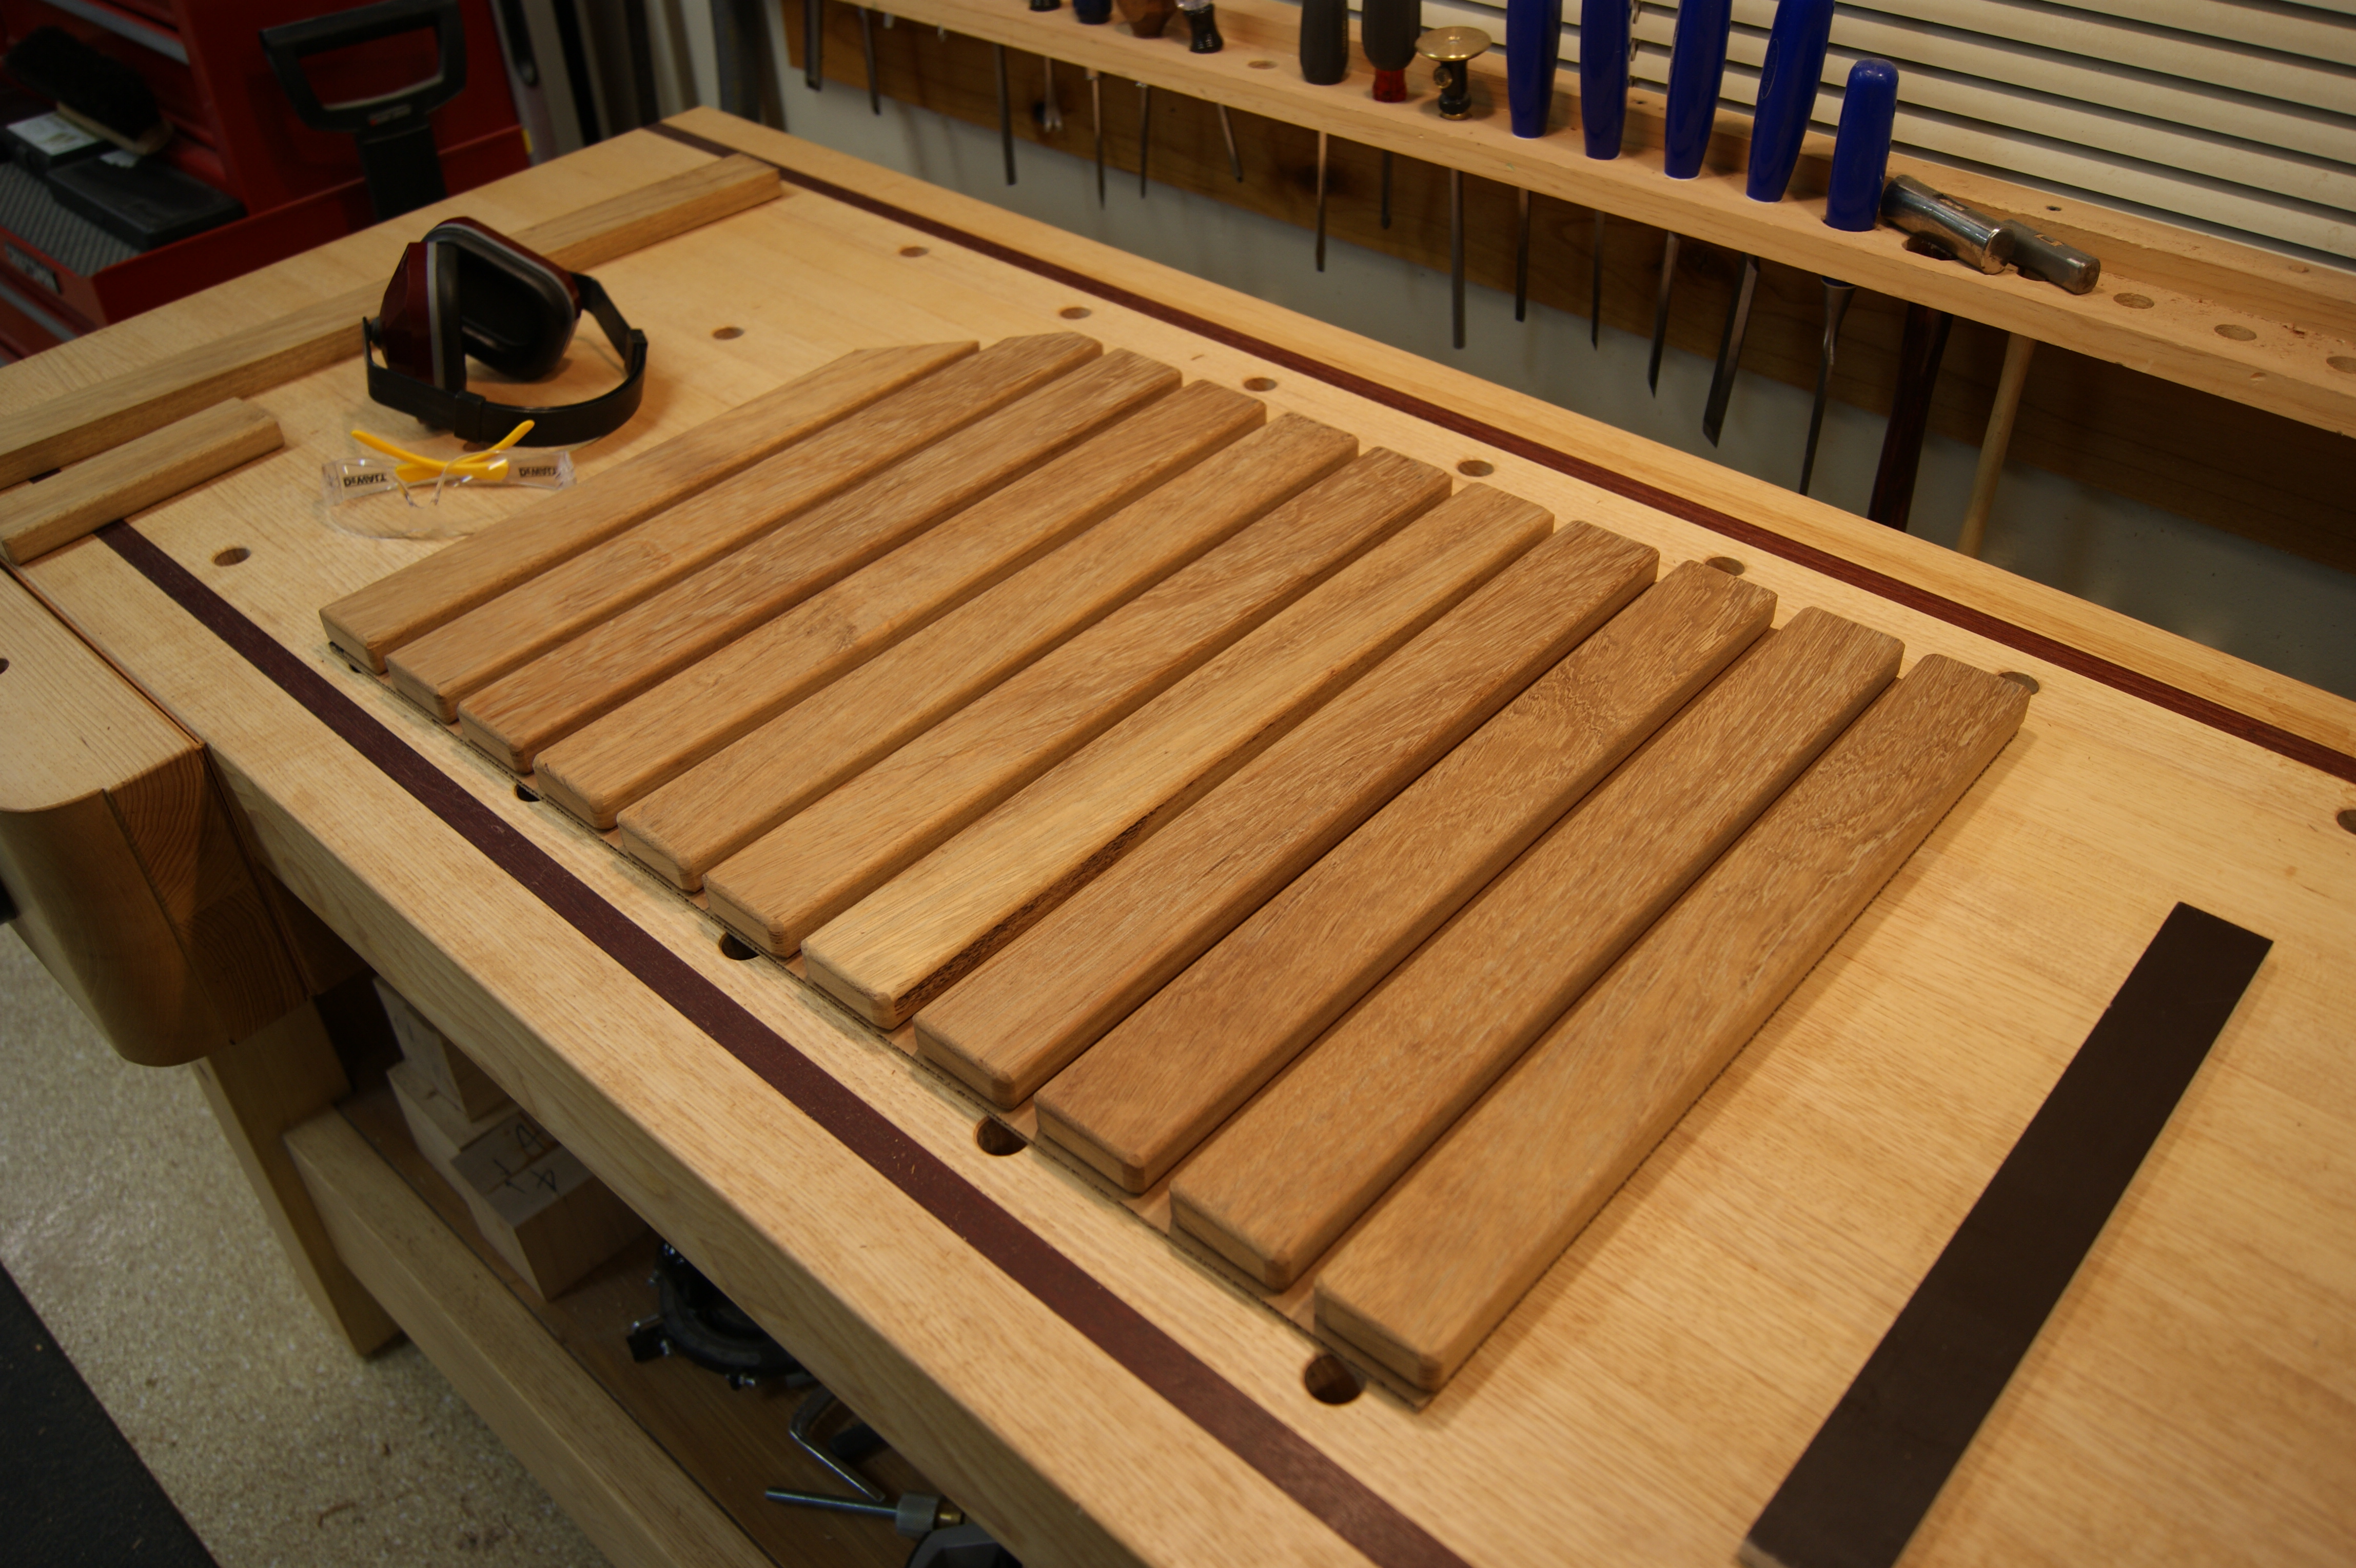
I have a bad habit of losing track of time and working until 2 or 3 AM without realizing it. By this point, it was getting late, and Stef reminded me to go to bed. So here’s where I left it that first day.
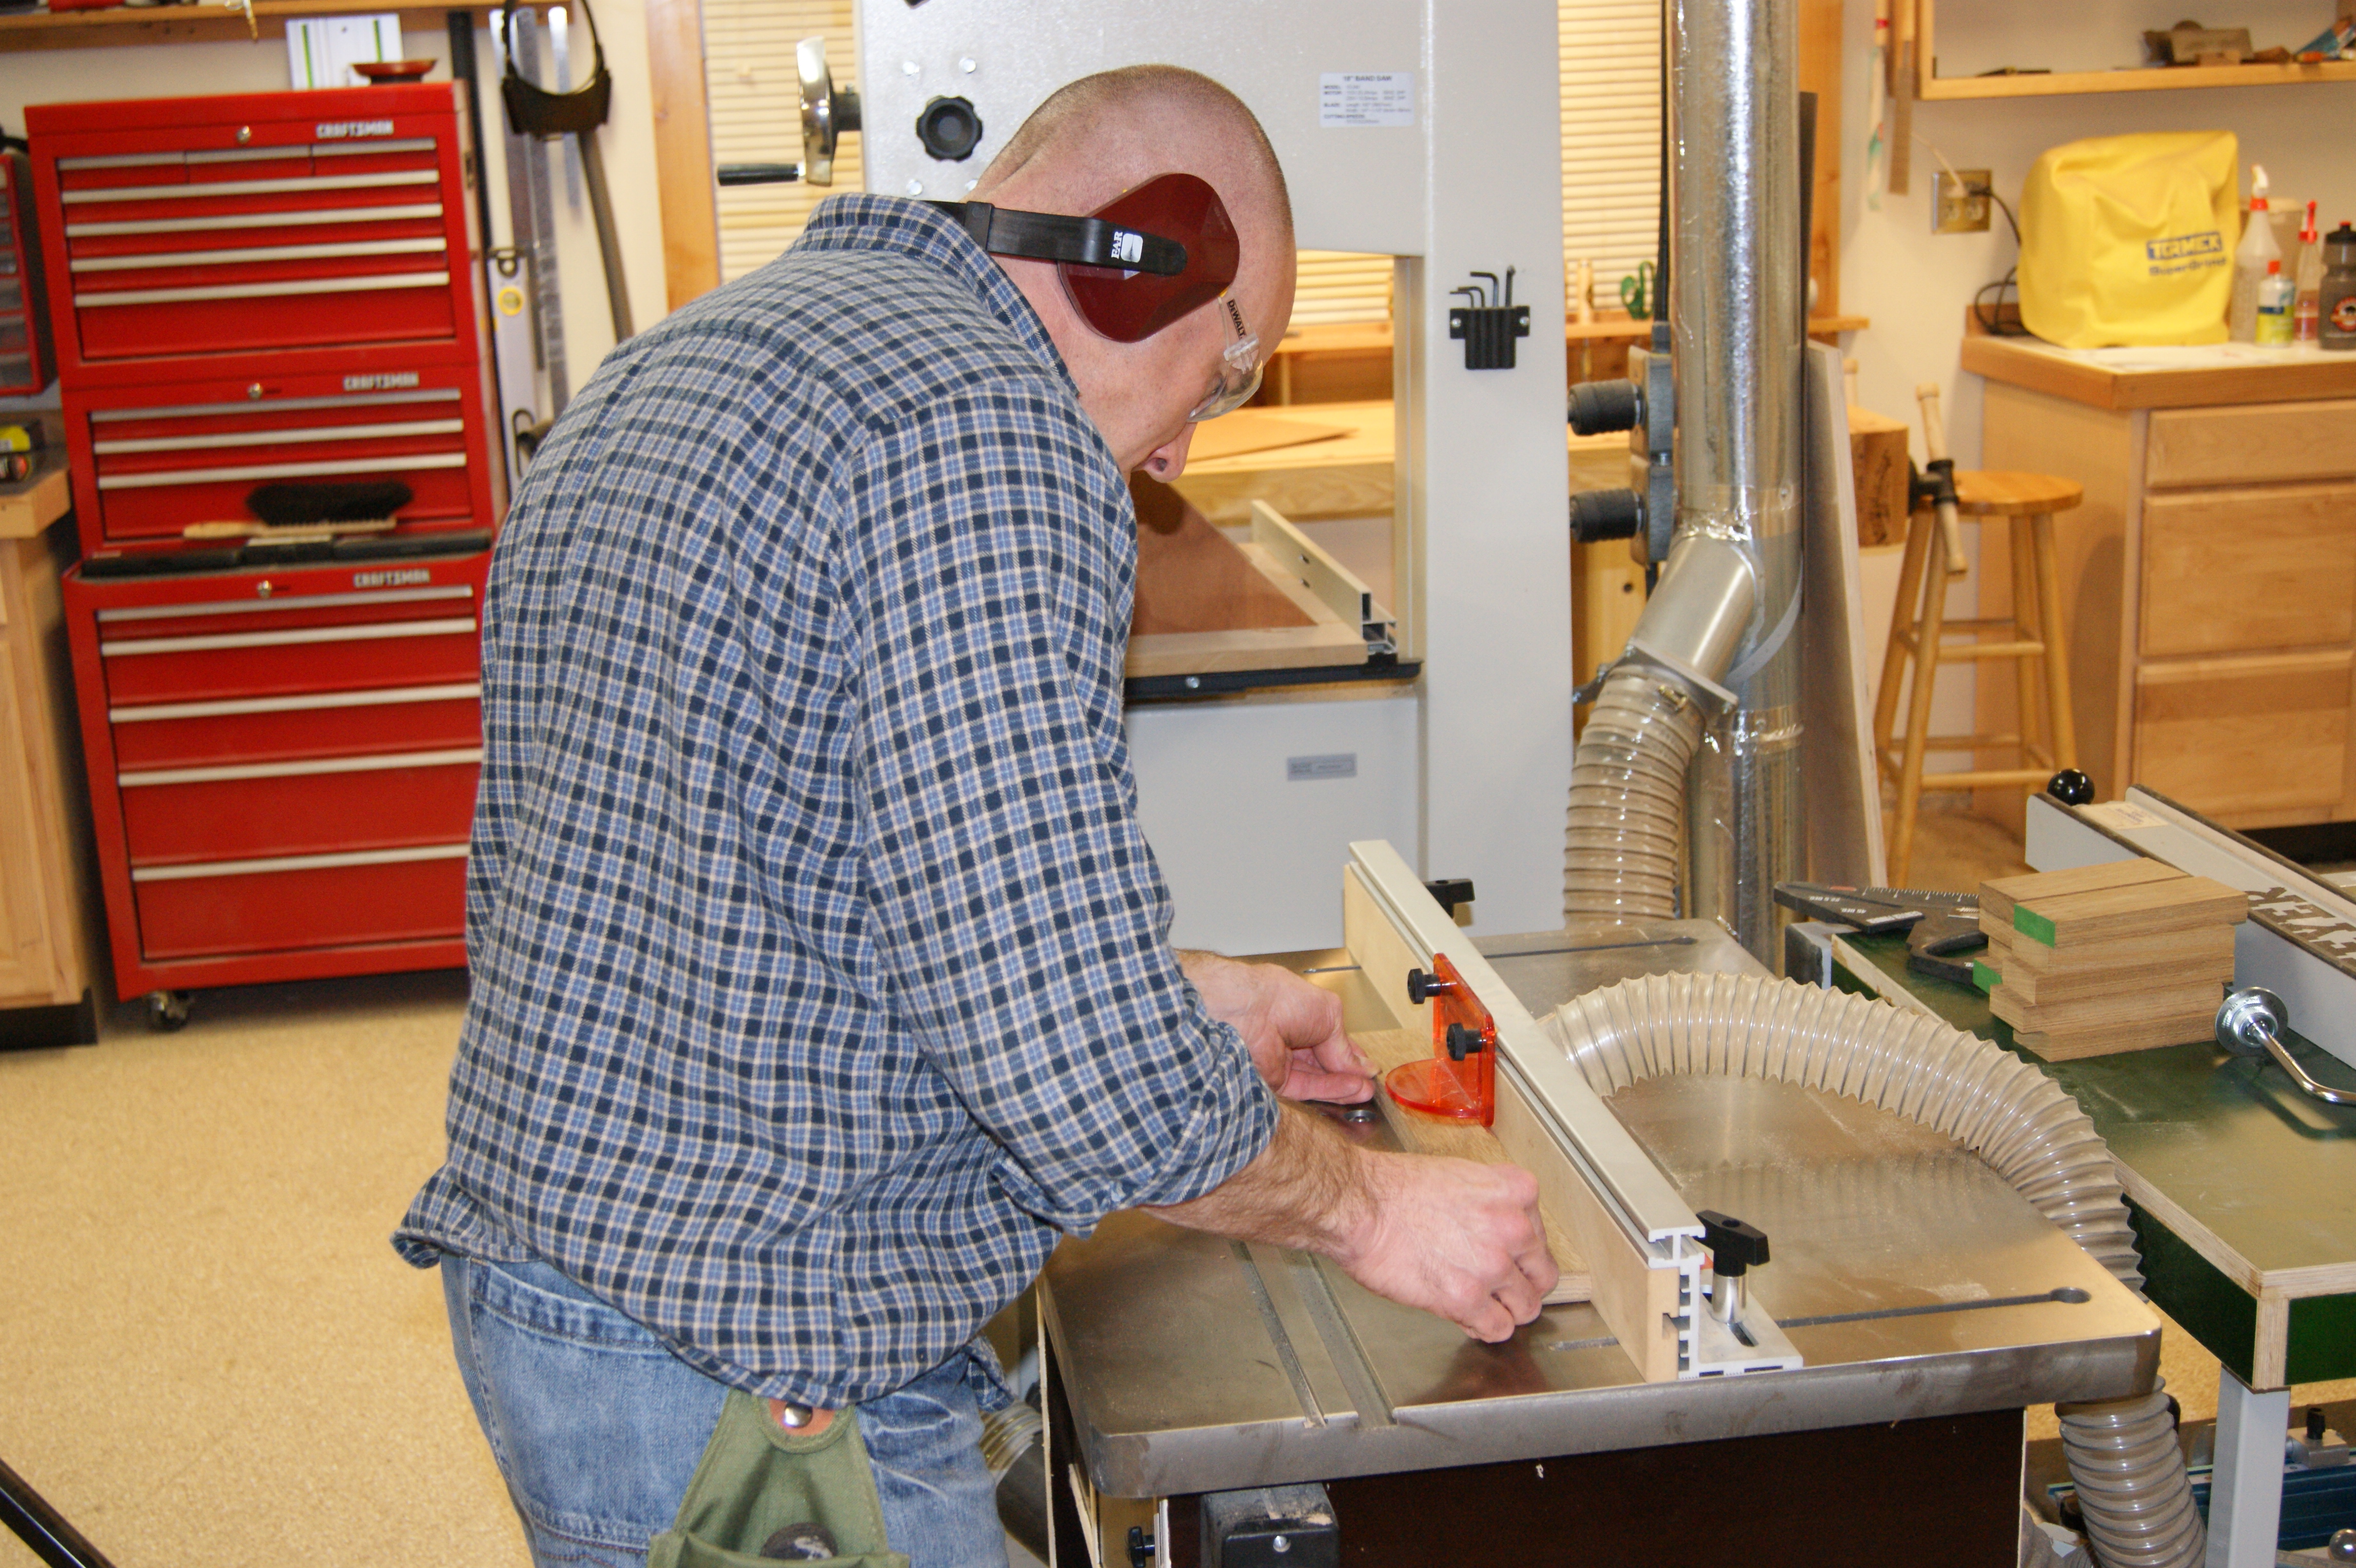
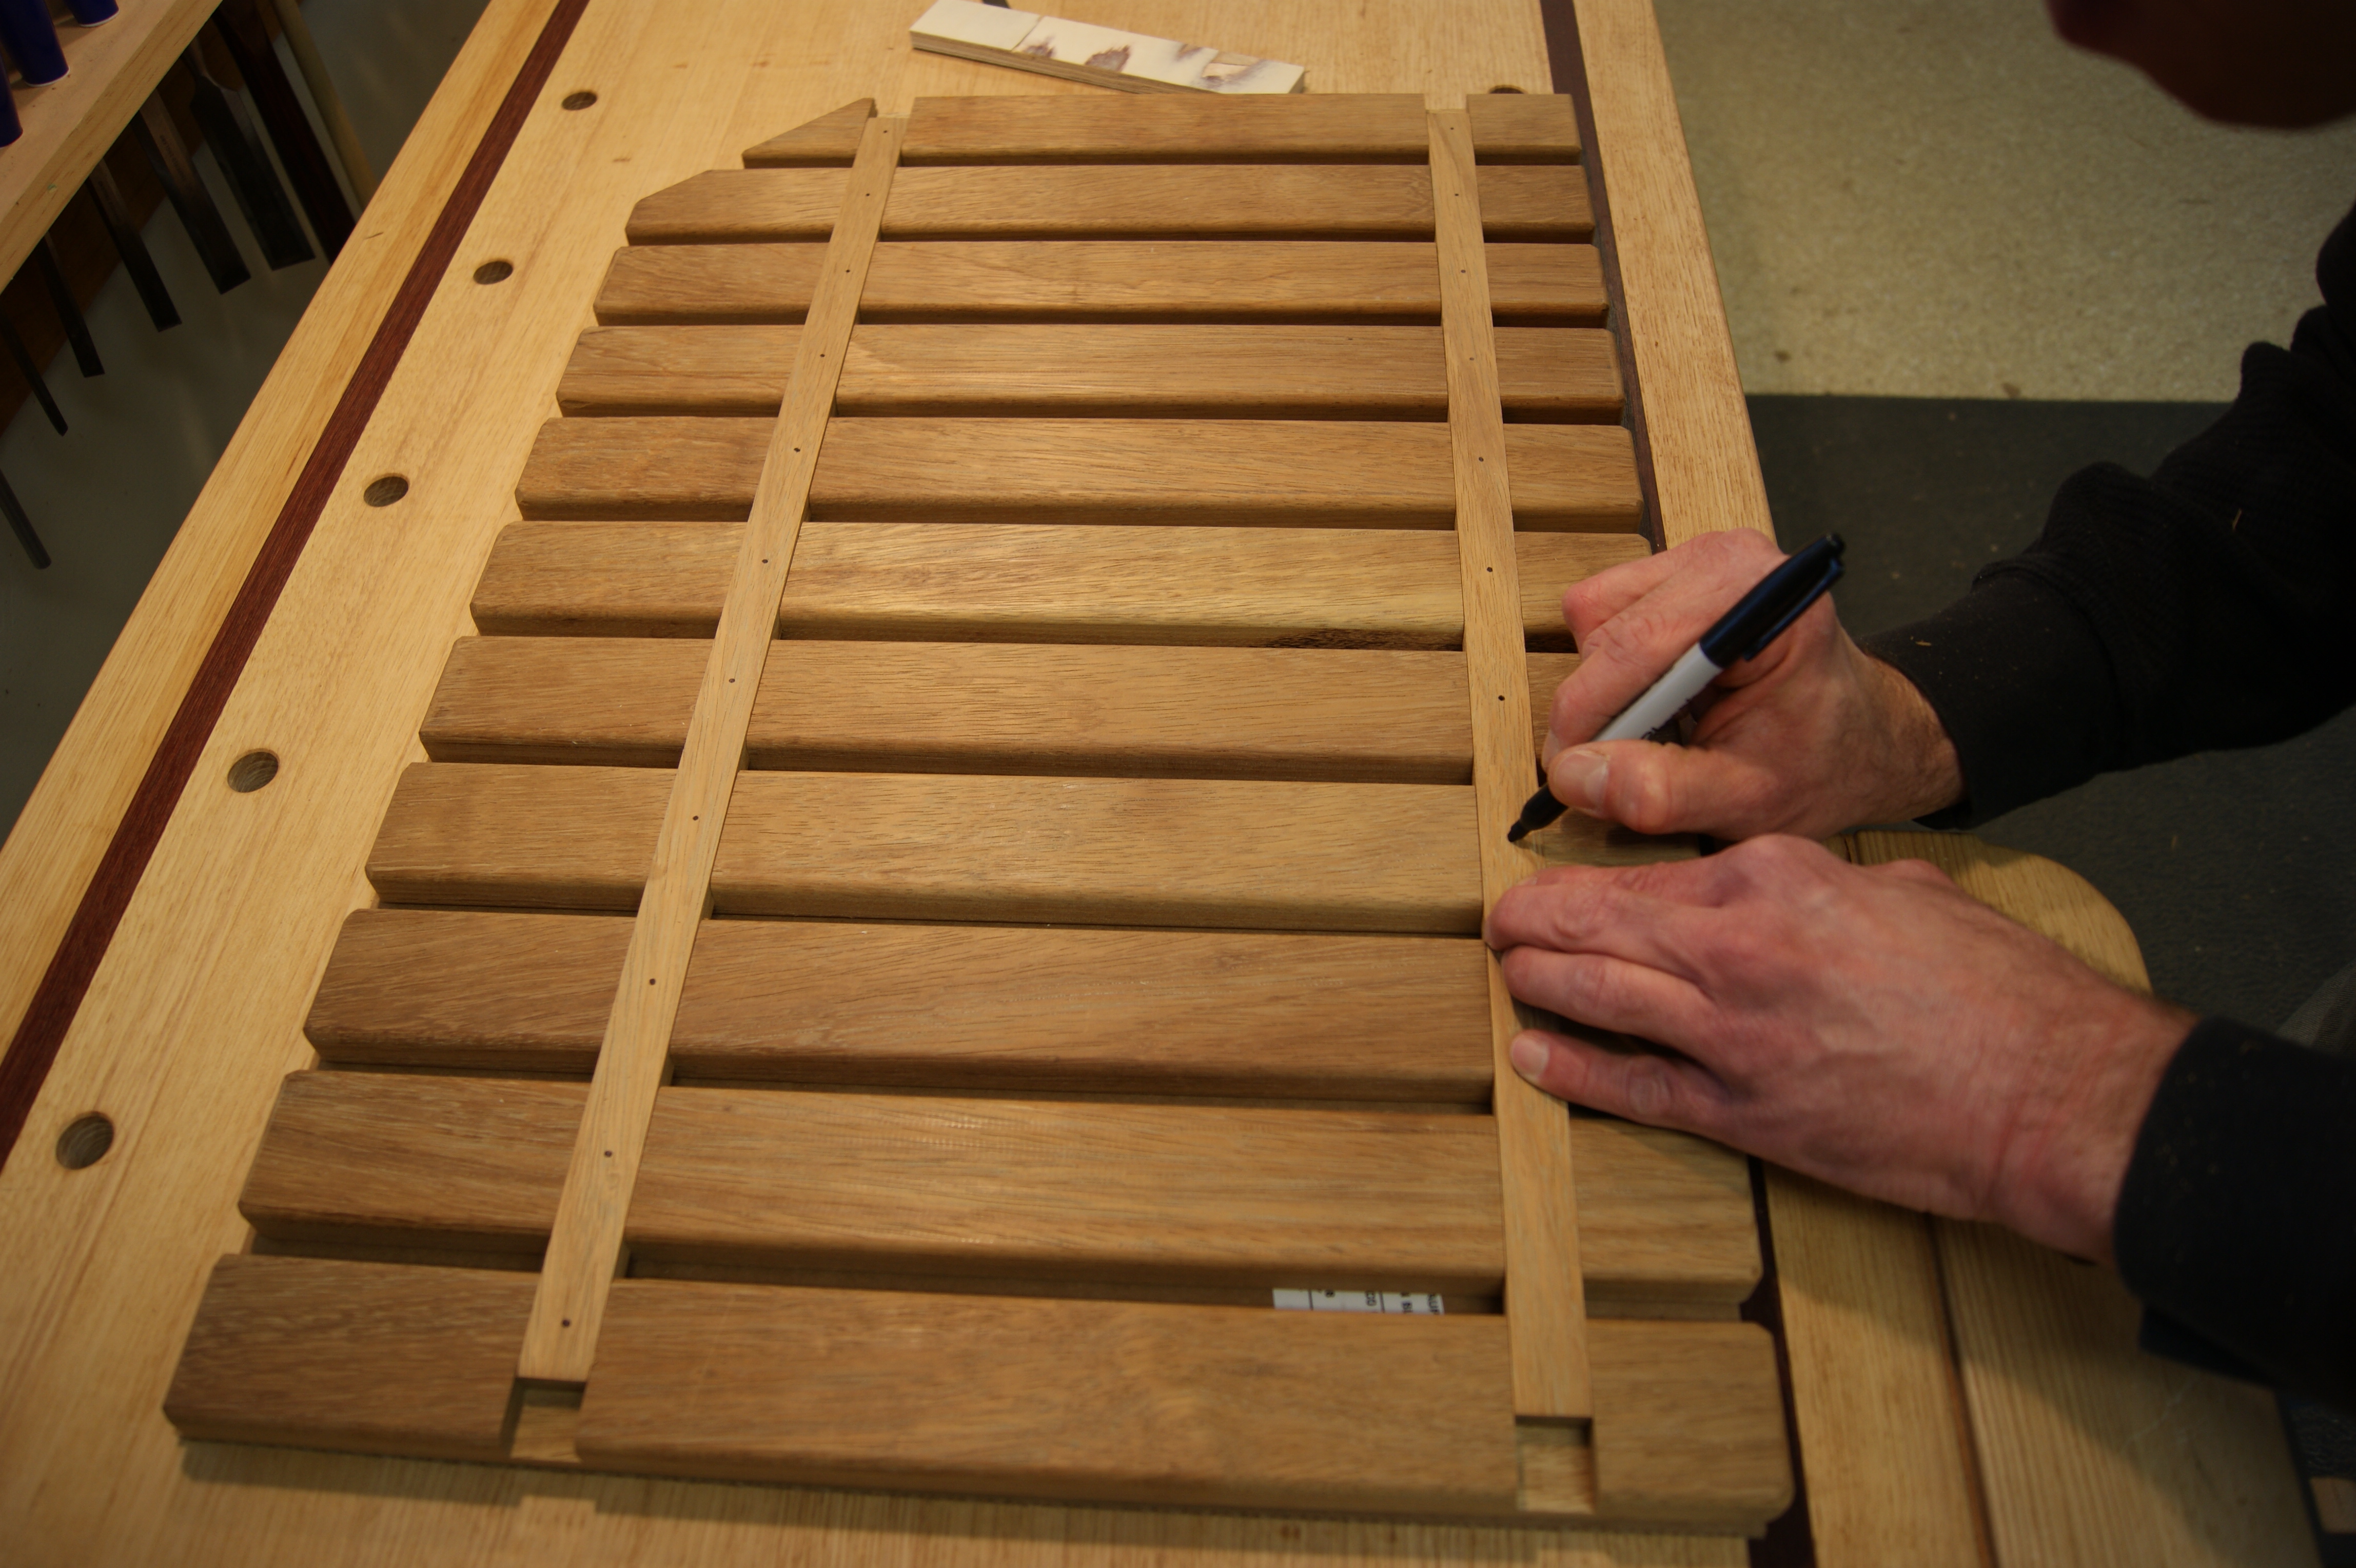
I mentioned earlier that I wanted ¾” thick slats. Here’s why. I wanted them thick enough so that I could set a crosspiece into them. I didn’t want to take up any more than ¾” of height in the shower, and doing it this way let me keep nice sturdy slats. Here I am dadoing out the underside of the slats for the crosspieces.
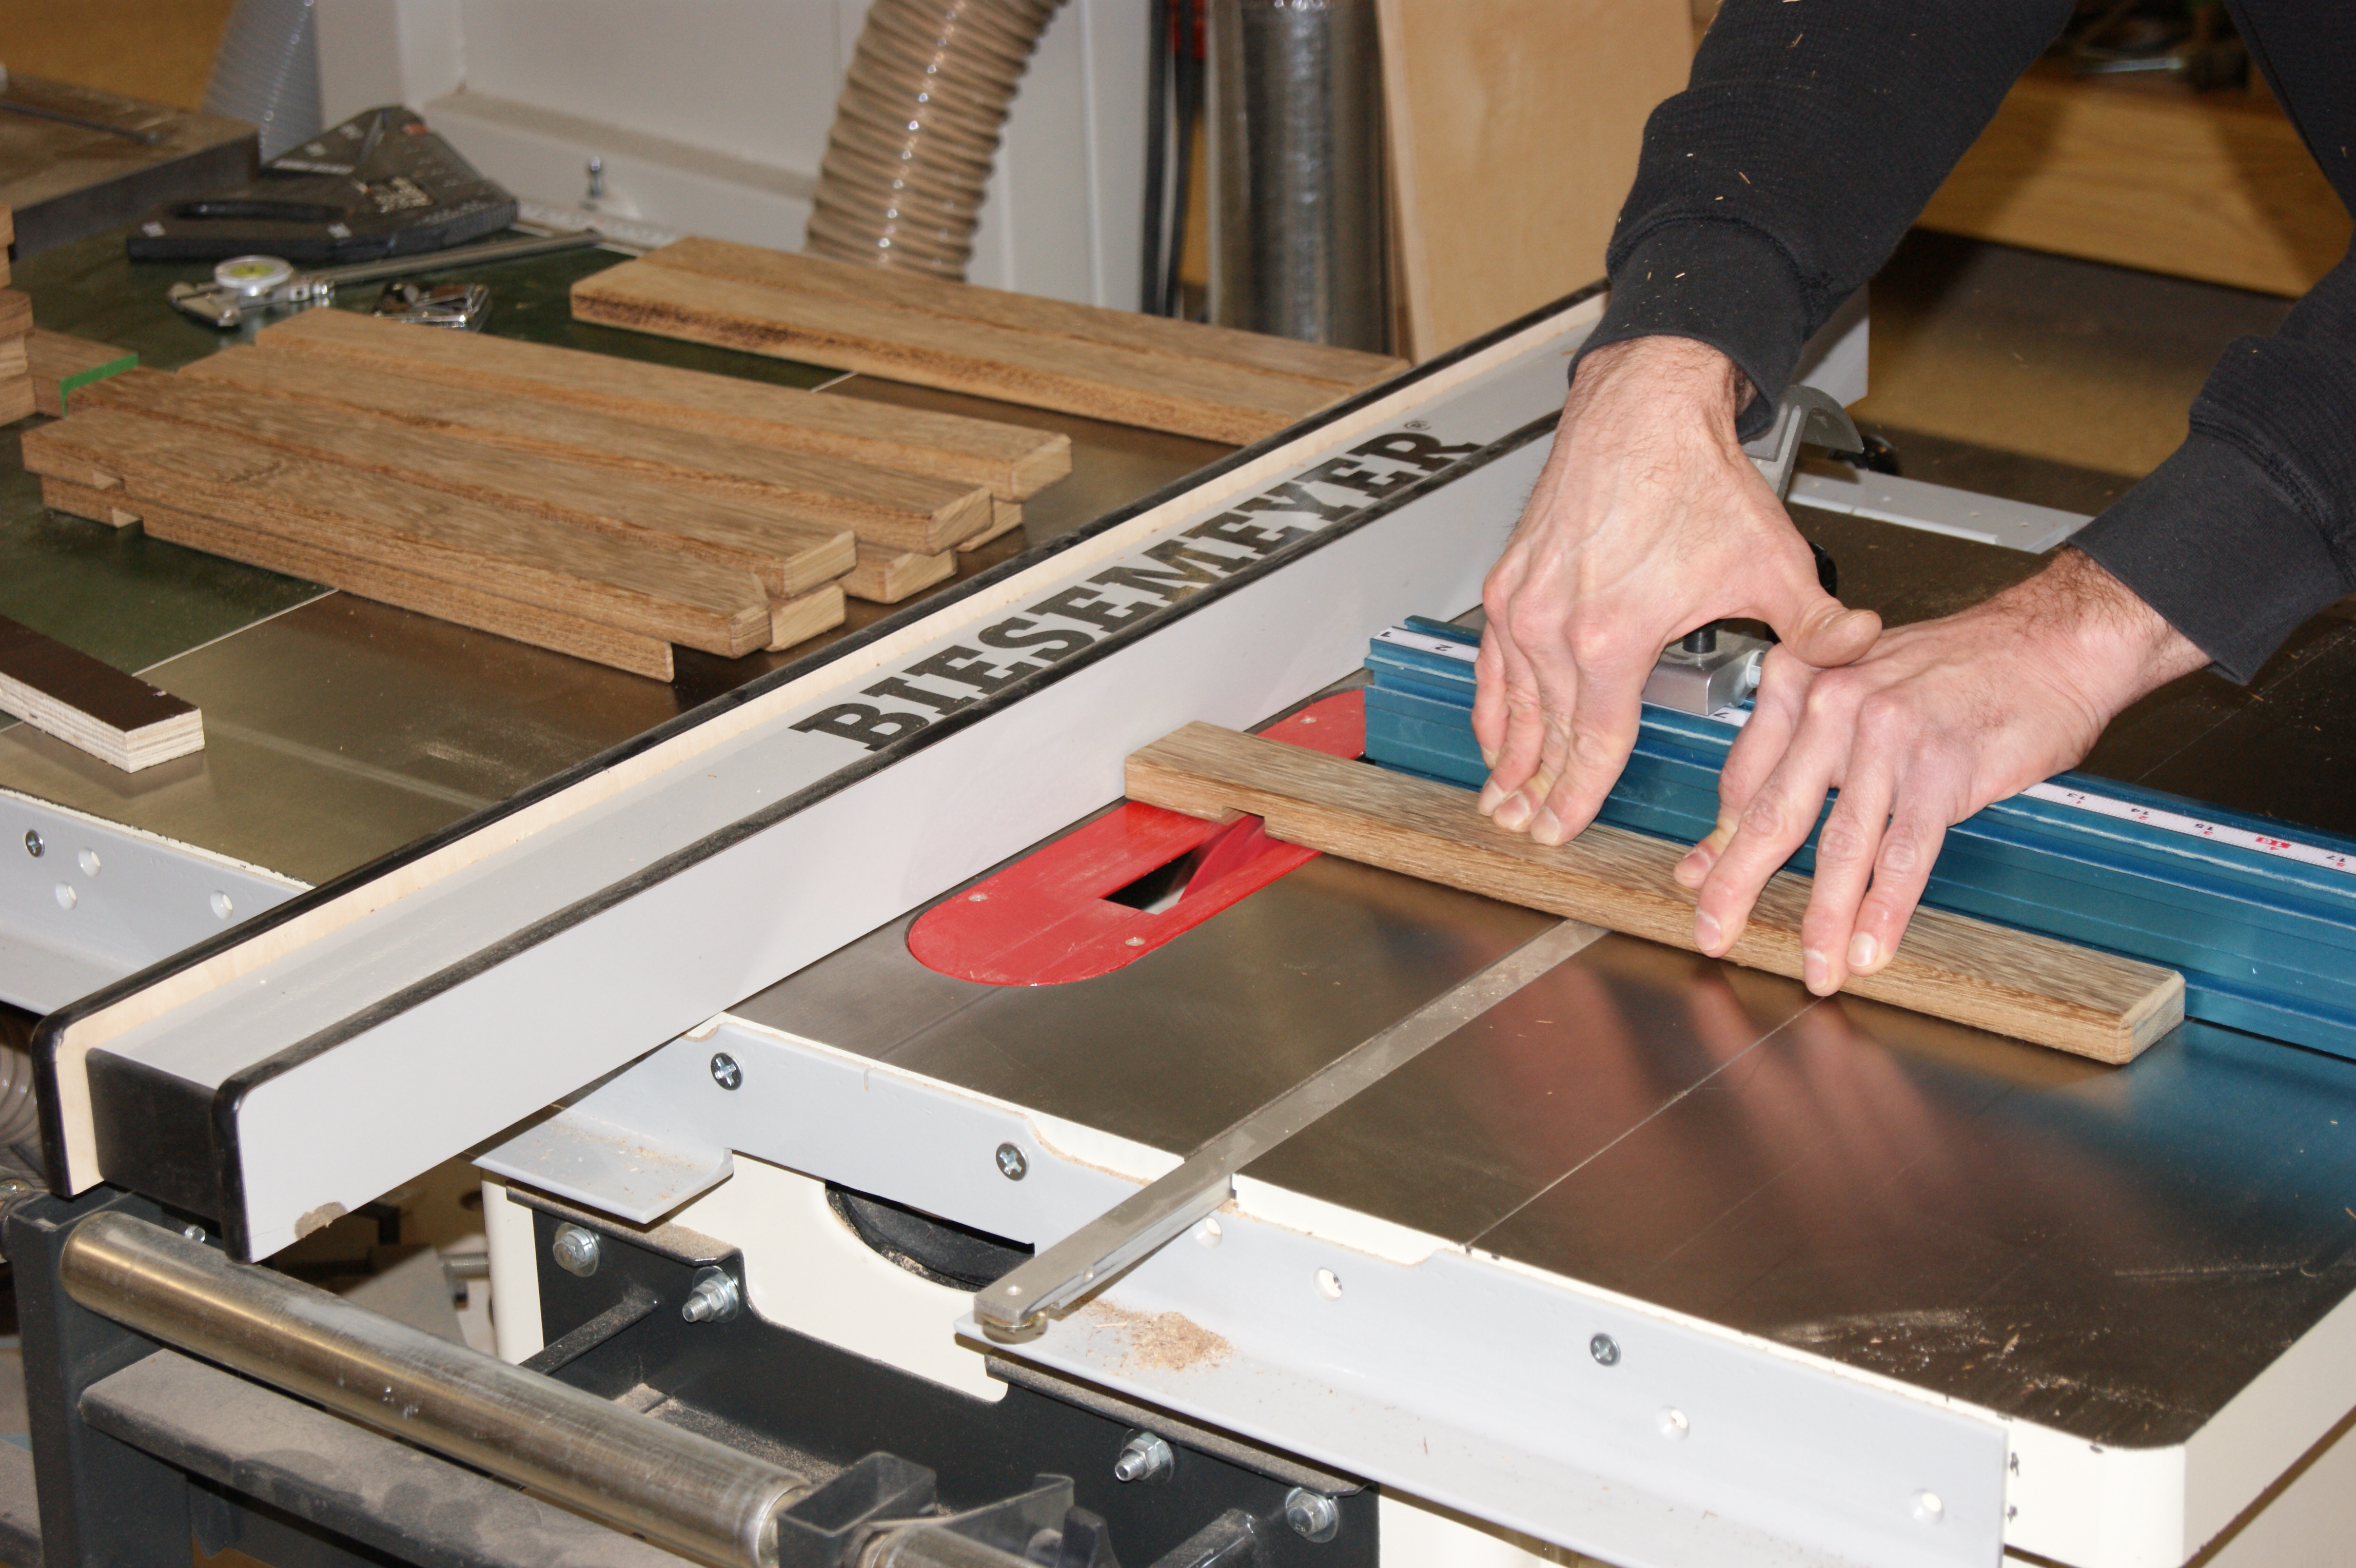
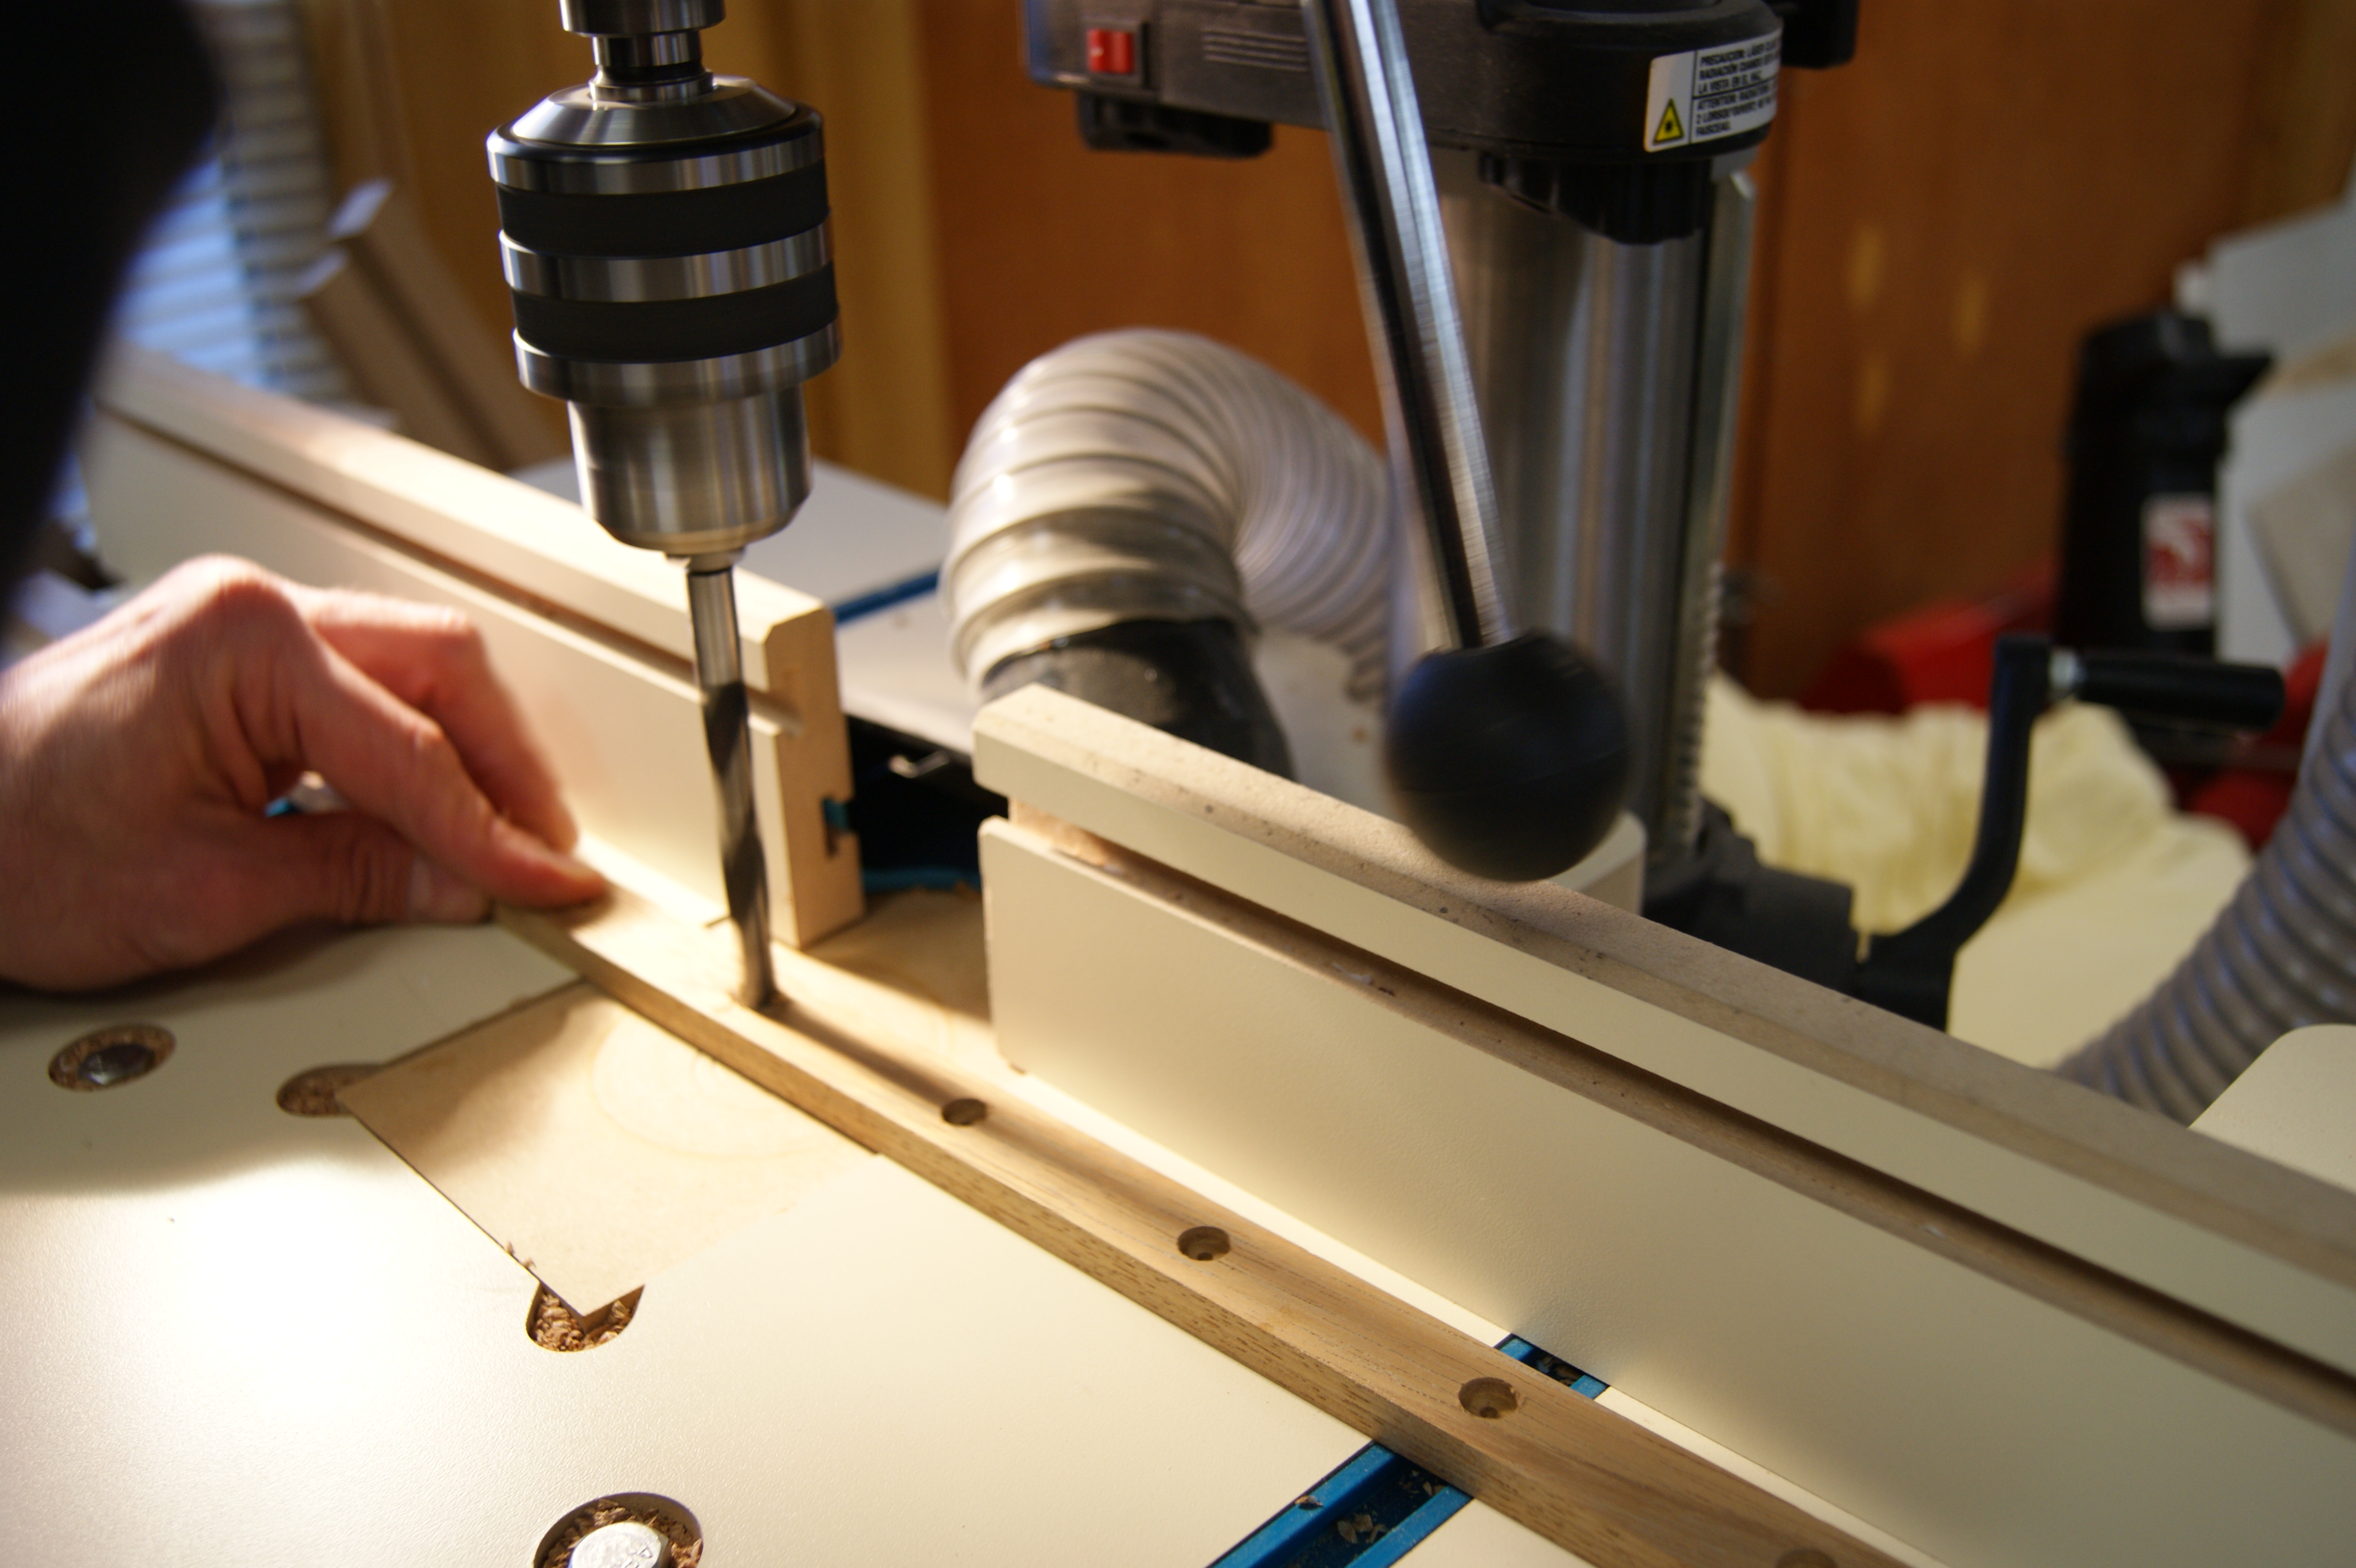
With all the dadoes cut, it was time to work on the cross pieces. Once they were positioned where I wanted them, I marked out where to drill for screws. I had purchased some stainless steel screws for this, and I needed to counterbore to keep the heads of the screws from marring the bottom of the shower. Here I am marking for those holes:
and drilling them out on the drill press.
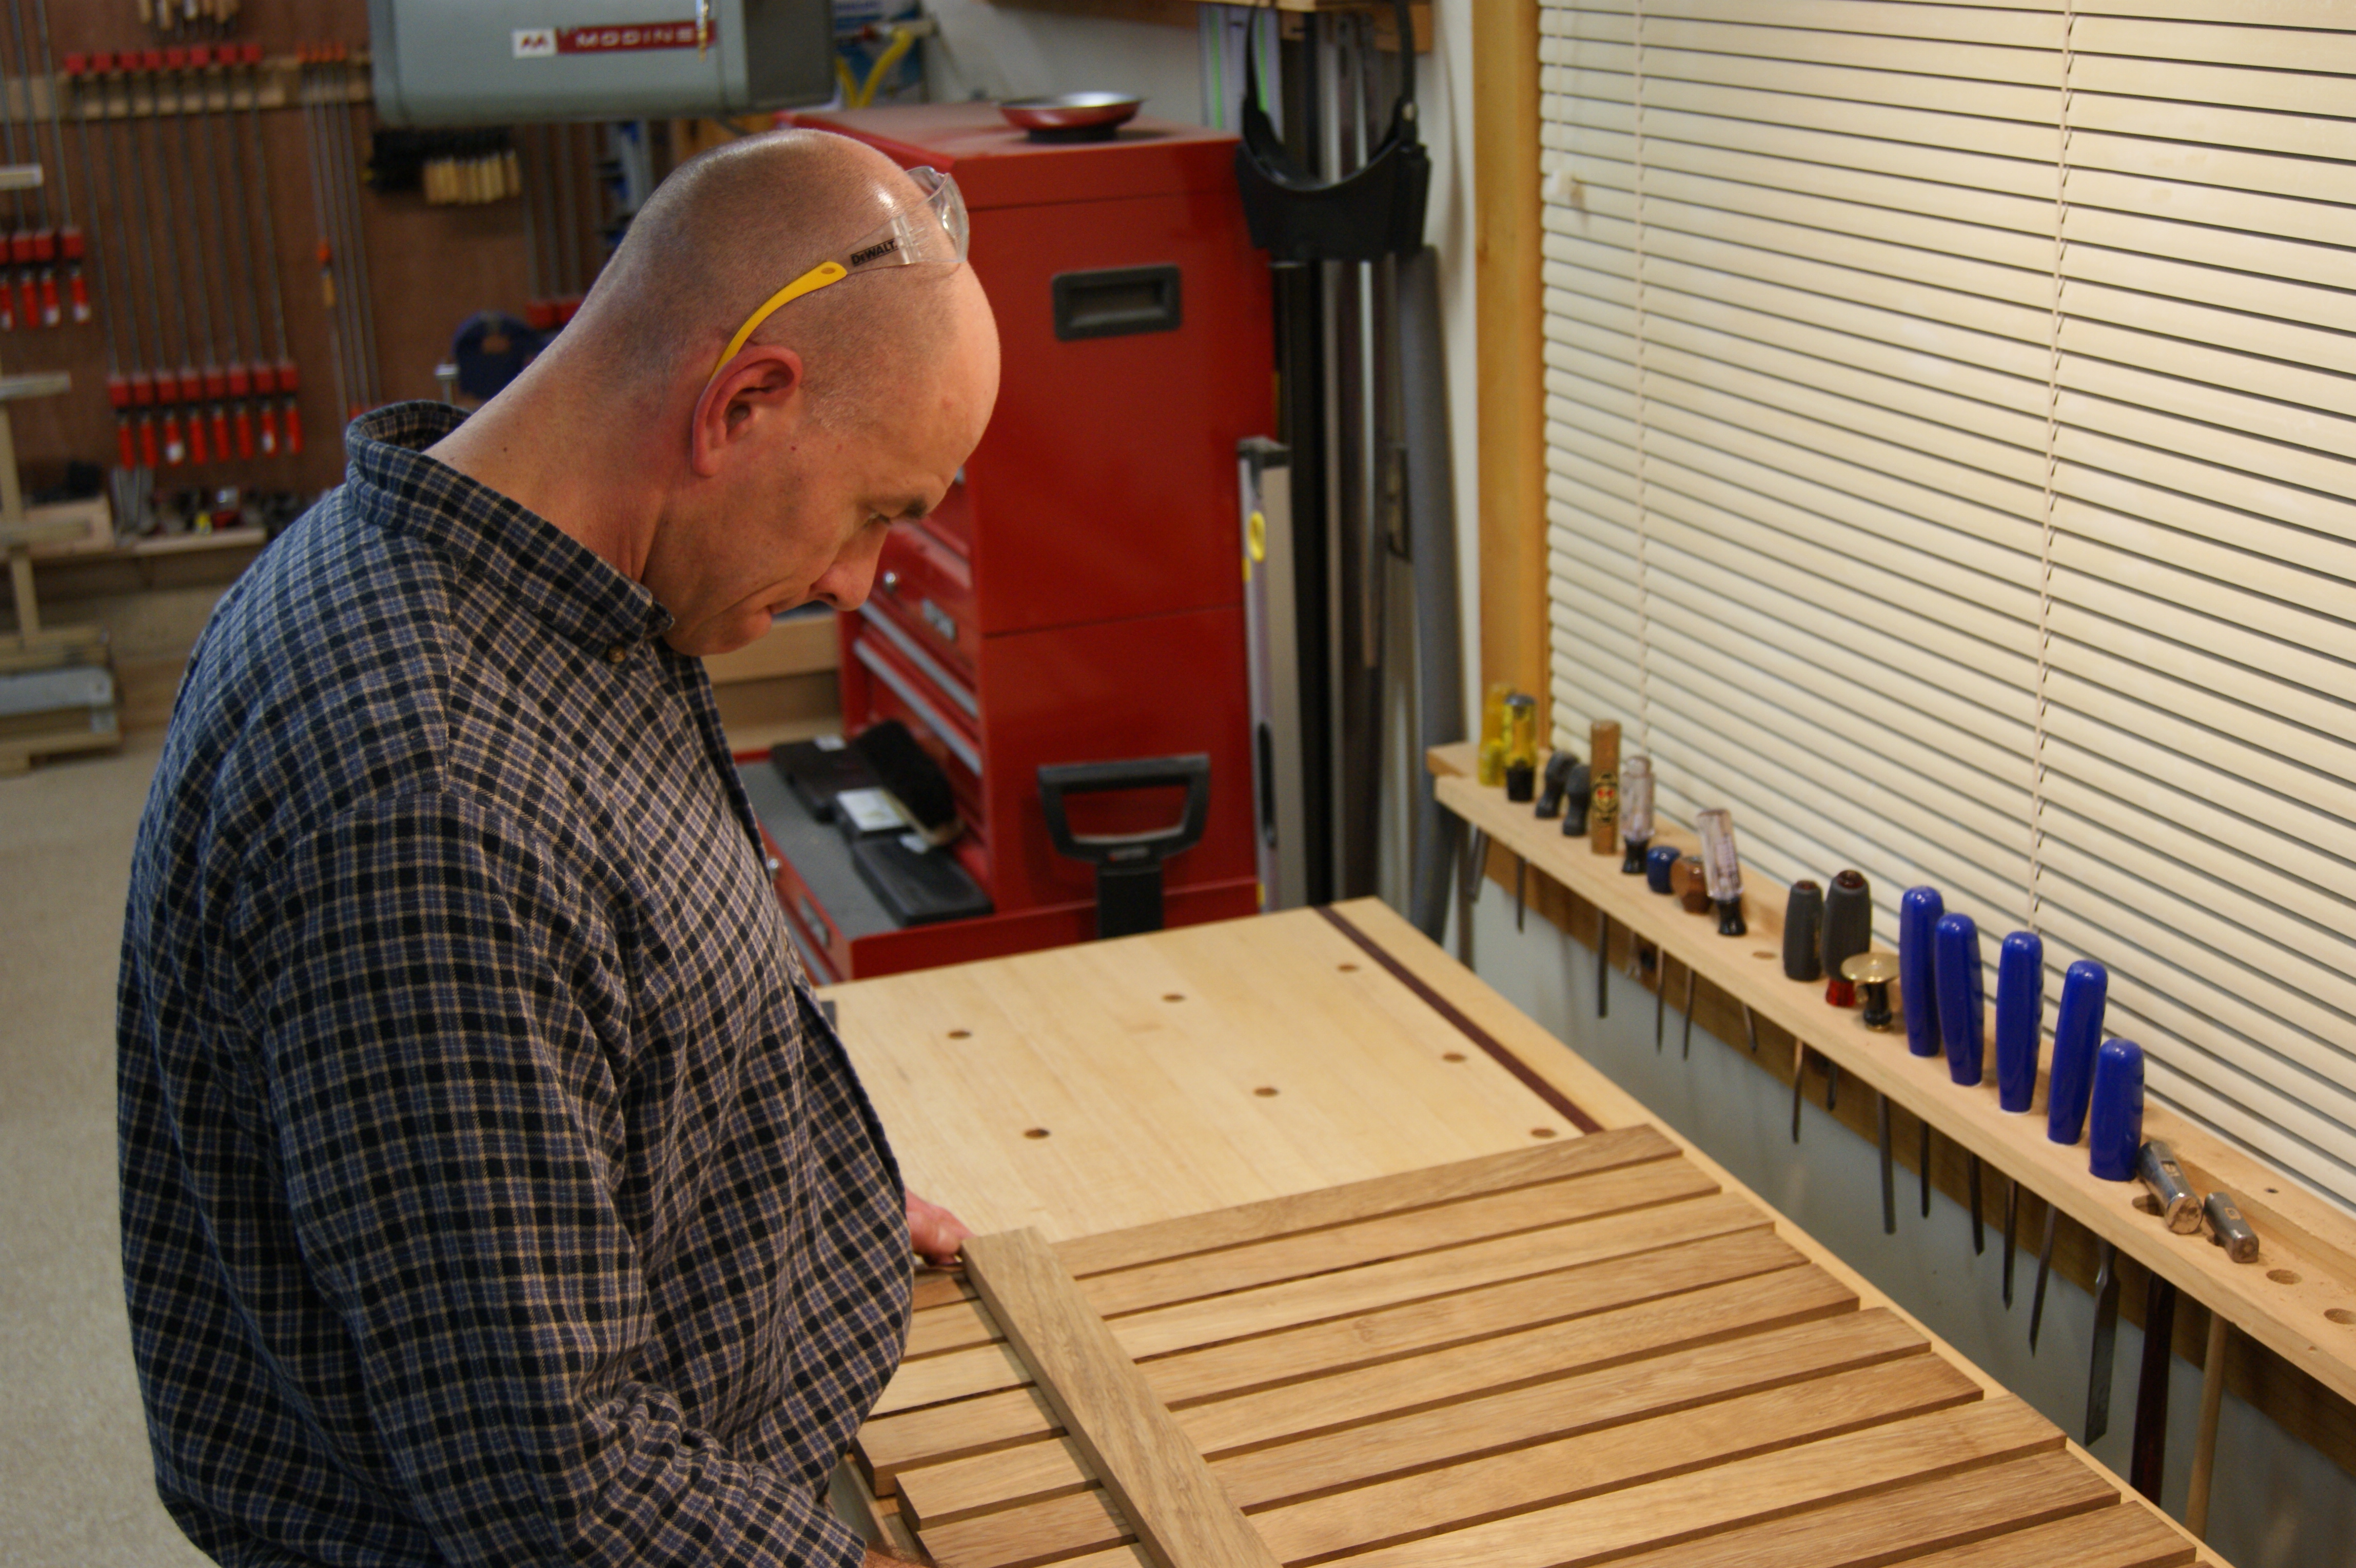
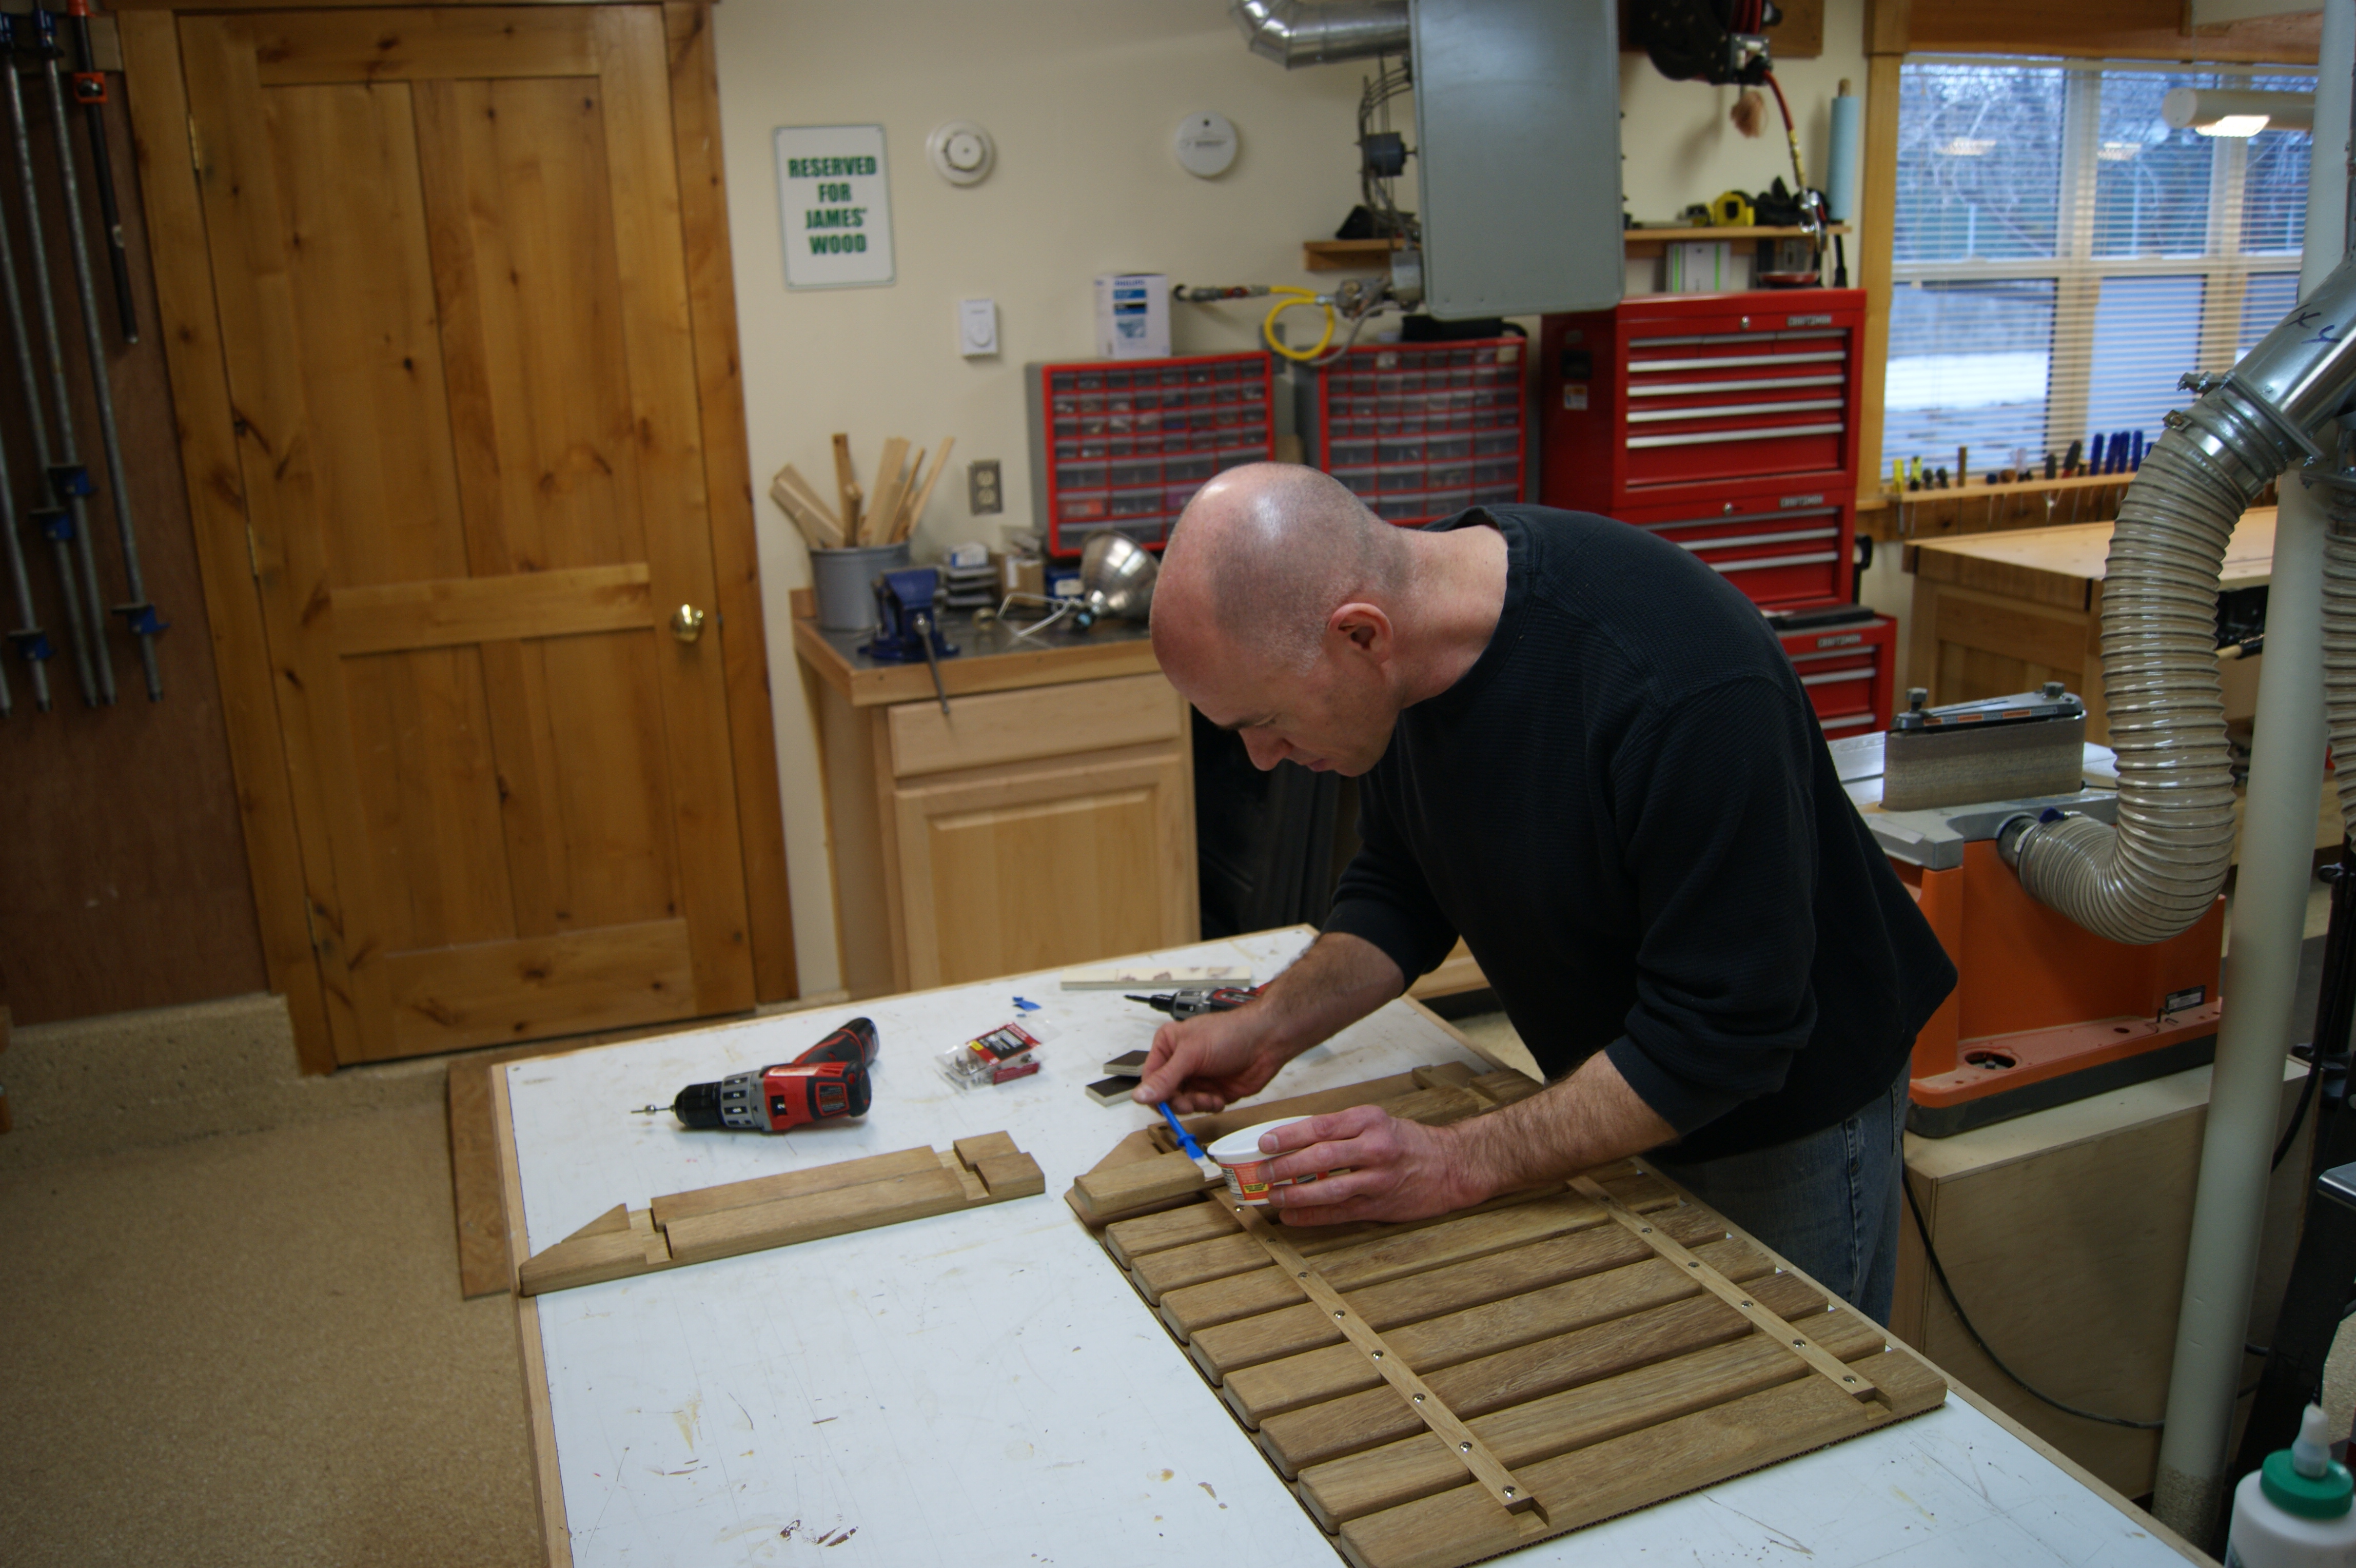
And with that done, the only thing left was to assemble. In addition to the stainless steel screws, I also used glue to hold them together. After an initial wipe down with acetone to clean off the surfaces, it was an easy glue-up. Spacer blocks and the dadoes kept things aligned, and the screws meant I didn’t even need clamps. That’s my kind of low-stress glue-up!
And done! Not too shabby.

So on this project, I was working with no plans to speak of, and I had exactly zero economy of scale. Even so, it took me only about 6 hours and $60 worth of materials. I like it well enough that I’m going to include it in every single RV I build. (lol!)
What do you think? Is this something you’d like to see included in your RV? (I hear a lot of folks don’t use their RV showers, so maybe this isn’t relevant for many of you.) Should I keep my day job? I’m genuinely interested in your thoughts on this project.
Thanks for looking, and we’ll see you on the road!


I would love to get one from you. You see we are living in an rv and the plastic floor in the shower has to be replaced with another plastic flooring in the shower. If I could get you to make one that would be great it would save the floor of the shower if I put it on top of the plastic flooring . It would be great!!
Unfortunately, I’m not set up for retail woodworking. Sorry!
Hi James, thank you for all the fantastic work you do! I have a question regarding your bathroom cubicle that I couldn’t find in any of your videos. How big is it? I am curious about the total dimension for my own DIY bathroom build and I also want to include a standalone toilet, like the one you have in your bathroom. I wonder how much it gets in the way of showering – I’d rather keep it there during showering that having to take it out each time. Thank you!
If you’re asking about the bathroom in this post, that was on our old RV, Das Bus.
We don’t have that van anymore, so I can’t help you other than to say it was small but functional.
Our current rig is a Winnebago Travato, which has a wet bath – so not totally the same thing.
Thank you! I have two options in my current build. I want to build a wet bathroom cubicle, which can have base dimensions either 85x85cm or 95x75cm. I am not sure which size to choose / which one would be more practical considering that there would be a composting toilet on the ground during showering. Which size would you pick? Thanks
Personally, I’d opt for longer and skinnier.
I’ve been looking for this for our travel trailer since before I purchased it. No luck. But I may find one that’s slightly larger and just cut it to fit! I would love to make one, but lack the tools.
iroko…never heard of it! any other types/species of wood that would work? don’t think I can find either teak or near teak in any lumberyards near me in Kansas…
You could maybe try Lignum Vitae.
(Although that’s probably harder to find than Teak!)
You can order some of these woods from online vendors. Google will find some for you.
James I’ve been following you years admiring your ingenuity and craftsmanship. Don’t know if you will see this question given age of this post. What is the dimension of the cross braces which I assume you cut. Also are the cross braces flush with the bottom of the slats.
Keep those projects coming!!
Oh darn.
We sold that RV a while ago, so I can’t go measure it for you. But knowing me, I’d bet the cross braces are 3/4″ wide by 3/8″ deep. And yes, the bottom of the slats were flush with the cross braces (that’s why I had to recess the screw heads).
It is nice to see clean, custom work being done for those special touches in an RV.
I have to disagree with some earlier comments, I think your mat would sell quite well to a significant sub-section of the RV market. I, for one, would love one for my Itasca Viva.
I only wish I had the time to make them!
I would like to purchase one for my Roadtrek CS Adventurous.
I wish I was in the business of selling them. But sadly, I’m not.
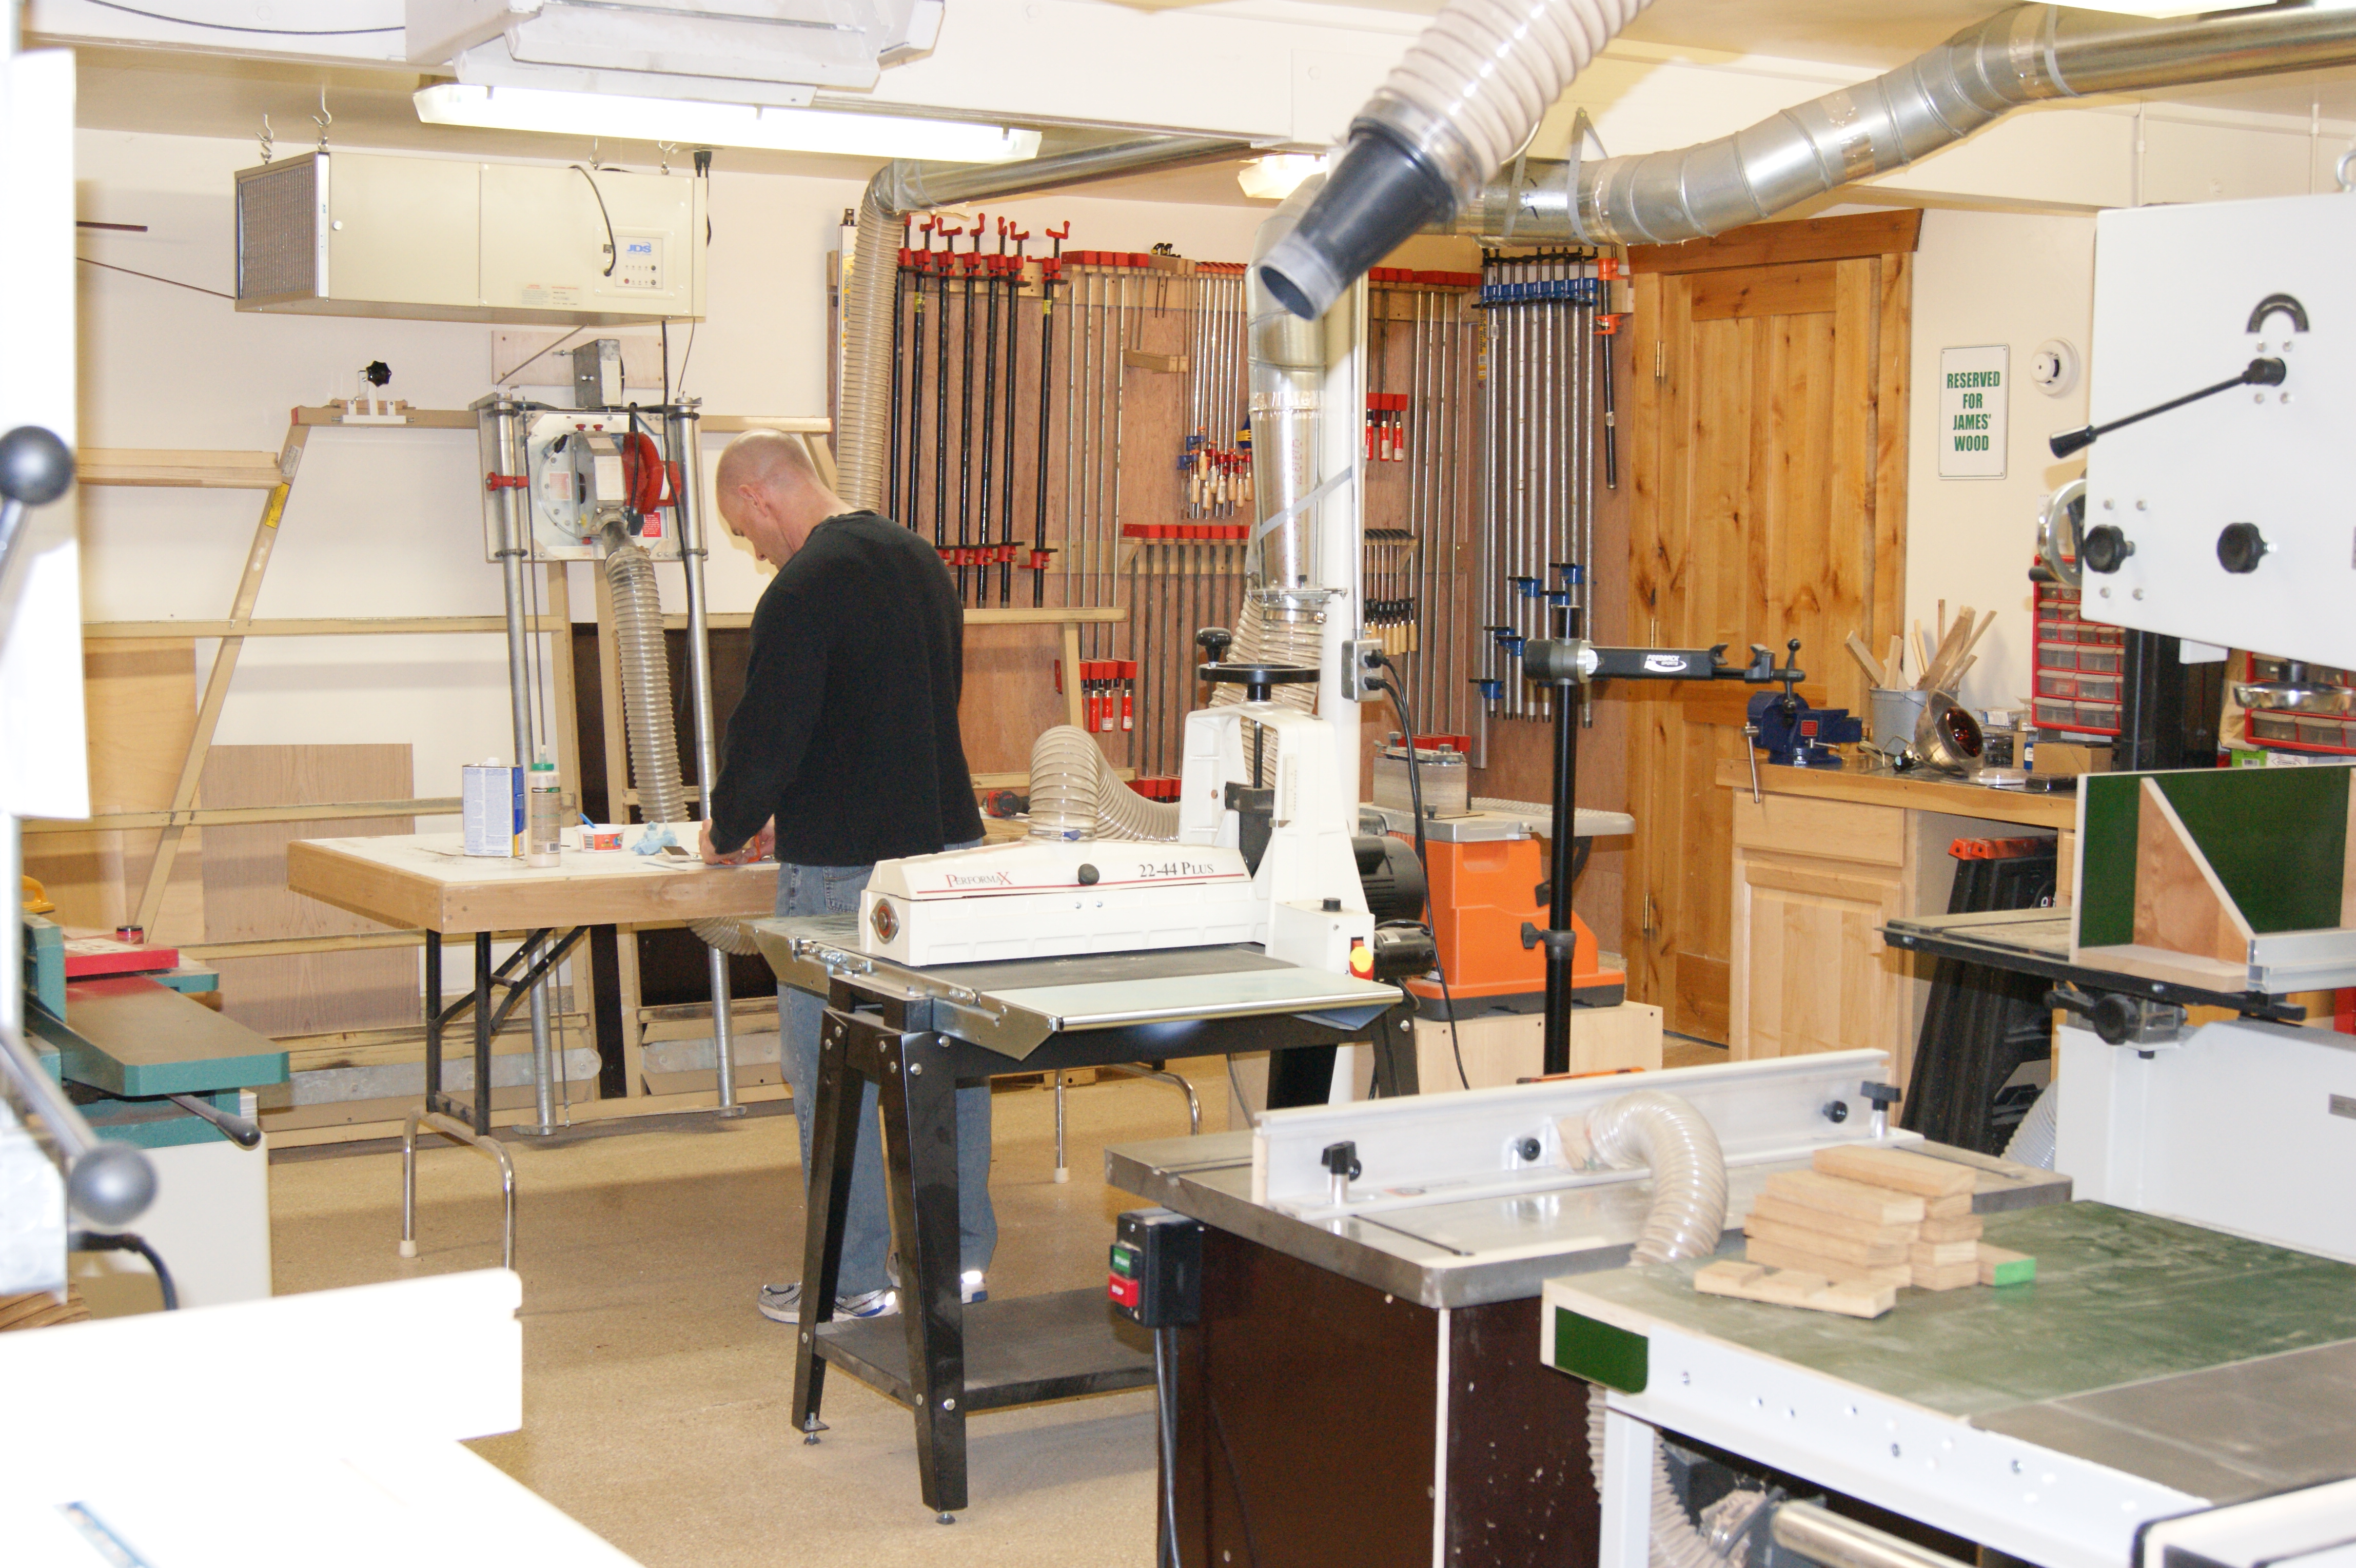
I’m looking at your shop and thinking it’s missing something.
ME! I’d like to be your neighbor and have access to a shop like that
Building up that shop has been about 15 yeas in the making.
(It still needs a bathroom though…)
That’s a great-looking wooden mat! And an awesome-looking shop – wow!
I’m pretty fortunate to have my shop space. I wish I got to use it more.
WOW! Nice Shop!
I love the idea of a teak or near teak shower grate in our RV. We’ve had them for years in sailboats and they are always much nicer than the bare plastic or fiberglass shower pan.
However unless you have a boating background, I’m afraid most folks are not going to see the utility or comfort of a grate like that. Expensive US hotels or custom homes don’t have them, so clearly they can’t be all that good, right?
Anyway, while it would probably be a watermelon scheme to make them, I’d love one, I just can’t see spending $300 (or the cost of your dado set) on one…
(I take my first line back…You have an AWESOME shop!)
Tom
Thanks! The shop is awesome. I try to remind Stef of that when it’s snowing and she’s complaining about not having a garage. 🙂