This post may contain affiliate links.
Well, the good news this week is that I’ve completed the construction of the entertainment center. There’s nothing left to build. The bad news is that there’s about a month of “finishing” ahead of me, and I hate finishing almost as much as I hate routers. I won’t get into the finishing here, but I will show you how the last few pieces came together. This post gets a bit long because these last bits actually were more work than I thought.
If you remember where I left off, I had just completed the frame that would surround the top. The next step was to fill in that frame with a laminated sandwich of plywood and zinc. For the plywood, since it’s not a show surface and didn’t need to be classy looking, I just went to the local BORG (Big Orange Retail Giant – it’s kind of a Star Trek nerd joke) and got the best half-inch plywood they had (read: warp-y junk). I had to sift through several hundred pounds of the stuff before I found a sheet that was acceptably flat. That was no fun. The fun started when I got it home. I got to use my Panel Saw!
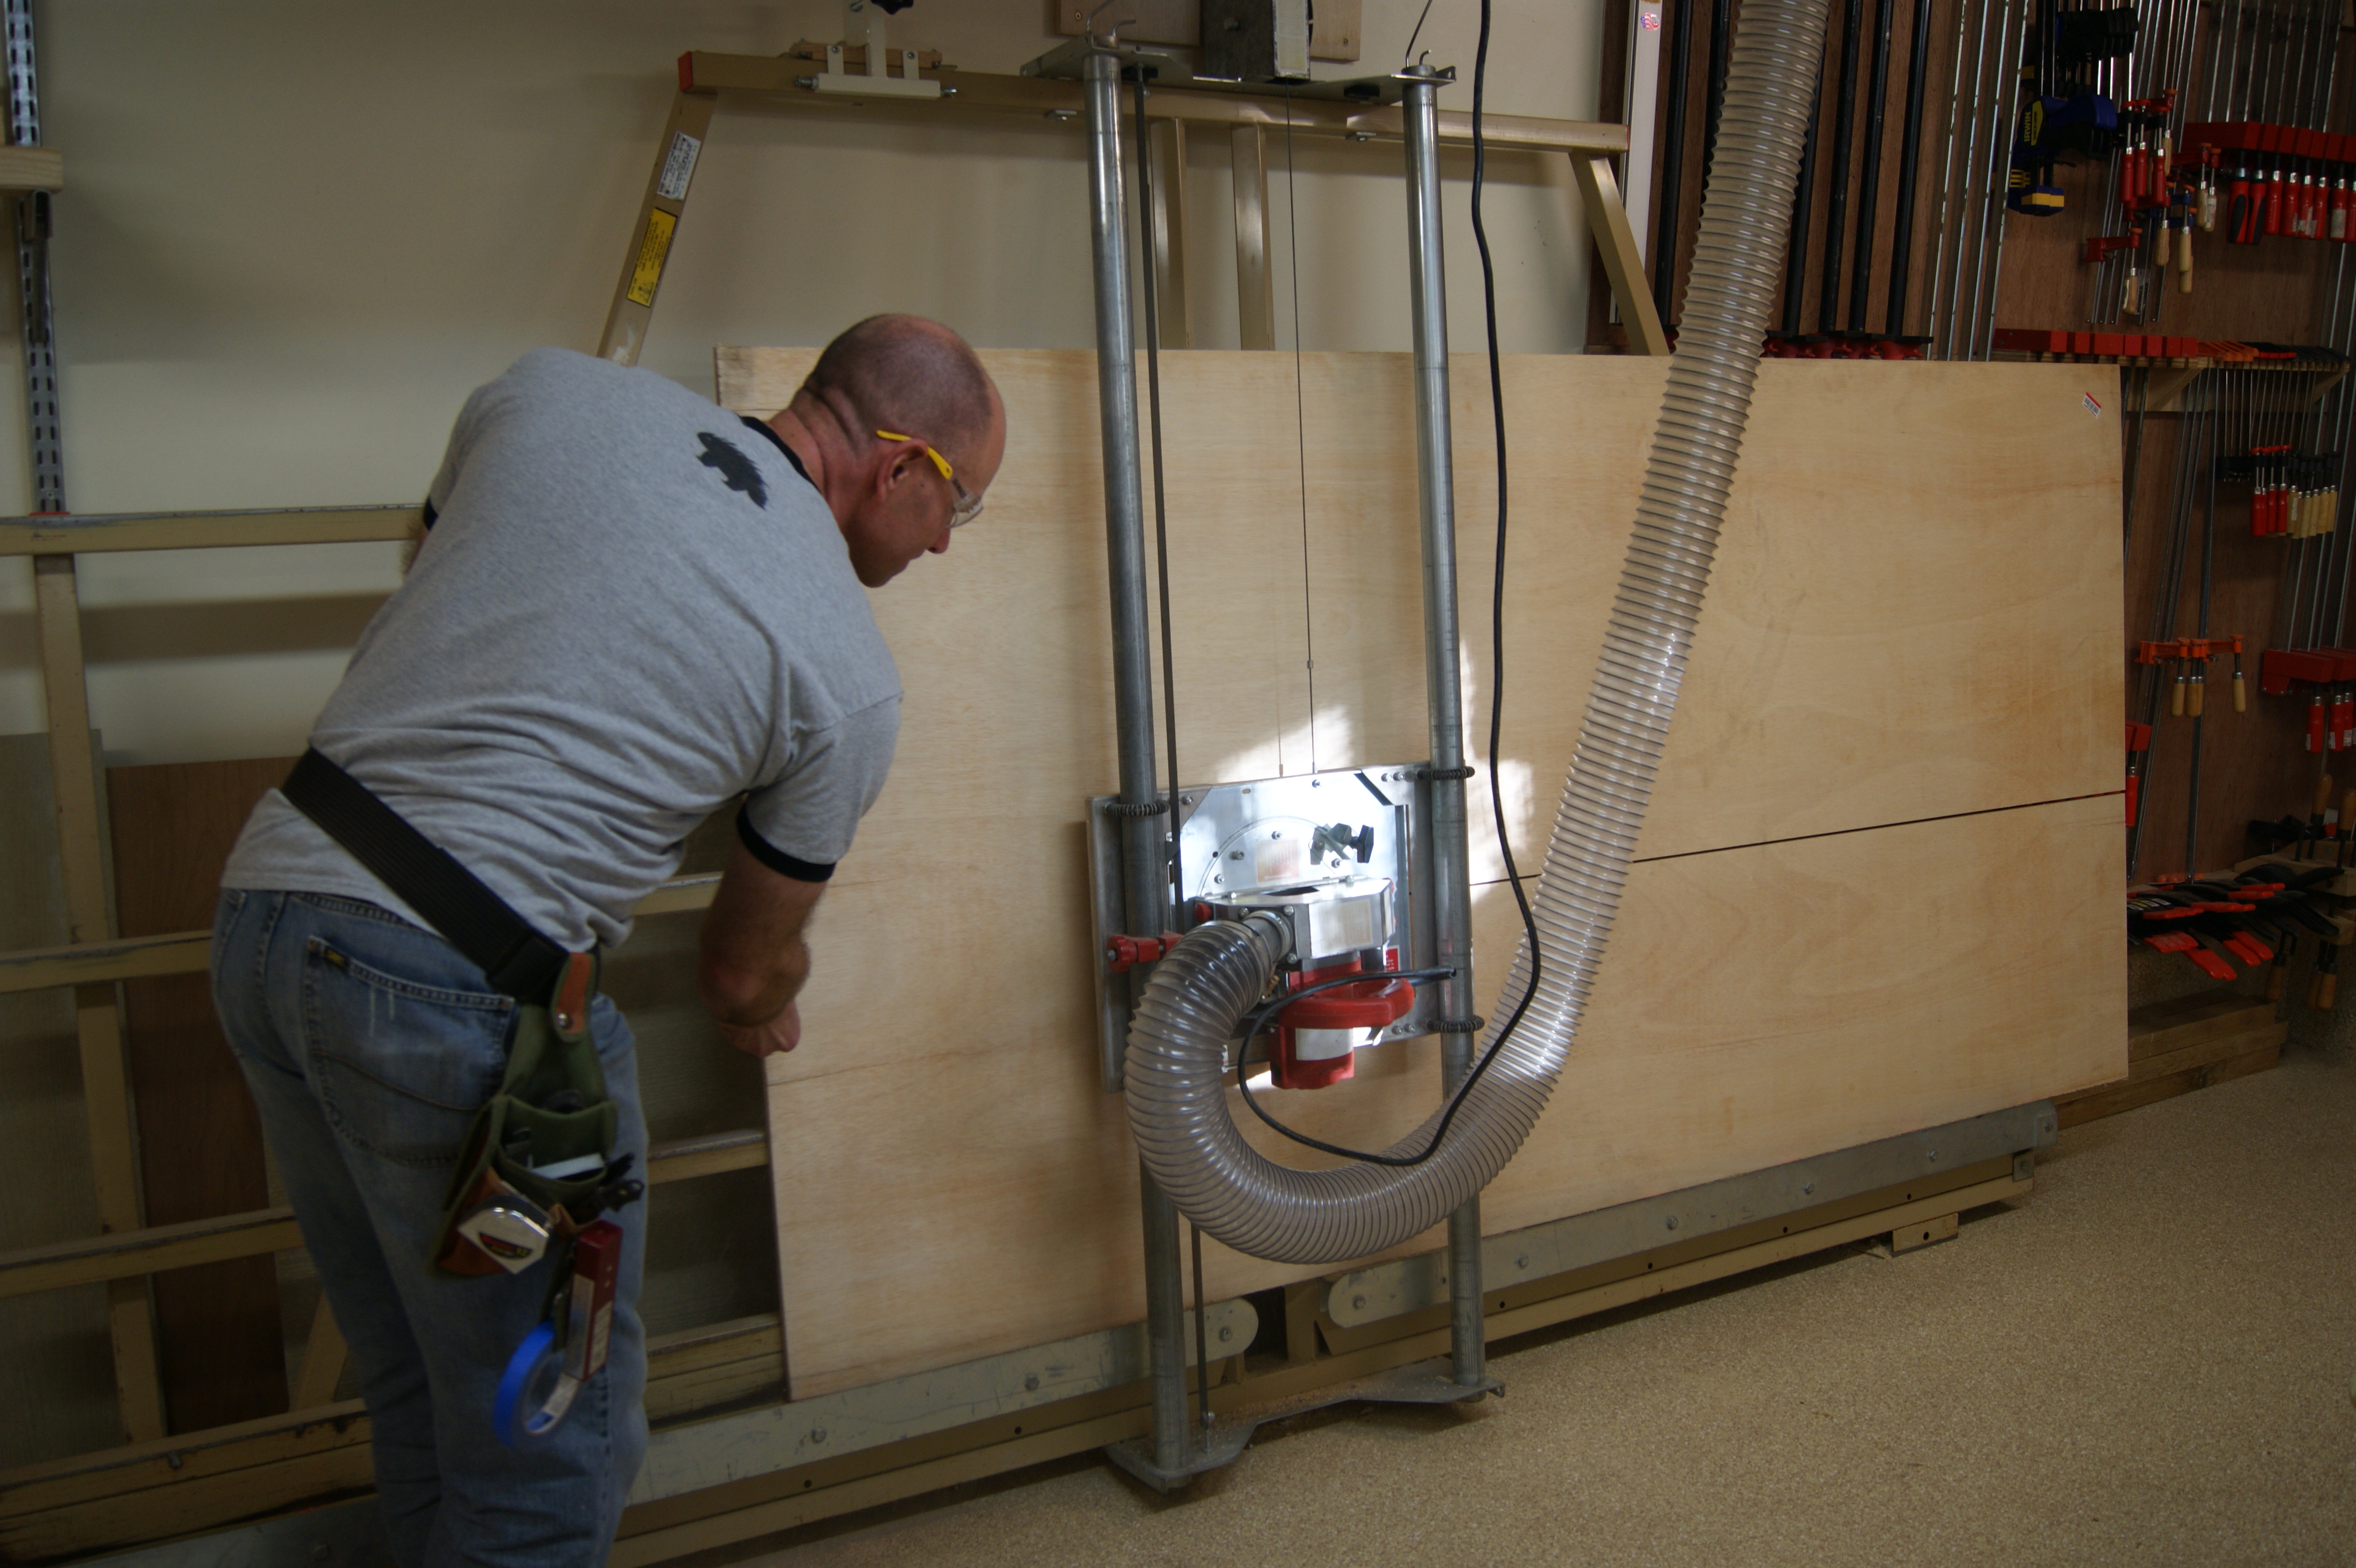
If you’ve seen some of our videos that we’ve done in the shop, you’ve probably seen the panel saw in the background. I don’t use it often, but when I need to break down whole sheets of plywood, it’s a lifesaver. It’s much safer than trying to wrestle hundred pound sheets over the top of the table saw. It’s unusual for such a small shop to have a panel saw, but I saw this one on Craigslist some years ago, and couldn’t resist. It was pretty beat up, but I cleaned her up, got her working again, and now she’s making fantastic cuts.
So, using the panel saw, I ripped the plywood to the width I needed to fill in the bottom part of the frame. (This is a multi-layered thing.) After that, I used the panel saw again to crosscut it to length, which gives me another chance to show you more gratuitous panel saw footage.
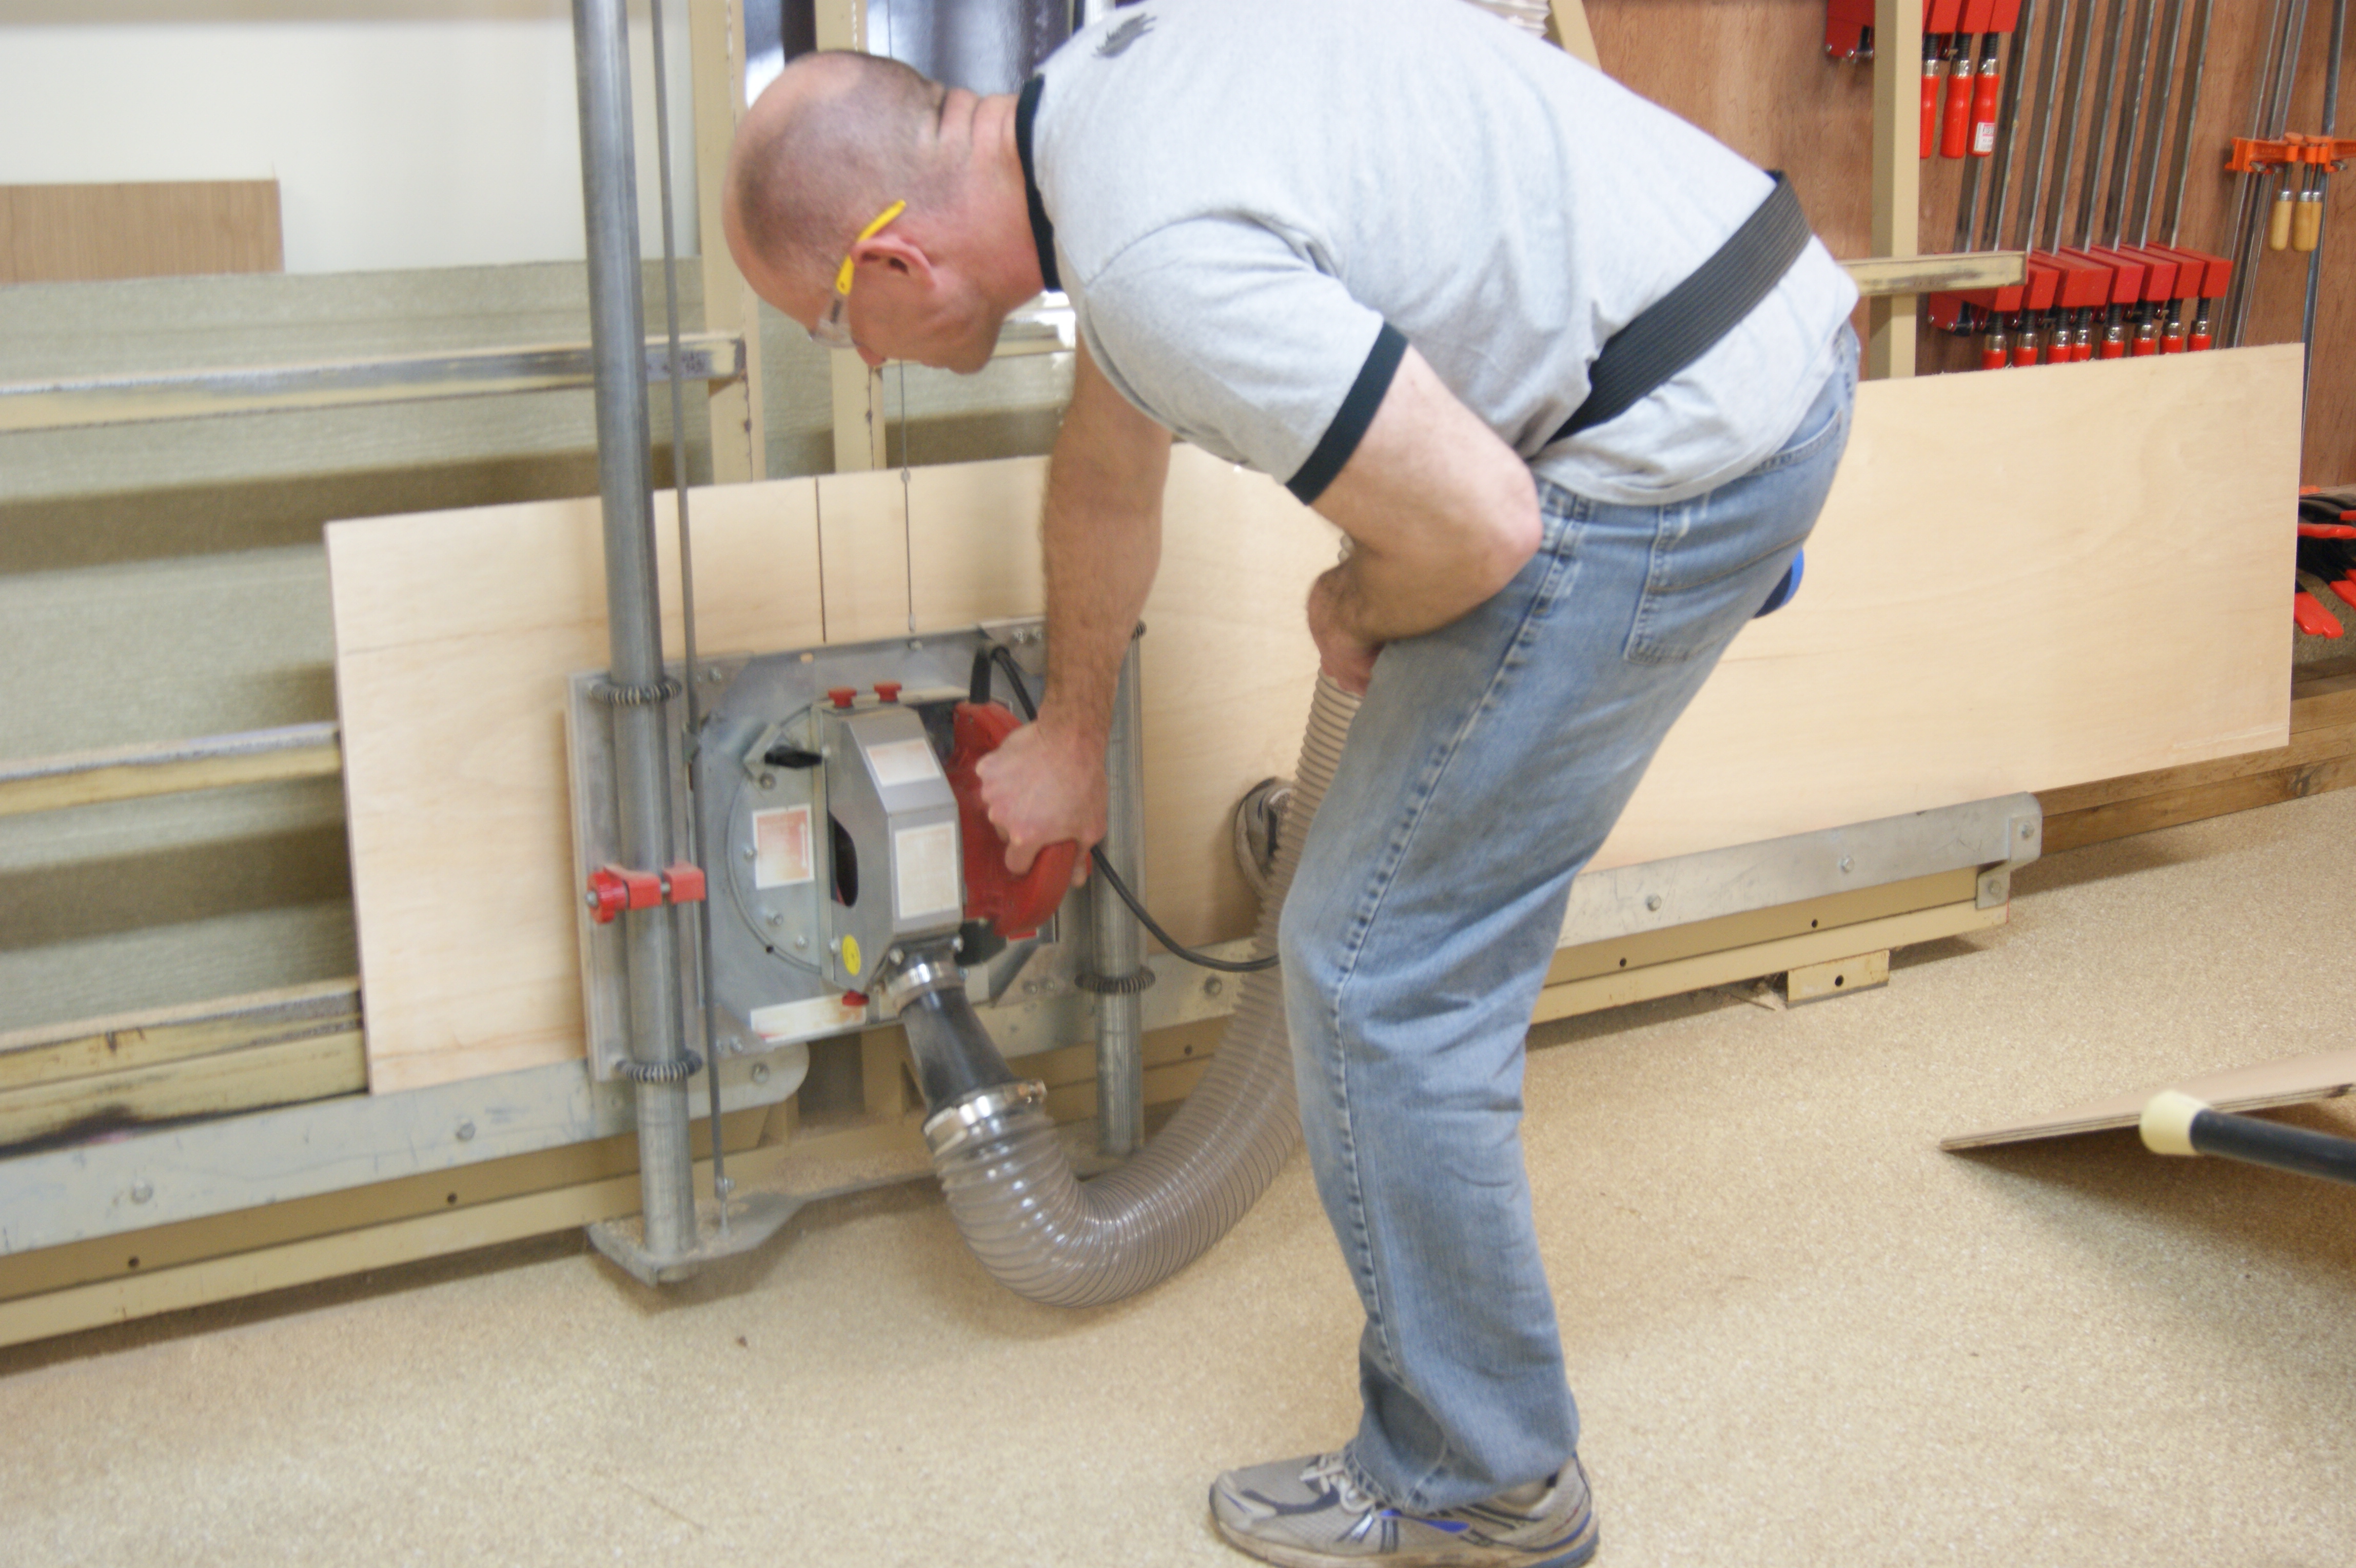
When you don’t use a tool that often, you have to milk the photo opportunities when you get them…
I glued the plywood into the bottom of the frame just around the edges. This was one of the least stressful glue-ups on this whole project. At first, I was a bit worried that there wasn’t going to be enough glue surface area to hold it together. But, due to the size of this thing, when I calculated it out, it was about 80 square inches. That’s actually quite a bit of glue, so it should be fine. I just applied glue on the lip on the inside of the frame.
Then dropped in the back panel and clamped it up. Since I only had glue around the edges, I was able to apply pressure with regular clamps. I didn’t need deep-reach clamps, and I didn’t have to work out anything special. I’m not so lucky later on.

Yes, I realize the plywood is the wrong color. I’m going to have to correct that later when I finish it.
That finished the underside of the top. But up top (on the top of the top?) I still had a quarter inch recess and needed to allow for the zinc sheet. What I did here took forever.
You see, I wanted the zinc sheet to be flush with the top of the frame. My zinc sheet was .022 inches thick. I had made a recess in the top that was a quarter inch deep to hold it. This meant I needed something exactly 0.228 inches (0.25 -0.022) thick to fill the recess with so that the zinc would sit flush. But as important as this project is to me, it’s not important at all to the plywood industry. Therefore, they don’t make plywood in a .228 inch thickness. I can’t even blame this on a metric to English conversion. It was just poor planning on my part.
Rather than buy a sheet of quarter inch plywood that I’d just use a strip of and have it still not be the right thickness, I just used the half inch stuff I had… and I GROUND IT DOWN TO THE RIGHT THICKNESS BY SANDING IT. Needless to say, this was not rapid.
It’s not as bad as it sounds at first. I do have a drum sander. So I loaded it up with some 60 grit sandpaper and started grinding away at the plywood.
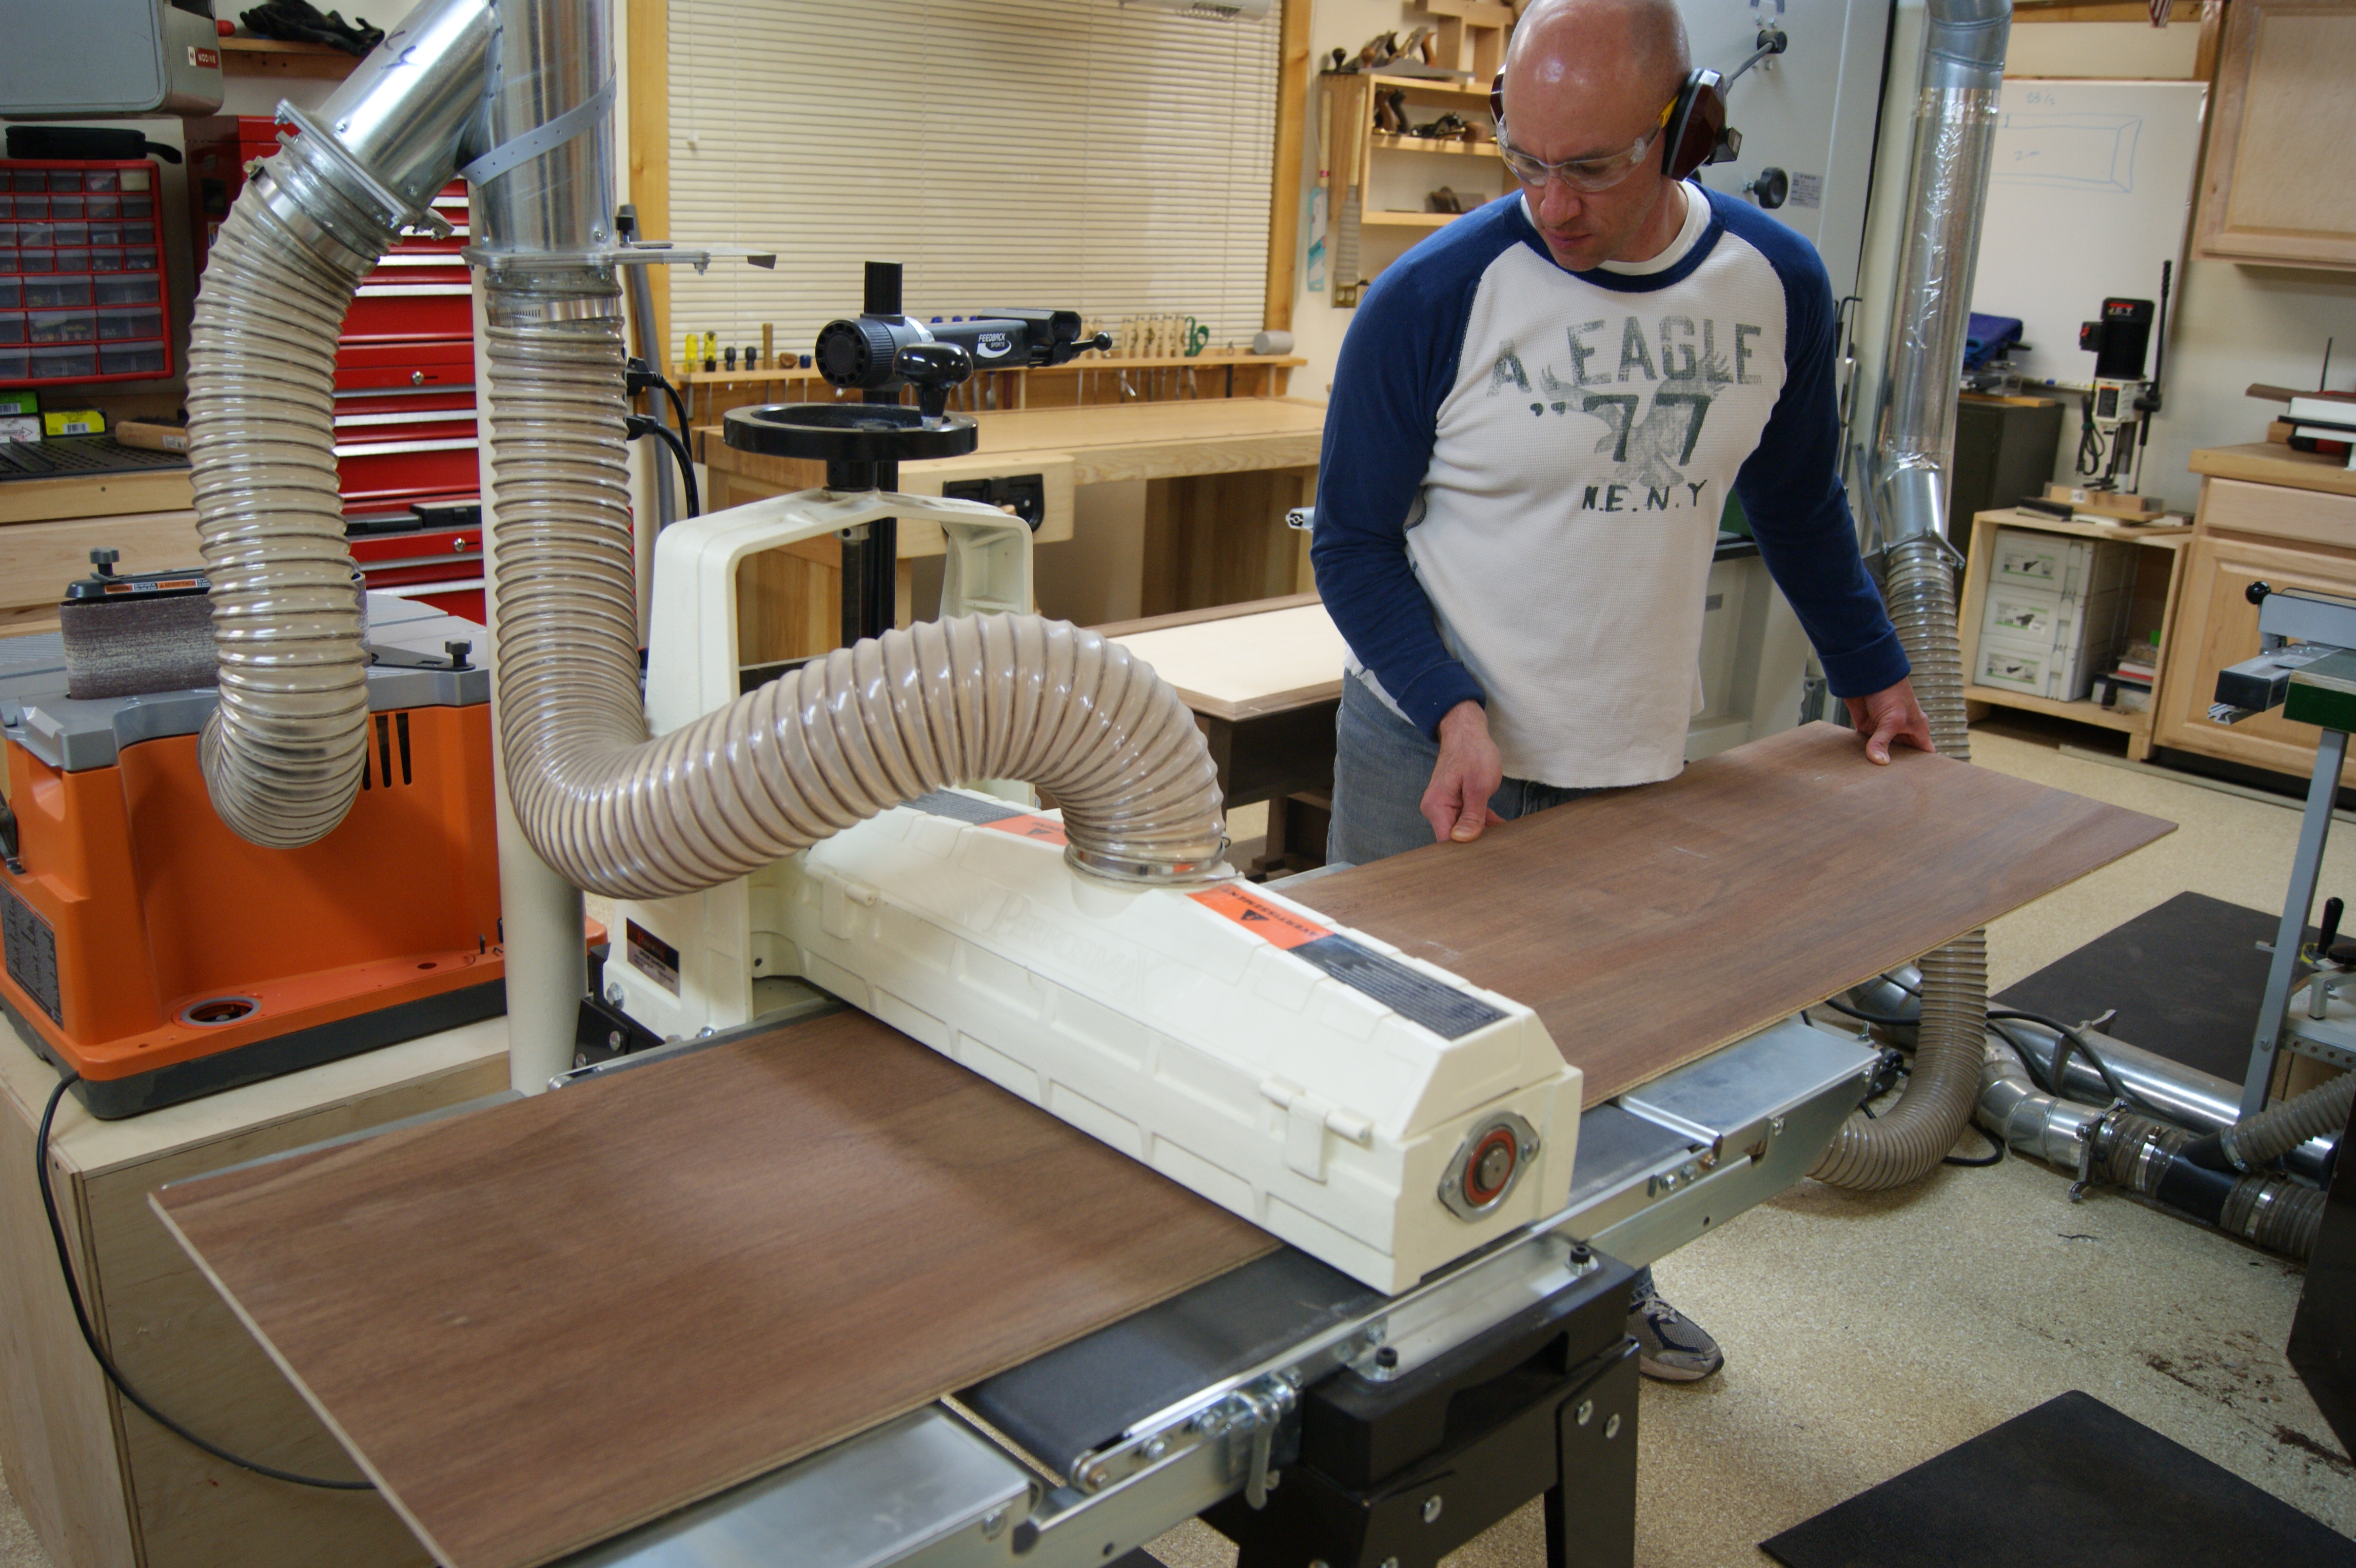
This really makes you appreciate a dust collection system.
I know what you’re thinking, and yes, that’s the same plywood as before. Only when I sanded it down, I found that the inside plies were made of… Peruvian Walnut! That’s the same wood as the rest of the project. Very interesting, but not altogether useful at this late stage. And if you’re wondering how long it takes to grind 14 square feet of plywood from ½ inch down to 0.228 inches, the answer is “a very long time.” I was out there very late, and Stef had gone to bed, but it eventually worked. When I tested things out with a scrap of zinc sheet, everything lined up just as I wanted.

Now that I had the odd-thickness plywood for the top, I needed to cut the zinc sheet to fit it. Believe it or not, I cut the zinc sheet with a utility knife. Sounds weird, but it works. I clamped the plywood to the table and the zinc, and just traced around it with the knife.

Another painfully slow method of work, brought to you by The Fit RV…
If you do this for about a half hour and go through about 10 utility knife blades, it really does work. Eventually, you can bend and snap the zinc right off, and it makes a very clean line.

Since I don’t work with metal a whole lot, this works well enough
Do You Remember More Chemistry than an 8th Grader?
Now, before I could glue the whole thing up, I needed to “age” the zinc. This piece will match others in the room that are somewhat “distressed.” And by “distressed,” I don’t mean something that looks like it came from the landfill. I mean I want it to look like it was a fantastic piece of brand new quality furniture back in about 1930, and it’s been used ever since. An 85 year old zinc table top won’t look shiny and new – it’ll be tarnished. (And I don’t want to wait 85 years to be done with this piece because I’m feeling kind of done with it already.)
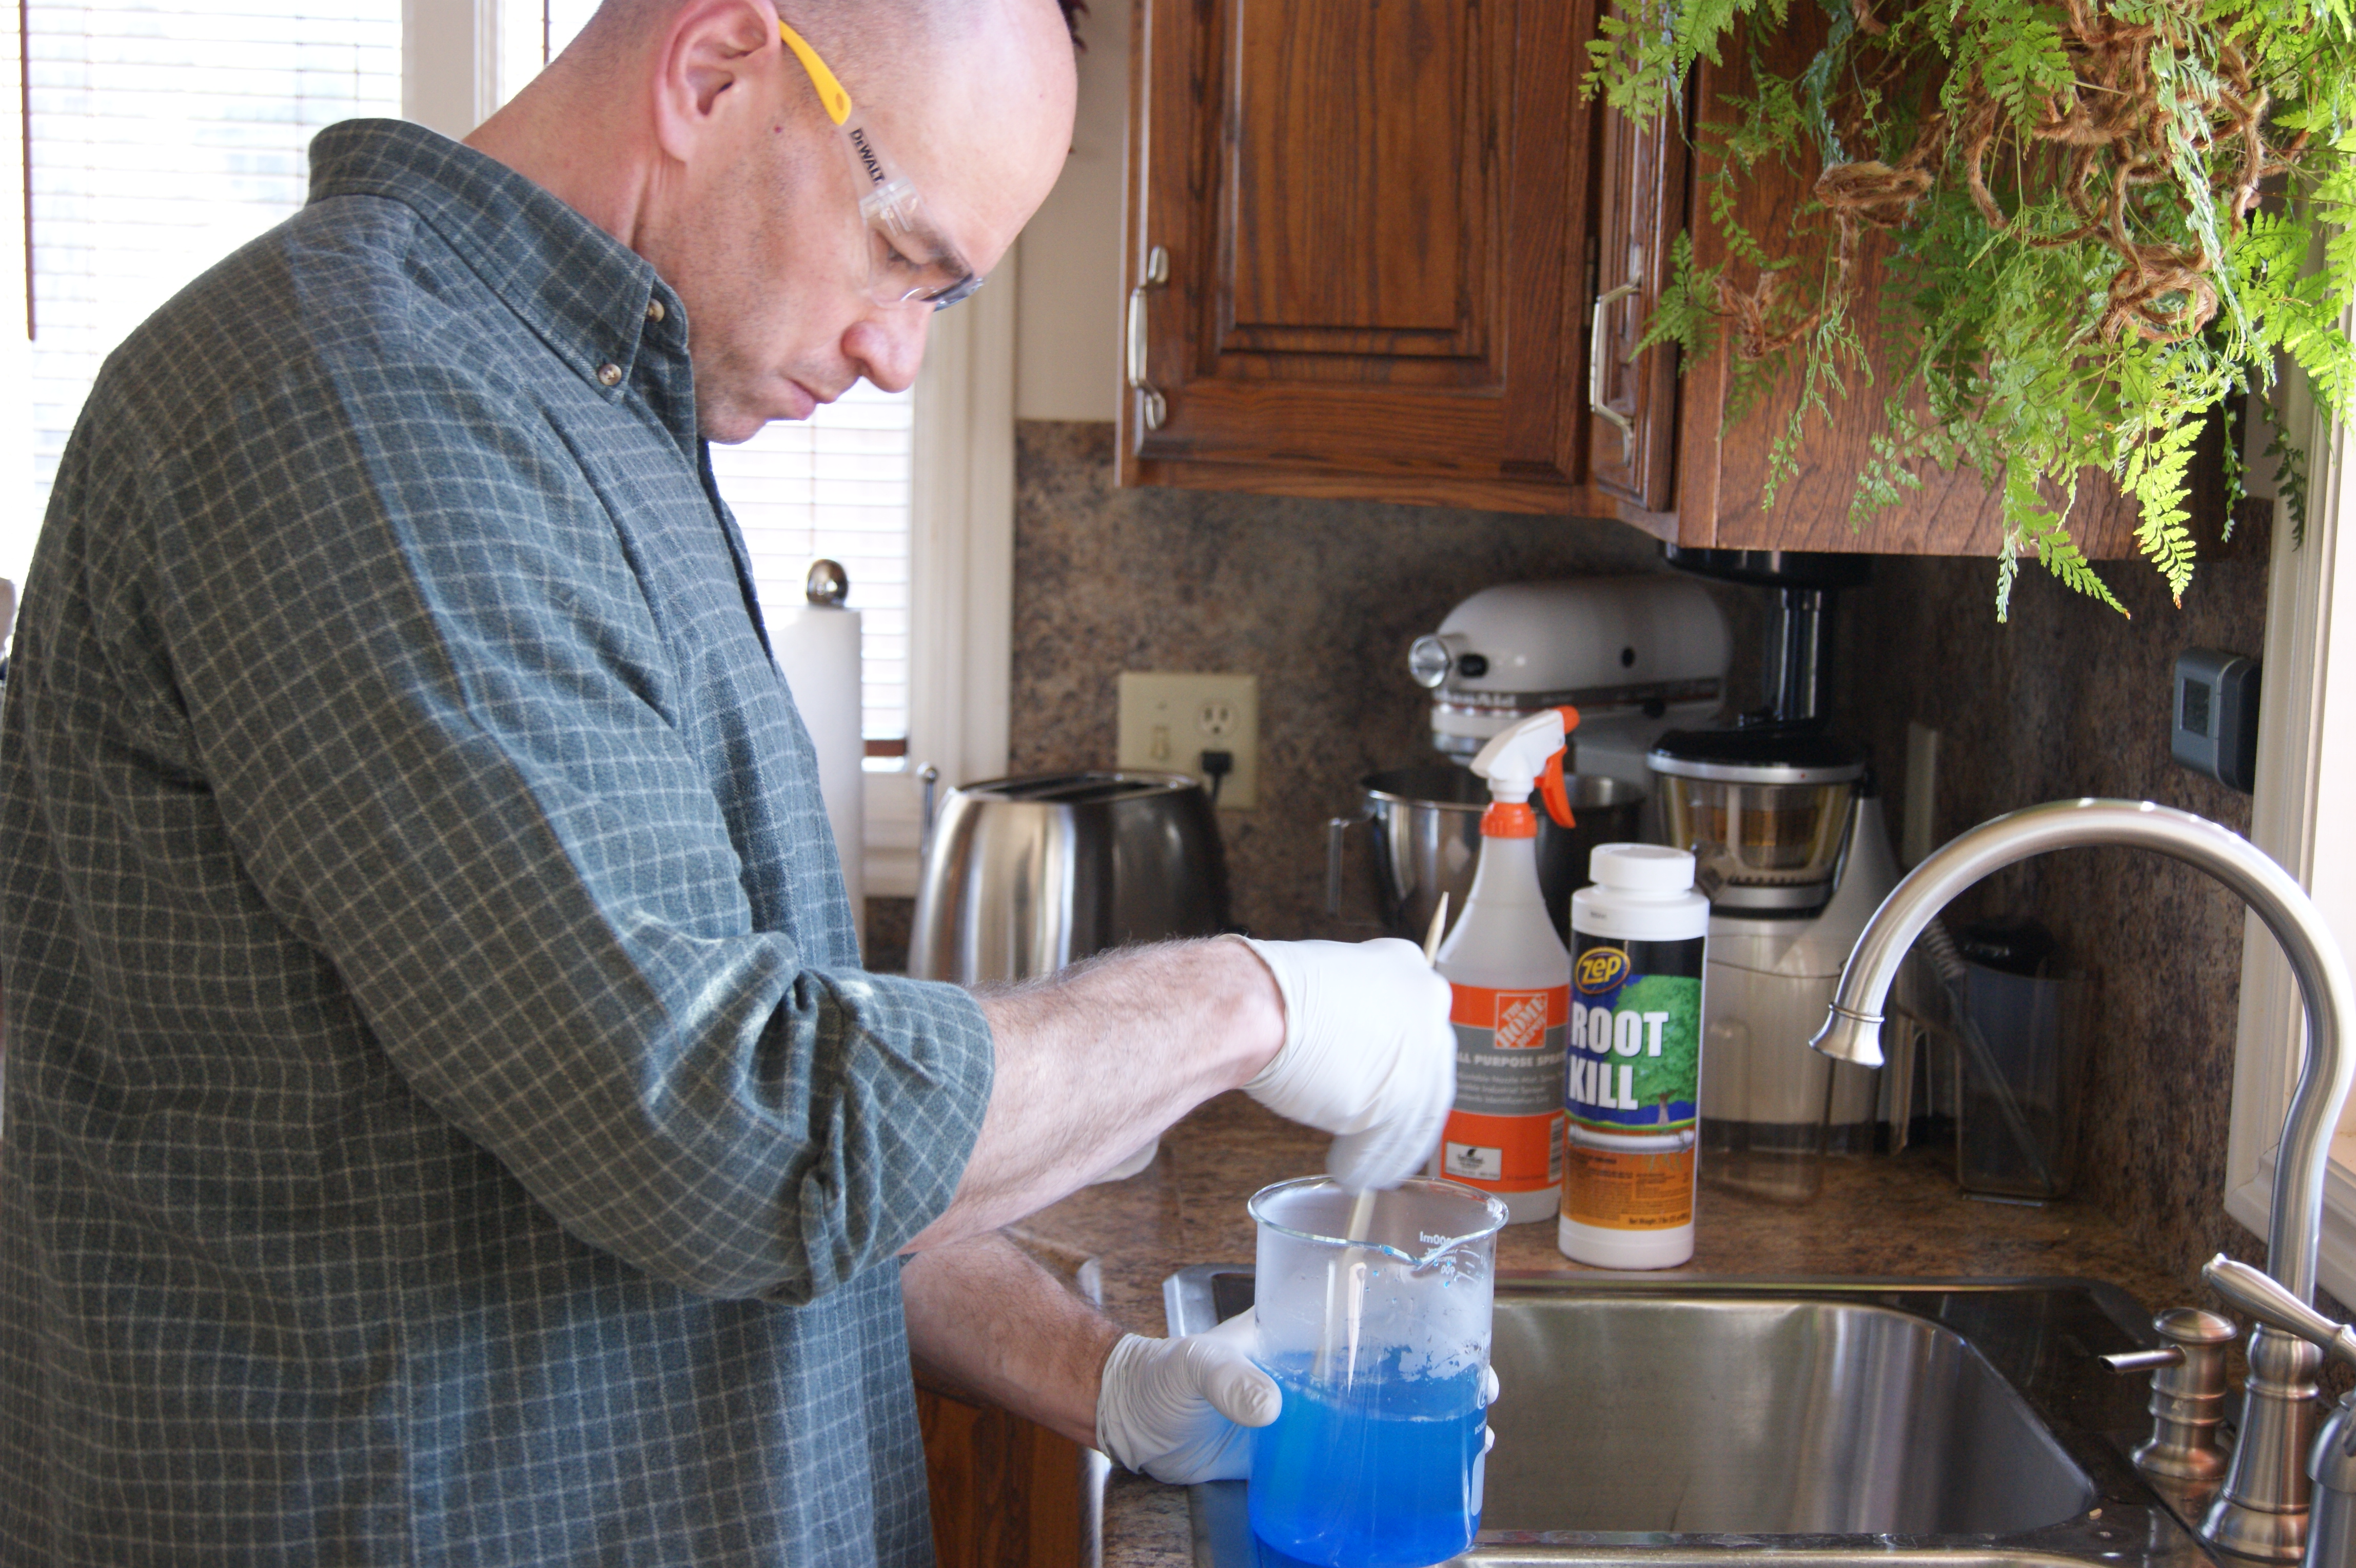
Having done this a time or two before, I know that a solution of Copper Sulfate will tarnish the zinc pretty quickly. It does this through a “Metal Displacement Reaction”. But for this blog, I wanted to be able to say a bit more about what was actually going on. The most awesome description of this reaction I found came from a “Connor H,” who was apparently a student in Mr. Kutz’s 8th grade science class somewhere. Connor writes:
“We used the copper II sulfate and mixed it with water to see if the copper II sulfate would dissolve into the water. The copper II sulfate dissolved into the water and the water turned blue and it looked like kool-aid and looked like it would be good to drink.
After all of the copper II sulfate dissolved into the water we put a strip of zinc into the solution. The zinc attracted all of the copper and then it started turning black. It looked kind of gross. When we took the zinc strip out of the solution you could see the copper sticking to the strip of zinc. The zinc was more reactive than the copper so it stole its protons and changed its charge so then the copper was attracted to the zinc.”
Awesome, Connor. Stolen protons. I can’t top that.
Copper Sulfate is actually pretty easy to find. It’s sold as a root killer for cleaning septic lines. I mixed some up with water, and assembled some rags, paint brushes, and spray bottles to get to work with.
I didn’t really have any place good to work on this, so I just worked on half at a time in a kiddie pool. It’s a very random process – smearing, splattering, wiping it off, leaving the solution on for different amounts of time. I find this randomness disturbing on some deep psychological level. (Yes, I know exactly what this says about me.) Anyway, I survived.
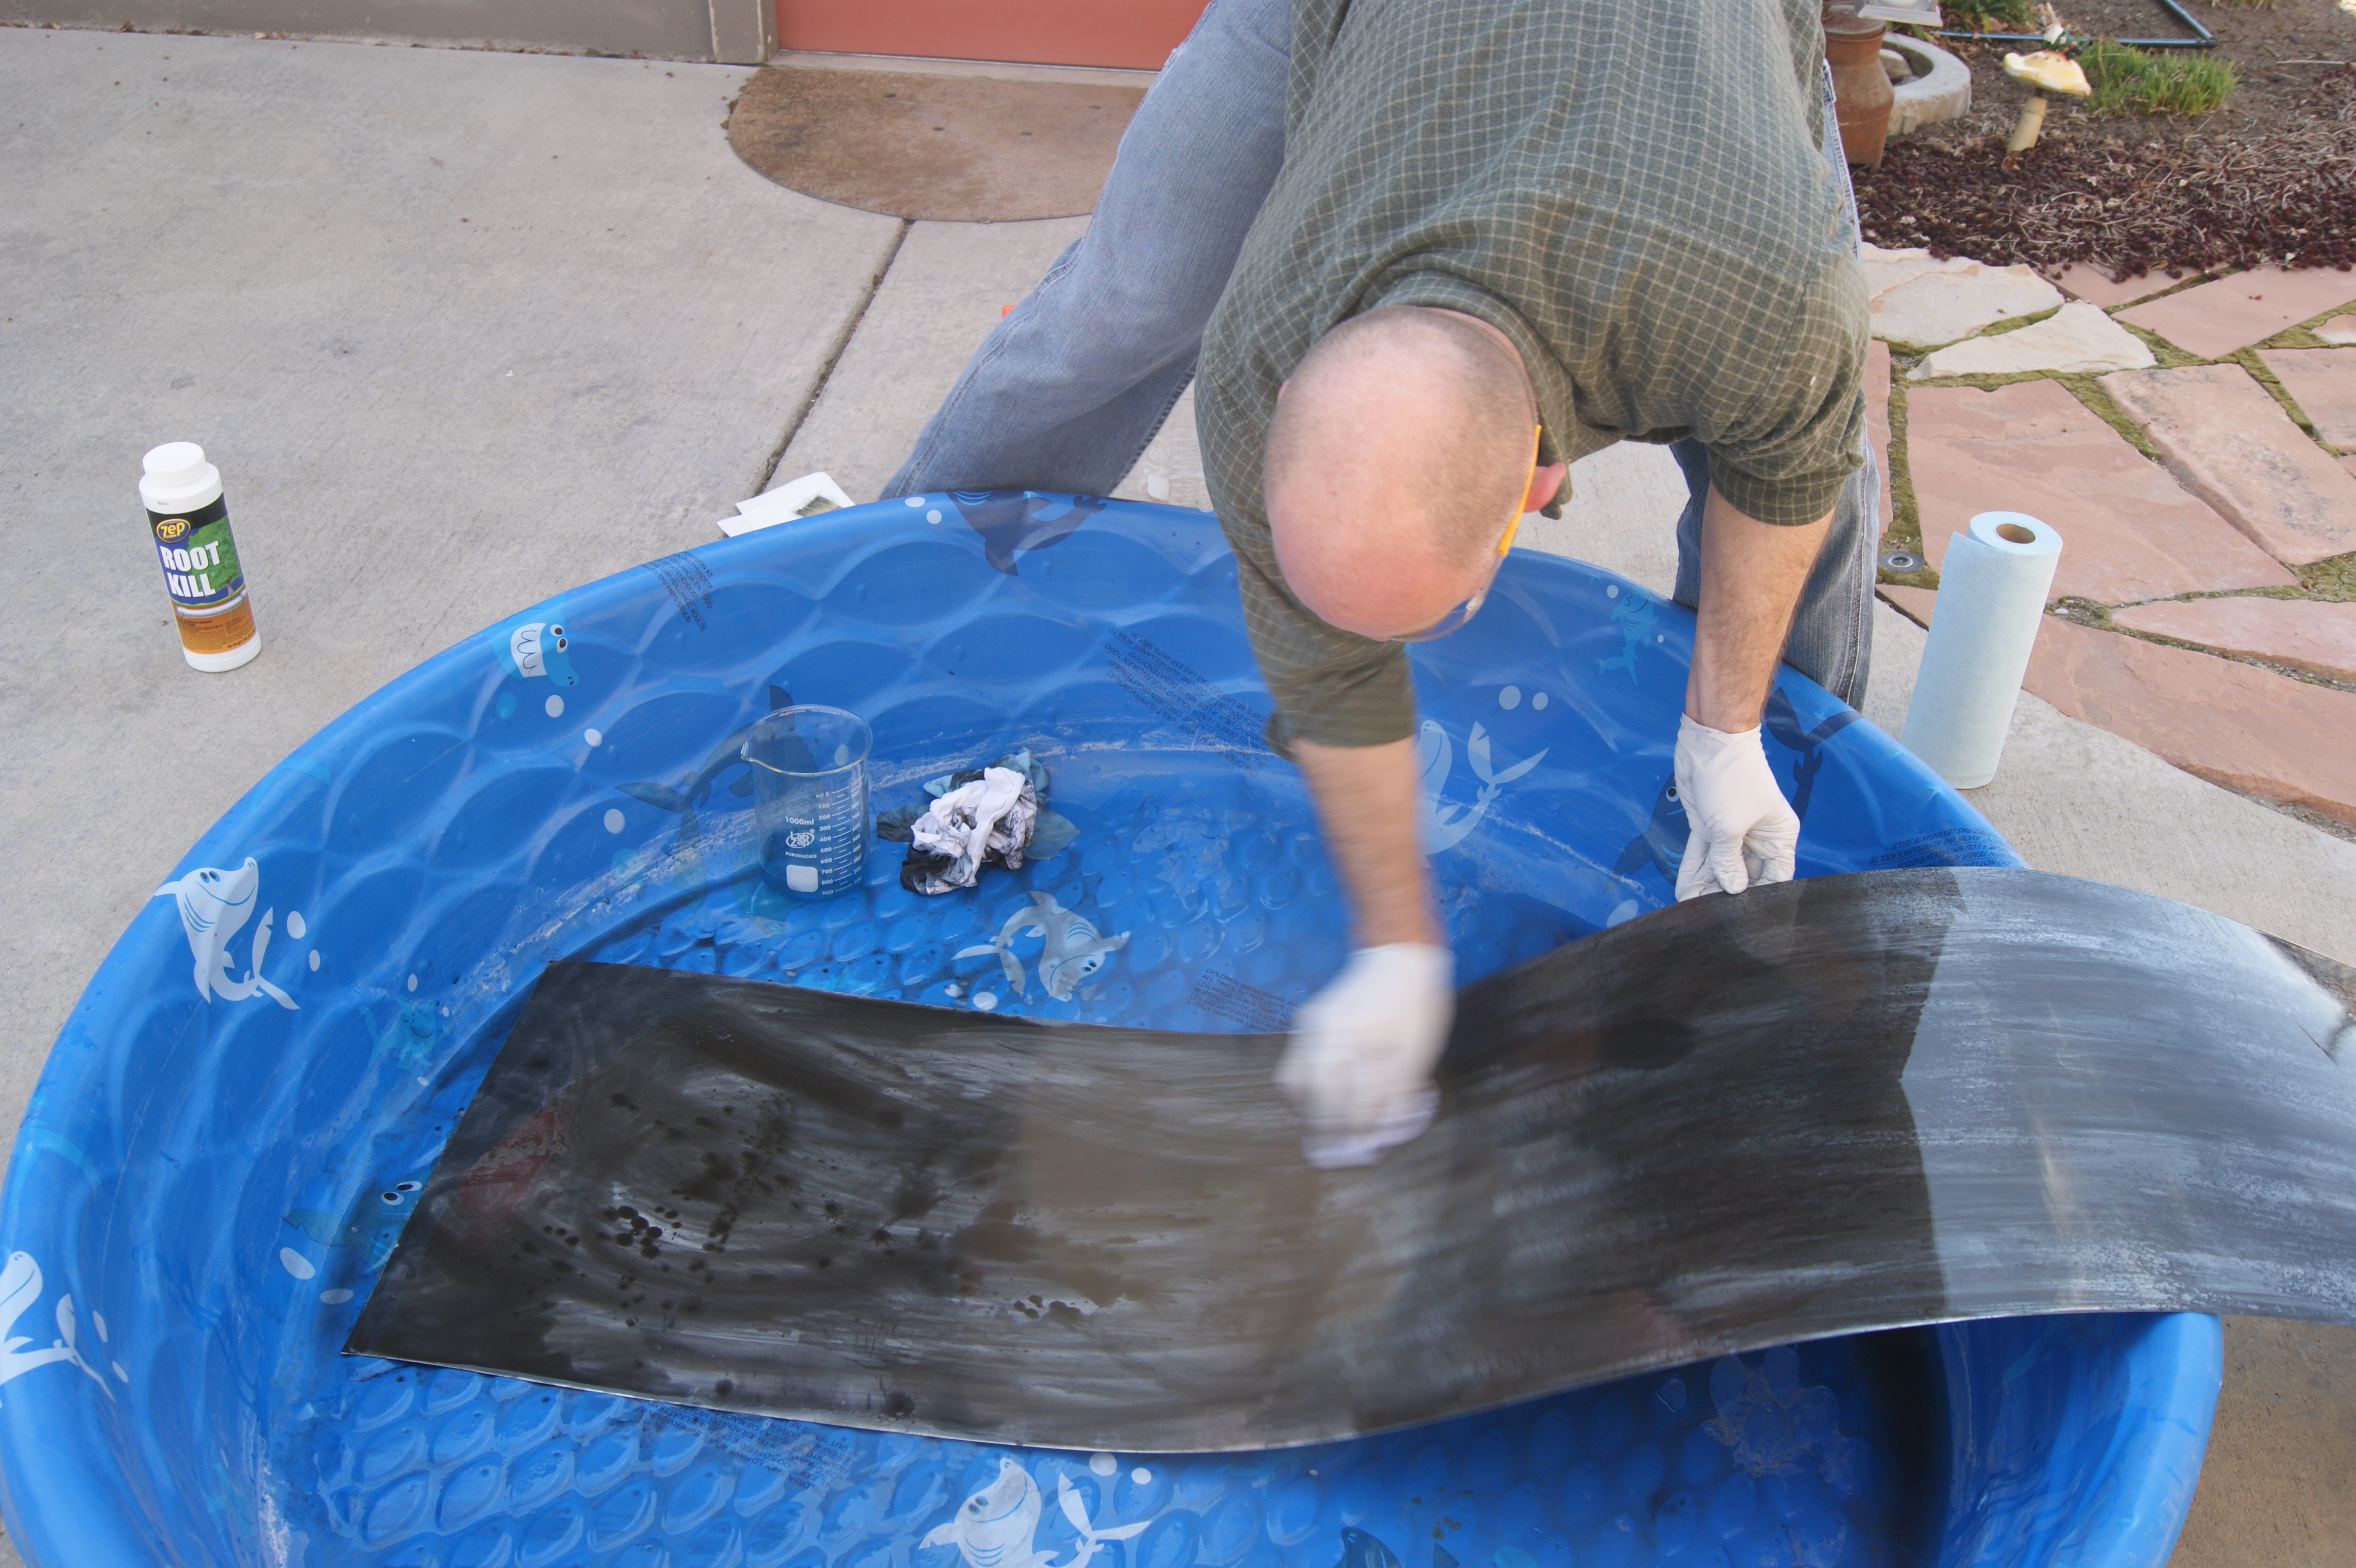
When the ordeal was done, it looked pretty “used” which is what I was going for. It actually looks darker in this picture than it does in person.

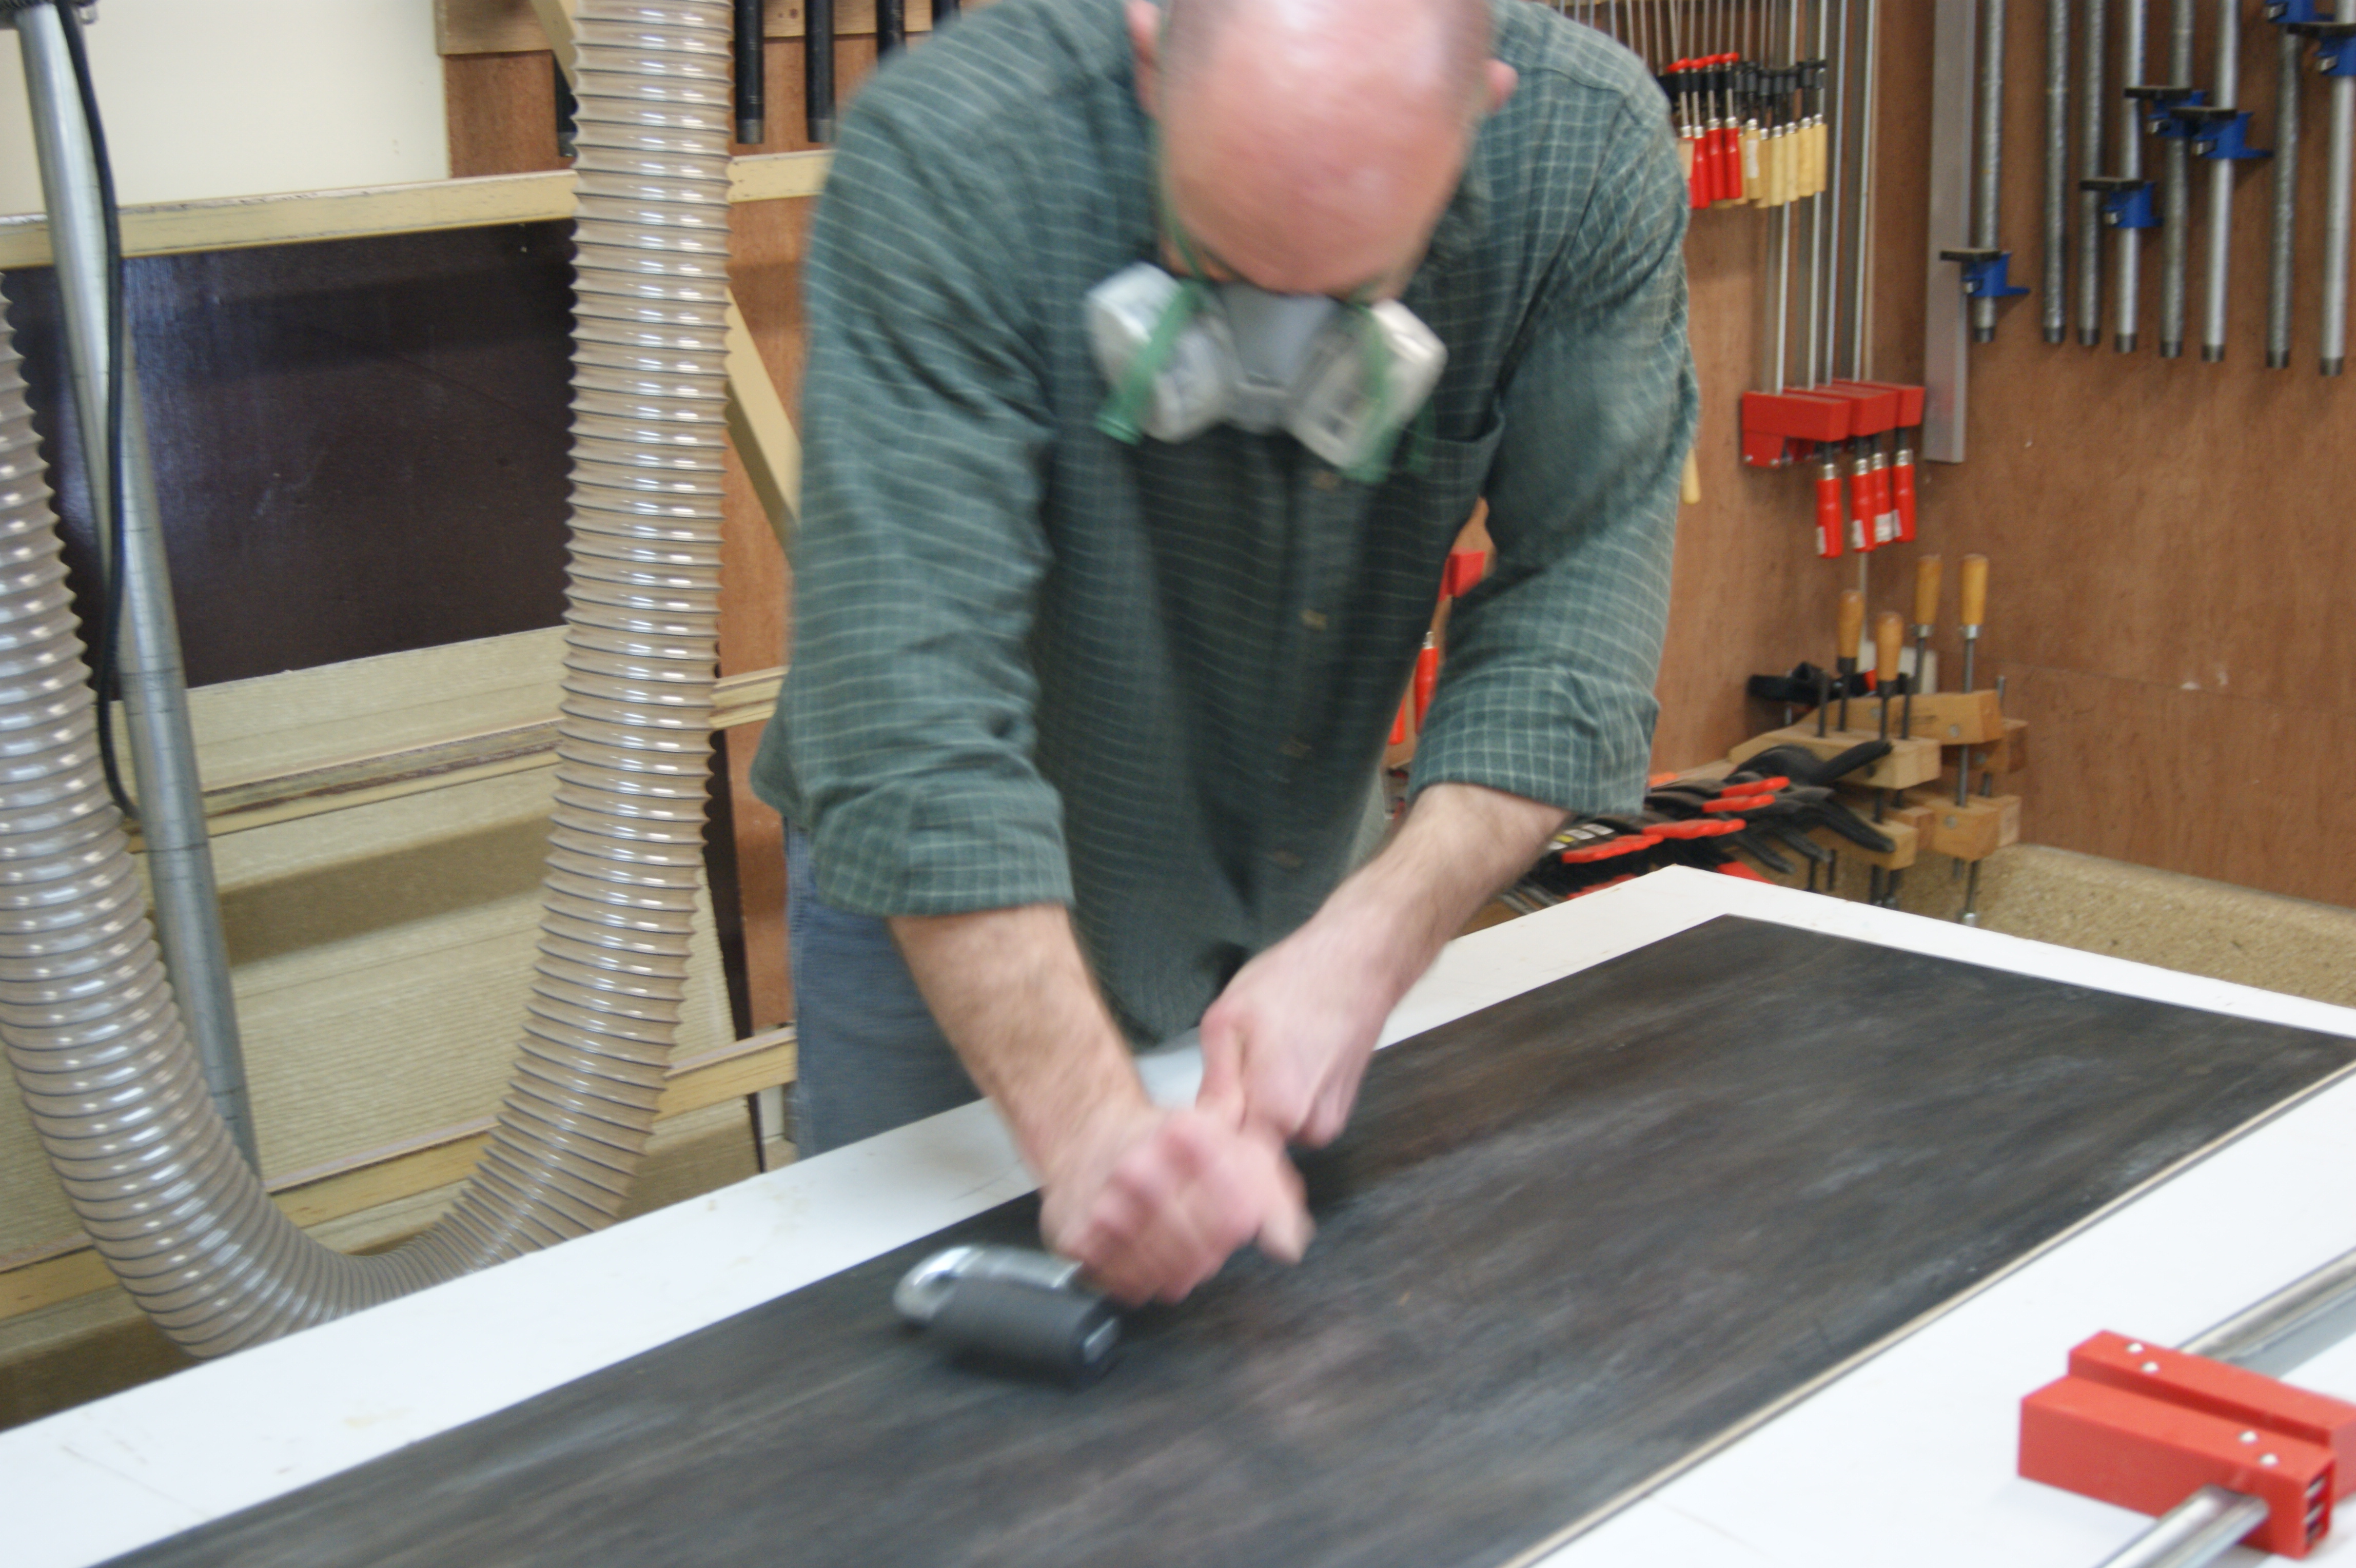
Now, to attach the zinc to the plywood, you can’t use wood glue, because it would just pull off. You have to use contact cement. Contact cement is very different from wood glue in how you apply it. First, you have to apply it to both pieces you intend to join, and then wait about 20 minutes for it to dry. This was a LOT of contact cement to spread around, so I used a small roller.

It’s also terribly noxious stuff, so unless you have extra brain cells that you want to kill off, you need to wear a respirator.
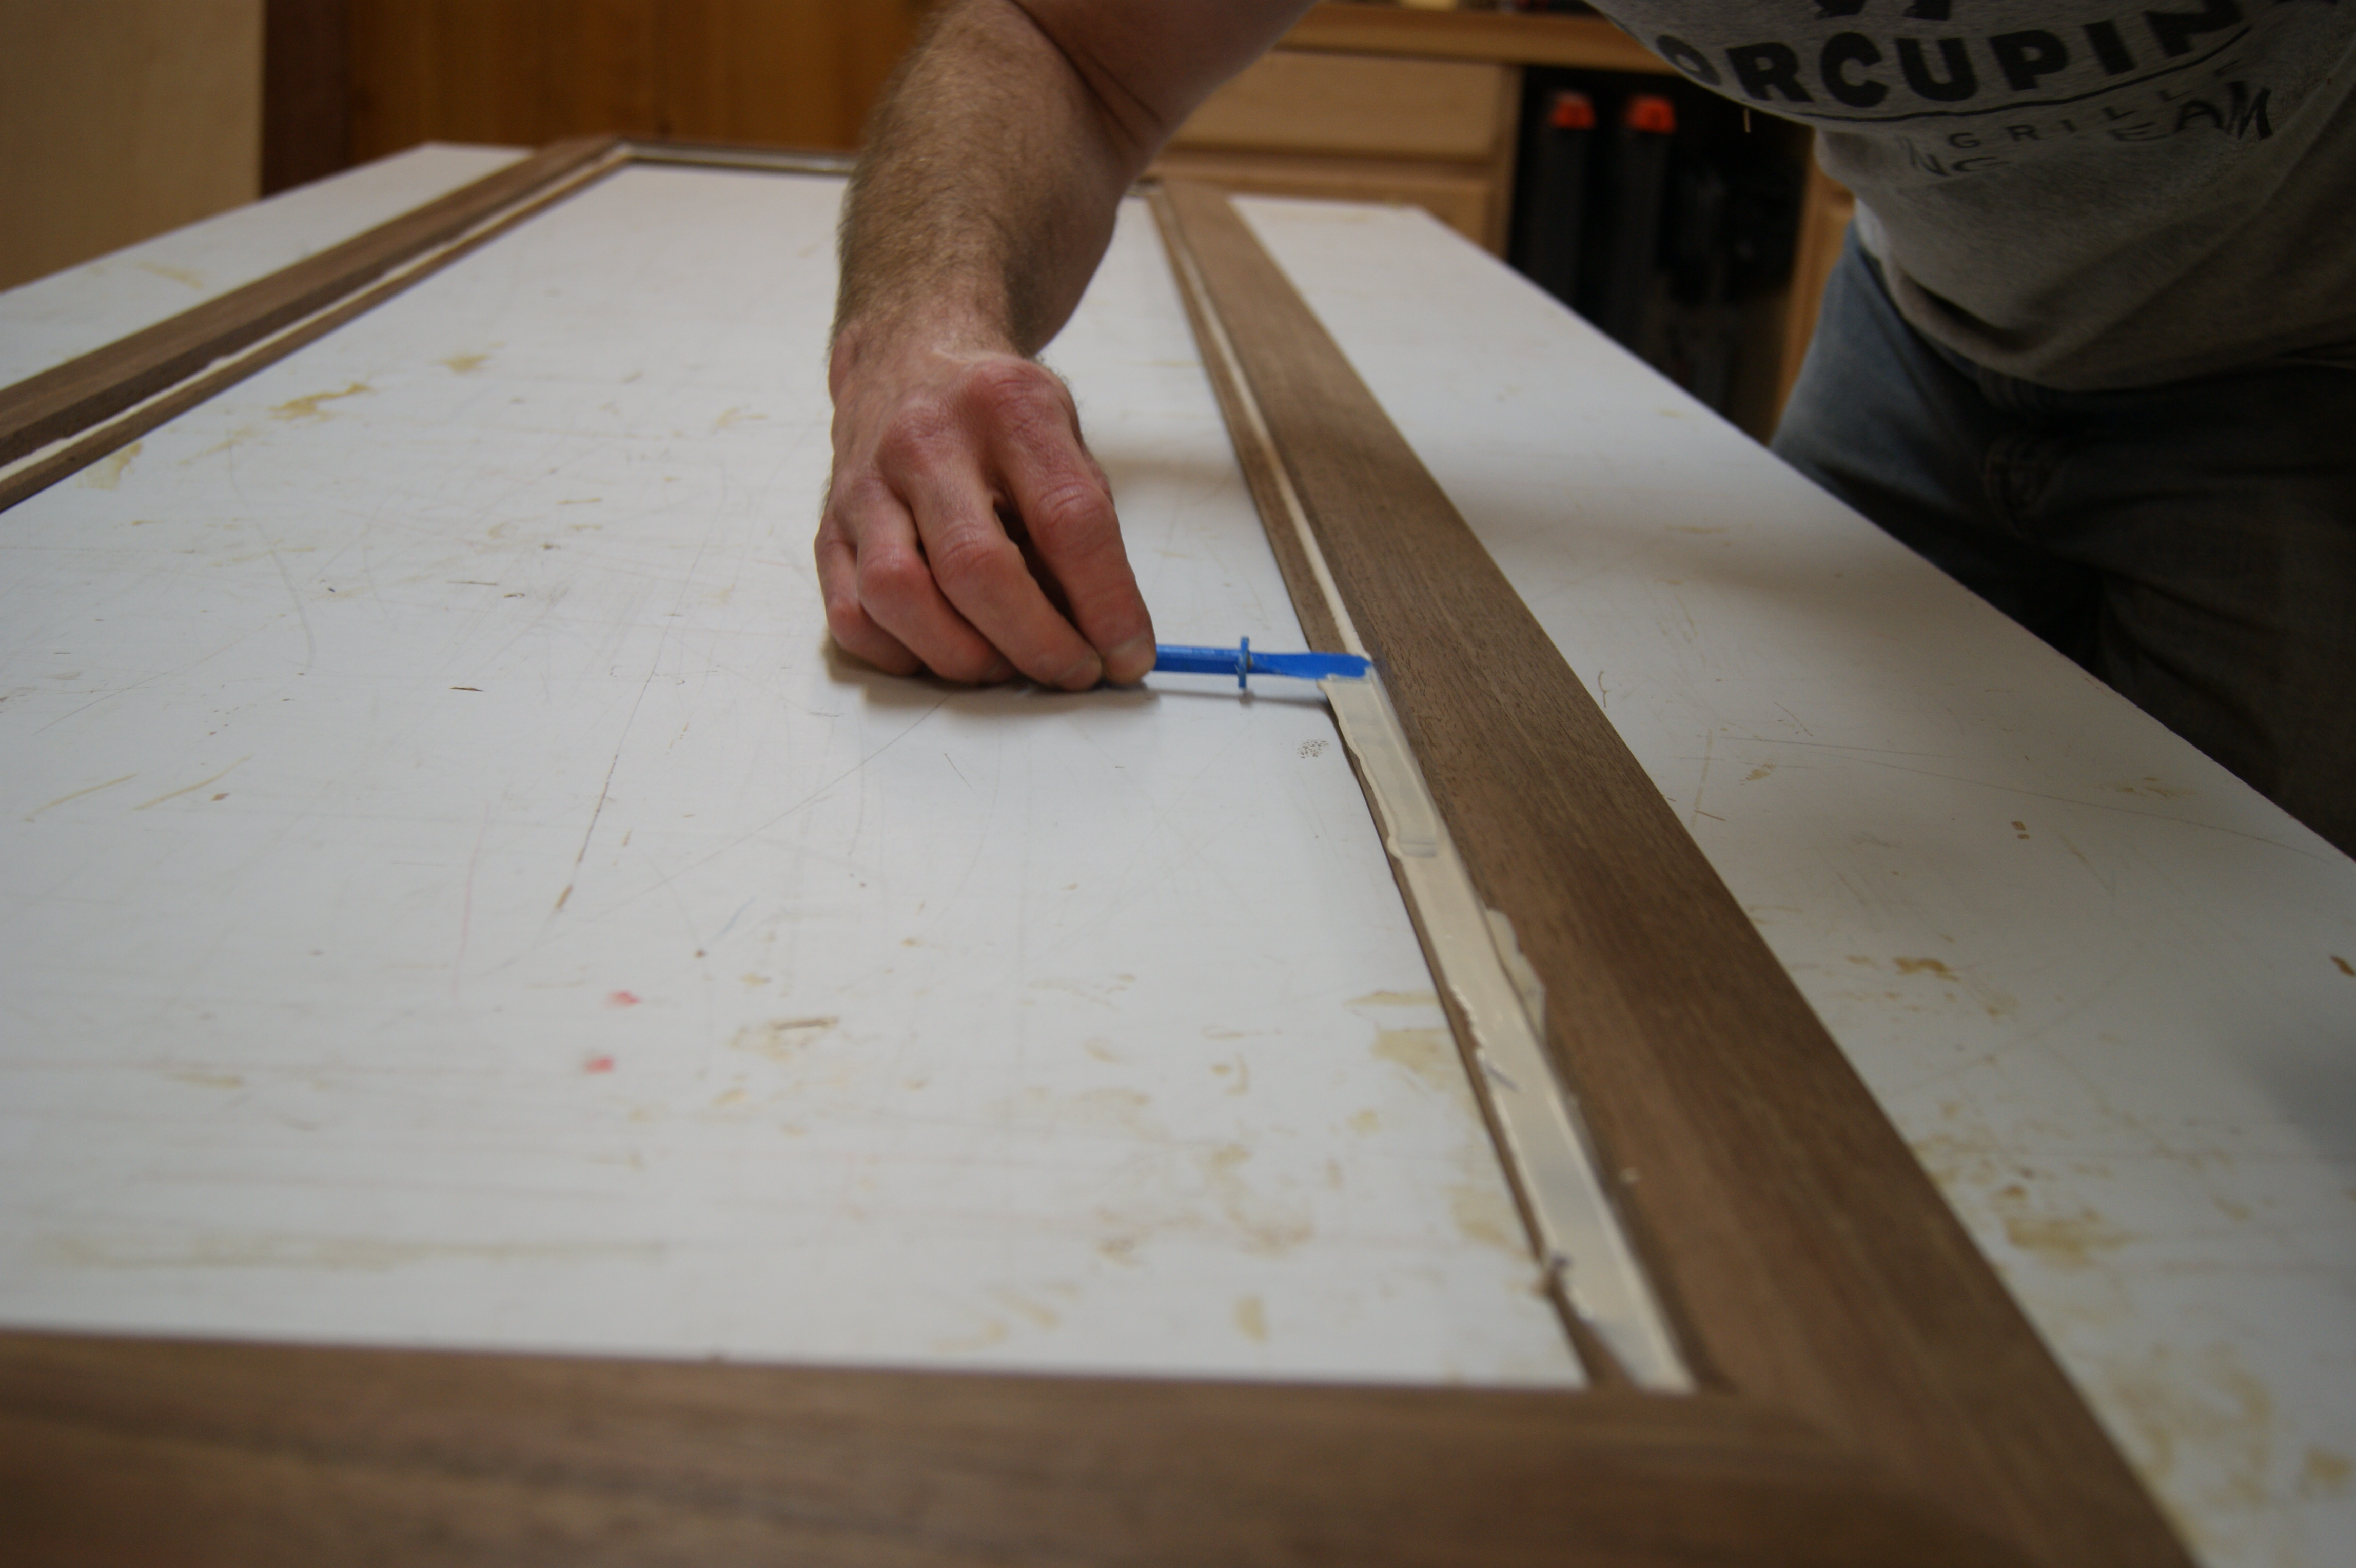
Now, once the contact cement is spread and left to dry for about 20 minutes, the two surfaces will bond instantly, the very second they touch. This means you have to get them lined up perfectly the very first time. I knew I could never do this with a 7 foot long floppy sheet of metal – even a slight misalignment would be multiplied seven feet later. Knowing I had a margin for error of exactly zero, I built this frame to help.
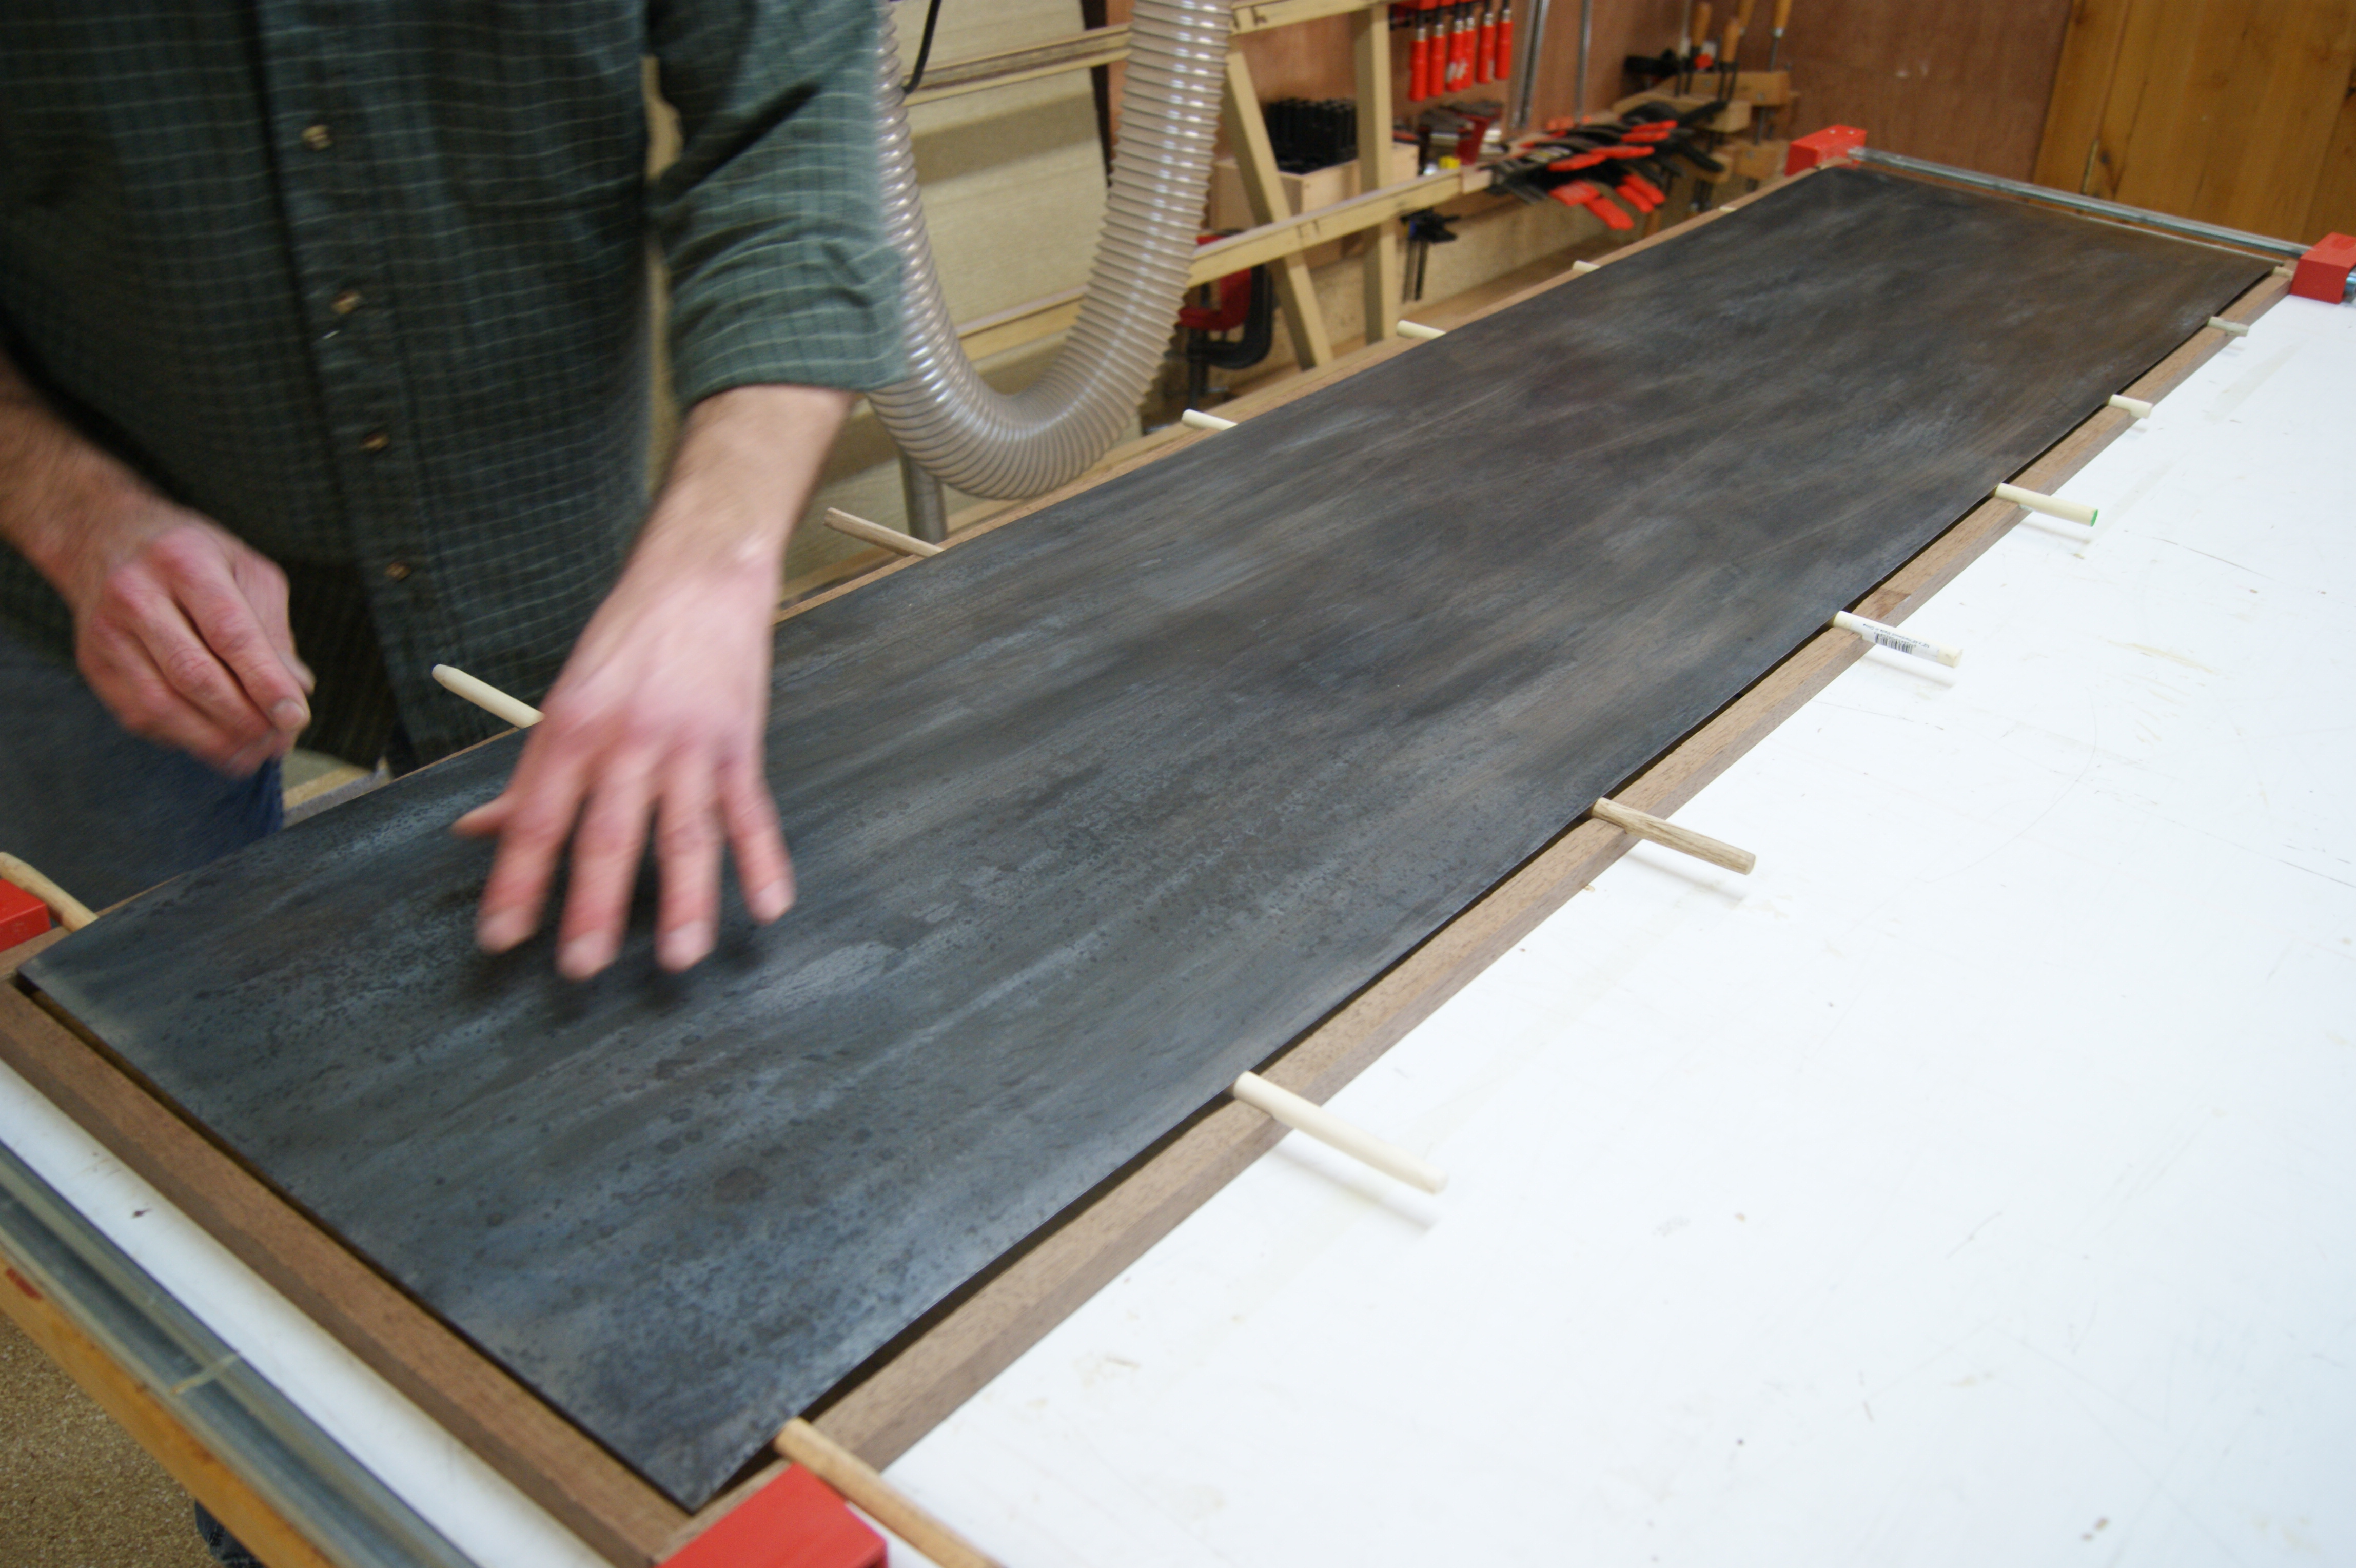
As long as the zinc fits inside the frame, it will be lined up exactly with the plywood below. The dowels are there to keep the two pieces apart until I’m ready for them to be stuck together. So I just started by lining up the first end, and pulling out dowels as I worked my way down the sheet, smoothing things out as I went.
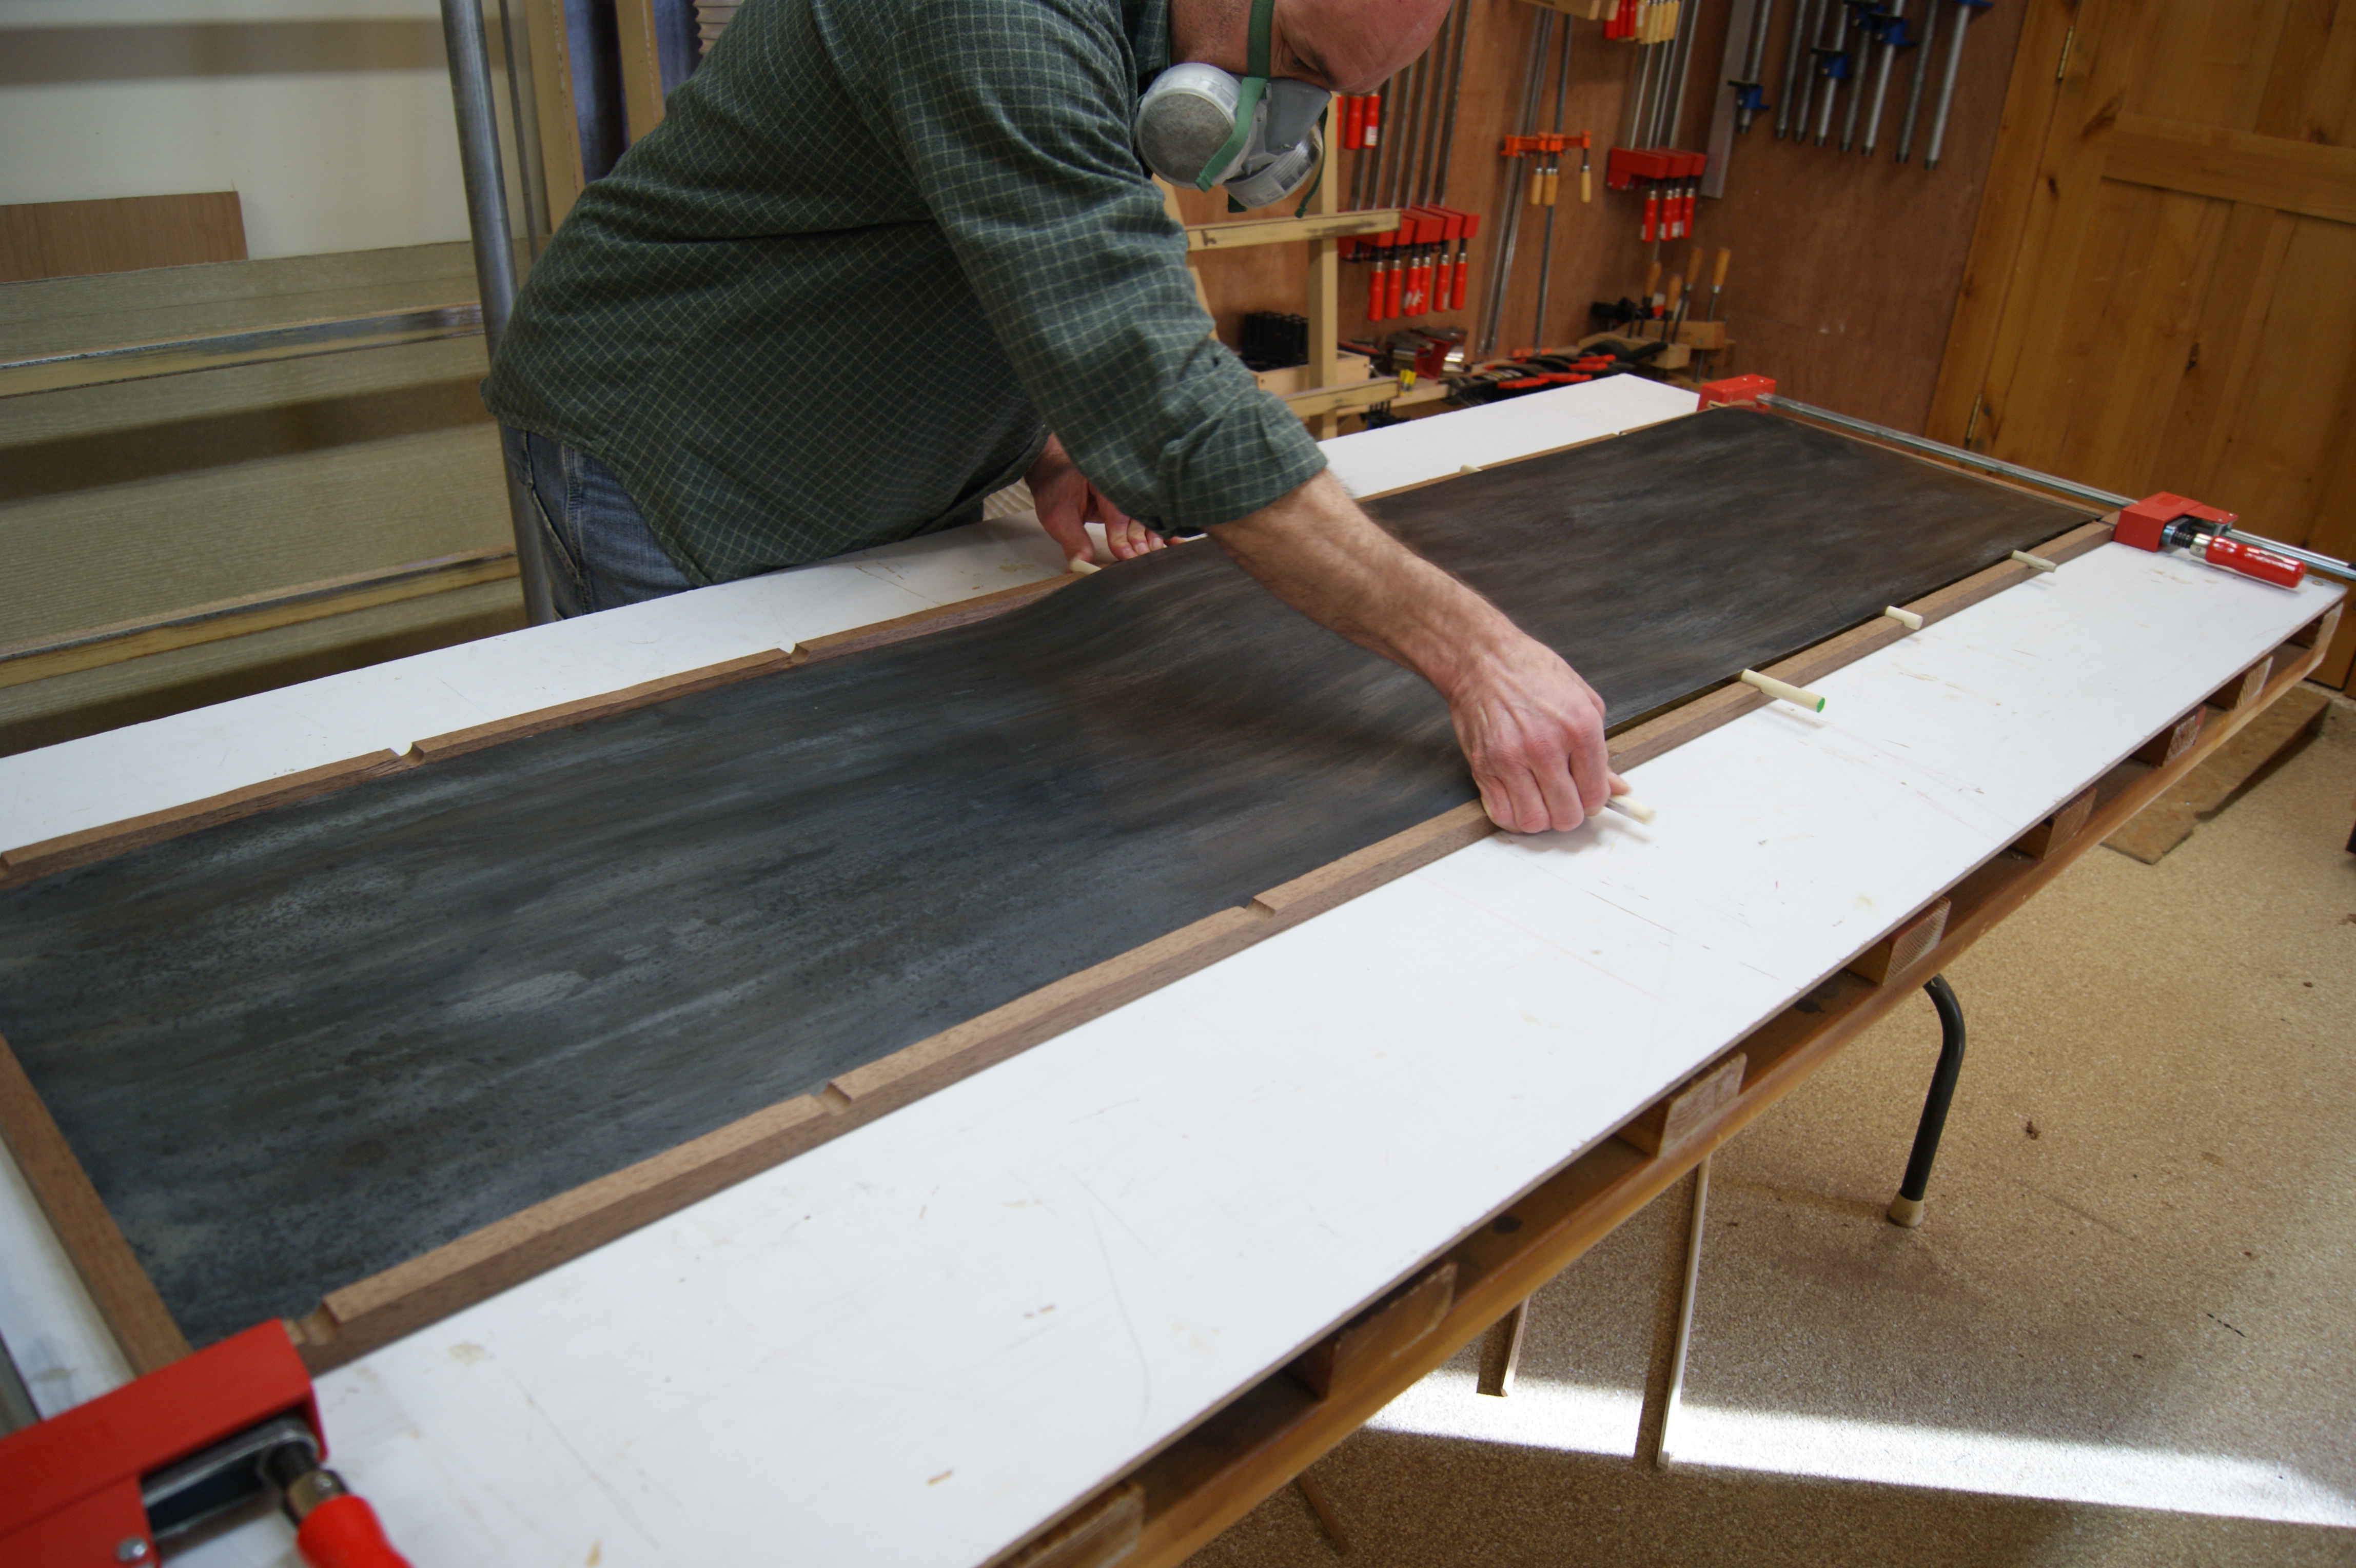
This actually worked out perfectly. I was able to keep the floppy zinc sheet perfectly aligned with the plywood below. After that, it just needed a quick roll-out to make sure that the contact cement was actually making “contact” everywhere on the sheet.
Then, I had to wait a couple of days before I could get back into my shop, because those fumes mean business!
I had to make sure to “burnish” or turn down the edges of the zinc sheet so that nobody gets their finger sliced on my table top. I did that by hand, and after that, the last step was fairly easy. I just had to glue the plywood sheet with the zinc on it to the plywood sheet already in the bottom of the frame. This required a LOT of glue, which I spread about with an old hotel room key.
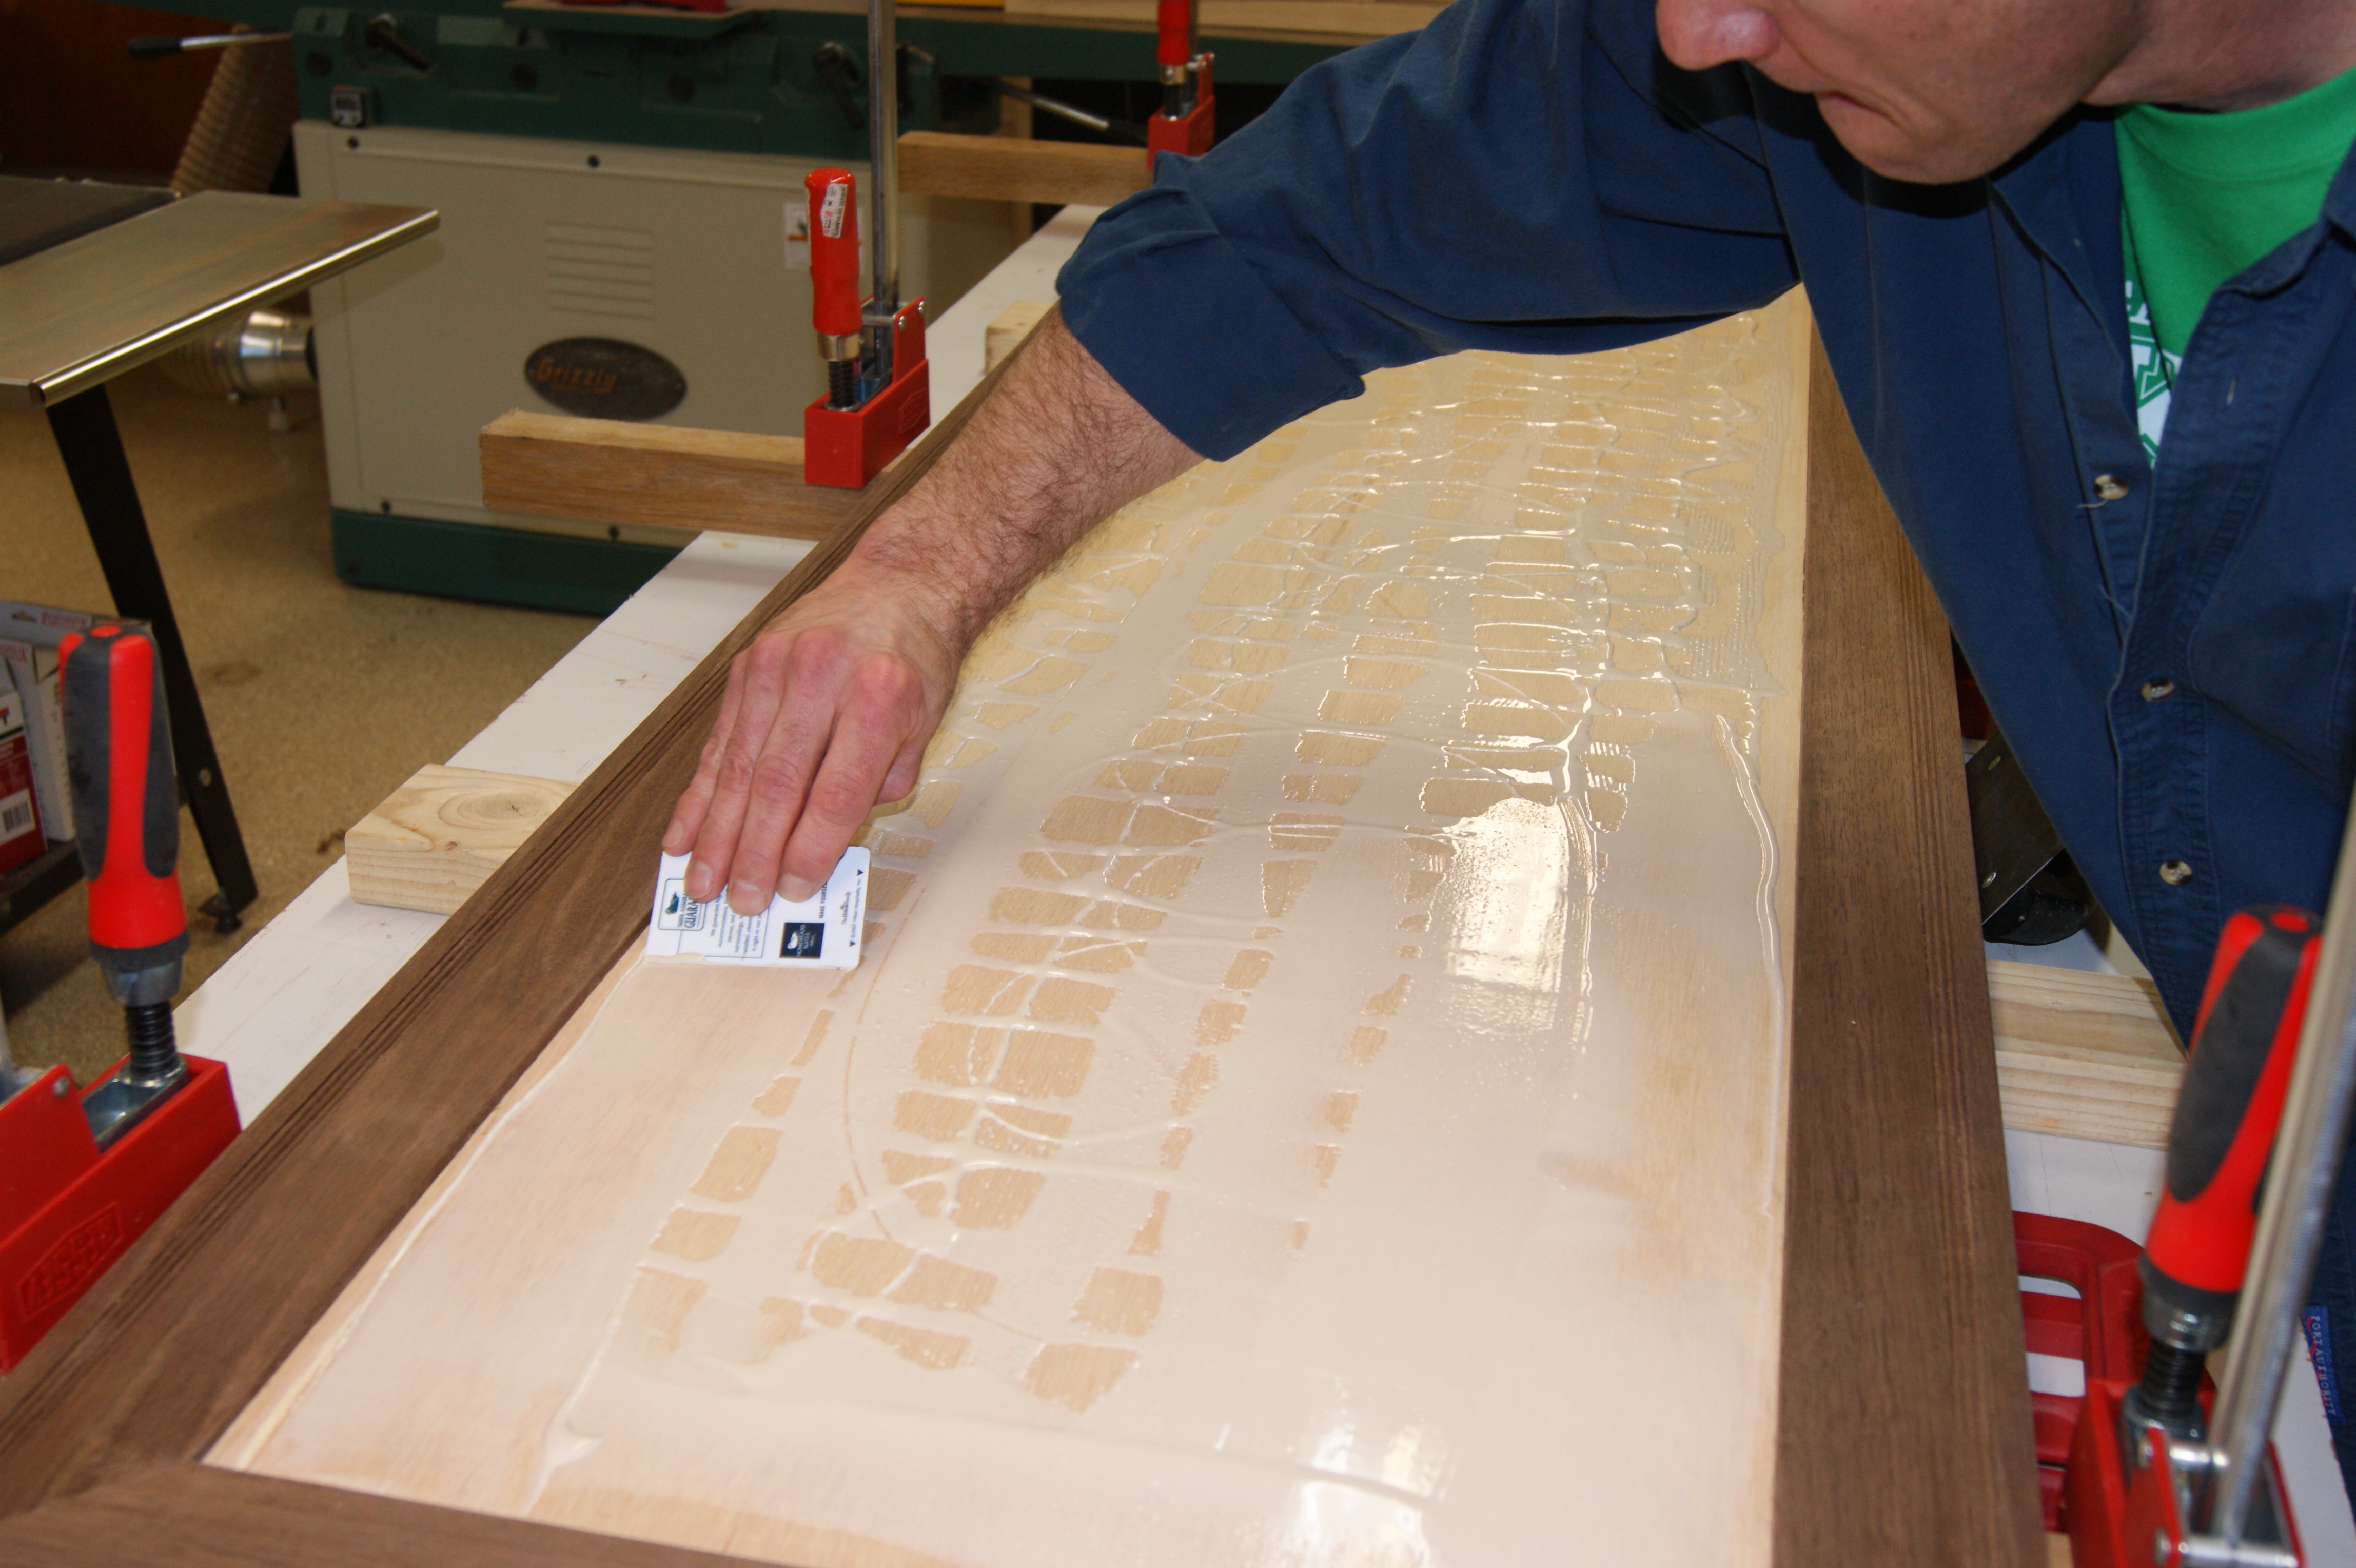
And then laying the two sheets together. Since this isn’t contact cement, no special precautions were necessary, though you can see that I’ve got the clamps at the ready.
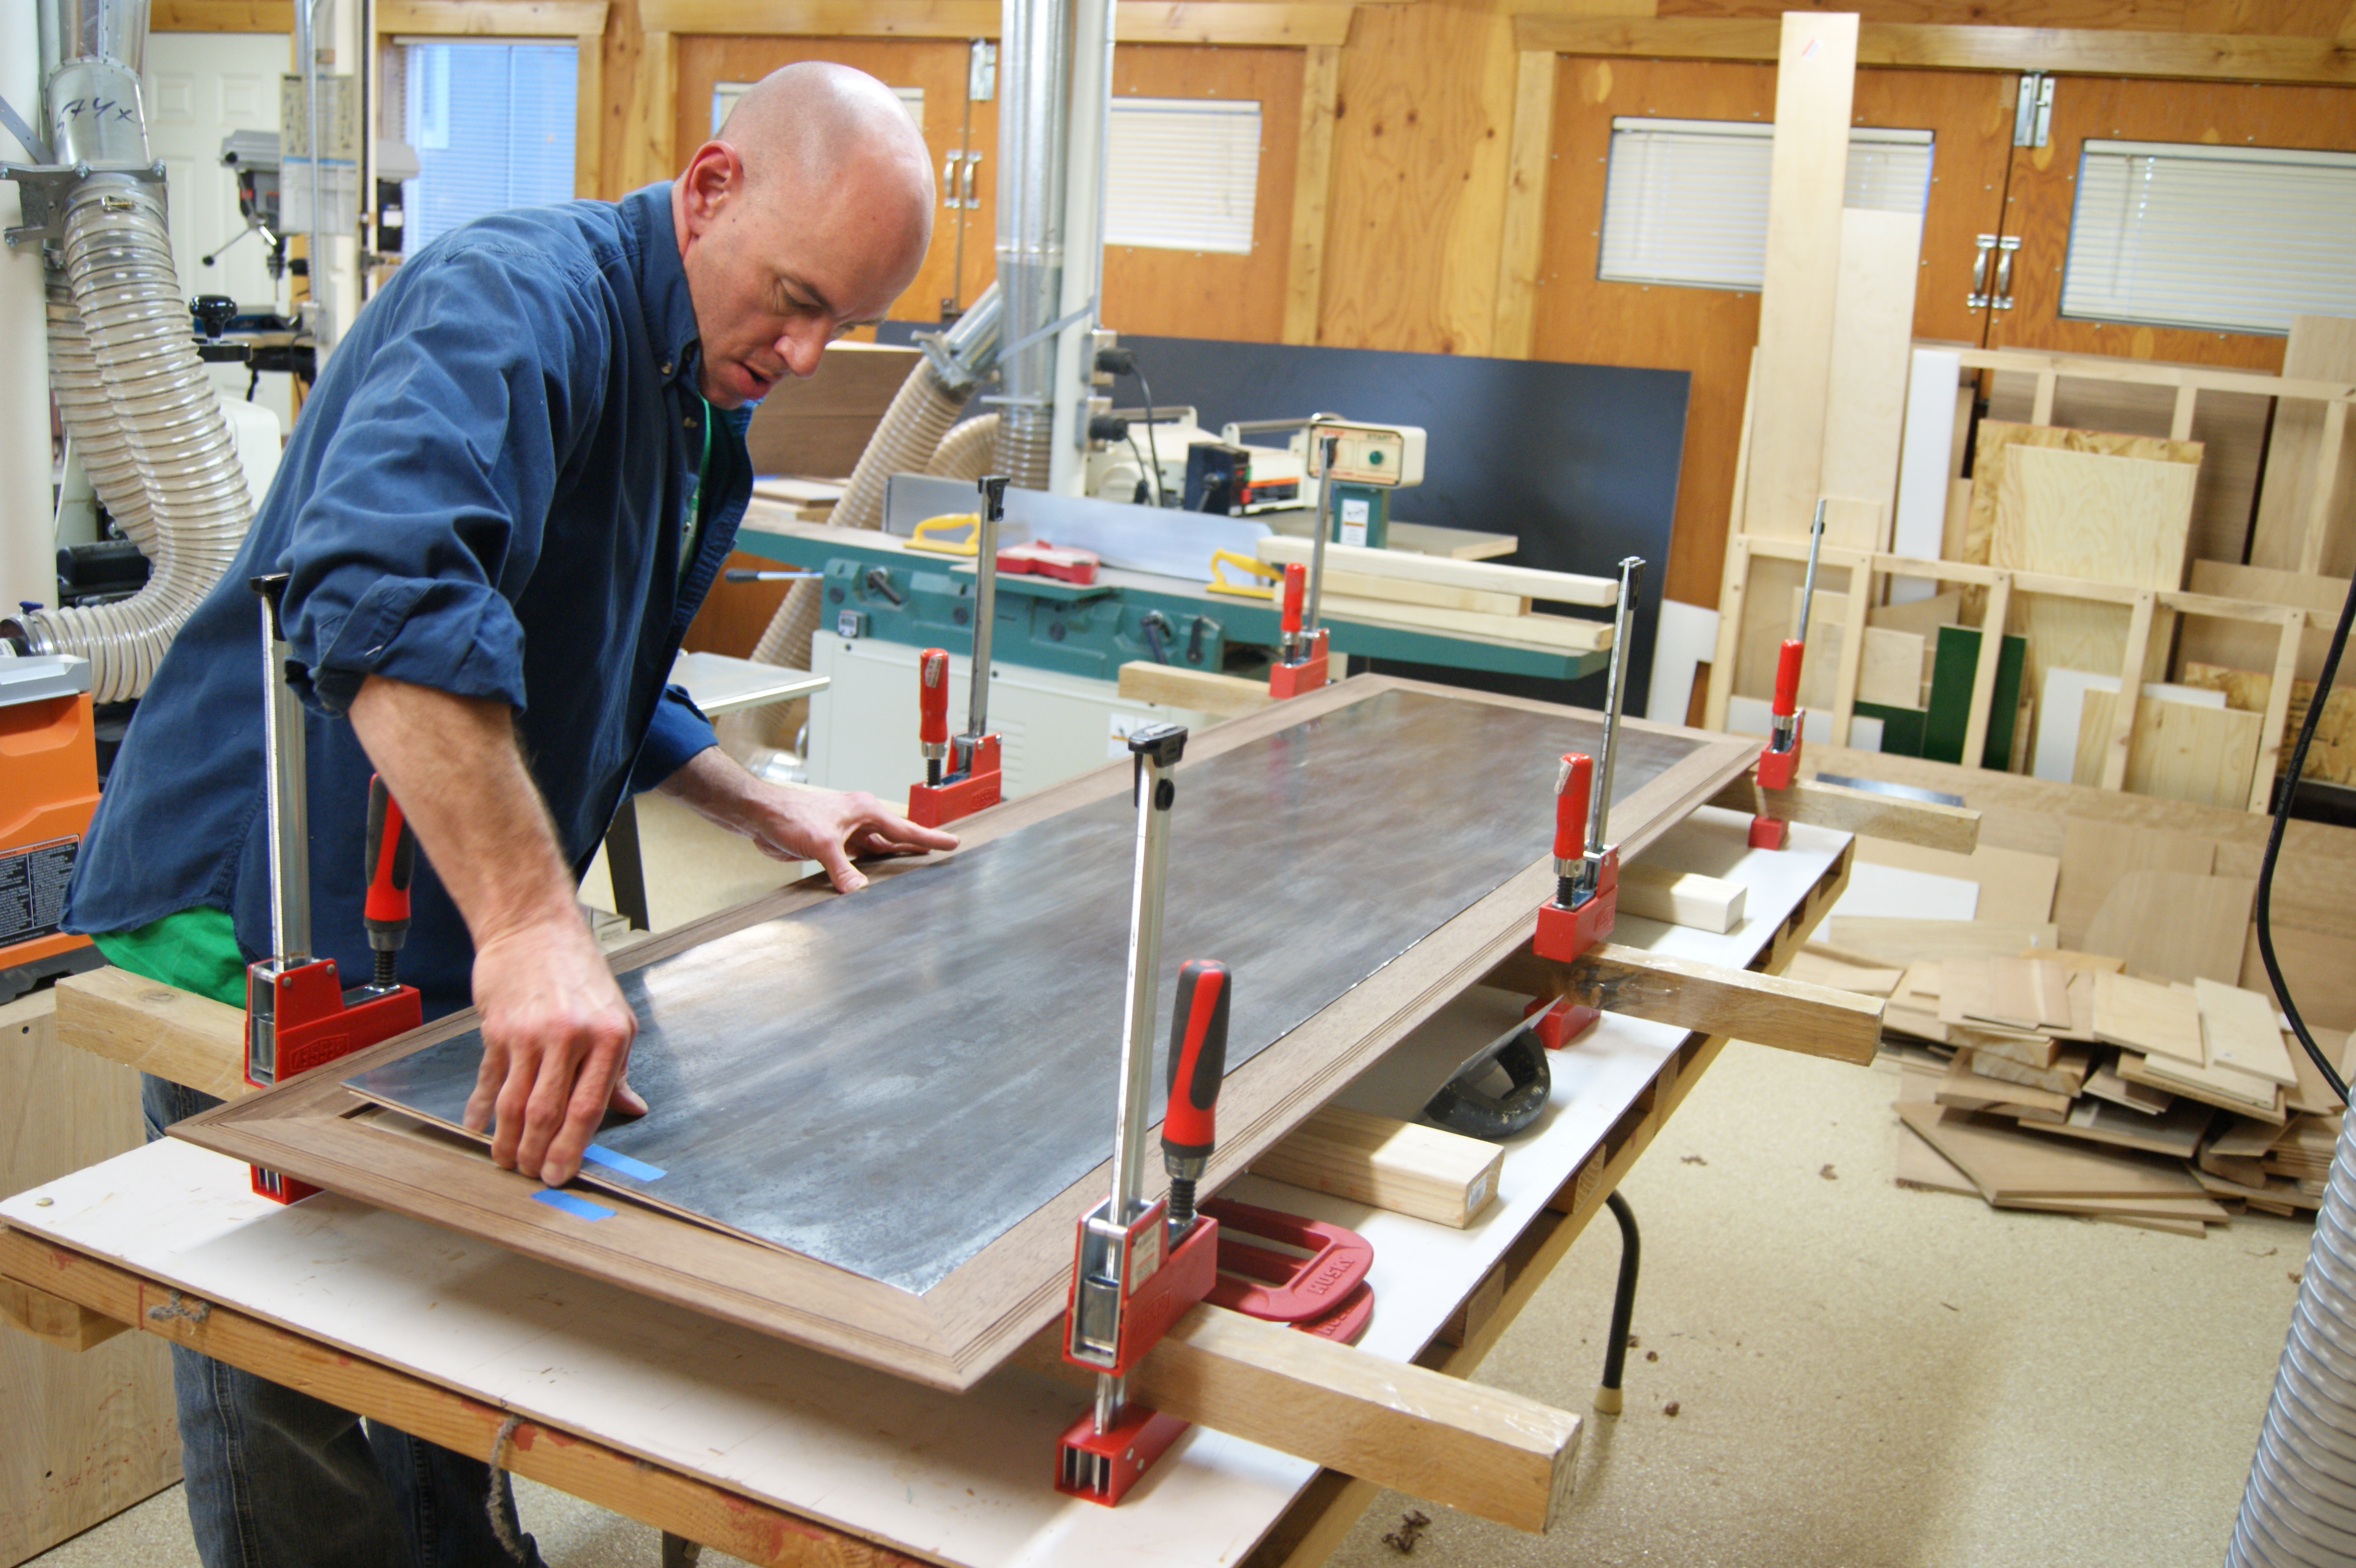
Clamping this was a bit more complicated. I needed to get pressure into the center of the panel, and I don’t have clamps with that long of a reach. So I came up with a bunch of cauls, blocks, and wedges that I could use to make sure there was good pressure on the glue everywhere. Here’s what it looked like when I had the whole thing clamped up.

And that’s it. I’m not going to show a picture of the final thing just yet. You can see that when it’s done. Sadly though, I’ve got a month or so of finishing time ahead of me. I’m not looking forward to it. I also won’t be blogging much about it, because 30 posts of “Today, I put another coat of finish on the thing,” doesn’t exactly make for riveting reading. Come to think of it, I’m not really sure this makes for riveting reading either.
At any rate, if you’ve made it this far, congratulate yourself on your virtual woodworking patience! I’ll make one last post when the whole thing is done and you can see it in all its glory. Thanks for reading!


James, I can see how useful the panel saw was in this situation. I am not sure that my husband Fred would want one since he has 2 different size track saws that he really, really likes 🙂 BTW, it has been quite interesting to follow your project; and I am anxious to see the finished piece … some day!! All the best, Michelle
Glad you’re liking the woodworking change of pace, Michelle.
Track saws, by the way, are an awesome alternative to a panel saw for breaking down sheets. I have one myself, and before I had purchased that one, I had made my own!
The larger table you see me gluing this frame and zinc up on… if you look closely, you can see it’s just a frame of 2x4s that I threw a sheet of melamine on top. That frame of 2x4s was (and still is) my sacrificial table when using a track saw. If I had to give up the panel saw, the track saw would be my go-to tool for this stuff.
Thanks for reading!
Brilliant! I love reading how you’re tackling various procedural challenges (i.e. getting the zinc top lined up before the contact cement… er, contacts), as well as the design decisions. As for riveting reading, I’m a details kind of guy so it’s very interesting to me – would love to see how you’re finishing it.
Dumb question: how did you burnish the edges of the zinc – emery cloth? Kind of curious how you did that without accidentally bending the edge.
Oh, and a *panel saw* ?? I’m officially green with envy now! 🙂
Thanks for the update!
Thanks, Mike.
I do plan to take pictures and such as I’m finishing it. But it’s highly repetitive, so I’ll combine them all into one last post.
As for burnishing the zinc – I used… a burnishing rod! No, seriously, I did. It’s basically just a very hard steel rod with a handle that I use to turn a hook on the edge of card scrapers. I just ran it down and across the edges of the zinc while holding it angled downward. (easier to do than to describe) Anyway, I basically turned the very edge of the zinc down, as I would have sharpened a scraper. It’s still sharp, but since the zinc is flush with the top, you can’t cut yourself on it since it’s turned under. And the zinc was already glued on the plywood when I did that, so it was backed up to keep it from curling under too much. Sorry for the long explanation.
The panel saw was a find – but it was in rough shape. It had been used to cut hardie board panels, so it was completely fouled with that silica dust. And it had been on a construction site, so it had gotten some pretty harsh treatment. Sort of fun to restore, but I’d like to get the dust collection working better on it. (It works, but a lot of the dust escapes.)
A burnishing rod – well heck, you learn something new every day! I hadn’t heard of those, but now that you’ve mentioned it I looked them up and see what they’re intended for. Thanks for the explanation, that’s rather ingenious!
I can totally appreciate finding something second hand and fixing it up, most of my tools are hand-me-downs or deals found online. 🙂
great post! I was just going to skim it this morning but ended up so engrossed that I lost track of time and was late for work! I love the details, especially the idea of the additional frame to make sure that the zinc top would be located perfectly, and you were right about noticing the panel saw. I’m sure every woodworker wishes they had one of those.
Glad you liked it, Russ.
The panel saw isn’t something I use every day, but when I do… it’s awesome!