This post may contain affiliate links.
I’ll just admit it up front; this post is going to be all over the place. Yes, it’s an RV project. And yes, there’s sewing. But beyond that, it’s going to wander. I can’t tell you how to follow along because I’m frankly not good at sewing. Not yet anyway. Me sewing is like your mom taking you to the movies when you were a teenager. Yeah, you’ll get there; but you really wish it was someone else doing the driving. So with that caveat out of the way, let’s get started.
What I’m tackling here is the storage space that we have on the underside of our flip-up bed. Winnebago had originally supplied a large Velcro pocket that covered up most of this space.
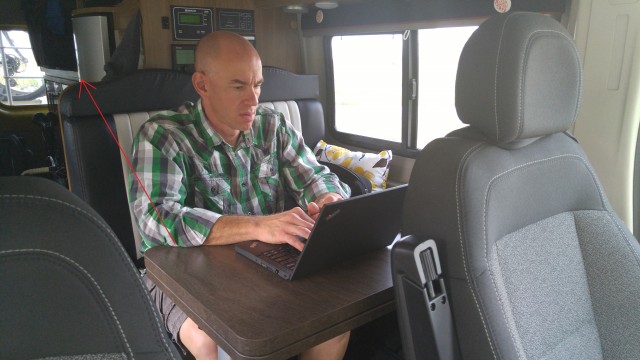
We didn’t take any pictures of it directly, but there’s the old bag in the background. And check it out: Old Fridge! Cloth Seats! No Inverter!
Since we typically store bikes underneath the bed, we didn’t want to strap axes or other heavy things under there lest we damage the bikes. So we started storing our dirty laundry in the bag. But this was a problem because the bag was a simple envelope affair, which meant it got really tight once you put a few things in it. The other problem was the Velcro. It was what can only be described as RAZOR SHARP. After about the 20th bloody cuticle from trying to put a pair of shorts in the laundry bag, I decided to do something else.
![]()
So I ordered this 20″x60″ net storage bag from Organized Obie. This certainly made it less painful to put things in and out of the laundry bag. But we soon faced another problem.
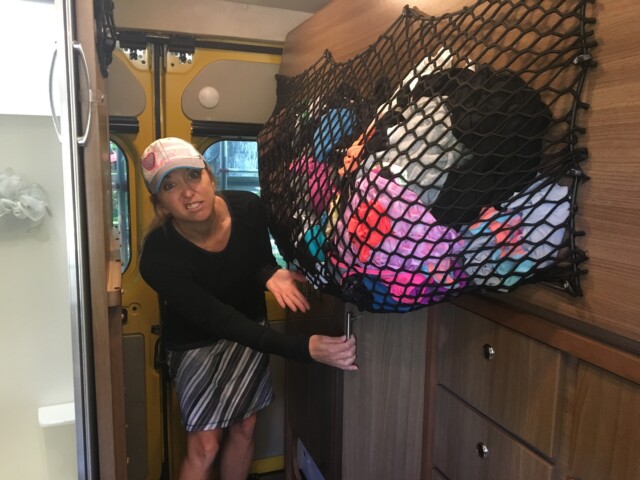
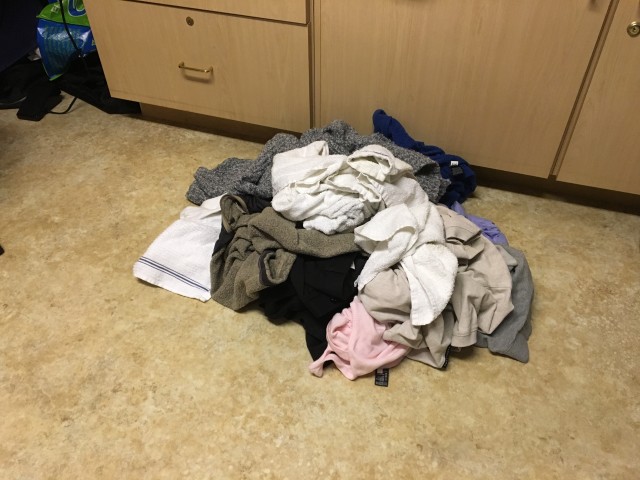
You see, that net storage bag is meant for lightweight items. So by the time we load it up with a few days’ worth of dirty laundry, it starts to sag. Stef has some sort of problem with my dirty underwear and cycling bibs blocking the door to her wardrobe, so she told me I needed to go back to the drawing board and come up with something better. After thinking on it for a while, I came up with these requirements:
- Bag(s) should occupy about the same 20” x 60” space as the original.
- Bag(s) should be removable to avoid having to find yet another bag to transport laundry in
- No Velcro
- Mounting to underside of bed should be strong enough to hold the weight of the laundry when the bed is down.
- Bag(s) should be opaque (to avoid displaying our laundry) but still breathable.
- Bag(s) should have a closure that will cinch tight to keep things from drooping.
10 minutes of half-hearted searching on Amazon while playing with the cat didn’t reveal any obvious solutions, so I knew pretty quickly that this meant I got to make something. (Since I like making stuff, it doesn’t take much of an excuse.) With the success of my recent curtains project fresh in mind, I designed some laundry bags. What I had in mind was a canvas (breathable) bag with sewn-in side and bottom panels. I wanted to bag to have a flap-over lid with a buckle closure. Sort of like this:
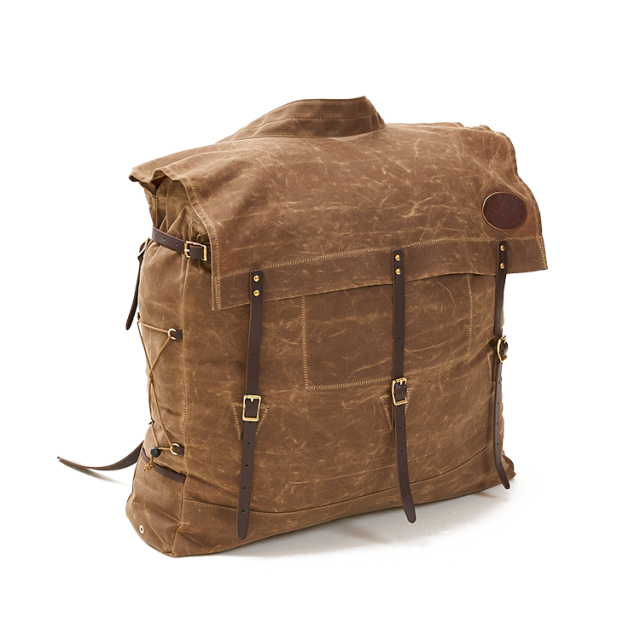
Image Credit: frostriver.com
That’s the picture I had in my mind anyway. The rugged, manly, laundry bag. And I wanted to make three smaller bags instead of one huge one. Sure, they’d be easier to carry, but they would also mean we could sort our dirty laundry as we put it away – then dump the whole bag right into the machine. Ahhh… efficiency!
I don’t have any hope that’s how the bags will get used though, because… Stef.
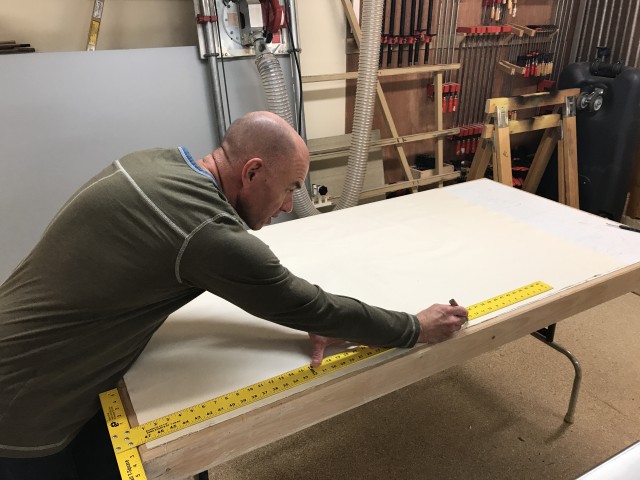
But anyway, that was the plan. The first step was to pick up some fabric and some thread. In my mind, I thought it might be roughly similar to going to the wood store to pick up wood for a new project. But this is what a trip to the wood store looks like:
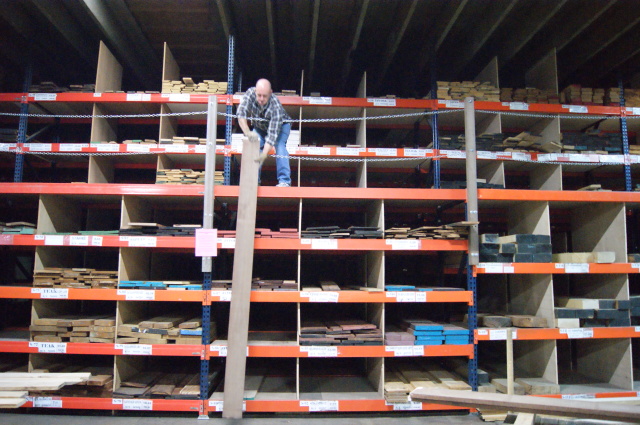
At the wood store, you’re surrounded by danger, forklifts, pickup trucks, and everyone just assumes you know the procedure even though it isn’t written down anywhere.
In contrast, this is what a trip to the fabric store looks like:

At the fabric store, you’re surrounded by children and mini vans. There’s no real danger unless one of the children sneezes on you. They do have their own set of procedures though with the “cutting desk”, and everyone just assumes you know the procedure even though it isn’t written down anywhere. There are also more kinds of fabric than there are kinds of wood. A LOT more. Most of them seem to have Disney characters on them. But eventually I found the plain canvas, nylon strapping, and buckles.
Making the Bags
I’m pretty good at planning out my work with wood. I can lay out the pieces, mill, cut and join them, and I know how that goes. Planning out a project with fabric was a bit more challenging because you have to think inside out vs right-side out. It’s a wrinkle (ha!) that you don’t have with a woodworking project. If you’ve ever cut a piece of carpet only to realize it fits perfectly… but with the backing side up, you understand. I consulted my plan (which was really just scribbles on used printer paper) and then went about cutting the fabric.
My canvas was 60 inches wide. I didn’t know this, but it’s extremely difficult to cut for 5 feet with a pair of scissors and have it come out straight. The first thing you have to do is go back to the fabric store again for $50 scissors. But even with those it’s still pretty difficult, so I went out to the shop and cut things the only way I knew to do it – with a drywall square.
I’m sure some will tell me a drywall square isn’t a good sewing tool. But my first idea was to staple the fabric to a piece of plywood and run it through my panel saw, so just be glad I didn’t try that.
With the fabric cut, I realized I had another problem. It immediately starts to fray and unravel if you look at it wrong. The proper way to deal with this is with an entirely different kind of sewing machine called a “serger”. They look about like this:
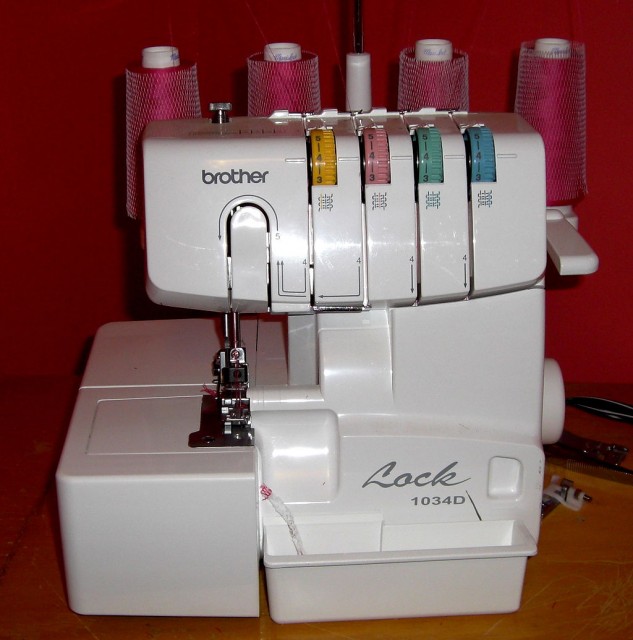
I’ll probably skip the hot pink thread though.
But a serger is actually a tool I don’t have. Yet. So in the interest of keeping things moving, I realized my current machine (A Janome HD3000) had an “overedge stitch” which sort of tries to do the same thing. That works OK and looks about like this:
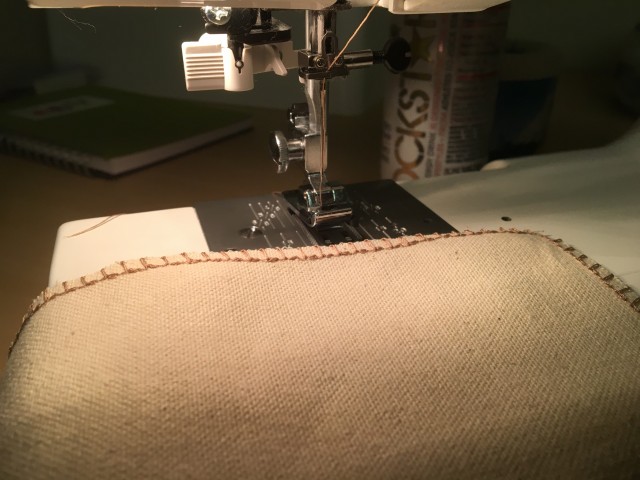
It also burns up a lot of thread, which meant I had to go back to the fabric store (again) and get more. Who knew?! This was my third or fourth trip, and some of the ladies there were starting to recognize me. After a day of cutting and tidying up the edges, I had three nearly identical piles of parts.
I was pretty pleased with myself at this point.
It was about this time I realized I had a serious problem. You see, my sewing machine is in the laundry room, because that’s where the iron is. There’s a surprising amount of ironing in sewing. I liken it to having flat and square stock before you start woodworking. But the laundry room is also where Mel’s litter box is.
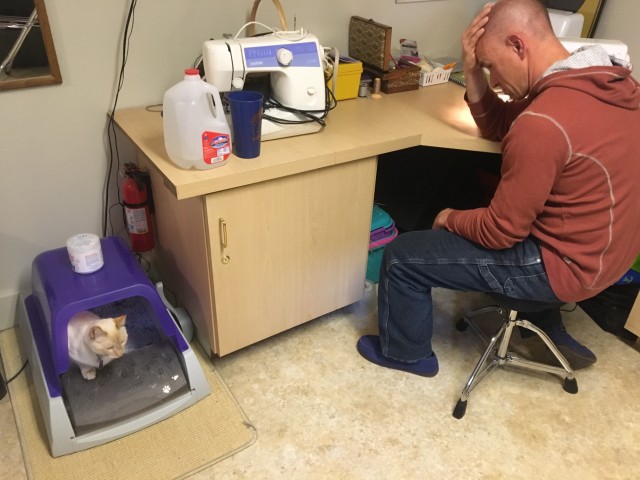
Every. Single. Time.
It turns out that our cat, Mel, is a “social pooper”. Pretty much any time someone goes down near the laundry room, you can count on Mel to follow behind and poop, because he can’t read and I guess he likes company when he poops. So every single time I sat down to work on this project, Mel took the opportunity to relieve himself. I basically gagged my way through this project.
Apart from the stench of cat poo, the project more or less went off as planned. Somewhere along the way, I learned about pins.
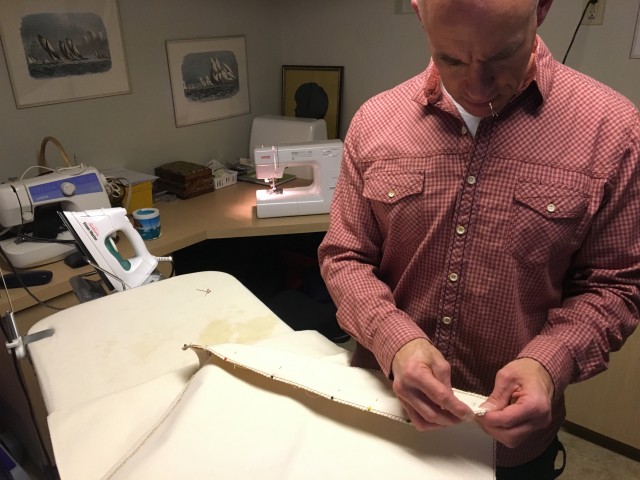
Pins are sort of like woodworking clamps that can make you bleed. The function is basically the same; they hold things together while you work on joining them. The main difference between pins and clamps though, is that since pins are so cheap, it IS possible that you can have enough of them. This is unlike woodworking clamps, where even after 15 years, you still need more.
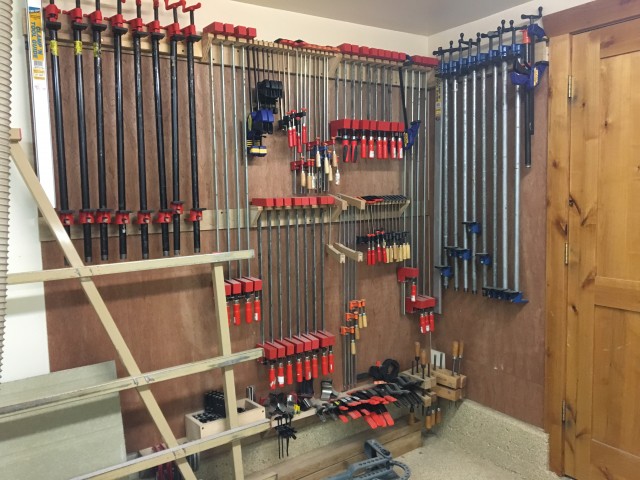
Never enough clamps
Lots of sewing later, I had three bags that looked like saddle bags.
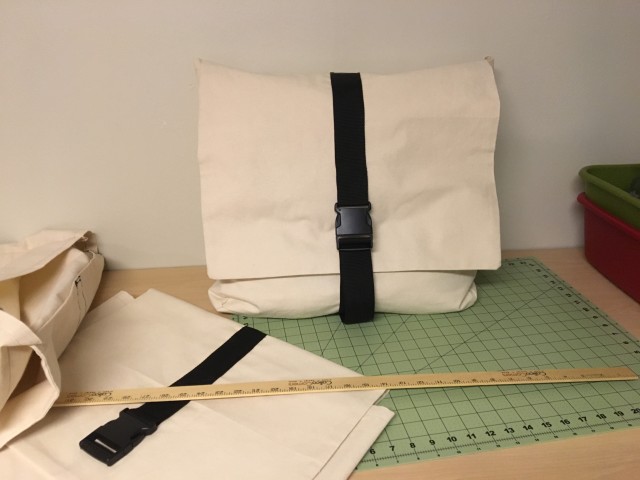
The bag in that picture is actually holding all of the laundry in this picture.
It could hold a lot more, so I think the size is fine.
The final hurdle in this project was to come up with a way to attach the bags to the underside of the bed. I decided to do this with “common sense fasteners”. I found that name intimidating, because it implies that if you don’t know how to make them work, you don’t have common sense. Someone in their marketing department dropped the ball there. “Easy Fasteners”, “Friendly Fasteners”, “Can’t-possibly-screw-em-up” fasteners… all of those would be better names.
I ordered a bunch of these fasteners. While I was waiting for them to arrive, I watched videos on how to install them. It turns out you don’t actually need common sense to install a “Common Sense Fastener”. What you do need is A 68 DOLLAR TOOL THAT ISN’T GOOD FOR ANYTHING ELSE!!!
So I take back everything I said about common sense fasteners. Those people are evil geniuses. They clearly got the last laugh.
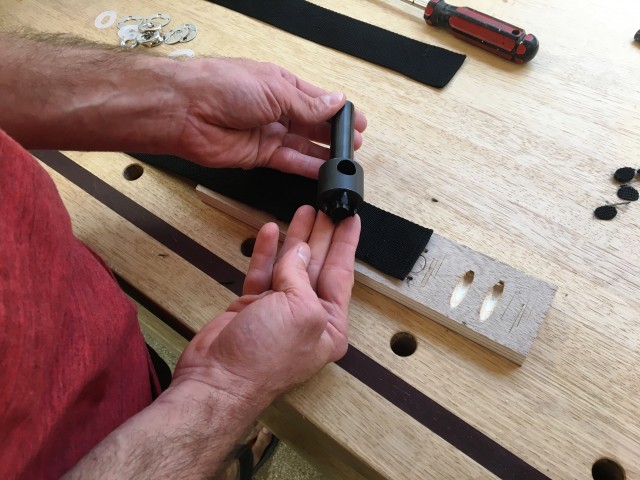
But once my 68 DOLLAR TOOL THAT ISN’T GOOD FOR ANYTHING ELSE arrived, installing the fasteners was simple. You simply place the tool on the strap where you want to install the fastener, and then pound out your frustrations until the 68 DOLLAR TOOL THAT ISN’T GOOD FOR ANYTHING ELSE cuts perfect holes and slits in the material.
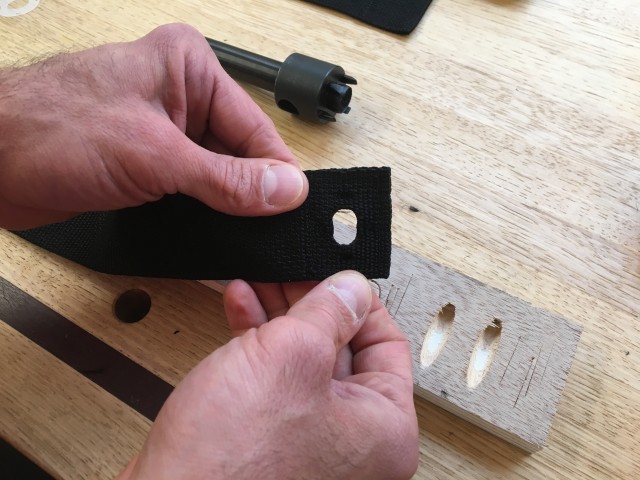
Then insert the fastener
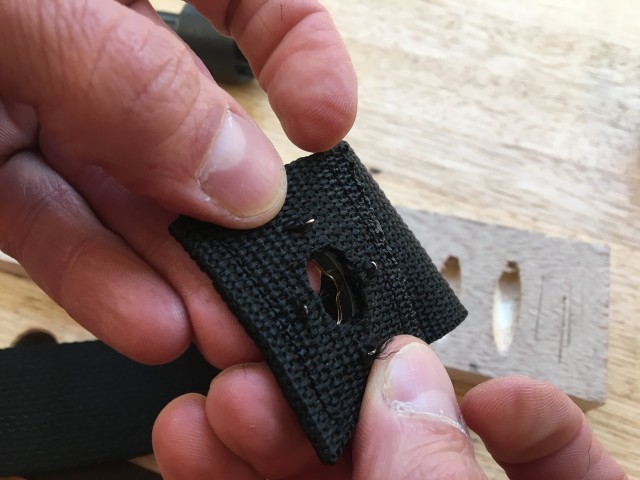
bend the prongs over
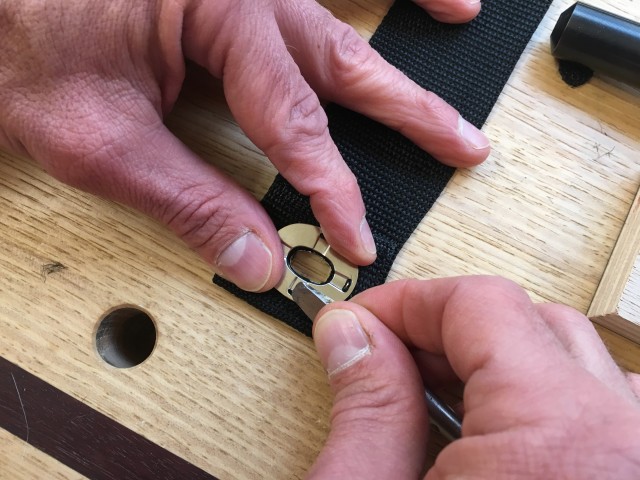
There was actually another $10 tool just to bend over these prongs. But since I already felt swindled by the $68 tool, I made do with a big screwdriver.
and use a lighter/blowtorch/flamethrower to singe the ends of the nylon.
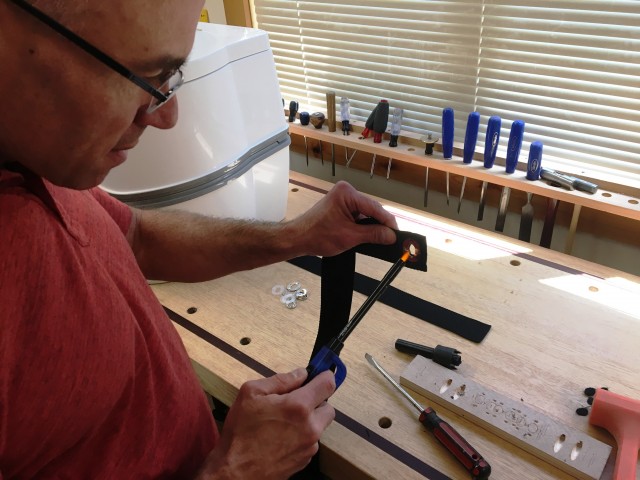
Sewing feels way cooler when I get to burn stuff.
Then there’s this complicated step where you try to sew the straps to the outside of the bag from inside the completed bag and through five layers of canvas and webbing and it doesn’t work well and you break your sewing machine like 6 times and yell a lot and then you have to complete the project on your backup sewing machine while your “heavy duty” machine is in the shop.
I don’t have any pictures of that step.
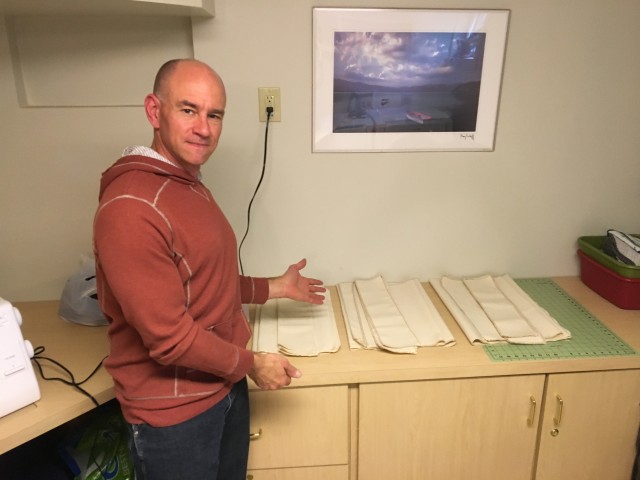
But I do have pictures of the completed bags hung up in the RV. Here they are!
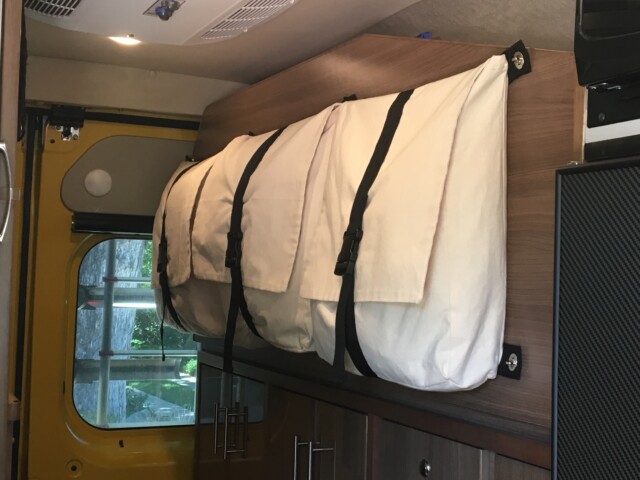
As promised, the bags remove and are very manageable for toting to the laundry. In these pictures, they’re actually holding two weeks of Stef’s laundry, so the capacity is more than adequate.
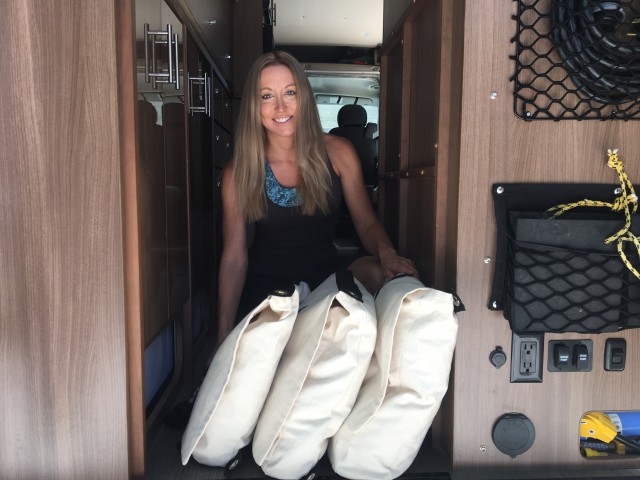
“That’s nice, honey. But can we stop playing with my laundry now and start, you know, washing it?”
In addition to Stef, Mel was there for the install and unveiling of the new bags. But he was clearly unimpressed.

“Oh, I hear you fine. It’s just that I don’t give a crap. Please shut up.”
And with that, the laundry bags are done. I’ve got some other interesting projects planned in the weeks leading up to our big summer trip. Air conditioners, toilet experiments, refrigerator performance. All those are coming up.
Cheers!


I loved this article! I am a hobby woodworker and a dressmaker by trade so I completely understand your references. Sewing, like woodworking, is addictive so I expect I will be seeing more projects from you. It is extremely satisfying to create things that you need and design yourself. Great job on those bags!
Thanks!
I knew there had to be another woodworker/tailor/dressmaker out there. 😉
I have a Singer Featherweight from 1952 that my mother gave me when I graduated from High School in 1975. It will sew through 5 layers of denim. Awesome little machine! I am now 60! and have used it for many years. As an engineer also, I truly appreciate the simplicity and sturdiness of it. A perfect little machine for lots of project. My mom missed the machine so much, that she bought herself another.
Those fasteners remind me of ones from my 1956 MGA. They work great!
Thanks for all that you and Stef do! I truly enjoy your videos and blog.
Katy in NH
Another vote of confidence for a vintage machine! I may have to check one out.
Hey guys, love the blog. Quick question….
We are looking at possibly getting a Travato as a daily driver. In your opinion does it perform well enough and is it comfortable enough for that purpose? Thanks!
Hi Chris! We know a bunch of Travato owners who use the T as a daily driver, so it’s definitely done. And as for comfort, you can’t beat having your own lounge and bathroom no matter where you are. Are you already on our Facebook group for Travato Owners and Wannabes? If not, come on over and join and you can pick the brains of other owners who are using it as their daily driver! http://www.facebook.com/groups/travatoowners
Great project. Did you pull an all-nighter on this, looks like a porta potty on the workbench.
Very ovservant! Yes, it is a Porta Potti on the bench. You’ll be seeing it in an upcoming video.
And I didn’t pull an all-nighter, but I did stay up very late several nights fighting with it… 😉
James are you taking orders yet. Nice work. We always need more tools.
Just think of all the new tools you will need for the AC project.
Steph you want to get a good nights sleep.
I’ve only come up with one new tool I need. But it’s really interesting…
Mel loves you James. Just shows it in a “funny” way.
Mel and I are cool. He’s only aloof up to a point. As soon as I start any vehicle, Mel moves directly to my lap and won’t budge until the vehicle stops.
Almost everything I sew is van-sized, so I could never make any project turn out without extensive use of a drywall square (I’m in the middle of sewing a custom noseeum surround for our van awning – pretty psyched about finally getting it done). But I never use canvas because it’s just too heavy and bulky. Wait till you discover ripstop nylon. Then you’ll really be off to the races.
🙂
“Van Sized Sewing”. We should totally start a new hashtag…
Hilarious article, I enjoyed every minute of it. So I now understand why James has been spending so much time at the fabric store. I am reassured because I thought he may have gone over to the other side, but then I remembered he went there some time ago.
Wow James those are cool and extremely labor intensive. Being tucked away in the mountains of Idaho I oddly have a thing for handbags…..I have a specific one that I take in my PW Class B….TMI……anyway, your post stimulated my jones for a new cool handbag! Maybe when you have “nothing” to do you could branch out into other kinds of bags….I definitely appreciate a smart way to create more storage in a Class B. Thanks for sharing all your creative ideas.
Well, I have considered making a custom bag to tote the liquids tank for the composting toilet… 😉
(And go for it on the new handbag. You only live once.)
You have come a long way in your sewing skills, James. I am proud of you! I too have a back-up sewing machine, it is the only way to go. You do know that there are different sizes of sewing machine needles for different strengths of fabric? Denim and canvas are so hard to sew on without breaking the machine needle. Can’t wait to see your next project, matching pajamas with Disney characters on them for you and Stef?!
Thanks!
I was using a #100 Schmetz needle and some pretty stout thread. But apparently a top-stitch needle would have also been helpful, because I guess it has a bigger thread opening. I’m definitely still learning.
I’m actually considering making pants for the cat. Not because he needs them or anything practical. But just because I think it would be hilarious.
Hilarious!! I really look forward to your posts. Being a bit of a DIYer myself I can soo relate to your anecdotes.
Keep up the good work, both.
Serious clamp envy here.
Funny thing is – I really do want just a few more clamps…
James and Stef,
What a fantastic idea in solving problem in a tight space. At my age the problems easier to solve. To lesson the load and space thing try Depends for the garments you hold dearer and closer to your heart…ha! It takes the worry ut of being close and they are real easy to store and dispose of.
Sorry guys I just had to add this wise guy comment. The truth is I like your idea and I’m going to mess ( no pun intended) with it a bit to see if I can make it a bit easier and practical knowing that the space usable application is the biggest problem to solve. Fantastic job guys! < FISH <
Well, I can honestly say that’s a solution we hadn’t thought of! lol.
I am so impressed with you, James! No wonder Stef fell head over handlebars for you! The 3 laundry bags are just terrific. When first reading your story, I thought, “Oh he is just a little desperate-like a mother with 5 kids under 6 and one on the way.” Then you pulled it off! I like the use of canvas: sturdy, washable, and easy to sew. Your overlap stitching is most impressive. Don’t be afraid of Stitch Witchery or fabric glue. Those products can really save your sanity sometimes. A serger is mostly a time saver-I like mine, but the creativity is in the Janome.( I have one also.) I’d think about a commercial machine if you intend to do more upholstery type projects. One that sews sails and leather. They only straight stitch, but wow does it cut down on frustration with heavy duty fabrics!
Some cats do seem to enjoy an audience when in the litter box. You might get a plug in Glade. Try adding some pearl “litter” to his box; that stuff is ultra absorbent on orders.
I’ve considered a commercial machine or a “walking foot” machine. I think I’ll probably wind up doing more stuff like this: upholstery, patio furniture covers, that sort of thing… so it could pay off. But first we’d have to convince Stef that I really need 3 sewing machines… 🙂
You don’t need a fancy machine, nor an industrial one. Look for a vintage machine with metal parts inside, not plastic, and a motor with some pep – like a Sears Kenmore from the 60s or 70s. They are workhorses that last forever and will sew through numerous layers of thick fabric like it was whipped cream! I got mine for $60 off Craigslist, but they’re all over ebay, too for anywhere from $25 to $200. Well worth it!
You did a good job. If you ever have questions about how to sew something, go and ask on the forums at patternreview.com – a great online community for home sewers!
I did make sure to get a mechanical sewing machine instead of one of those computerized ones. It just seemed like a sturdier way to go.
Interesting thought though to go get a 70’s model. Not a bad idea.
I’ll have to check out patternview before my next project. Thanks for the tip!
Nice laundry bags. If Stef gets three, where is yours?
But please get on with the A/C project. I hope you find or modify a unit that cools without requiring hearing protection; i.e. one that you can run and sleep at the same time in a B van. Apparently ducted a/c, if you have any extra headroom, helps somewhat to lower the noise level, but not that much and I am 6 ft tall and can not spare much head space!! If I could get this along with the comp. frig = nirvana.
AC project is definitely happening before July!
Love the bags, James. I, too, use a dry wall square for large pieces of material. Suggestion for your next sewing project? Use a rotary cutter instead of scissors. And, use a step zig-zag stitch to stabilize material that frays easily. I have no suggestion for Mel’s aroma therapy, however.
Step Zig-zag stitch? Must look this one up…
“Pins are sort of like woodworking clamps that can make you bleed.”
Herein lies wisdom.
The kind of wisdom that comes from experience. 😉
Is Mel actually camping with you these days, or just supervising the laundry?
Mel visits the RV, and we take him on drives, but we haven’t taken him on a trip yet.
Most of our trips involve things like riding a bike for 8 hours. We don’t want being cooped up like that to be Mel’s first introduction to RVing.
We’re working on him though…
Could quilting be next? Well done and loved your observations on the sewing scene.