This post may contain affiliate links.
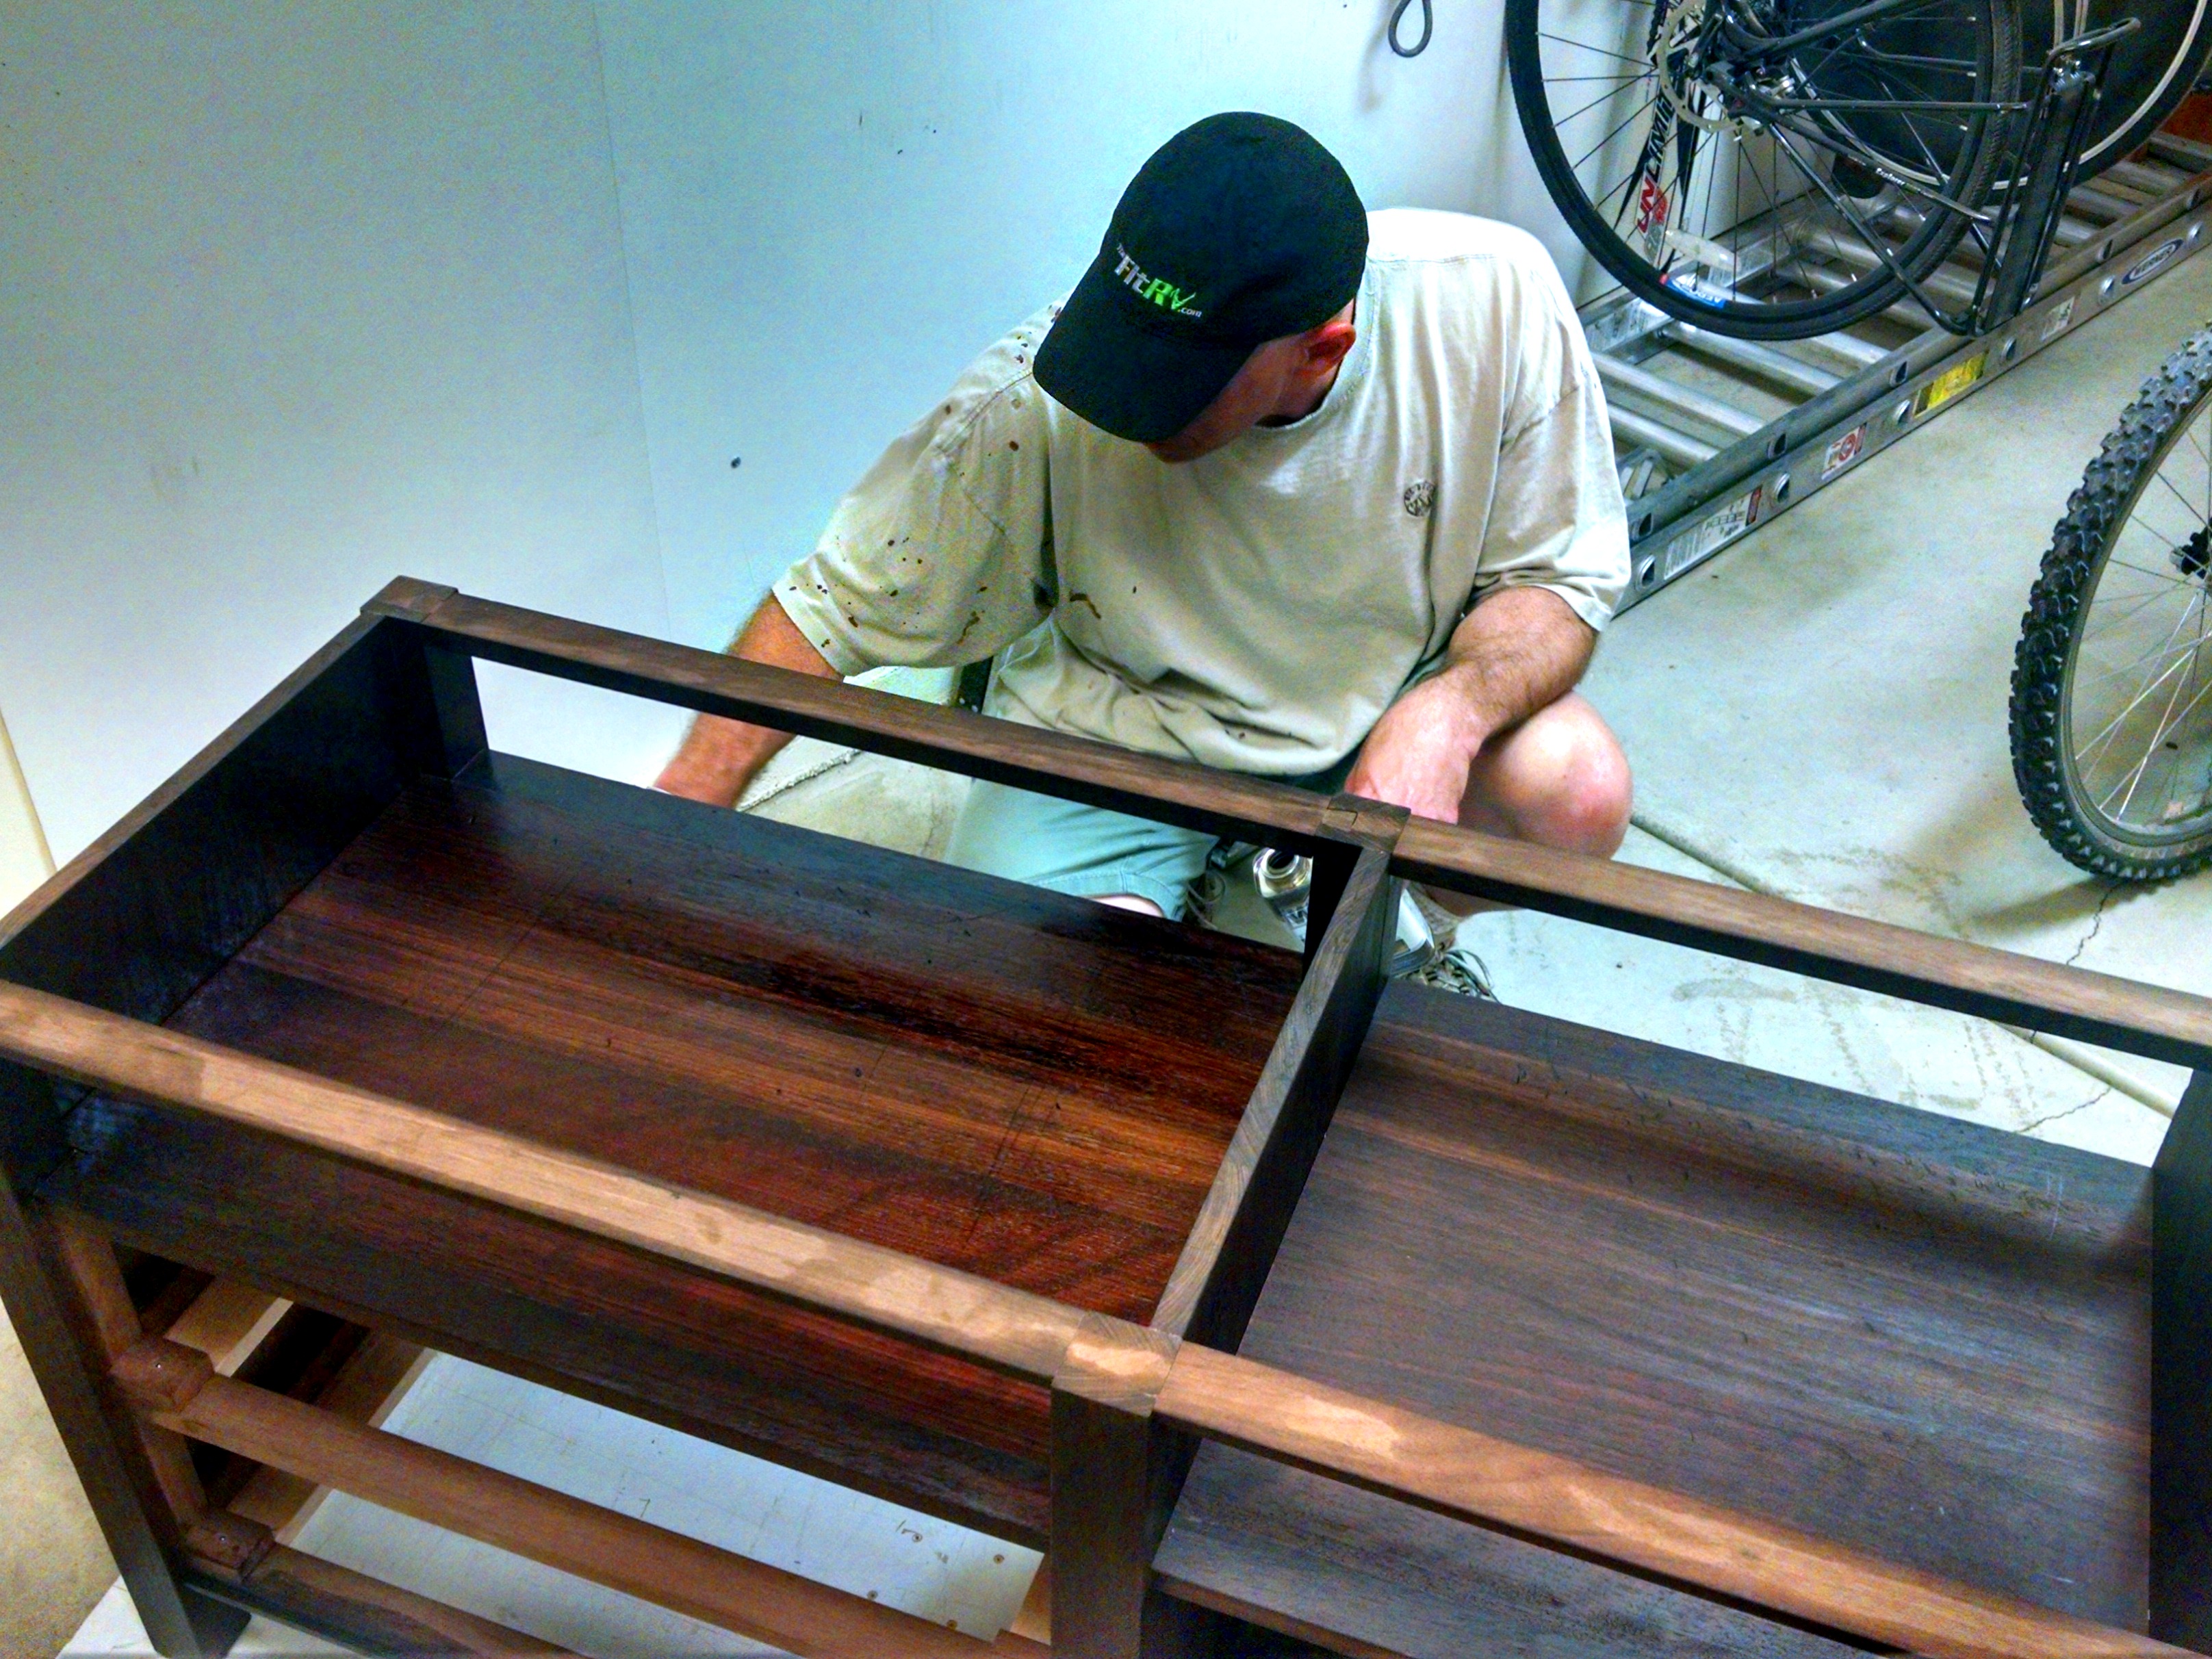
Hey, does anyone remember that entertainment center project I was working on? I’m actually still working on it – but it’s been really boring, so I haven’t written about it. Well, today, I put the final coat of finish on it, which is somewhat of a milestone, so I’ll catch you up. After letting it cure up for a week, I’ll be ready for final assembly.
The first thing I tackled with the finish was the underside of the top. I bothered to finish it because in this piece, it will be visible as the “ceiling” of the top row of shelves. (OK, you’d have to lie on the floor to see it, but it could happen, and I’m kind of OCD about these things.) I typically abhor oil based pigment stains (sorry, Minwax), but for 14 square feet of plywood that were the wrong color, I thought I’d suck it up and just use the stuff.
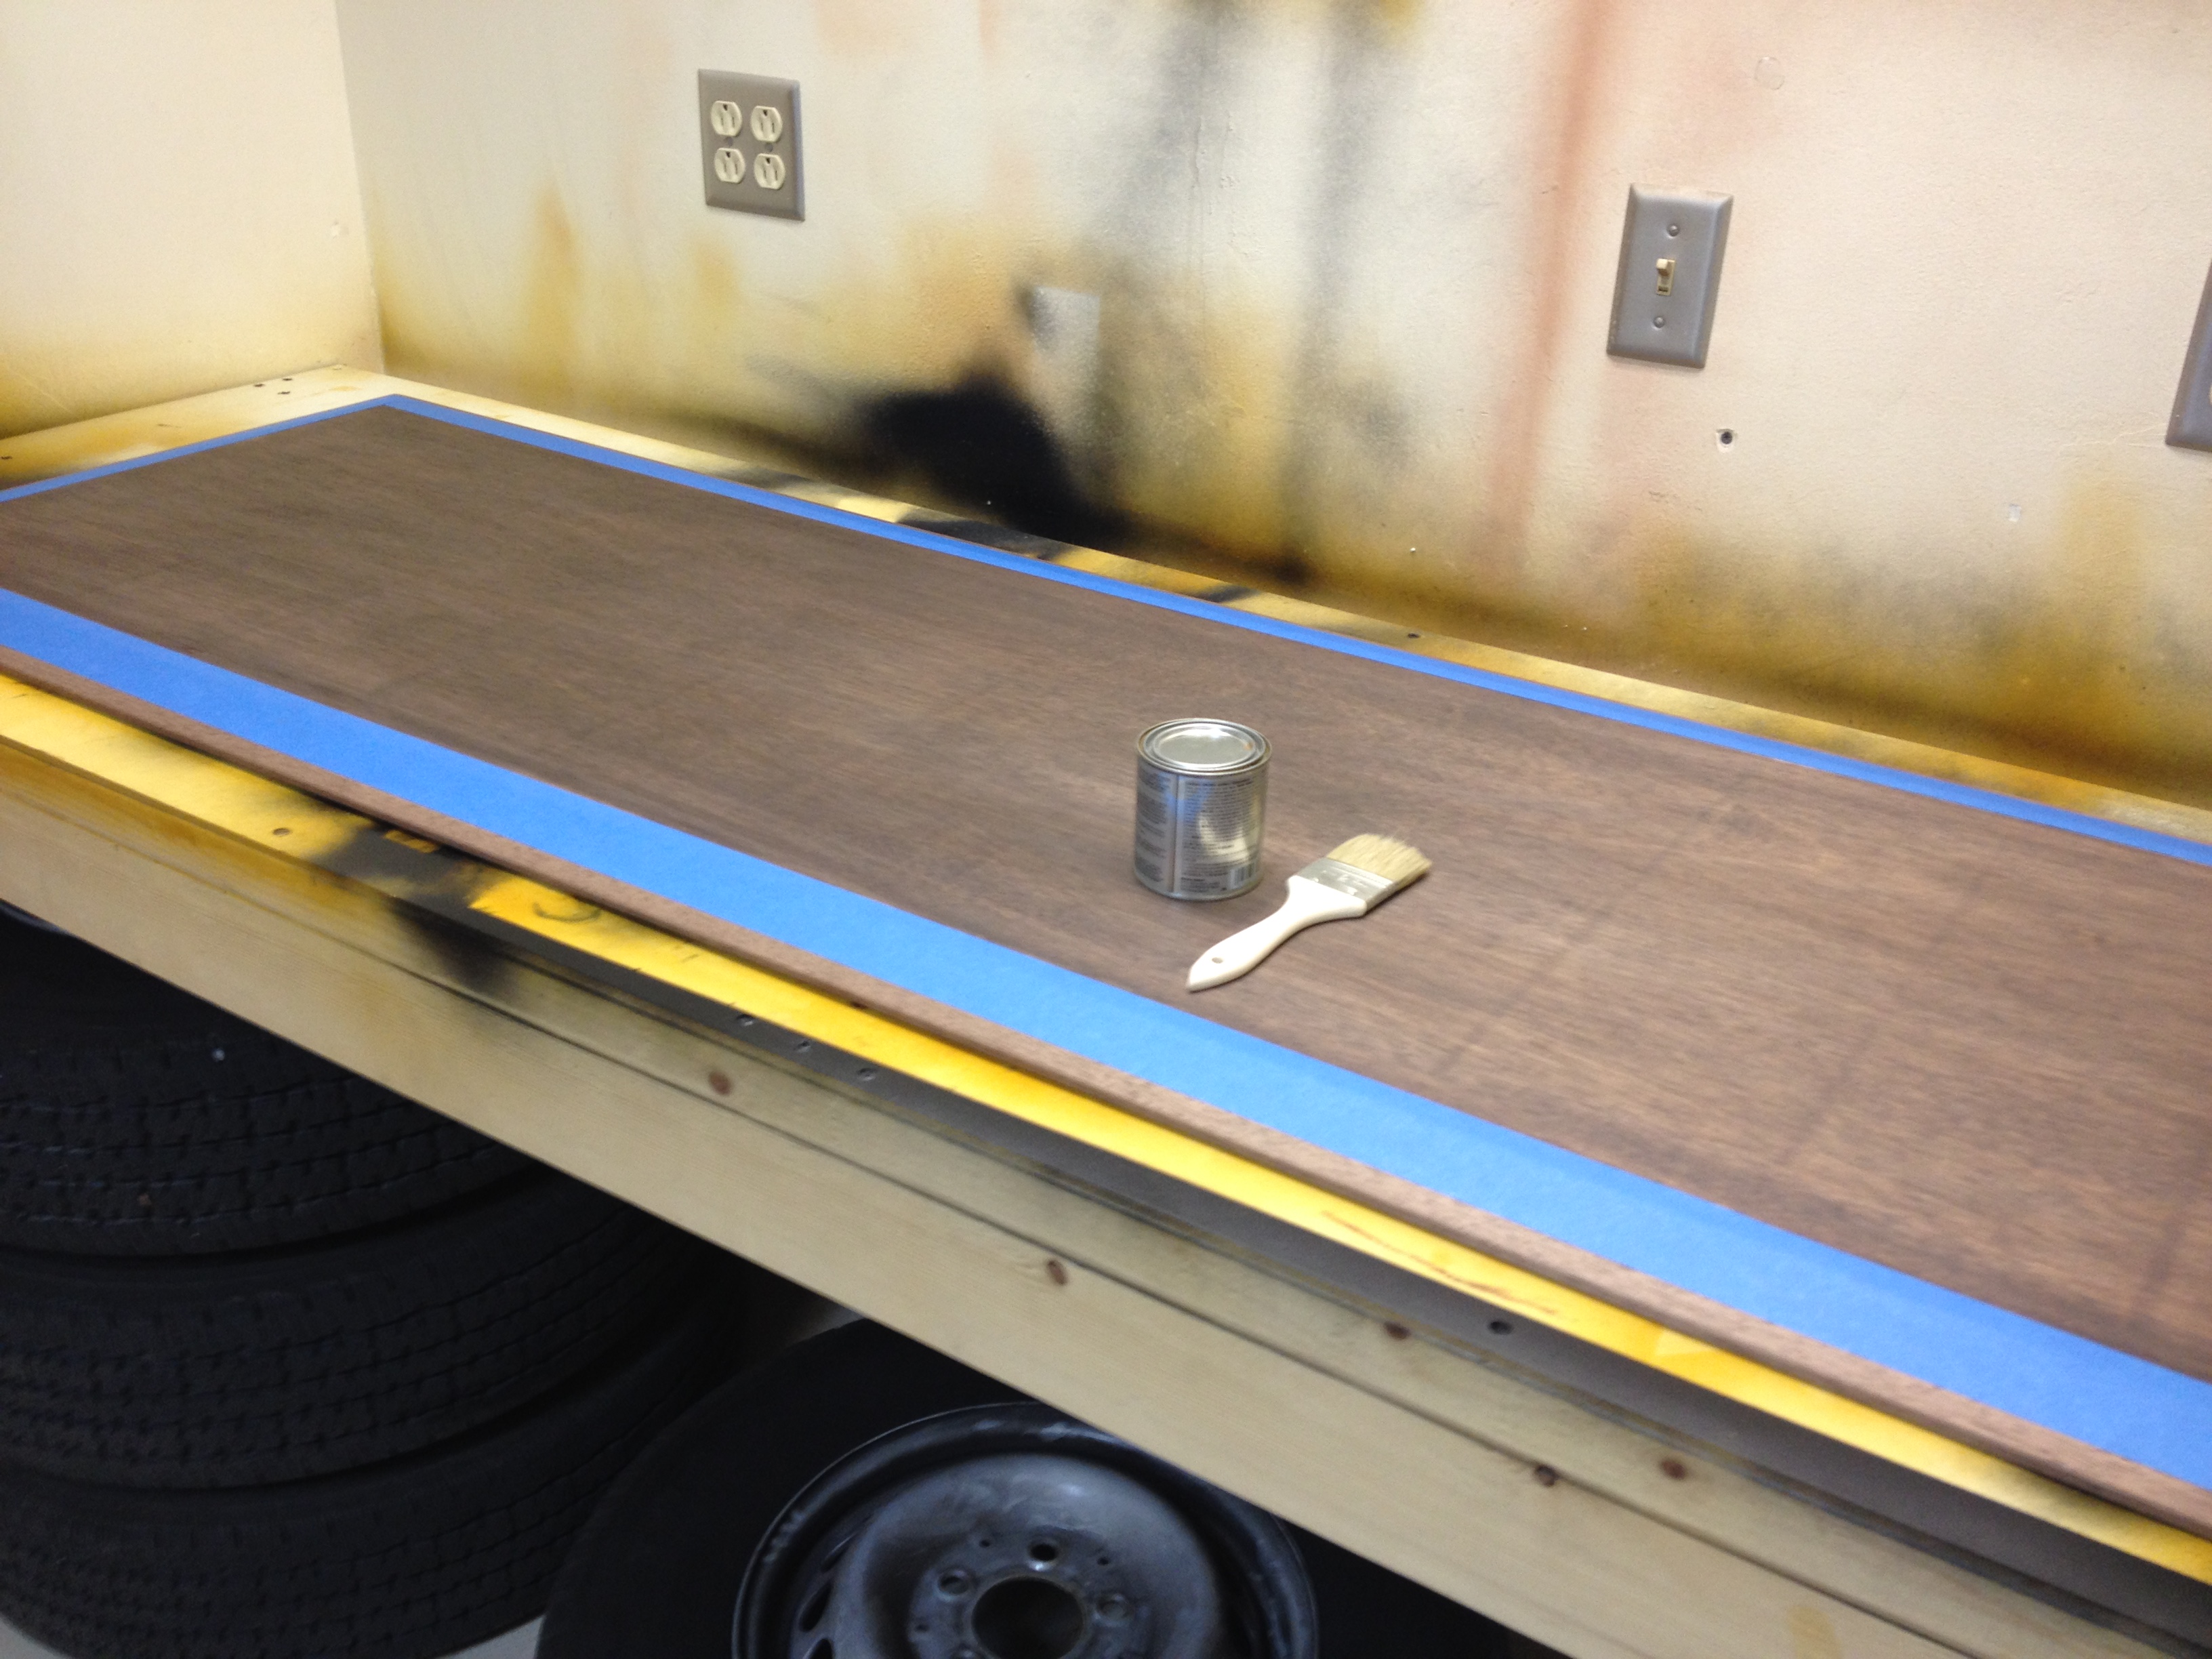
This went quickly, and after that I put (gasp) polyurethane on it. If you’re at my house and find yourself on the ground looking up into the dark recesses of the entertainment center, then you can give me crap about the glossy Minwax film finish on the underside of the top. It’s a risk I’m willing to take.
Say Cheese!
Next up were the drawers. I’ve learned the hard way that you can’t ever use an oil based finish on drawers, because once you close them up inside a cabinet, they’ll just smell like oil basically forever. So I finished the drawers with shellac. But not the drawer fronts! I did want to finish the drawer fronts with oil and wax, so I had to mask them off. I even went as far as masking off the ends of the pins on the dovetails so that I could finish them with oil as well. (I did tell you I’m a little OCD about this stuff, right?)

Yes, I spent a couple hours with an Exacto knife and blue tape masking off 16 pins and 16 half pins.
I masked them off because I *spray* my shellac. I used fresh premixed (but not dewaxed) amber shellac because I’m trying to make them look like they’ve been around long enough to darken. I’ve actually gotten pretty good at spraying shellac. I use an HVLP conversion gun with the big compressor in the shop (and a dryer and filter for the air). And I also use the 3M PPS. I think it stands for Paint Preparation System, and it’s the greatest thing to happen to spray cleanup since ever. I also bleed the air out of the collapsible liner so I can spray inverted. You can see the liner being sucked/collapsed in the picture below. When you’re done, you just throw the disposable liner away and flush out the gun. It’s a cool system for a guy who hates messes.

Spraying shellac in the back room of the shop.
The drawers were pretty quick to spray, and shellac dries in nothing flat, so this was just a day’s work on the drawers.
Now, for the part of this that will make some people cringe. (including me)
I intentionally damaged the piece.
Now, I don’t mean I took a sledgehammer to it and broke it. I mean I “ distressed” it. My reasons for doing so are three fold.
- The other pieces it needs to match have the same treatment.
- I want this piece to look like it has been around since about 1930.
- If there are already a few nicks and scratches, I won’t cringe if someone drops their keys on it a little too hard. (That OCD thing again – and don’t even get me started on coasters…)
So, when I do this – and it is hard for me to beat up something I’ve worked months perfecting – I don’t just go banging on furniture with a hammer, although that is part of the process. I try to think about how the piece might have been used and abused throughout its life if it were actually old. I start by wrapping a bunch or chains, screws, bolts, and whatever else I have laying around in an old T-shirt, and then whapping in the wear areas. In this case, that was the top, around the drawer handles, and anywhere there’s a corner.
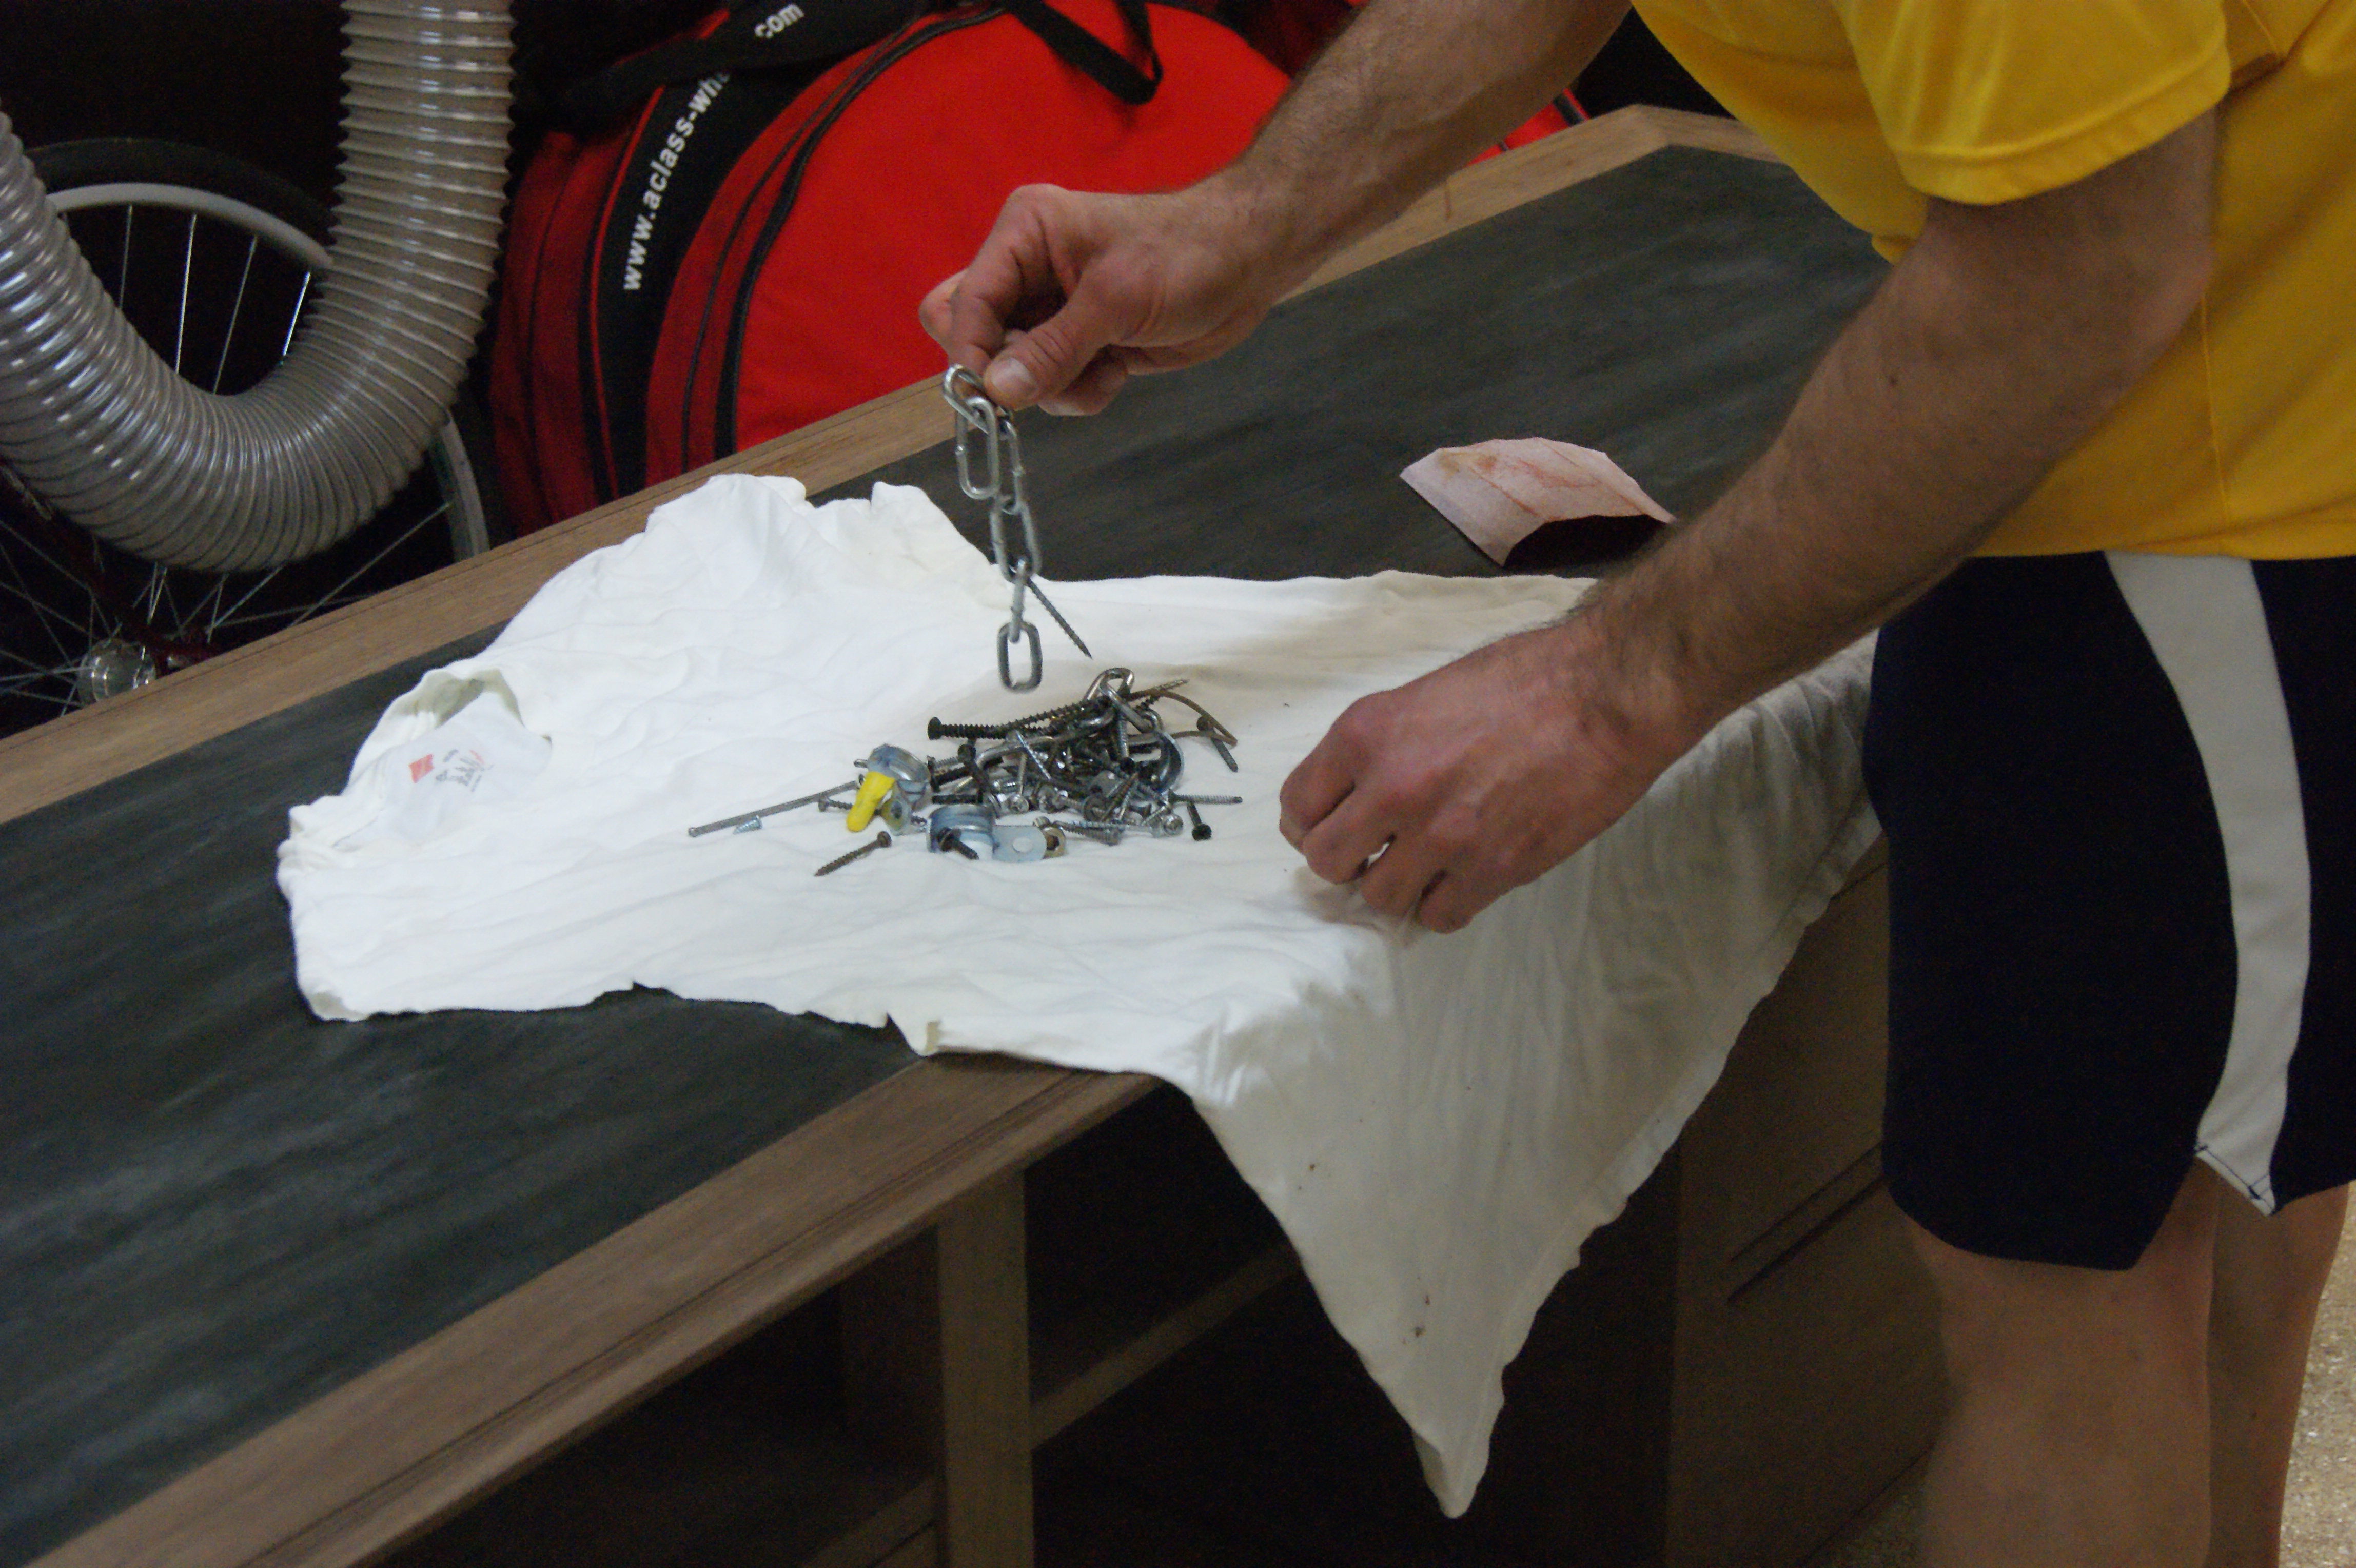
Distressing implements. Although there’s nothing necessarily distressing about them on their own…
Then I go a little further. I bang a large round weight around the bottom where you might have hit it with a vacuum a million times over. I intentionally slam things in drawers as if something was sticking out when you closed it. I drag metal objects back and forth across the shelves as if there were metal feet on whatever was stored there. I heavily burnish spots on the sides as if something was rubbing against it for a long time. Etc. etc. etc.

The whole distressing process actually goes pretty fast (double entendre intended). But then things slowed down tremendously.
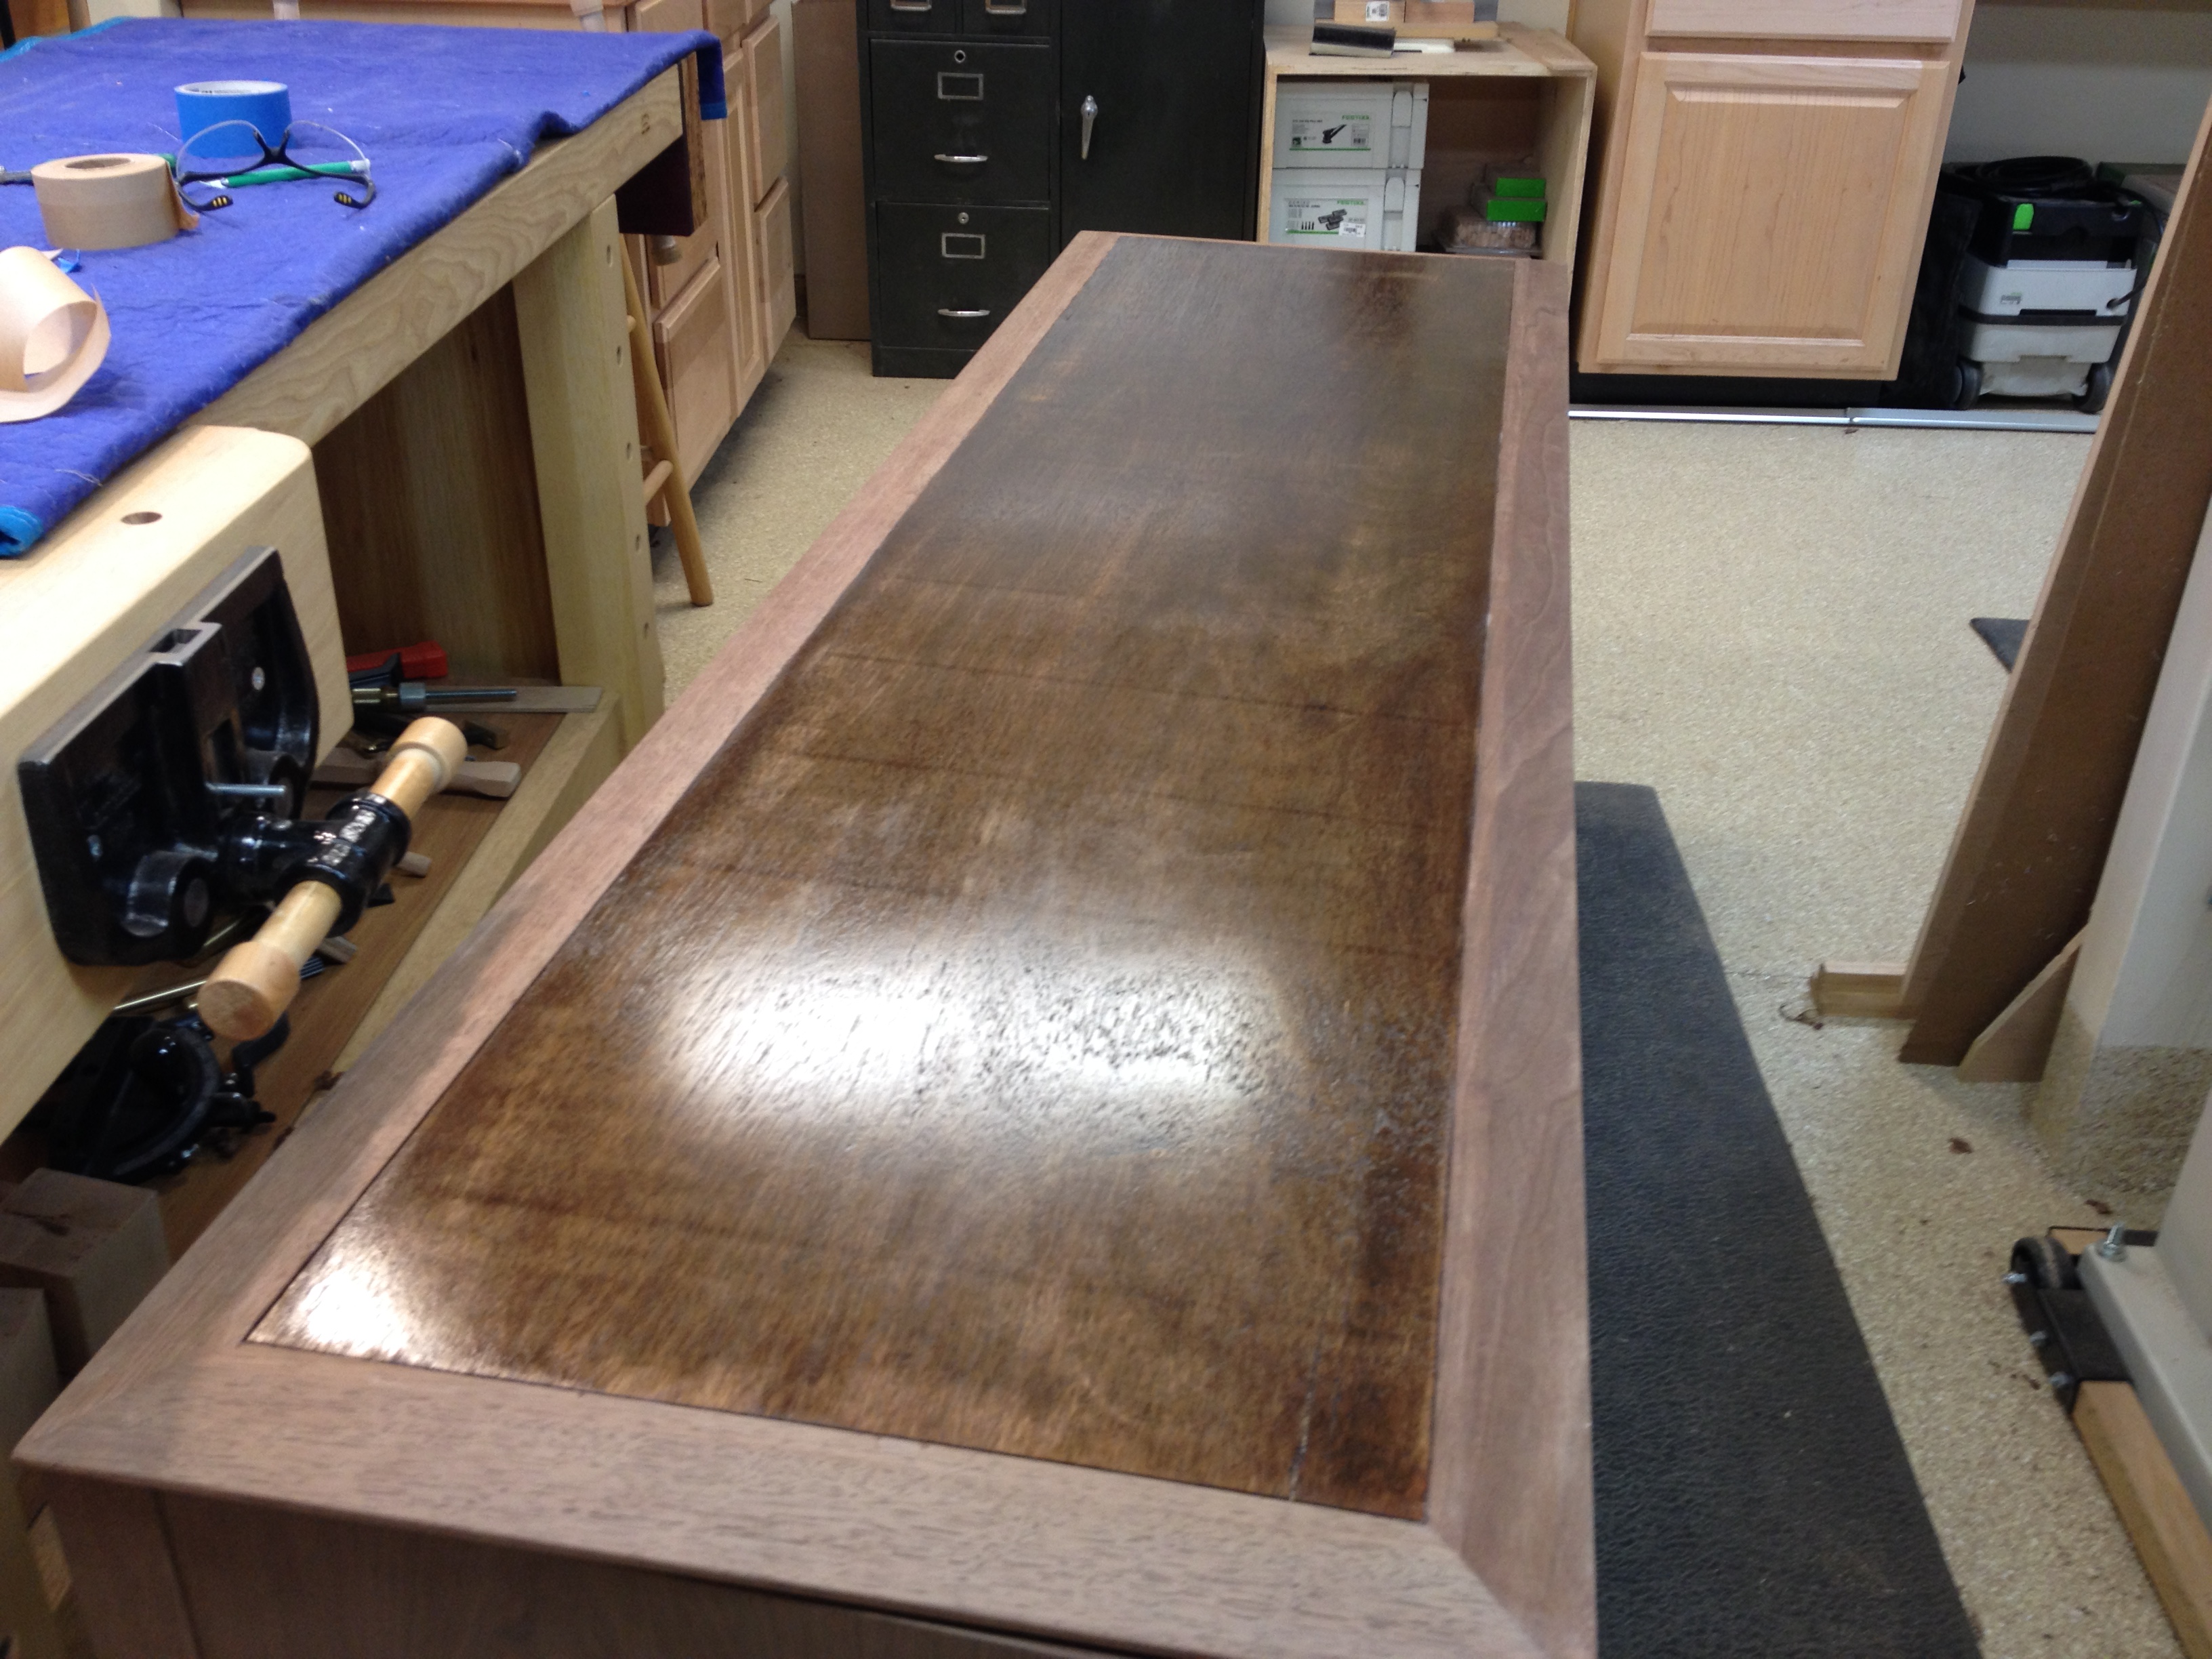
So the main reason it’s taken me so long on the finishing has to do with the kind of finish I’m using. For this piece, I wanted an “in the wood” finish, instead of a “film” finish. So I’m using boiled linseed oil and Danish oil. They don’t provide a lot of protection, but they look fantastic. You’ll see. But they take forever to dry. So at best, I can put one coat on a few pieces in a night. And I’ve applied up to 5 and 6 coats in places.
And I don’t apply these oils in the regular way. Typically, you just pour the stuff on and smear it around, let it soak in, and then wipe up the excess. I don’t do that because a) I find it tends to leave too much oil on the piece, and it gets kind of gloppy as it dries; and b) it’s way too messy and I just can’t handle it. So what I do instead is apply lighter coats with a saturated rag. You can see me doing that here on the top.
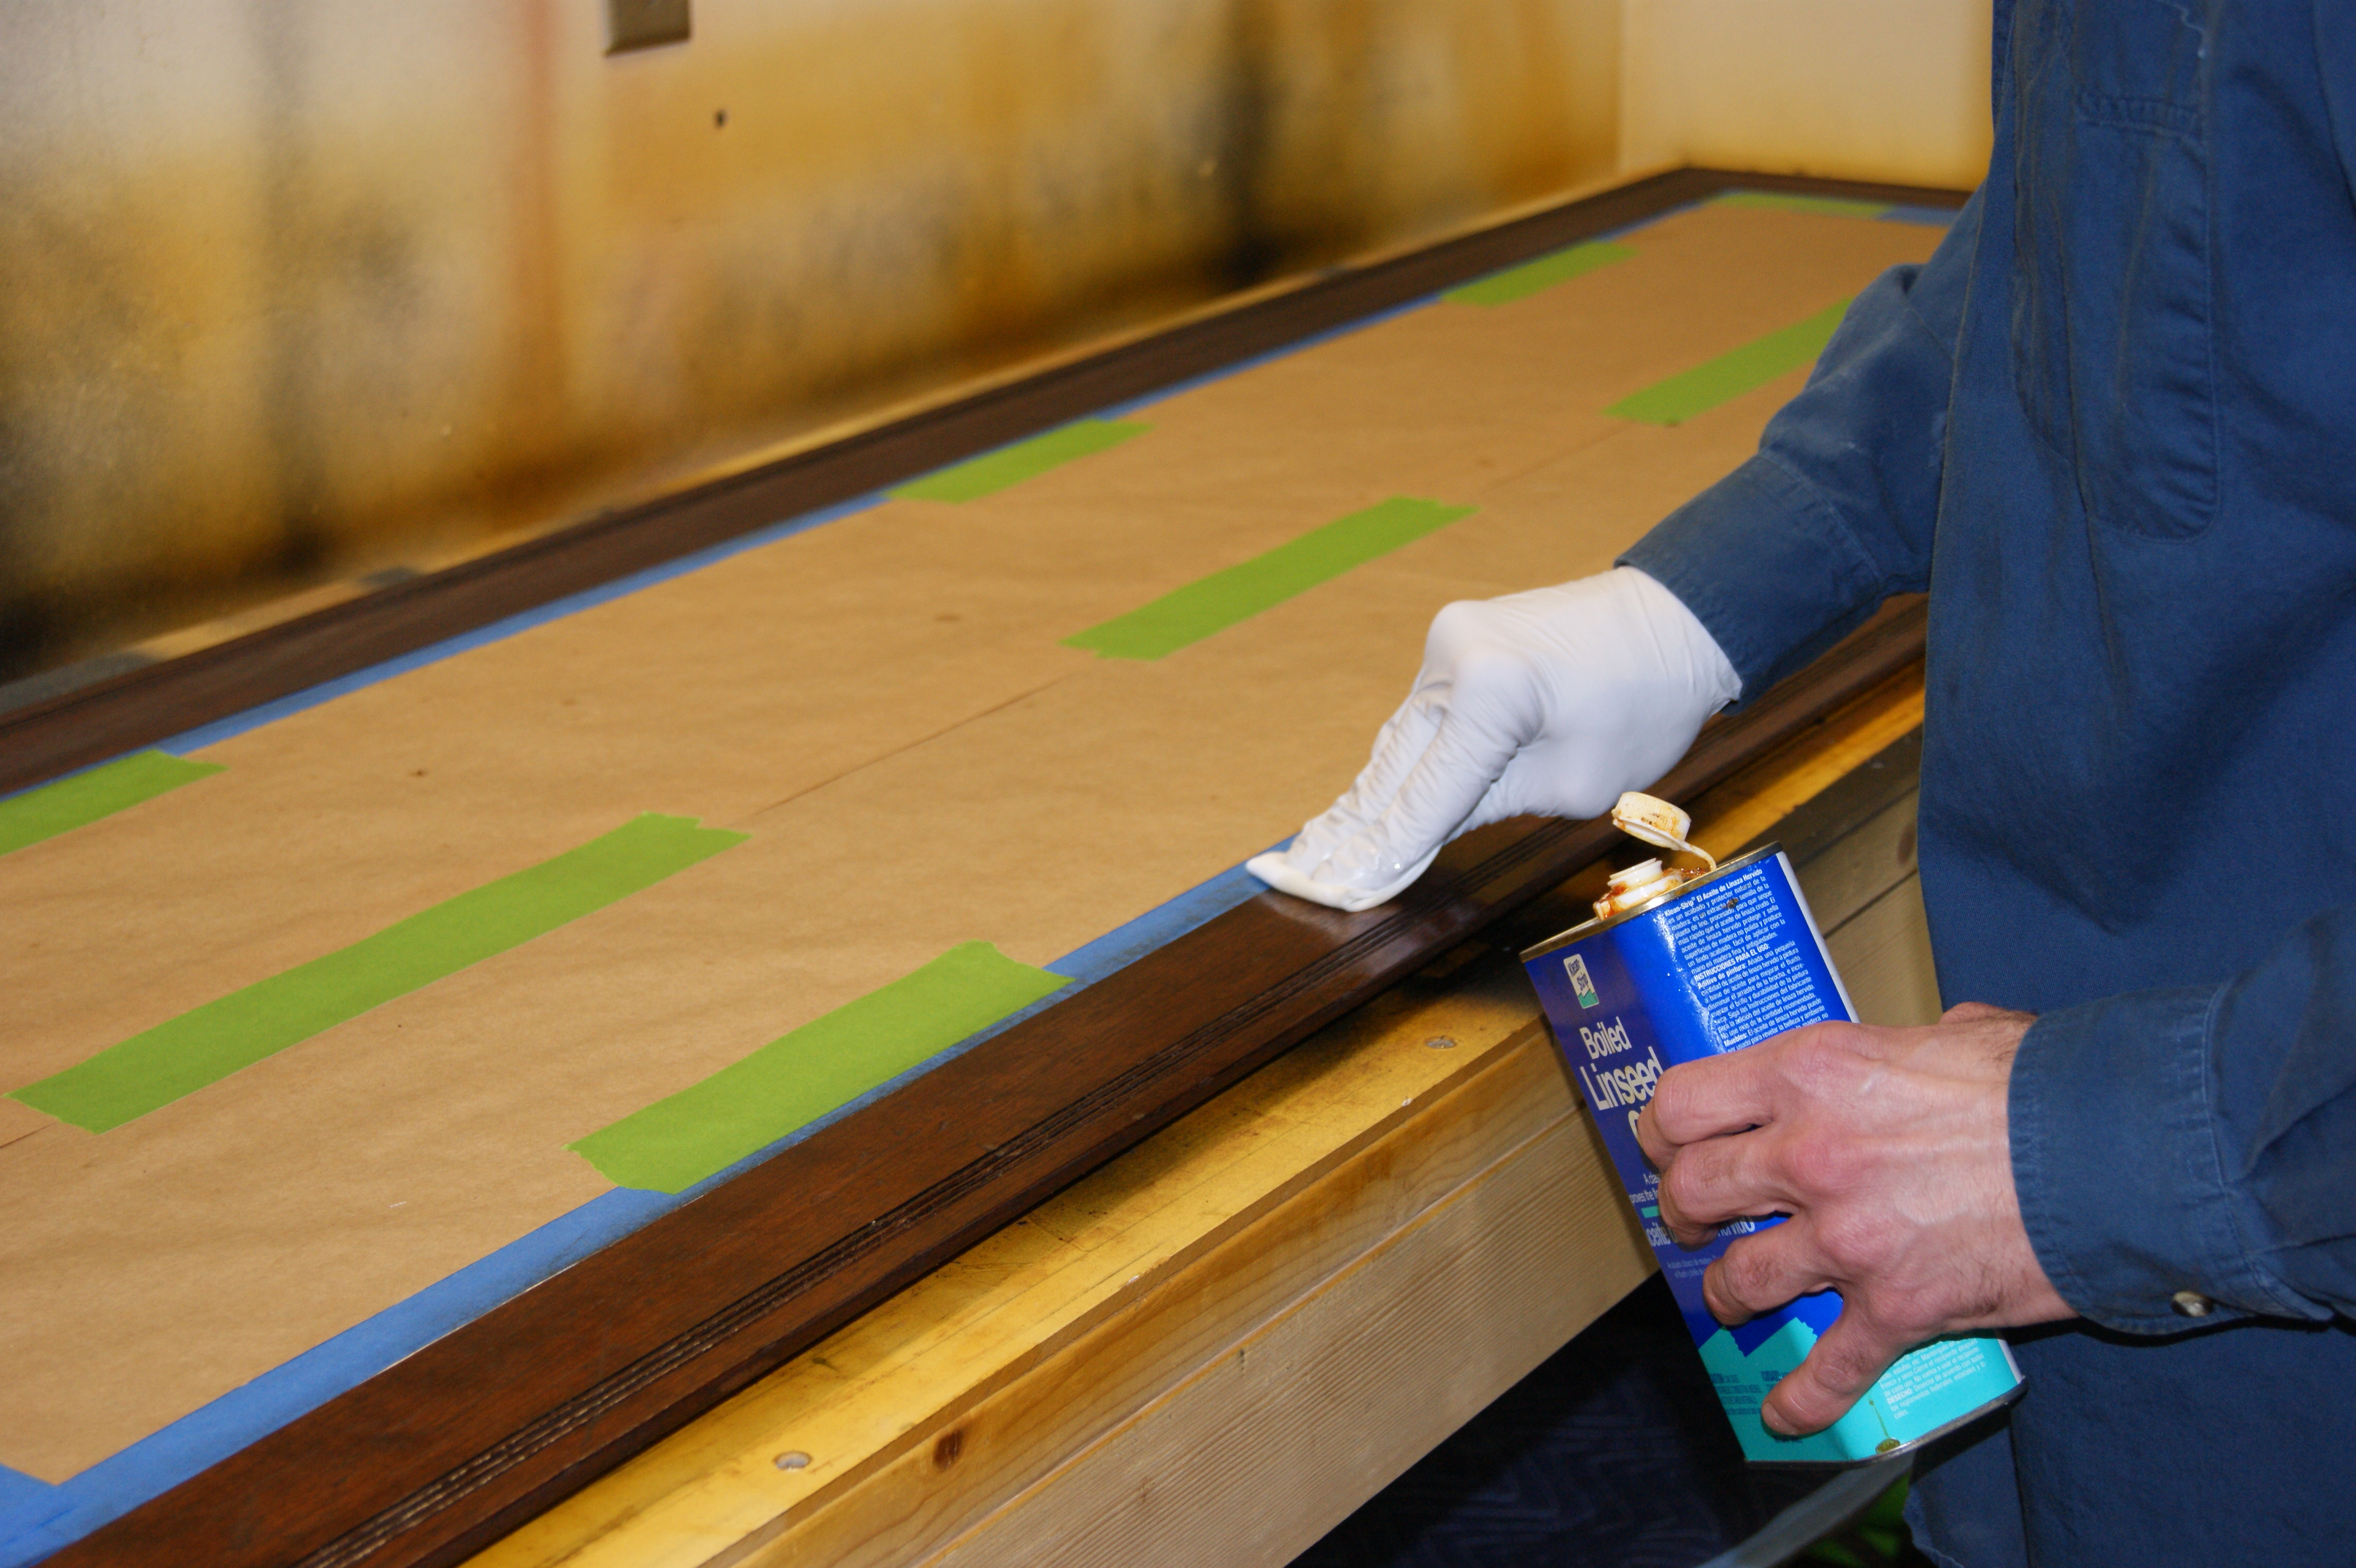
I’ve masked off the zinc for now.
There’s a whole protocol for disposing of oily rags, so if you’re thinking of trying something like this yourself, please read up on it and be safe – the rags can spontaneously combust! In fact, there was a 2 million dollar mansion here in Salt Lake City that burned to the ground last week for this very reason. Seriously. Be careful.
So, if the finish I use smells bad, takes forever to dry, and can potentially burn down my shop… why in the heck do I use it?
Because look how fantastic it looks!
Compare the completely unfinished tops of the top rails to the part I’m working to see why I put up with this stuff.
So, that’s why it’s taken me so long. There are six coats on the top, five coats on the drawer and door fronts, five coats on the main body, and even four coats on the underside. (In case you really lie down on my floor and get a flashlight and a mirror to see underneath.) Each coat takes a couple days to dry, and so basically, I started in February and now it’s June. But hey, it’s done.
And now, finally, we get to the part I started to write about.
It’s a total woodworking nerd thing, but I actually got it right on this piece, so I’m all proud and this is my blog so I get to say whatever I want.
You see, wood moves. It moves mainly in response to changes in humidity – it swells and shrinks. If you imagine a board, it expands and contracts mostly along its width. Not so much along its length. And it’s proportional, so the bigger the piece is, the more it moves. This has implications when you’re building a big case. On this piece, the sides of the entertainment center are two big slabs of solid wood, with the grain running vertically, like so:

Sorry about the bad cell phone shot, but you can see the grain. The grain on the intersecting shelf, btw, will expand front-to-back, like the sides, and therefore presents no problem.
But the drawer runners go from front to back, with the grain running perpendicular to the solid panel slides, like this.

So the expansion and contraction of the large sides is at odds with the drawer runners, which won’t change much at all in that direction. If everything is glued up tight, and the wood on the sides moves, something’s gotta give. This is where you have to be smart in your design. You want to have that “give” where you want it to be, and not inadvertently blowing something apart.
Now normally, it’s so consistently dry in Utah, that none of this really matters as long as we don’t move. But last month was the wettest May in history. And remember, I assembled the piece in the forced-air dryness of winter. So the sides of the case have swelled with all the humidity since they were assembled. But the good news is, I totally had this under control.
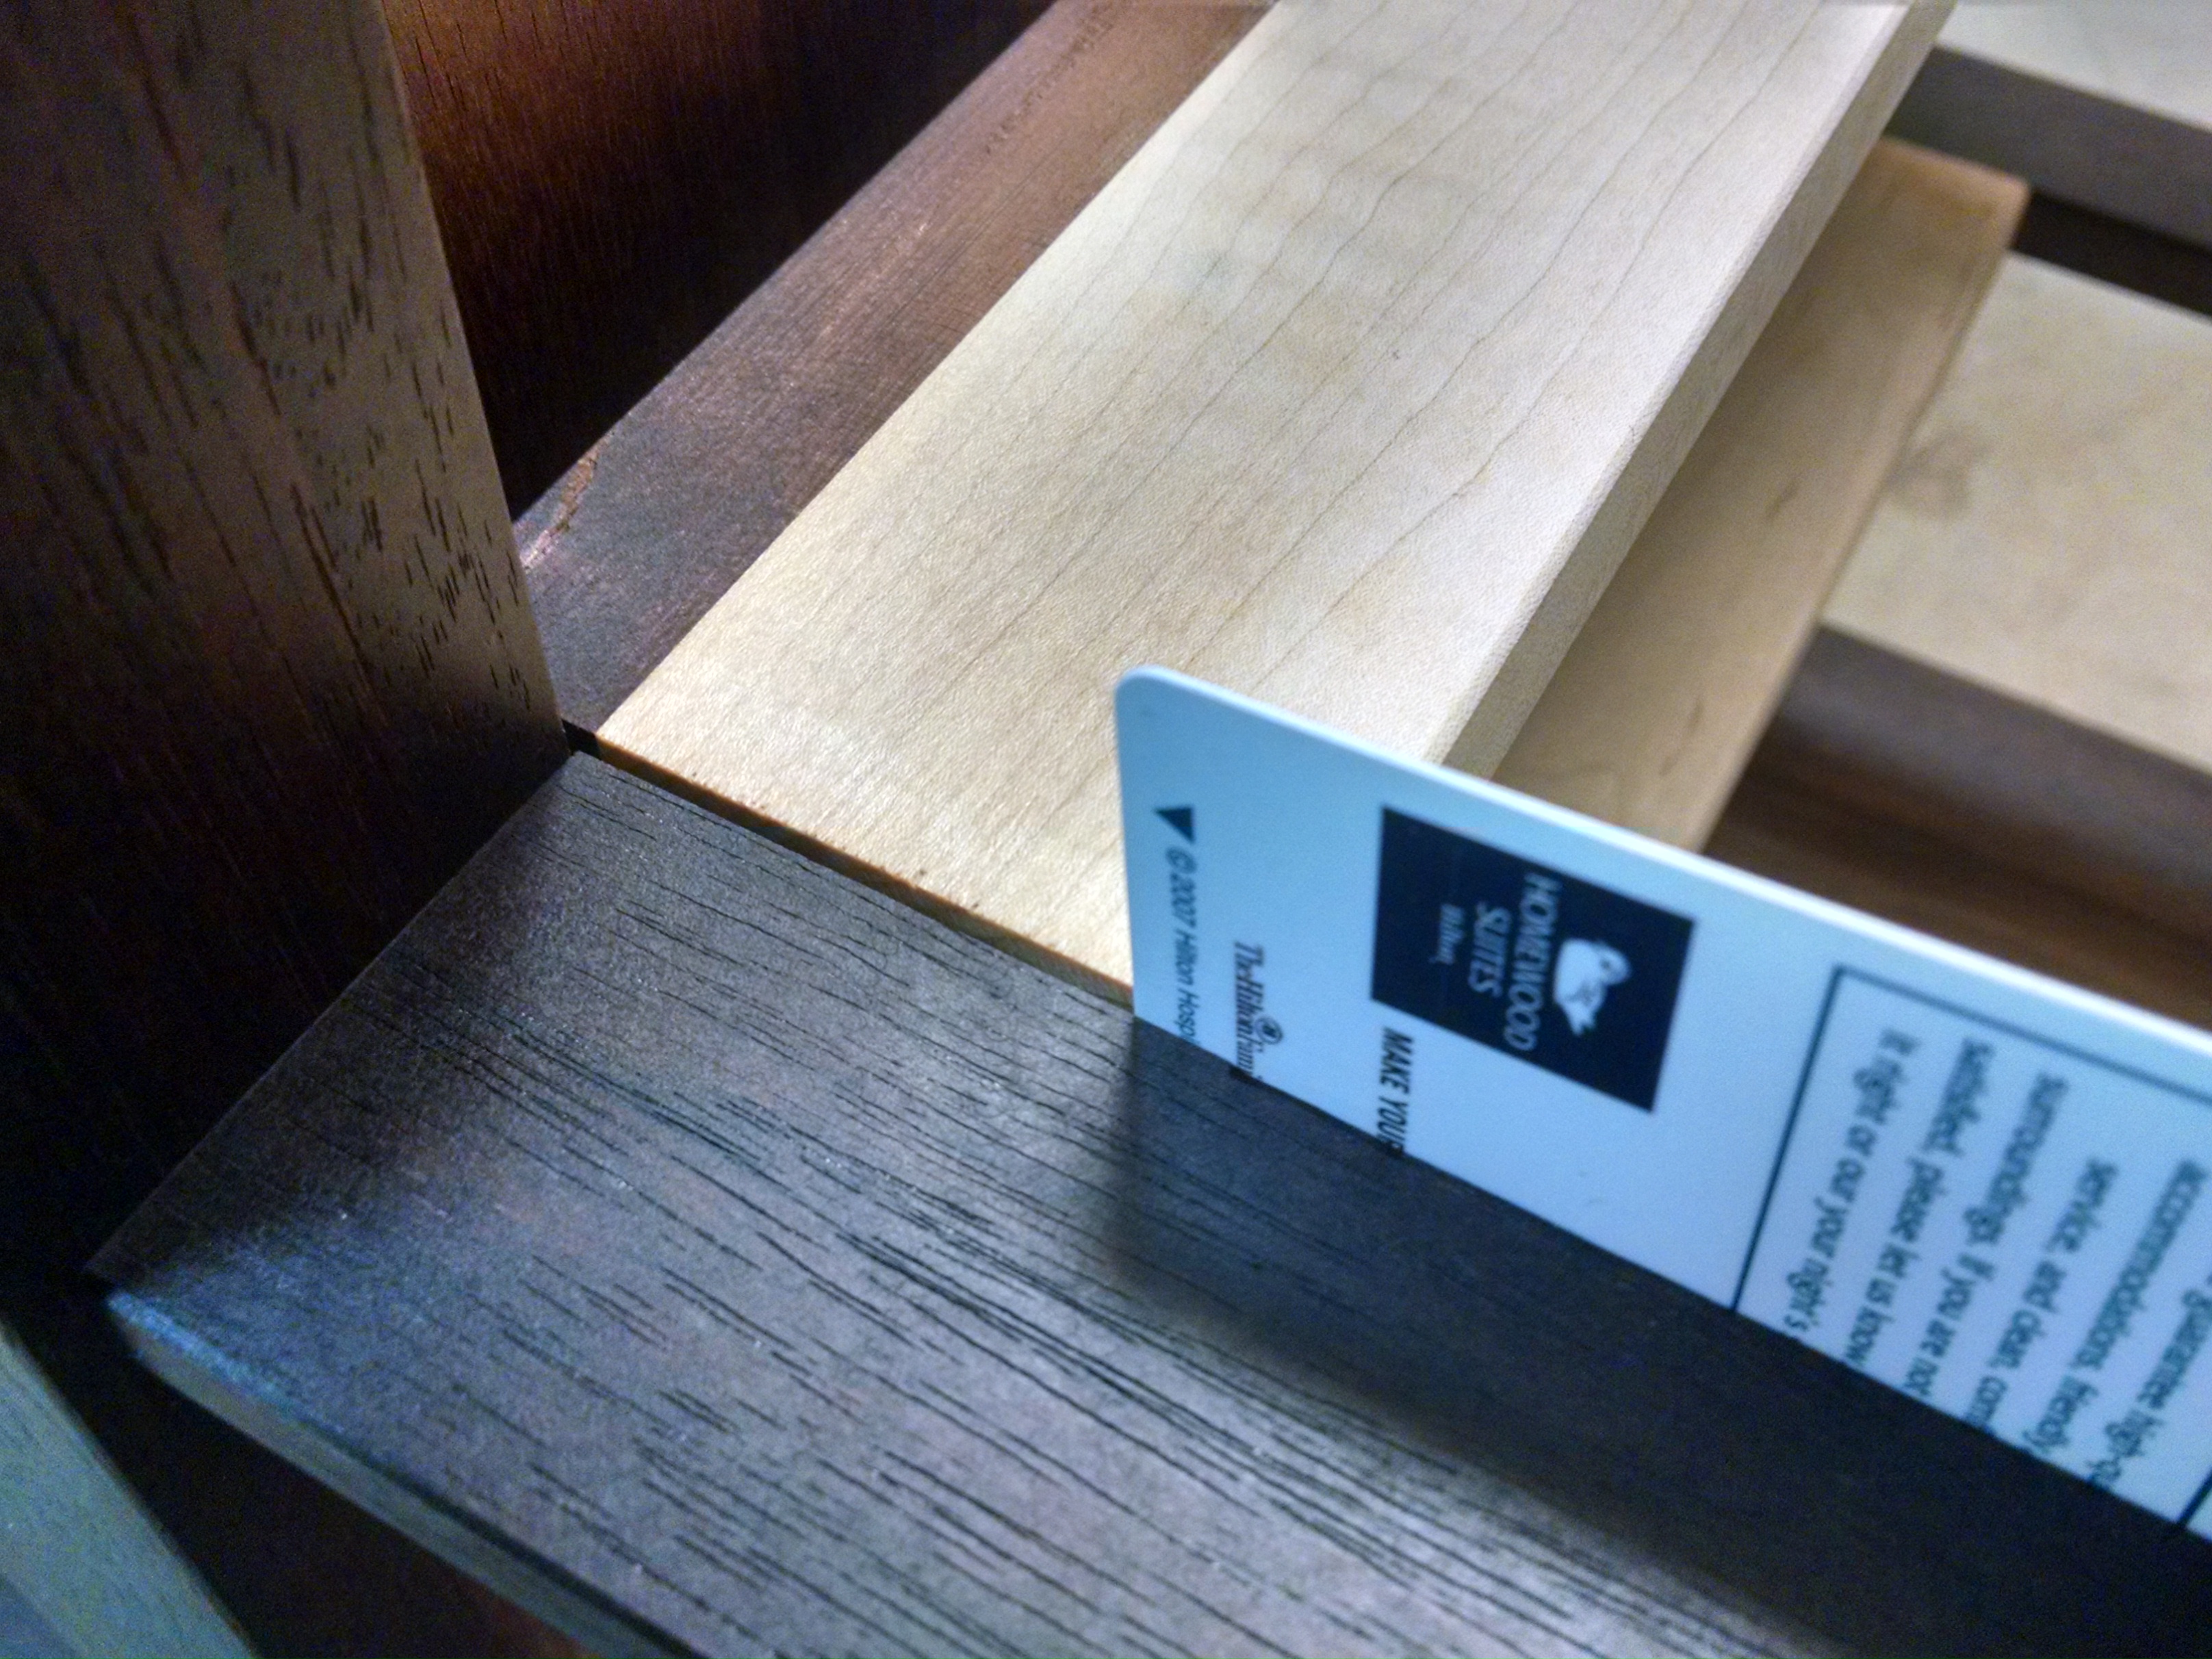
A perfect failure.
Yes, gaps did open up – larger than an old hotel room key I had lying around. But they opened up at the BACKS of the drawer runners where I purposefully did not glue them in. They’re still supported by the dominos; nobody but you will ever see these gaps; and they won’t affect the operation of the drawers at all. Score!
So that’s what I mean by “occasionally, I get something right”. And I’m completely prouder than I should be of it.
And that hubris probably means that next week, when I go to attach the top or install the door, I’ll do something bone-headed and ruin the whole thing. So, uh, wish me luck.


Really, really good work. You have a right to your pride!
I don’t have the patience it takes to do fine woodworking. I’m OCD, but I get impatient with finishes, my own clumsiness, and my lack forethought. I’m happy knocking together the most amazing treehouse ever, but can’t make a side table.
Just made a set of Cornhole boards for my husband for Father’s Day and the poly tops have been killing me because I’m determined to get it right and somehow, no matter how careful I am, it’s never right.
May the end result reflect the time and effort you put in!
Thanks, Jen!
For Polyurethane, I’ve mostly switched to water-based poly because I can safely spray it in my shop (without blowing myself up).
But if you don’t have the time to invest in spray equipment – use wipe-on poly. Minwax sells it, and you can find it in most home centers.
It doesn’t build as quickly, but since you wipe on such thin coats, it’s easy to get it looking awesome.
(Though, it does take patience to slowly apply that many coats…)
Looks awesome to me, congrats on the progress! I don’t know if I could bring myself to distress it after, but I completely understand the reasons for doing so 🙂 Can’t wait to see the finished piece! (um, you are going to post a pic or two of the end result, right? And not leave us hanging? 😉 )
Absolutely. I will have one more post with some completed pictures.
I’m very excited to get it out of my shop (it takes up a lot of space!).
I would have finished it this past weekend, but we had some improvements to make to the room where it will be moved (paint, drywall repair, etc. etc.).
I still need to run some power/cabling in the walls there, but I may just go ahead and finish for now and run the cabling later if we get a TV.
James,
It looks awesome already and it’s not fully assembled yet! I, for one, can’t wait to see the finished piece of furniture. How soon might that happen?? Inquiring minds want to know 🙂
Michelle! If all goes according to plan, I hope to have it completed this week. (of course, things seldom go according to plan…) But I’ve gotten really behind on my video editing, and we want to take Das Bus out to go sailing, so we’ll see how it goes. In any case, I’m really close.