This post may contain affiliate links.
OK everyone, I know there are at least a few of you following this, and I need your help and ideas. When I first drew up plans for this entertainment center, I put a door on the small cabinet section in the center. I still intend to do that, but I’m wondering what kind of hardware to use for the door. As a refresher, here is my original sketch:
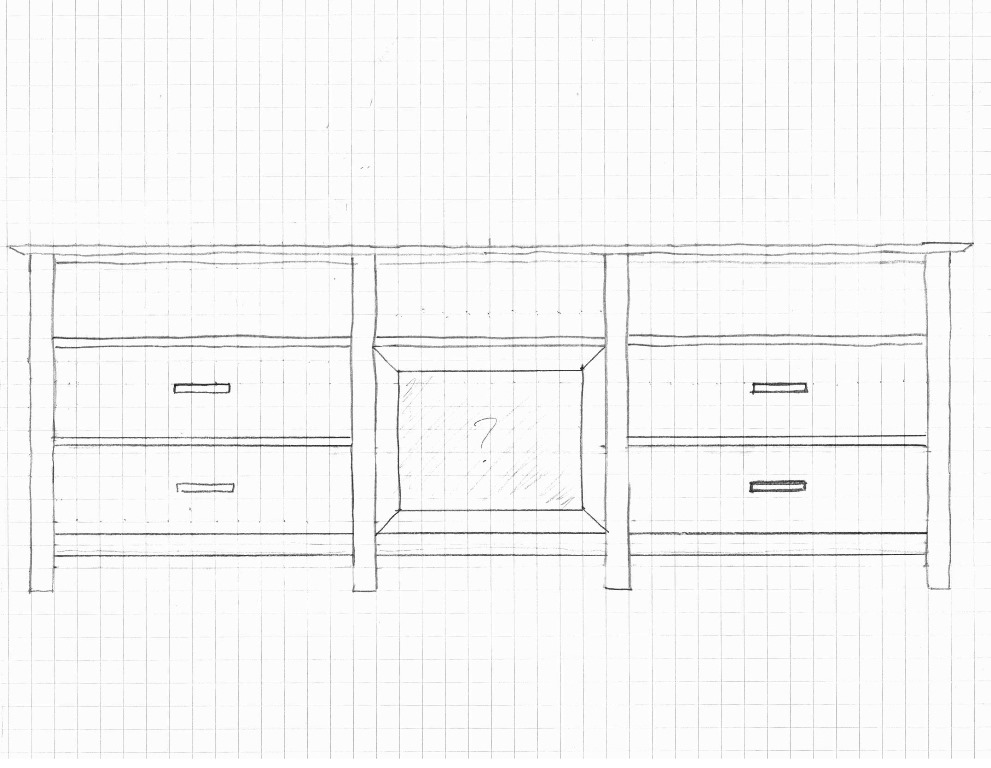
I was so unsure of what to do here that I deliberately drew in a question mark.
Notice how I left any evidence of hardware off that center section in the drawing? That’s not me being clever. That’s me not knowing what to do. Complicating matters, the front of that cabinet is inset about 3/16″ from the front of the legs, like this:
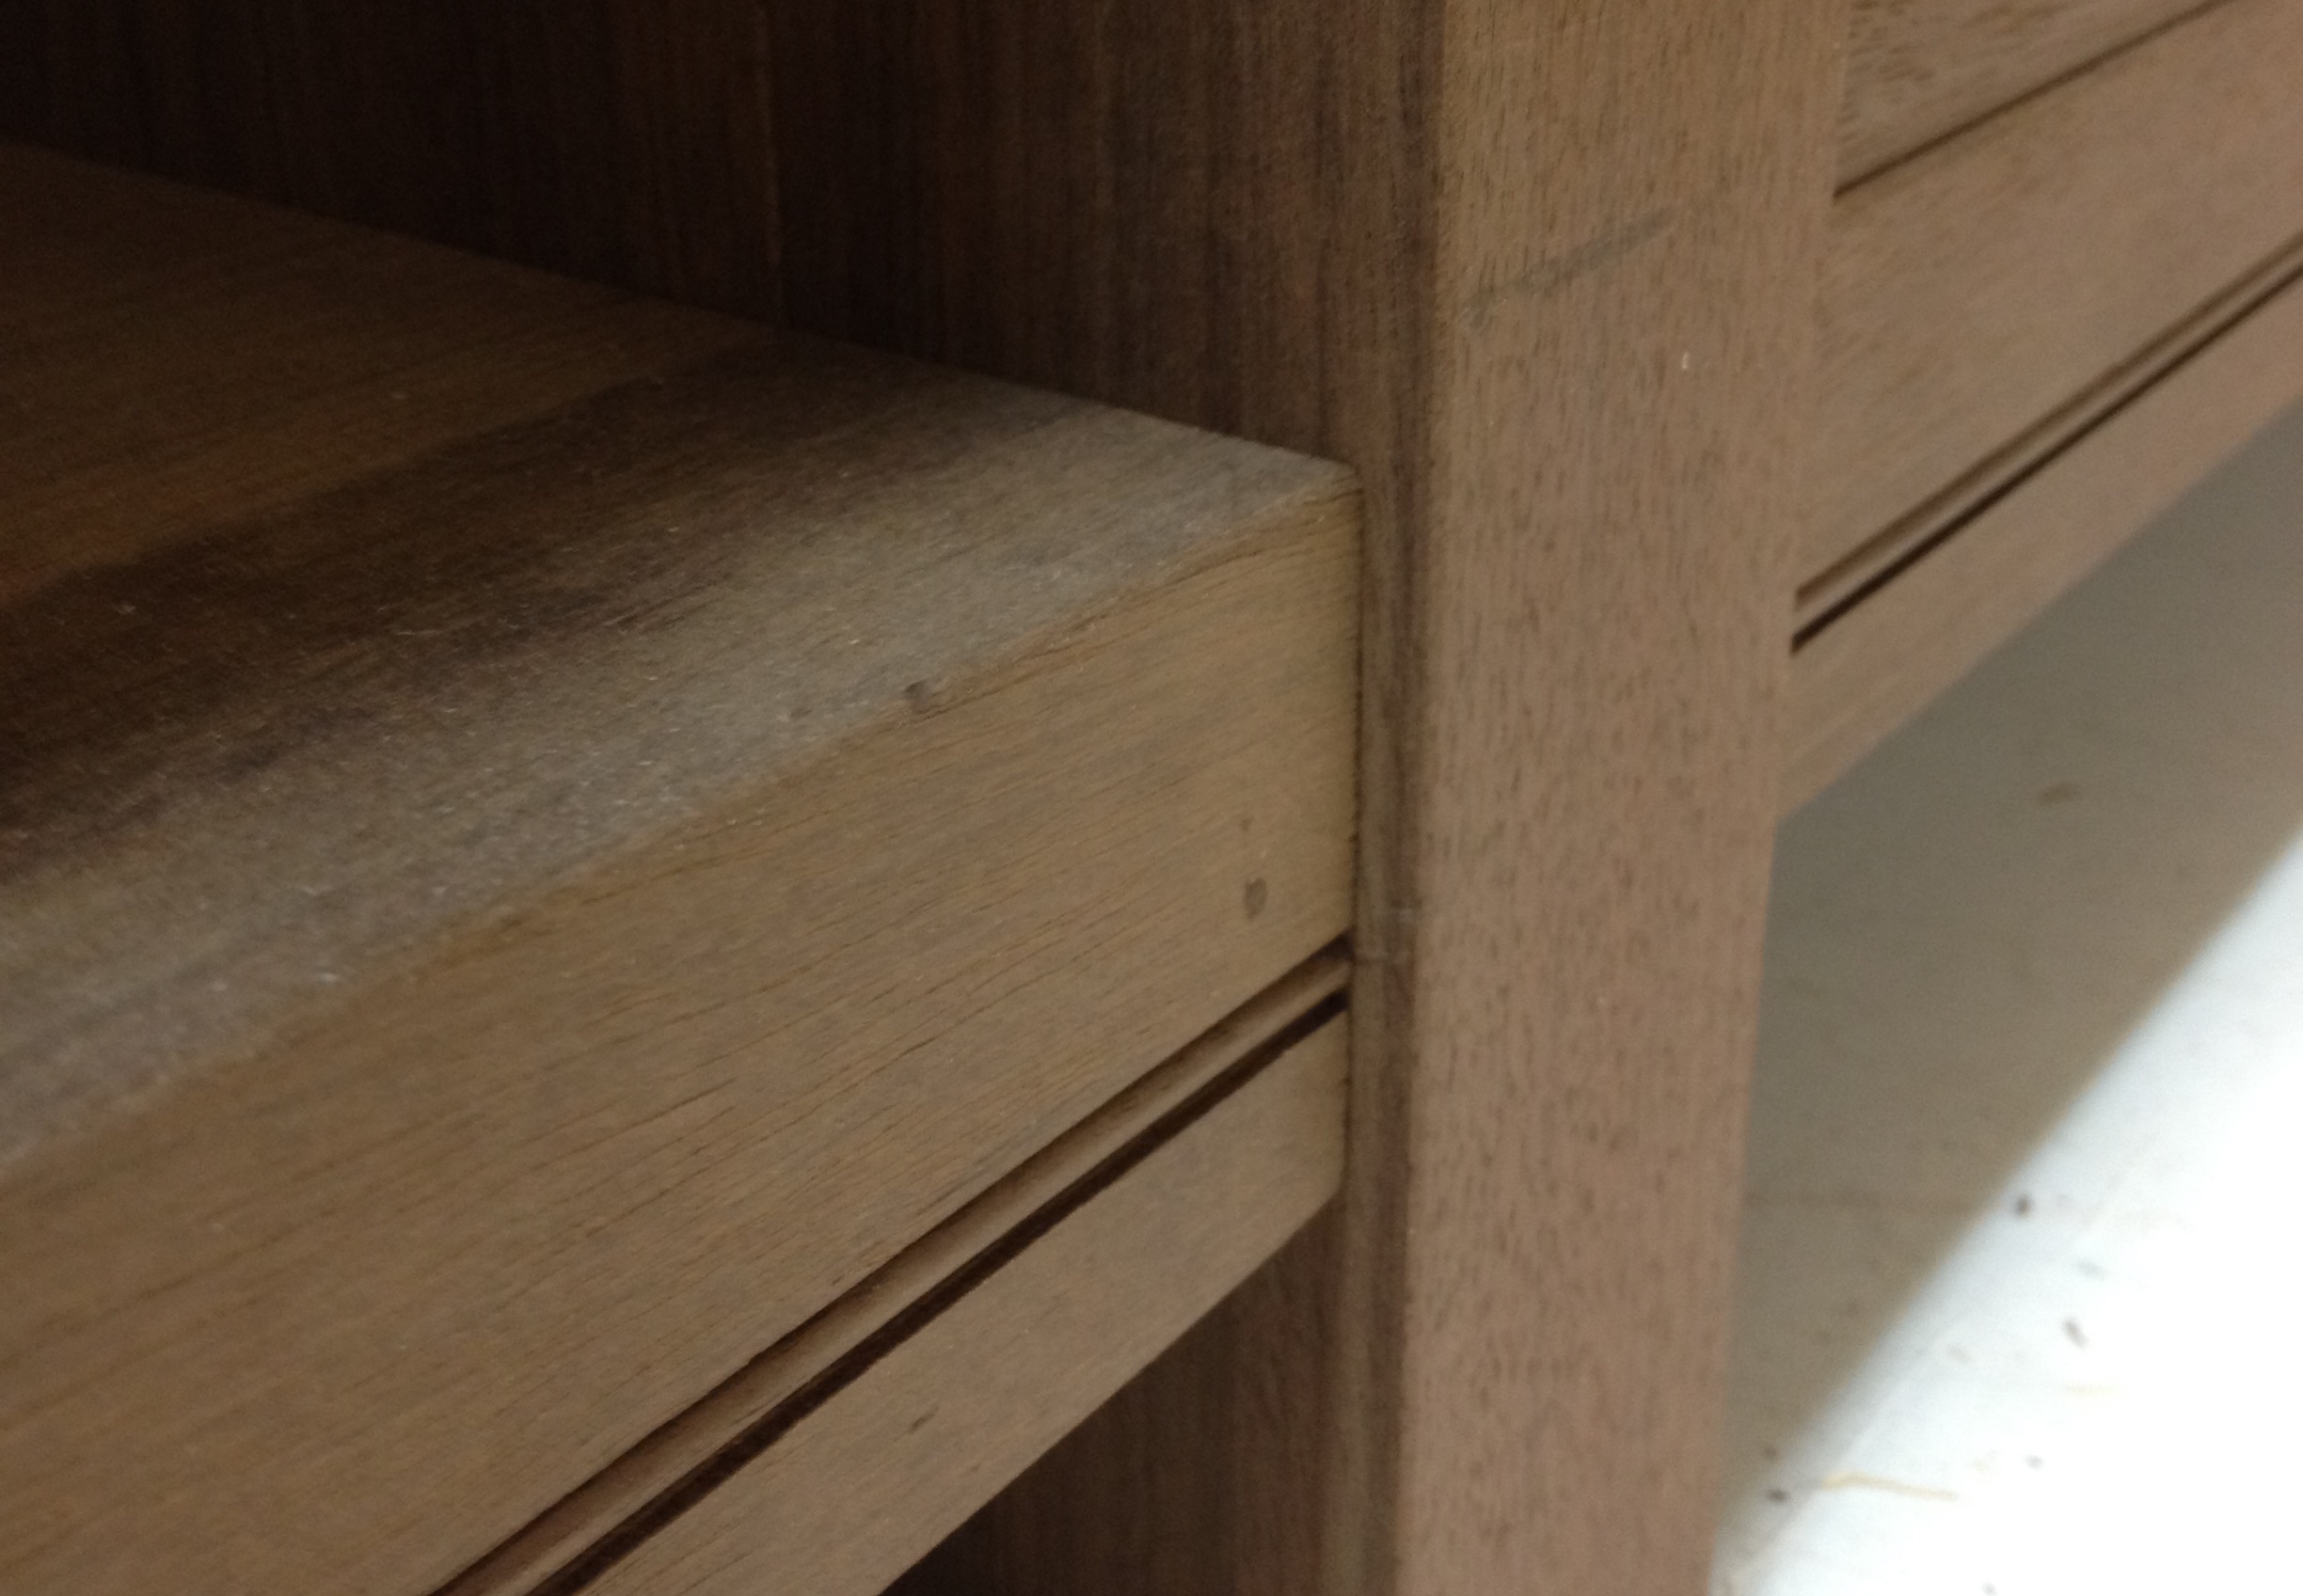
Since there will be audio equipment in there, I need the door to open fully. So that 3/16″ has some implications for the kind of hinges I might pick. One option is, I could stick with the original drawing, and use some sort of European cup hinge like in frameless cabinets (or in our RV).
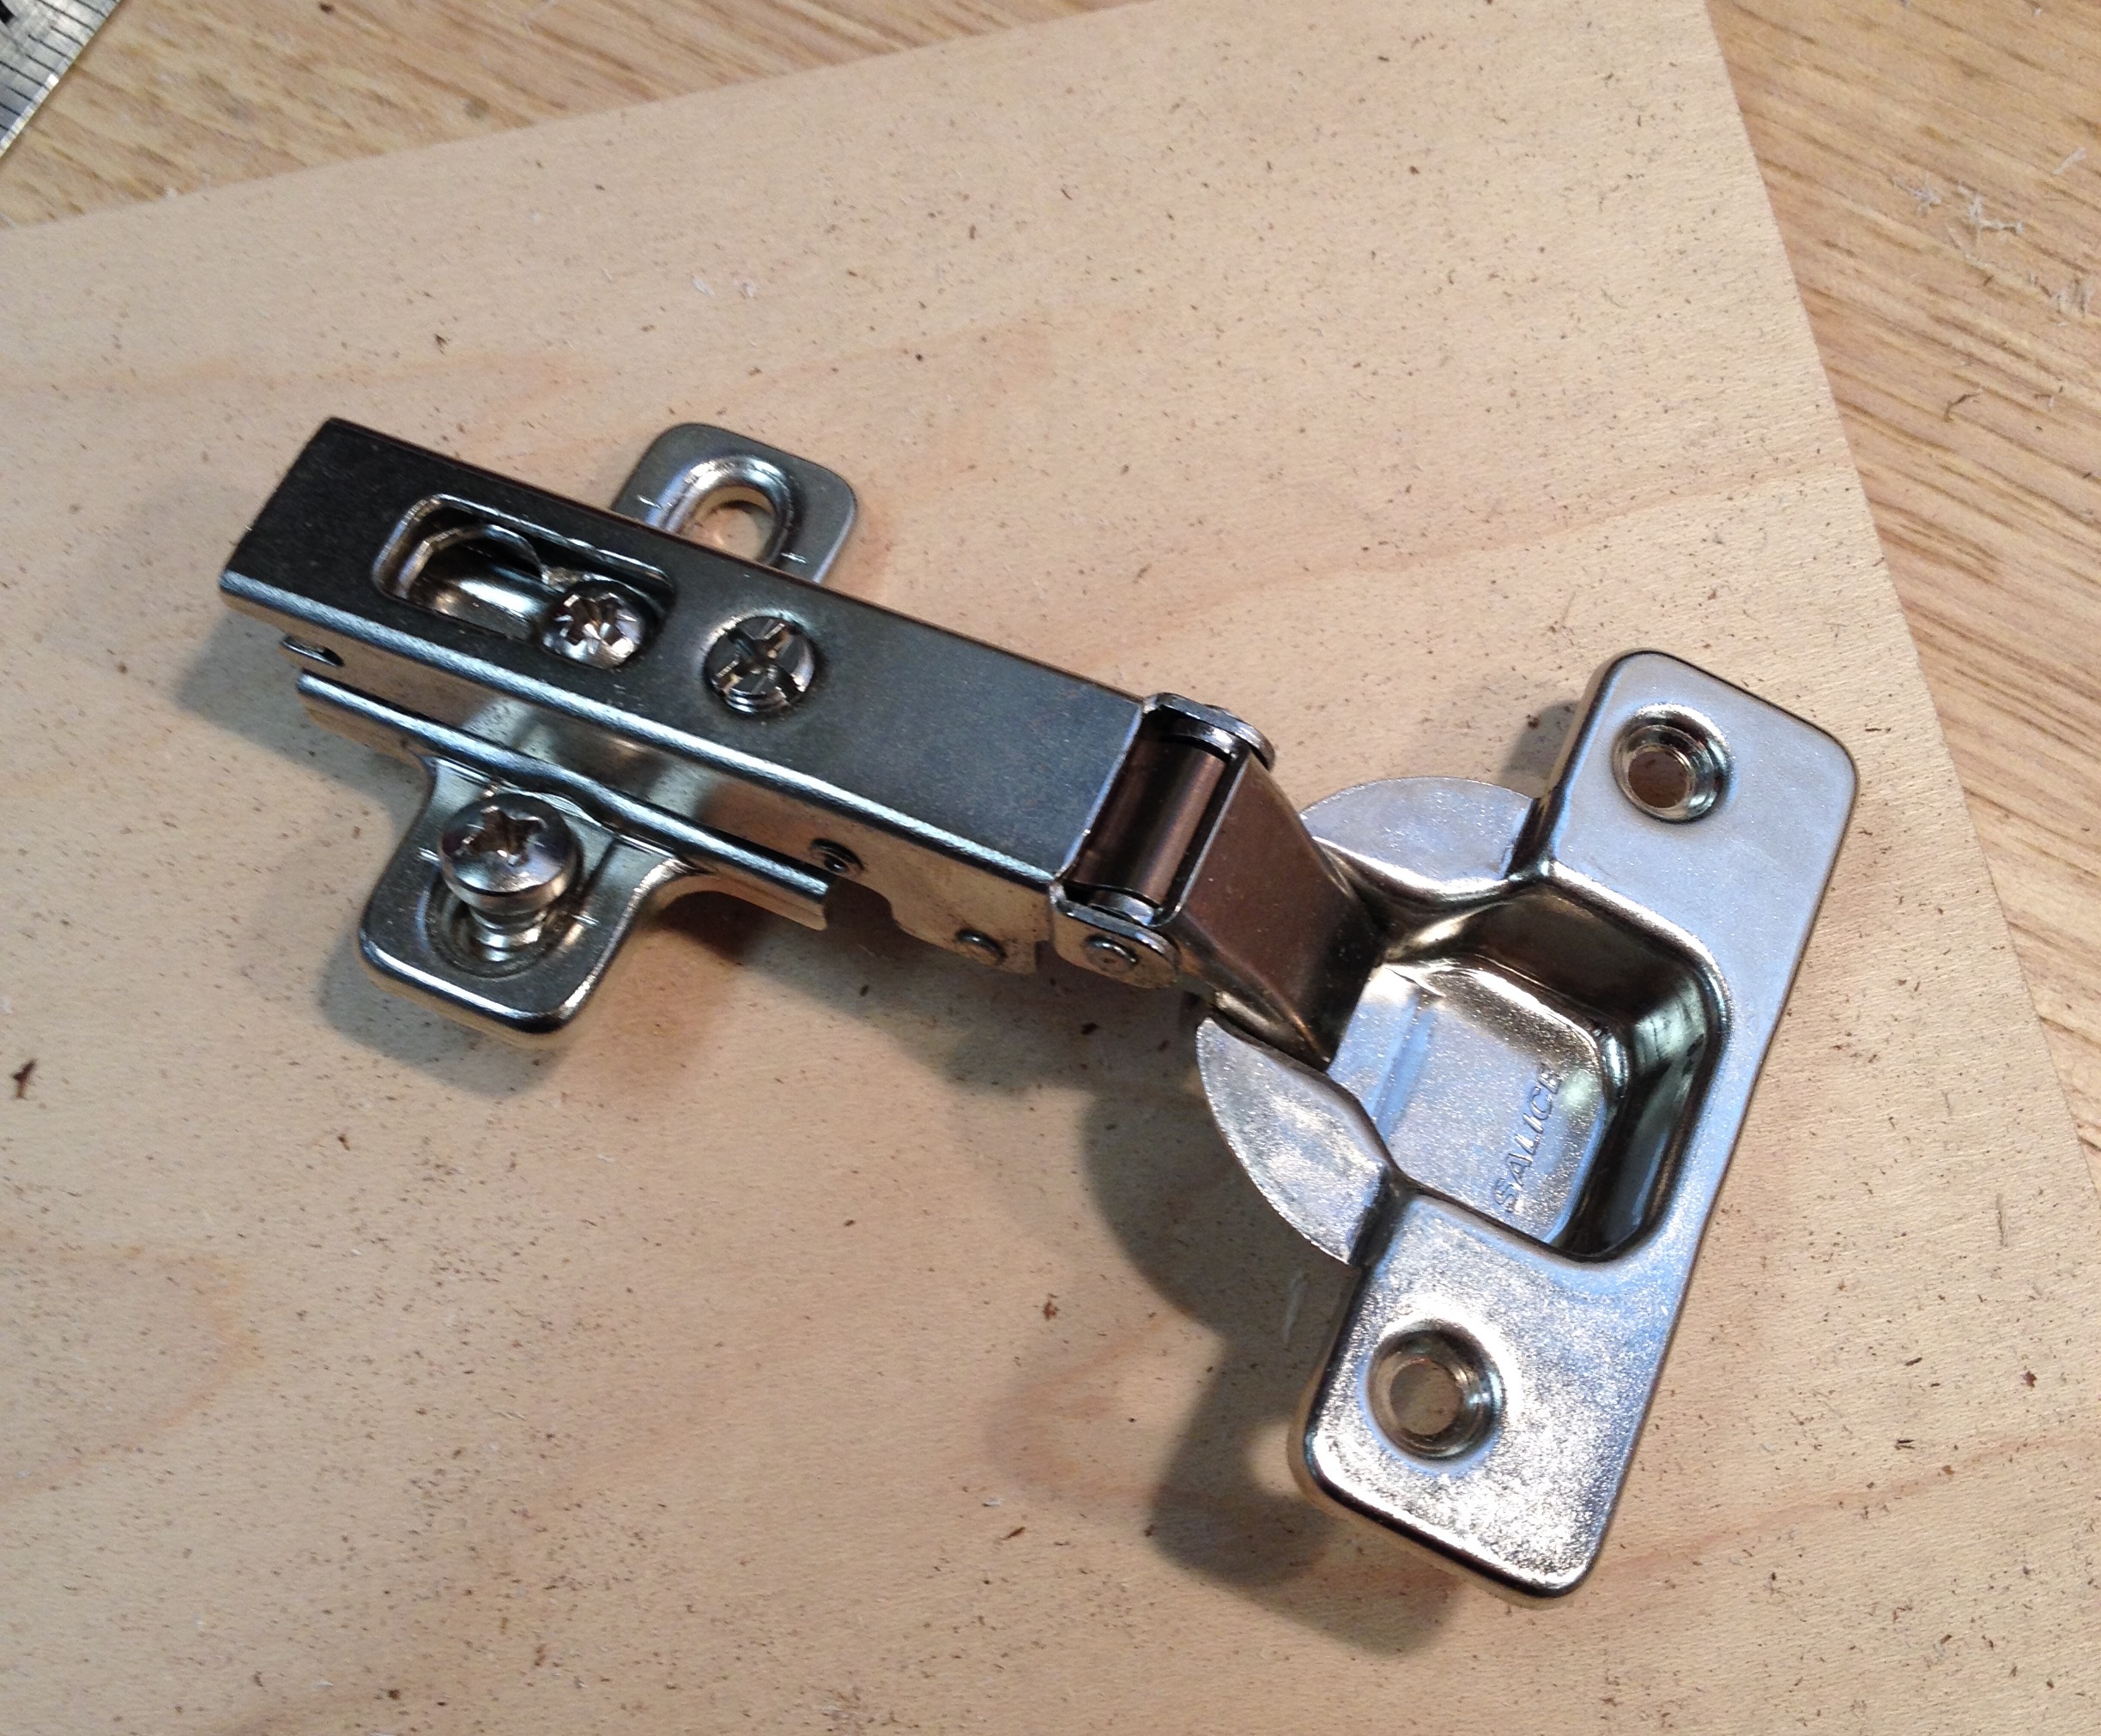
They wouldn’t be visible from the outside. And I could use some sort of push-to-open door magnet hardware so that I wouldn’t even need a knob. That would be the ultimate in door stealth, but I’m not sure that would be appropriate for this piece. You see, this piece will have Victorian-looking drawer pulls, an old-looking zinc top, a punched tin looking door panel, and it will be distressed and made to look “old”. I don’t think modern euro hardware would look right on an “old” piece of furniture.
But I can’t use the standard butt hinges that would be on an “old” piece because of that 3/16″ setback. Either the hinge knuckle wouldn’t clear the leg, or I’d have to mortise the knuckle into the leg (weird). And either way, I’m worried that the door wouldn’t open all the way. One thing I think would work would be to use a pair of no-mortise hinges like these. (Obviously not brass though…)
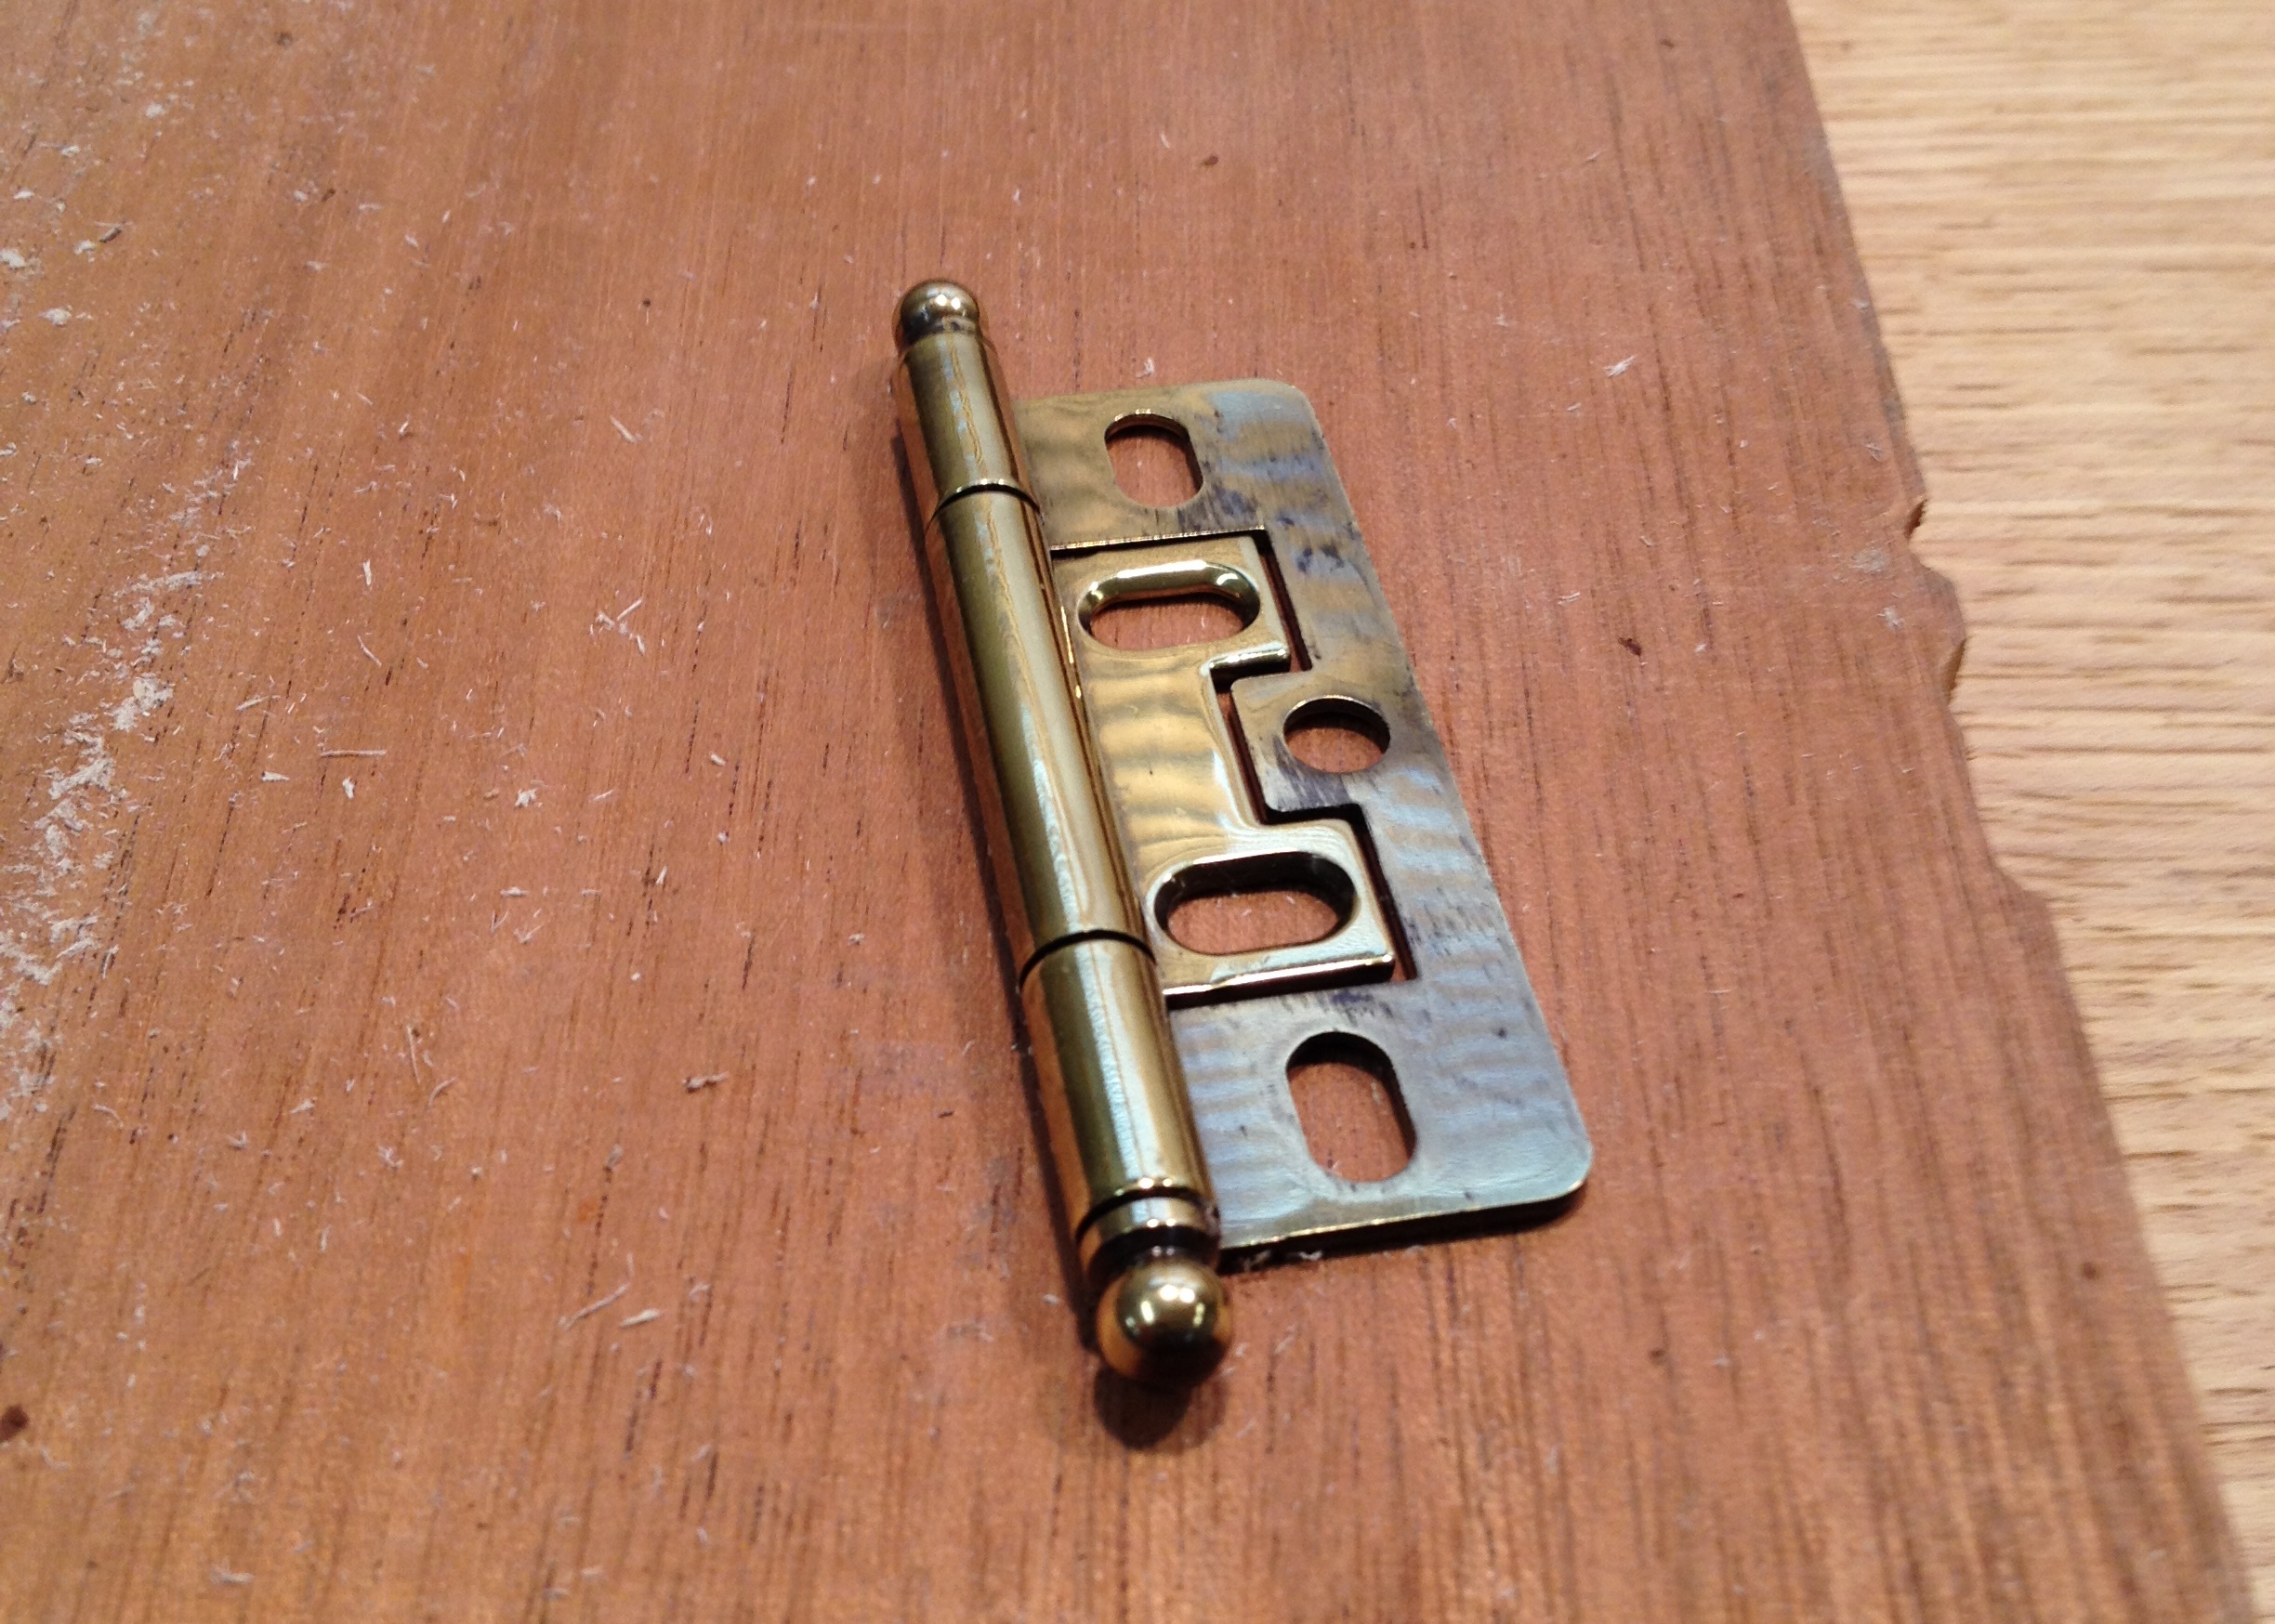
That seems kind of like cheating to me – just screwing on a stamped hinge – but it would at least look correct.
And then there’s the question of which way should the door open? If it opens left or right, that kind of busts up the symmetry (unless I use the invisible euro-hardware). Is that symmetry even important? I don’t know. I could have the door open down and outward. That seems like a recipe for broken toes and banged shins. But with that setup, I could use regular butt hinges. But you wouldn’t be able to get any closer than 14 inches to the front of the cabinet with the door open.
I’ll probably go with the no mortise hinges, this door knob, and a hinges-on-the-left setup. Also, departing from the original sketch, I don’t think I’m going to miter the corners of the door. At least, that’s how I’m leaning right now. If I modify my original sketch, it would look like this.

But if any of you have any other ideas I may not have thought of, please let me know in the comments.
I did some actual work
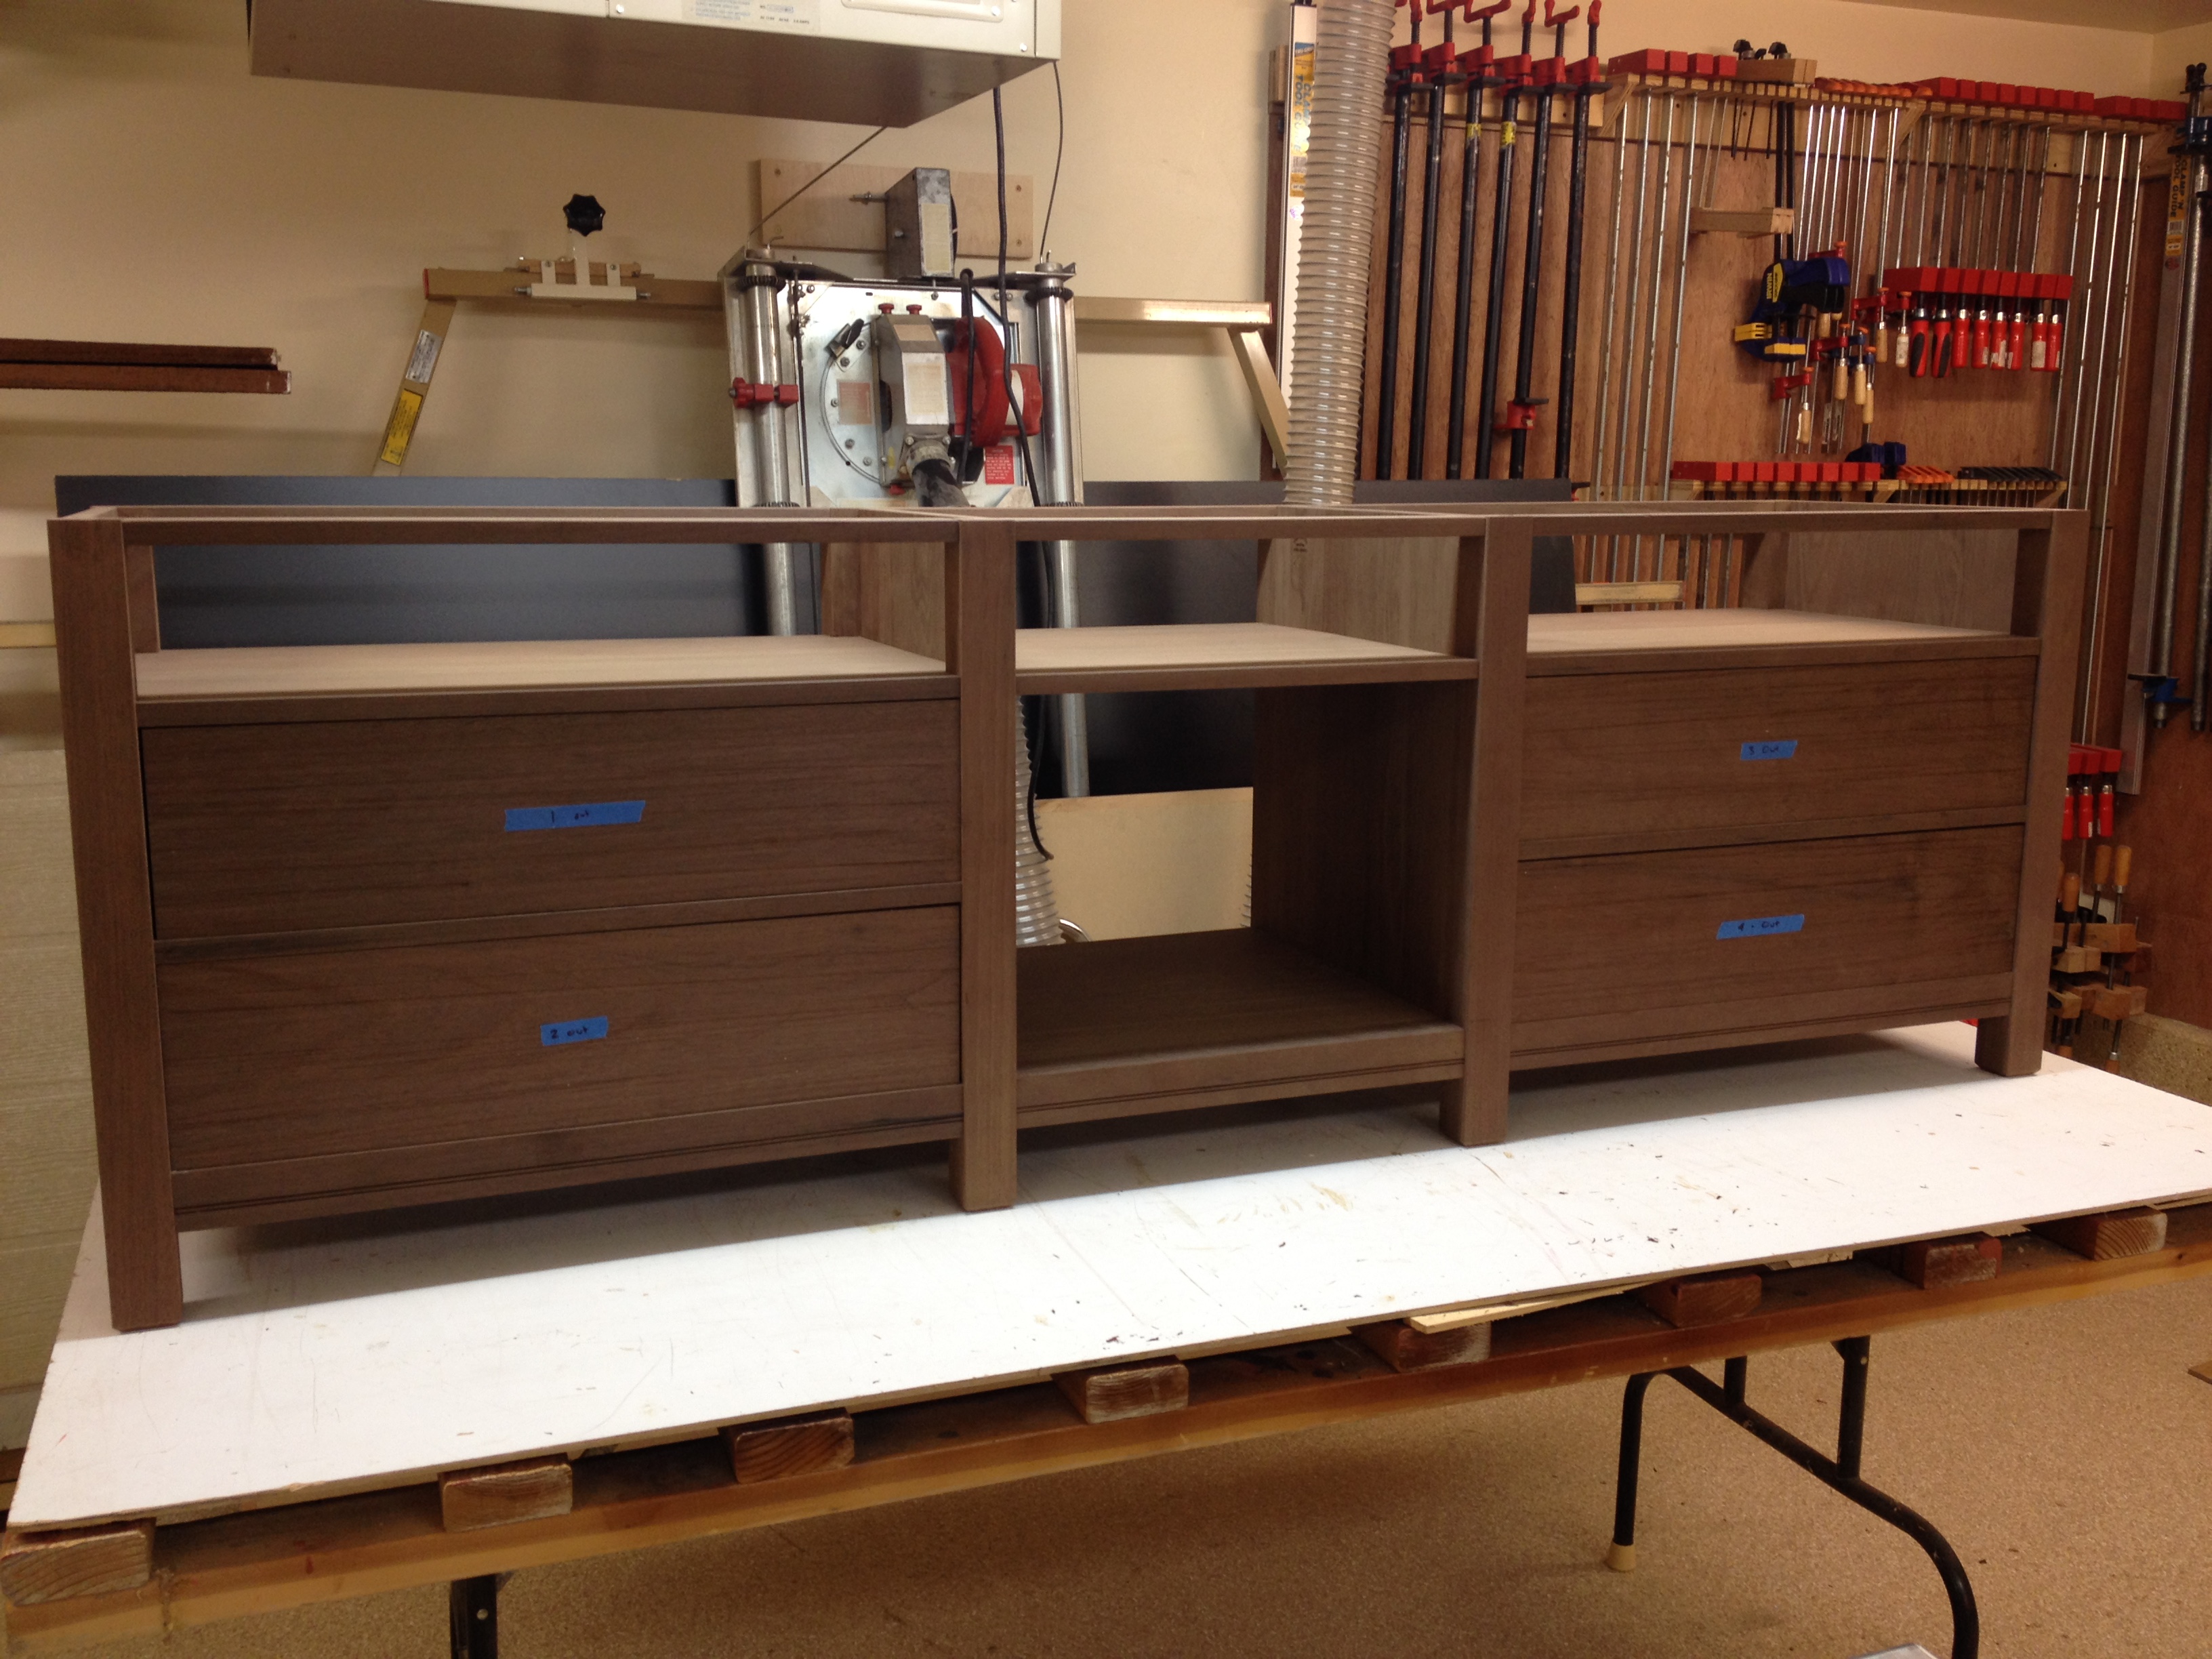
In addition to fretting and indecision, I did some actual work this week on the drawers. I’m happy to announce that I’ve got the hard parts of the drawer boxes complete, and here they are sitting in the cabinet.
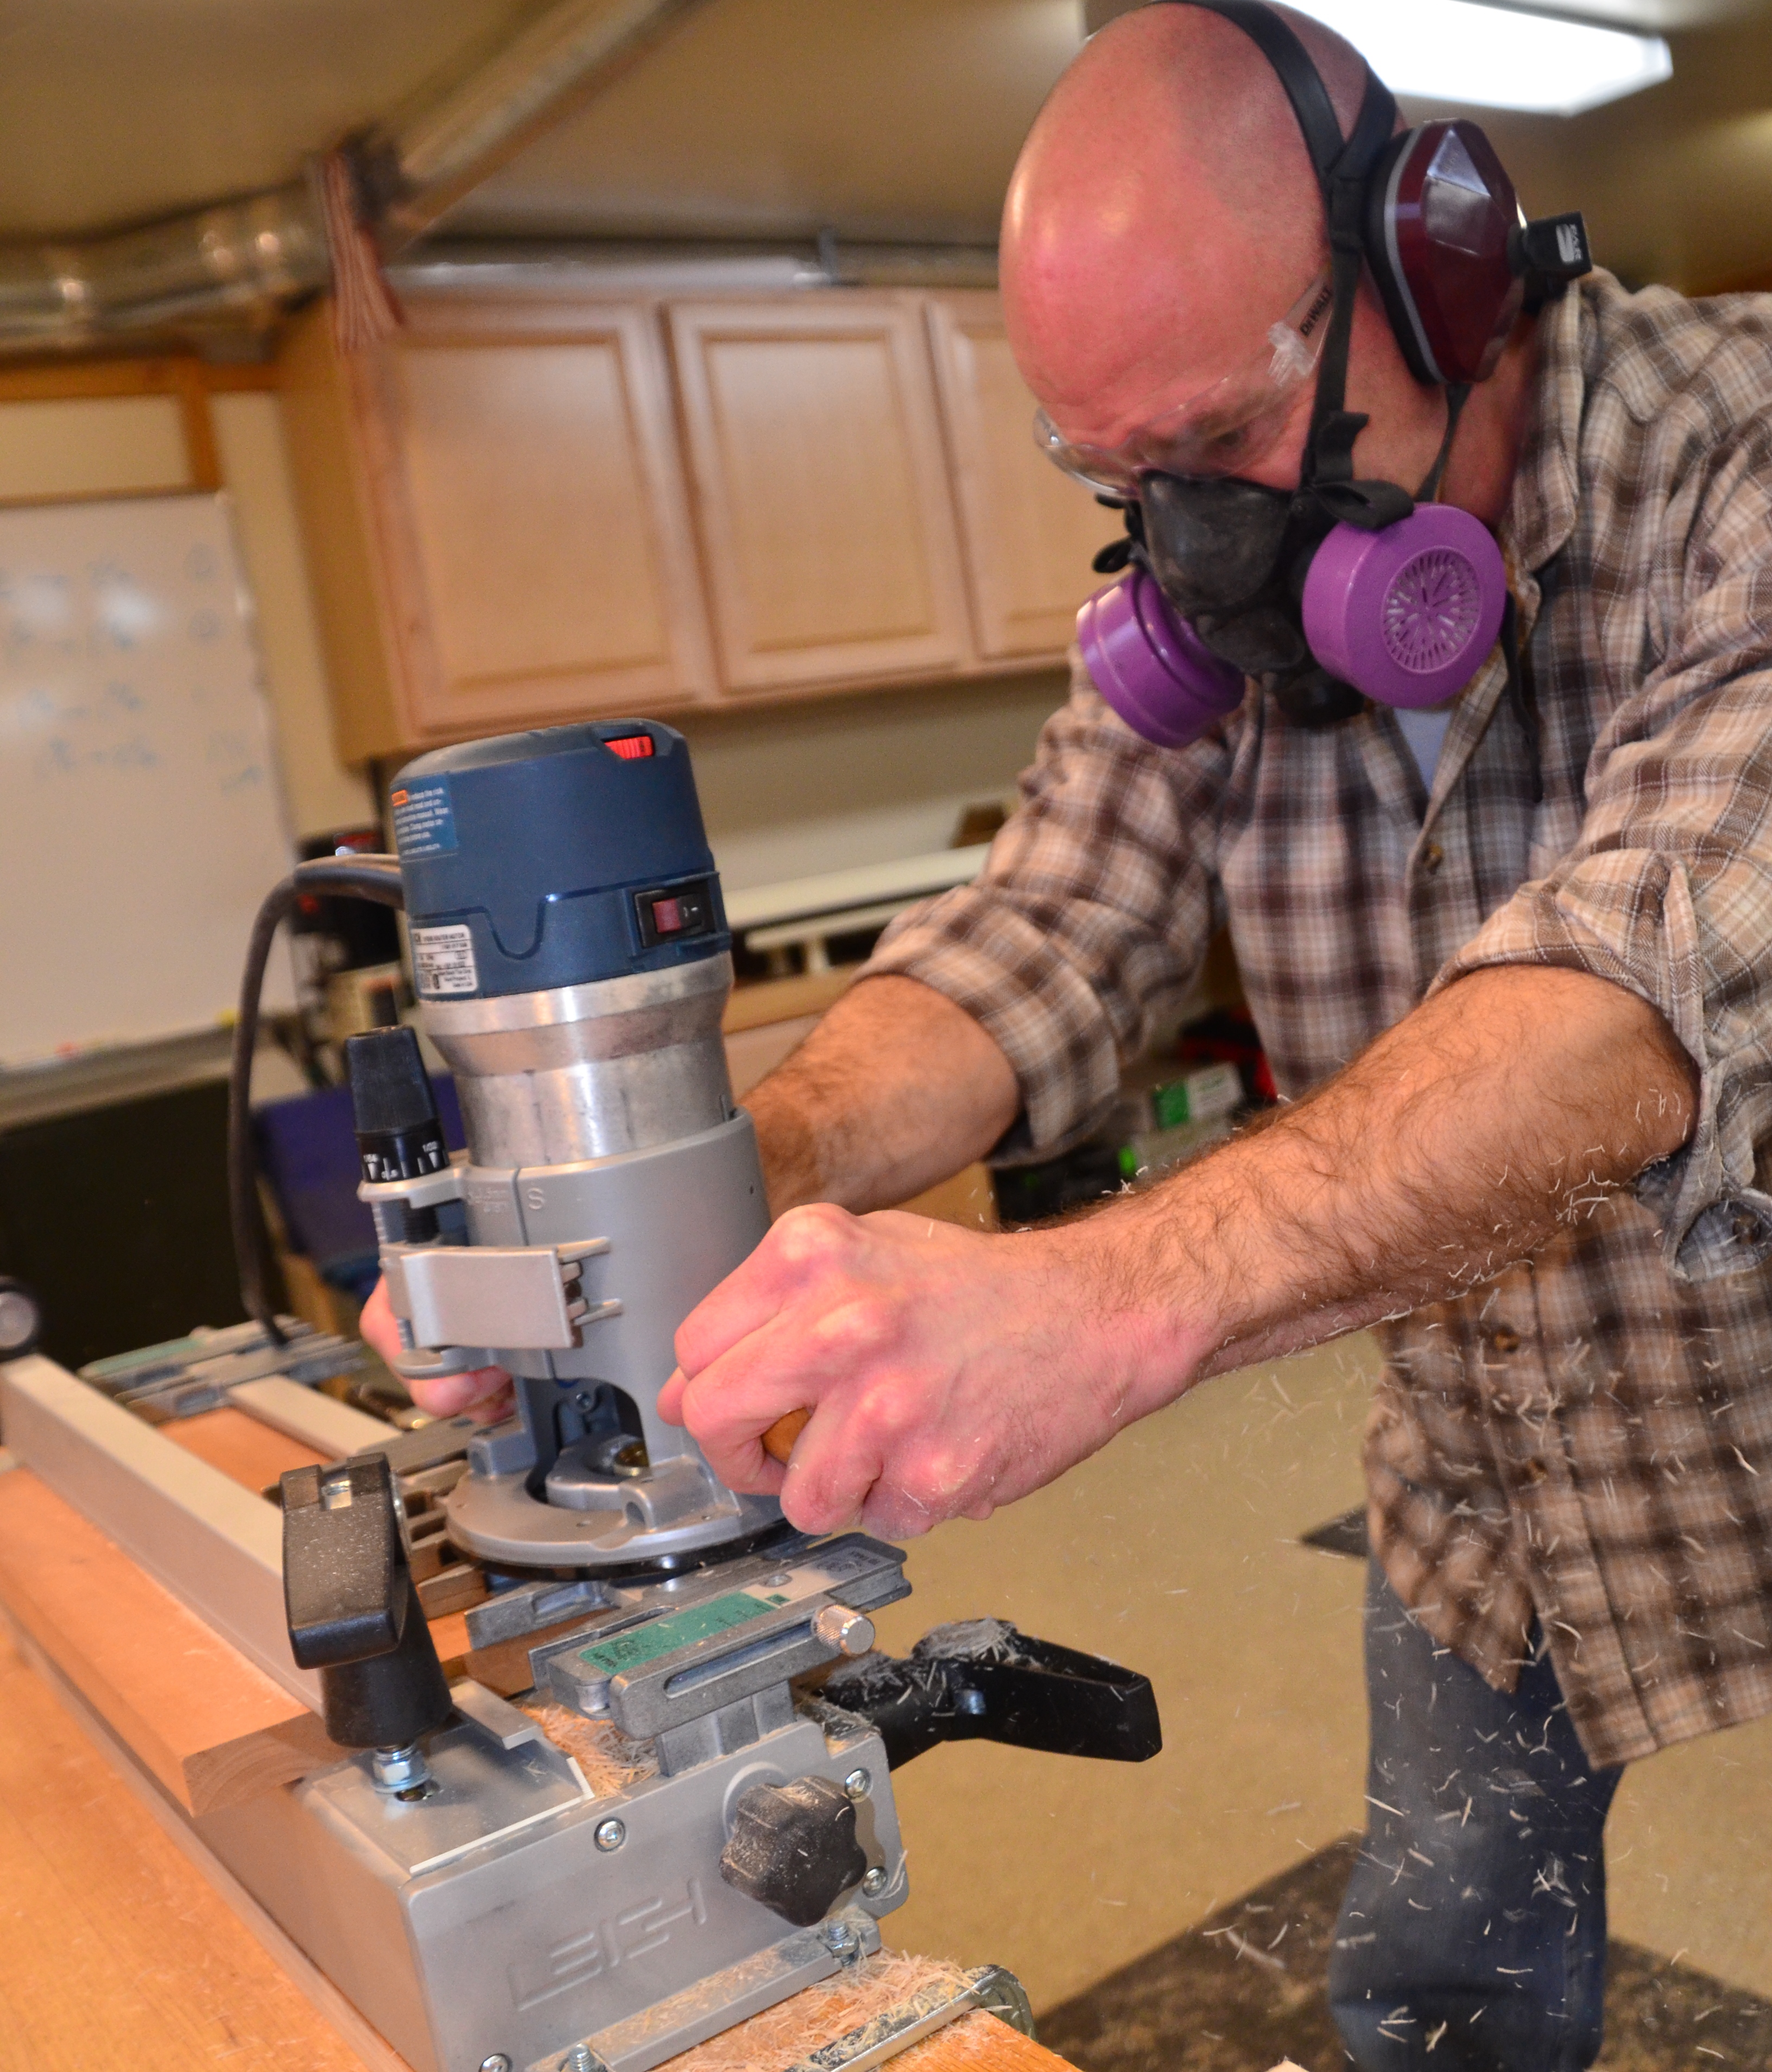
Earlier in the project, I waxed poetic about the virtues of hand-cut dovetails. And that’s great when I need to cut one or two. But when I need to cut four corners of four drawers with five to seven pins and tails each… well I know when I’m beaten. For this task, I turned to a router dovetail jig (and we all know I hate routers). My jig is a Leigh – which is a good quality jig. But it’s fussy, and I don’t use it often enough to do things by memory. This means I have to read the entire hundred page manual and burn through multiple test-pieces each time I want to use the thing. It takes me hours and hours to use the jig. The good news is that it makes for really spectacular pictures while it’s in use. Like this one:

The picture is cool, but what’s not cool is that it’s a router. It’s incredibly loud. It throws crap everywhere. It makes a lot of dust. So if you’re smart, you wear eye protection, ear protection, and lung protection. This is what I look like using this jig.

Somehow, Stef finds this attractive.
It gets pretty hot and stuffy under all that protection. And since I have to make multiple setups and adjustments, I took it off and put it on about 1400 times while making these drawers. Routers. Ugh.
So to sum up, this week in the shop, there was a lot of this
A whole barrel full of this
 And at the end of it all four sets of tight fitting dovetails holding the drawers together. Miraculously, I did not mis-cut a single piece in making all the dovetails. (I usually cut into the wrong end or side of a board at least once when I do this.) I used through dovetails on the back

And half blind dovetails on the front
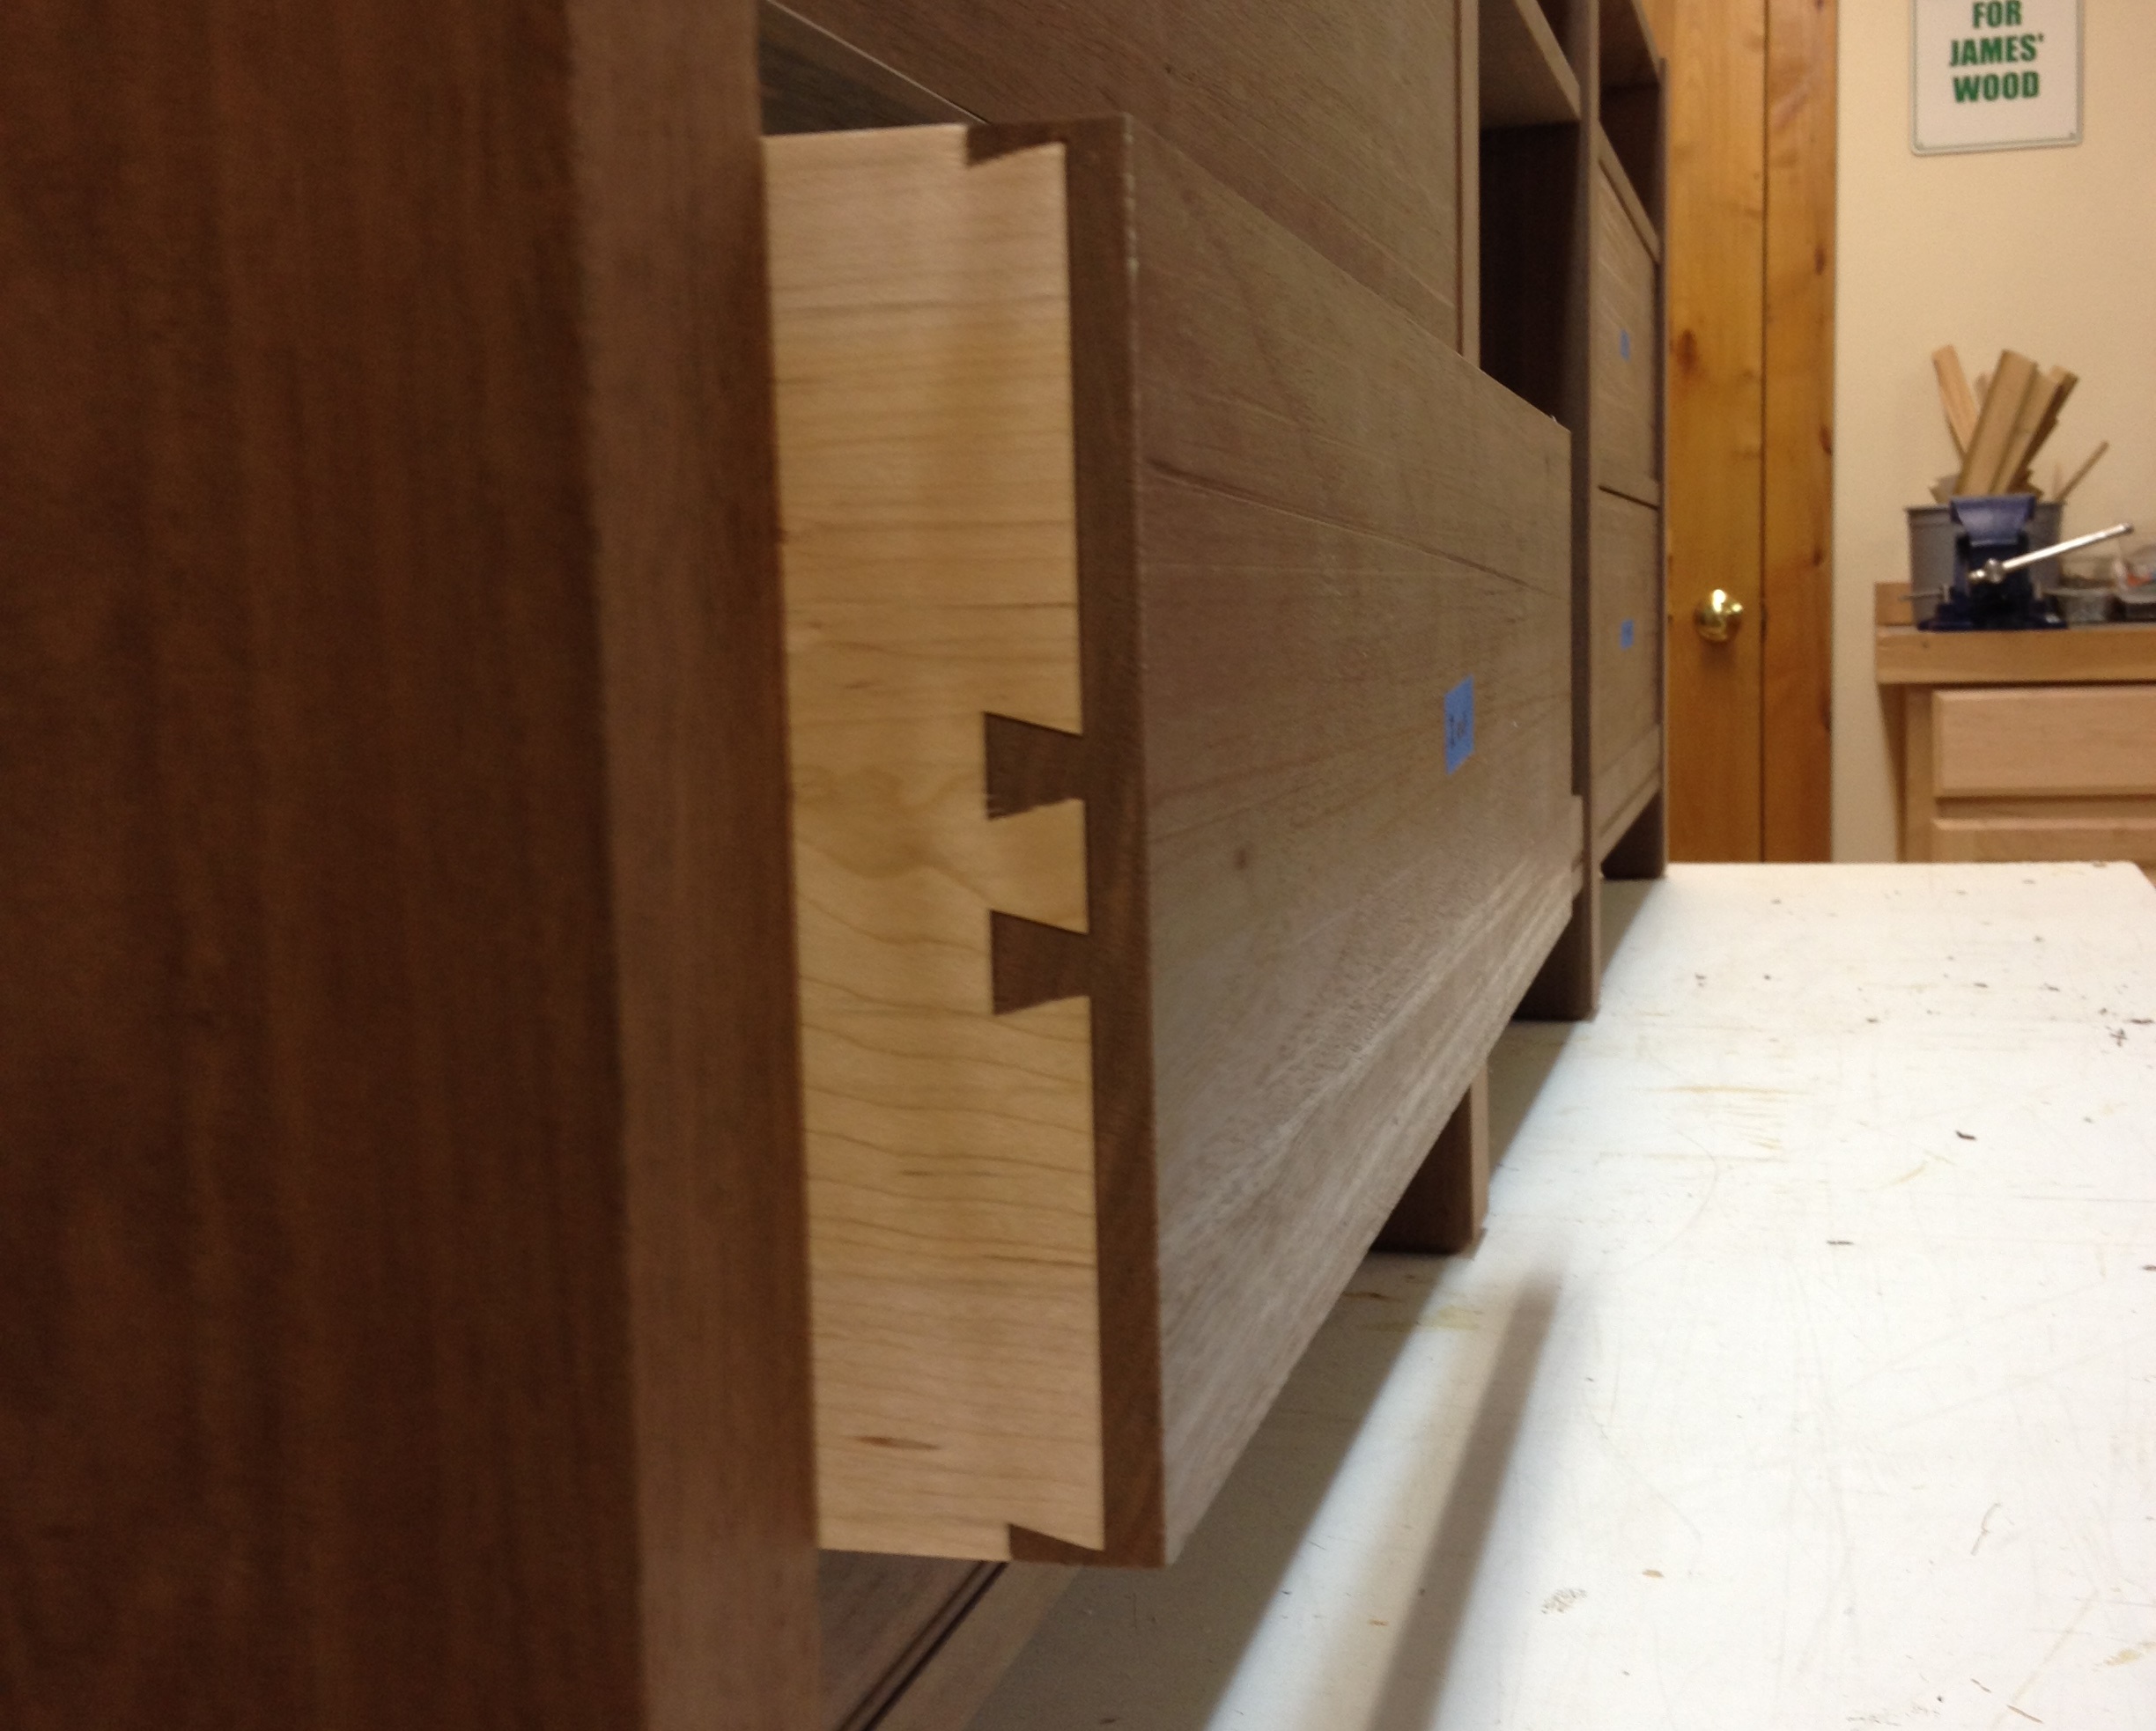
I’m actually a little worried about those tiny half-pins on the ends of the half blind dovetails. I wanted them small so that the grooves for the drawer bottoms would fall into the tails and you wouldn’t see them from the outside. I accomplished that. They should be fine once the drawers are glued up… I’m just worried that I’ll snap one of them off during a test-fit.
And speaking of the drawer bottoms – I still have to cut those. I had thought, in error, that I had some appropriate plywood lying around for the drawer bottoms. I have quarter inch maple, and walnut – but not enough of any one kind to make all the drawer bottoms. I do have enough cherry – but that would look just wrong. So this week will entail yet another trip to the lumber yard; to buy a sheet of plywood that I’ll use one third of; which will leave me two thirds of a sheet to add to my ever-growing stash; which somehow won’t be enough for the next project where I need it.
And now, for something completely different
On an unrelated note – we went snowshoeing this past weekend with brother-in-law Joe, where we stumbled across what looked to be the Griswold Family Christmas Tree.

Bye for now!


Hey you two, hope all’s well.Thanks for the speedy reply to my question about compartment door gas strut installation, James. I just need to know how to figure out the anchor spots and length of the struts There must be a ratio formula or rule of thumb somewhere.
Thanks again,
Mike
I’d suggest buying the struts first. Mine came with detailed drawings and instructions. I suspect they’re different for each potential strut.
You might try Lee Valley – they try to put instructions for a lot of their hardware online so you can check it out first and see if it will work for you.
Got a new comment via email from Bonnie who says:
“I say, hidden hinges and then use one of those “pop latches”. The kind where you depress it and it releases. So no hardware. It will look like a decorative panel.”
Which I’ll interpret as a vote for my original sketch (minus the miters).
This is kinda out of the box- so to speak- but what about something like this-
http://www.richelieu.com/us/en/category/hinges-slides-and-opening-systems/opening-systems/vertical-opening-systems/parallel-lift-up-door/lift-system-for-retractable-door/1033301
Or even something that opens vertically and slides back across the inside top of your cabinet box- like a garage door.
I think it would be a cool departure from traditional cabinet hinge setups.
Holy Coolness! That is one tricked-out door hinge. It won’t work on this cabinet though, because I don’t have the room inside to mount those brackets it requires. The inside of that center cabinet is exactly the width of rack-mount gear, and the rack rails I have fit the height exactly (8 RU). I would have to set the rails too far back to fit those – or cut the rails shorter – but I need the 8 spaces.
Still – that’s an awesome idea for cabinet doors. I think that would come in super handy inside an RV! Often, especially in a class B, there’s just not room to swing open a door. Those would solve the problem nicely. Totally bookmarking that one.
And I had considered the “garage door” approach. Something like the “barrister’s bookcase”. But again, I need all that space inside and can’t spare it to store the lid.
But a big thanks for that hardware link!
How about a knife hinge? nicely hidden and won’t cause any clearance issues. Mortising it on a fully assembled case might mean a very careful chisel work though.
Now THAT’s something I hadn’t thought of! Something like these, from Lee Valley. Of course, they’re thirty dollars a pair, but still. that might be the ticket. And yeah – careful chisel work… Thanks for the suggestion!
Man that is looking nice! I like the way you have it sketched. For something centered like that my eye prefers the right to left opening like you have it sketched but it could also depend on the positioning of the piece in the room.
Based on the clean design of the drawers a hidden hinge might be nice with only the handle visible.
Whatever you decide I’m sure it’ll be awesome!
The piece will be fairly accessible on all sides except the back. A door opening either way would work, but like you, it looks better to me opening right to left.
I agree with your choice not to miter the corners of the door. The lines are certainly more consistent without them. Have a launch date in mind?
Have a black piano hinge of some sort on the bottom of the door and let the door open from top to bottom with cabinet struts on either side. No door handle required as you could put a spring loaded magnetic catch on top. Just my opinion. Great job, BTW
If I’m picturing that correctly, it’s sort of a “drawbridge” approach, huh? I did use gas struts in the RV cabinets. I don’t see why they wouldn’t work upside down. That would save the toes & shins.
Thanks for chiming in!
I know this is off subject, but, my 14j Navion does not have gas struts to hold open the storage compartment doors that open vertically. (hit u in the head type). Have you discussed these type of installations on your (very informative) site)? Thanks James & Stef.
Mike
We haven’t specifically addressed that before, but I know what you mean. Normally when they give you vertically opening storage compartments, they give you those little plastic clippy things to hold them open. That never seemed like a great idea to me because those clips seem pretty fragile.
Adding the gas struts shouldn’t be that hard. The biggest thing you would have to overcome is how to attach them securely enough that operating the door doesn’t tear out screws. The solution would vary based on what the door and wall were made of, if there was a secure point to attach something, etc. I’d have to see it in person to have a better suggestion for you.