This post may contain affiliate links.
Well, it’s been a few weeks since I’ve been able to get into the shop, but I finally broke that streak and the entertainment center is slightly closer to completion. Here’s what happened, and why my shop is too small.
Having now basically completed the cabinet, I’m working on the top. When completed, the top will have a three inch wide frame of Peruvian Walnut surrounding a zinc panel. The substrate for the panel will be just plywood, but the frame is solid wood so that’s where I started. But here’s the thing… This top is LARGE. It’s roughly seven feet long by two feet wide. The two feet isn’t a problem, but the seven foot dimension caused me all sorts of problems building it. This is why I need a bigger shop, with a bigger assembly table, bigger workbench, bigger router table, and bigger clamps. I’ve been trying to sell Stef on the whole “bigger shop” idea, but I’m not getting very far.
I think she’s afraid if I get a bigger shop, I’ll try to build an RV in it… (Hey! I mentioned RVs again!)
But back to this titanic frame. After I milled the stock to thickness and width, I set about getting some beading into the frame. This was done to match the other similar pieces I’ve already got in the family room. To put the beading onto the frame, I turned again to my Lie Nielsen Bronze beading tool. If you remember from before, this tool works by basically scratching the shape you want into the wood. That’s fine for a couple feet or so, but to make this frame, I needed over 18 linear feet of the stuff! This was a long long day of scraping and scratching this profile into the wood.
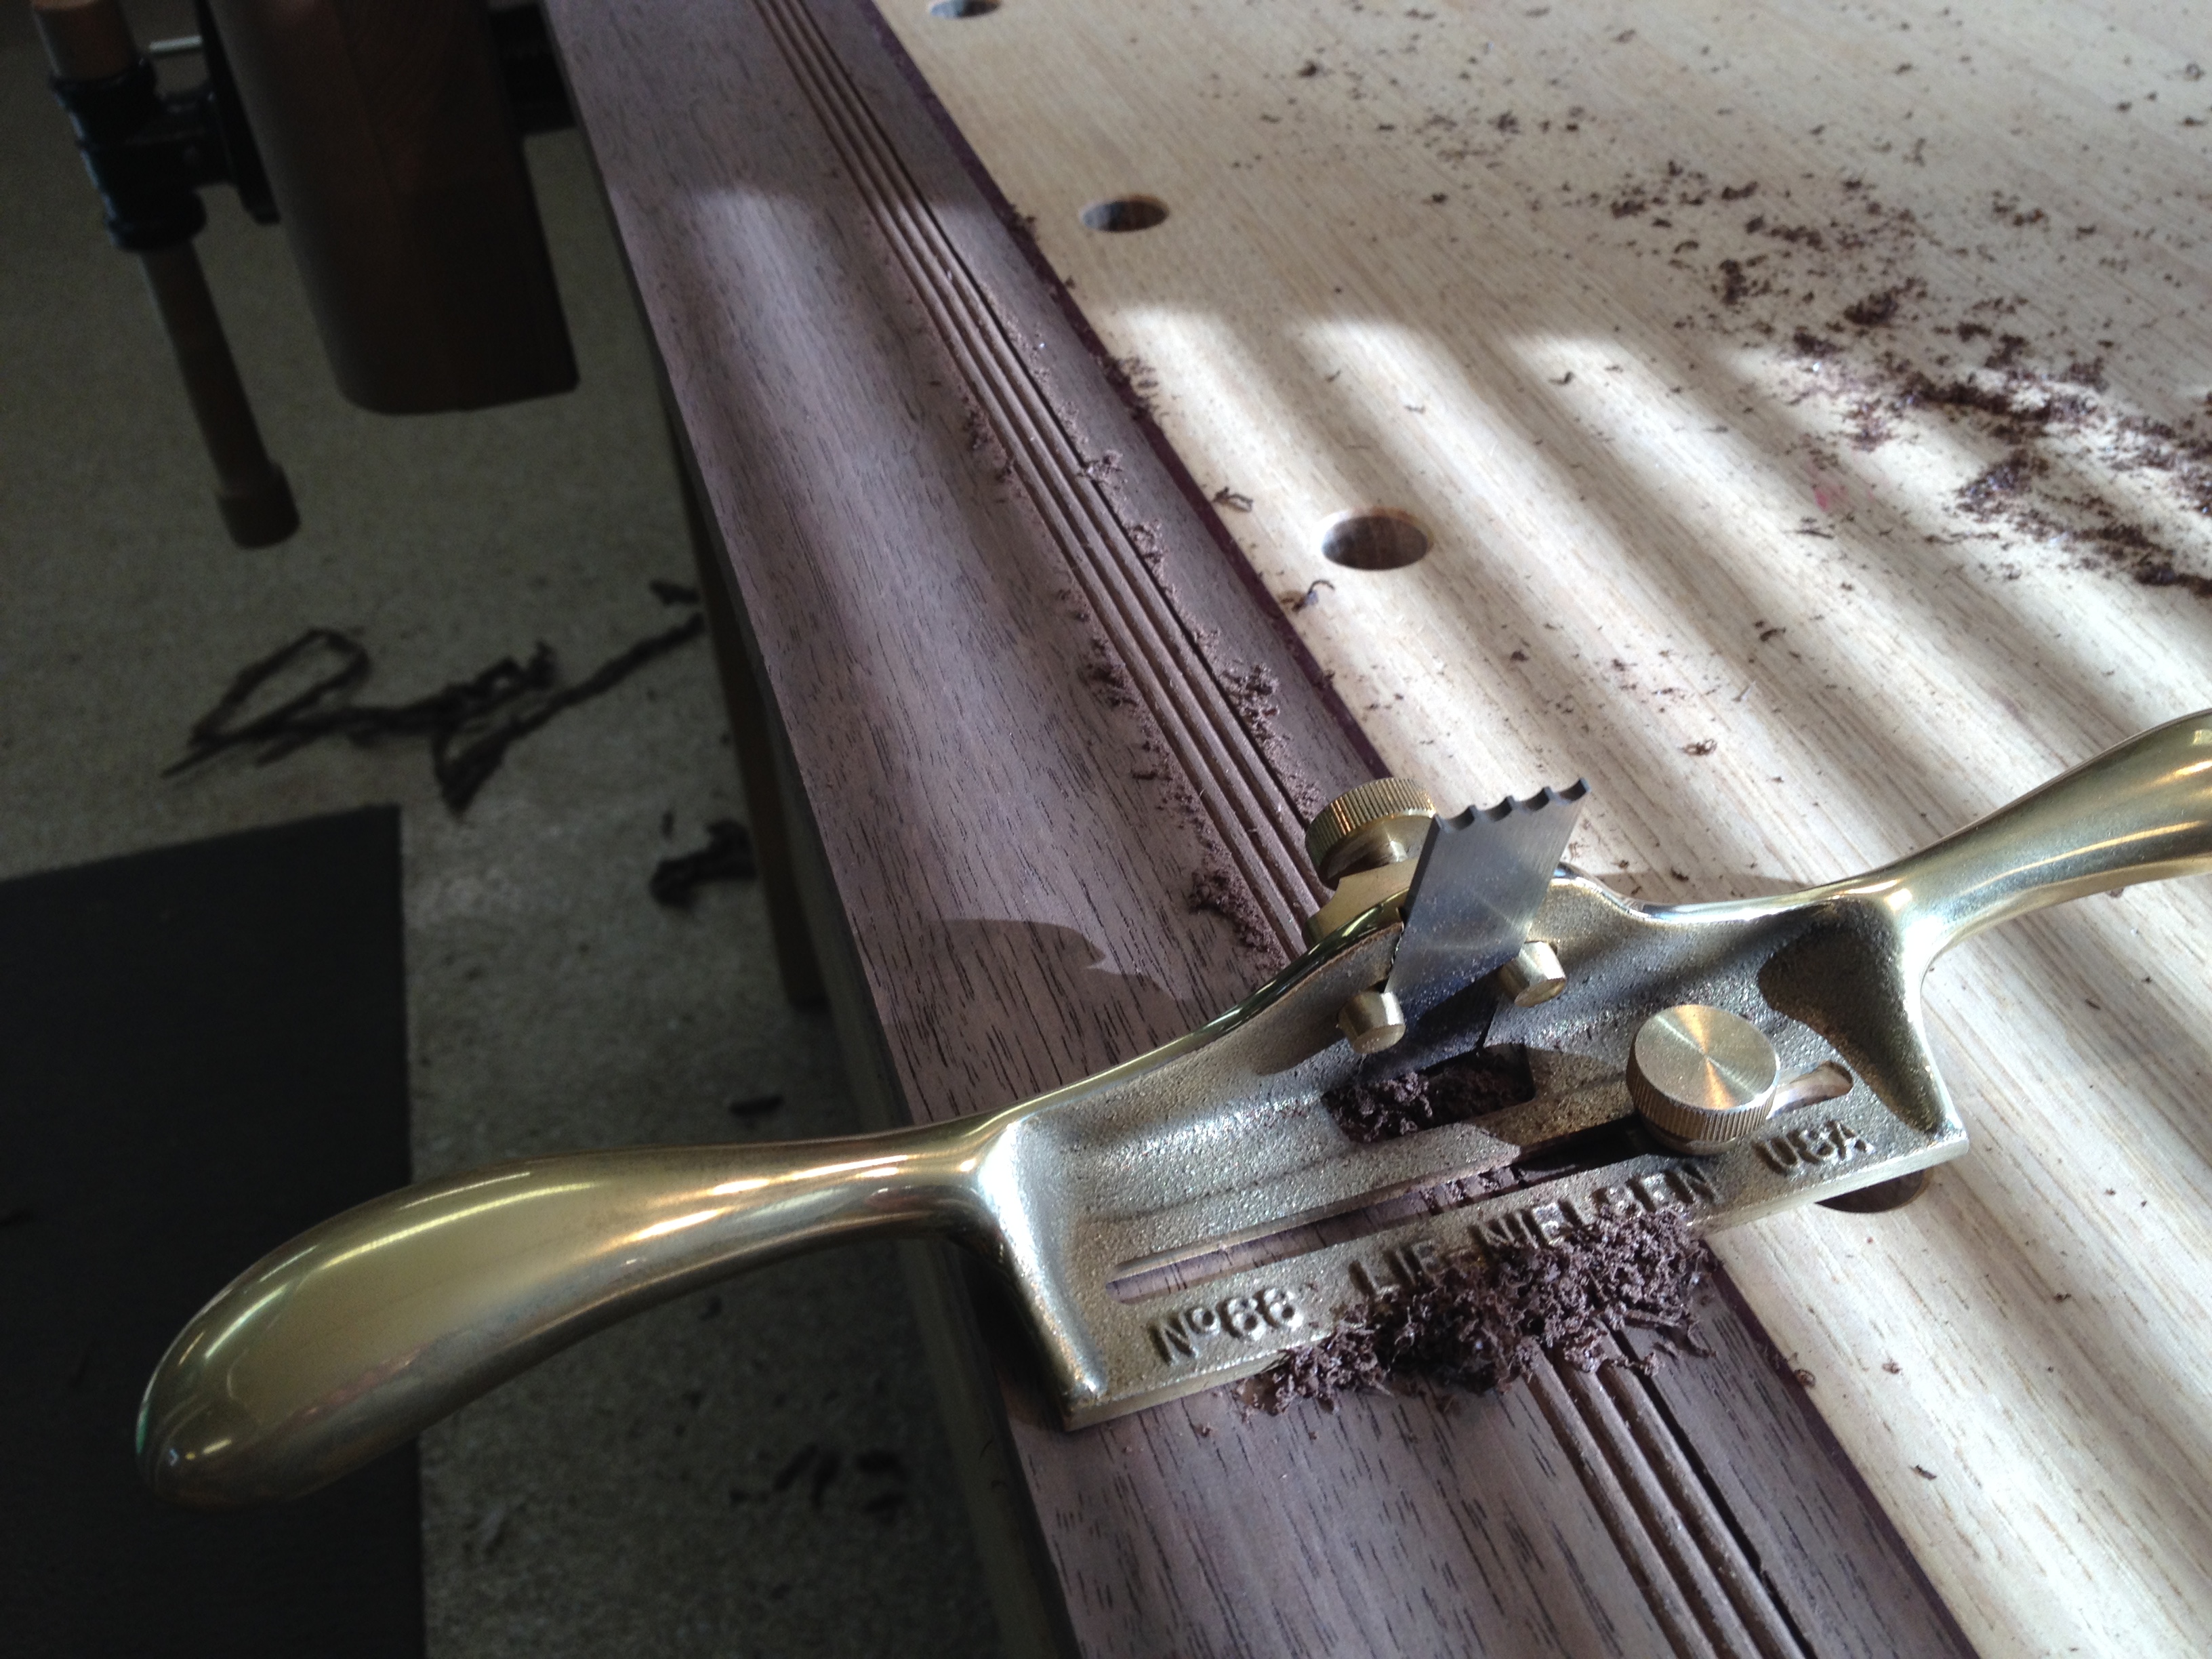
My bench is only about 6 feet long, so even clamping these long pieces to work on them was difficult.
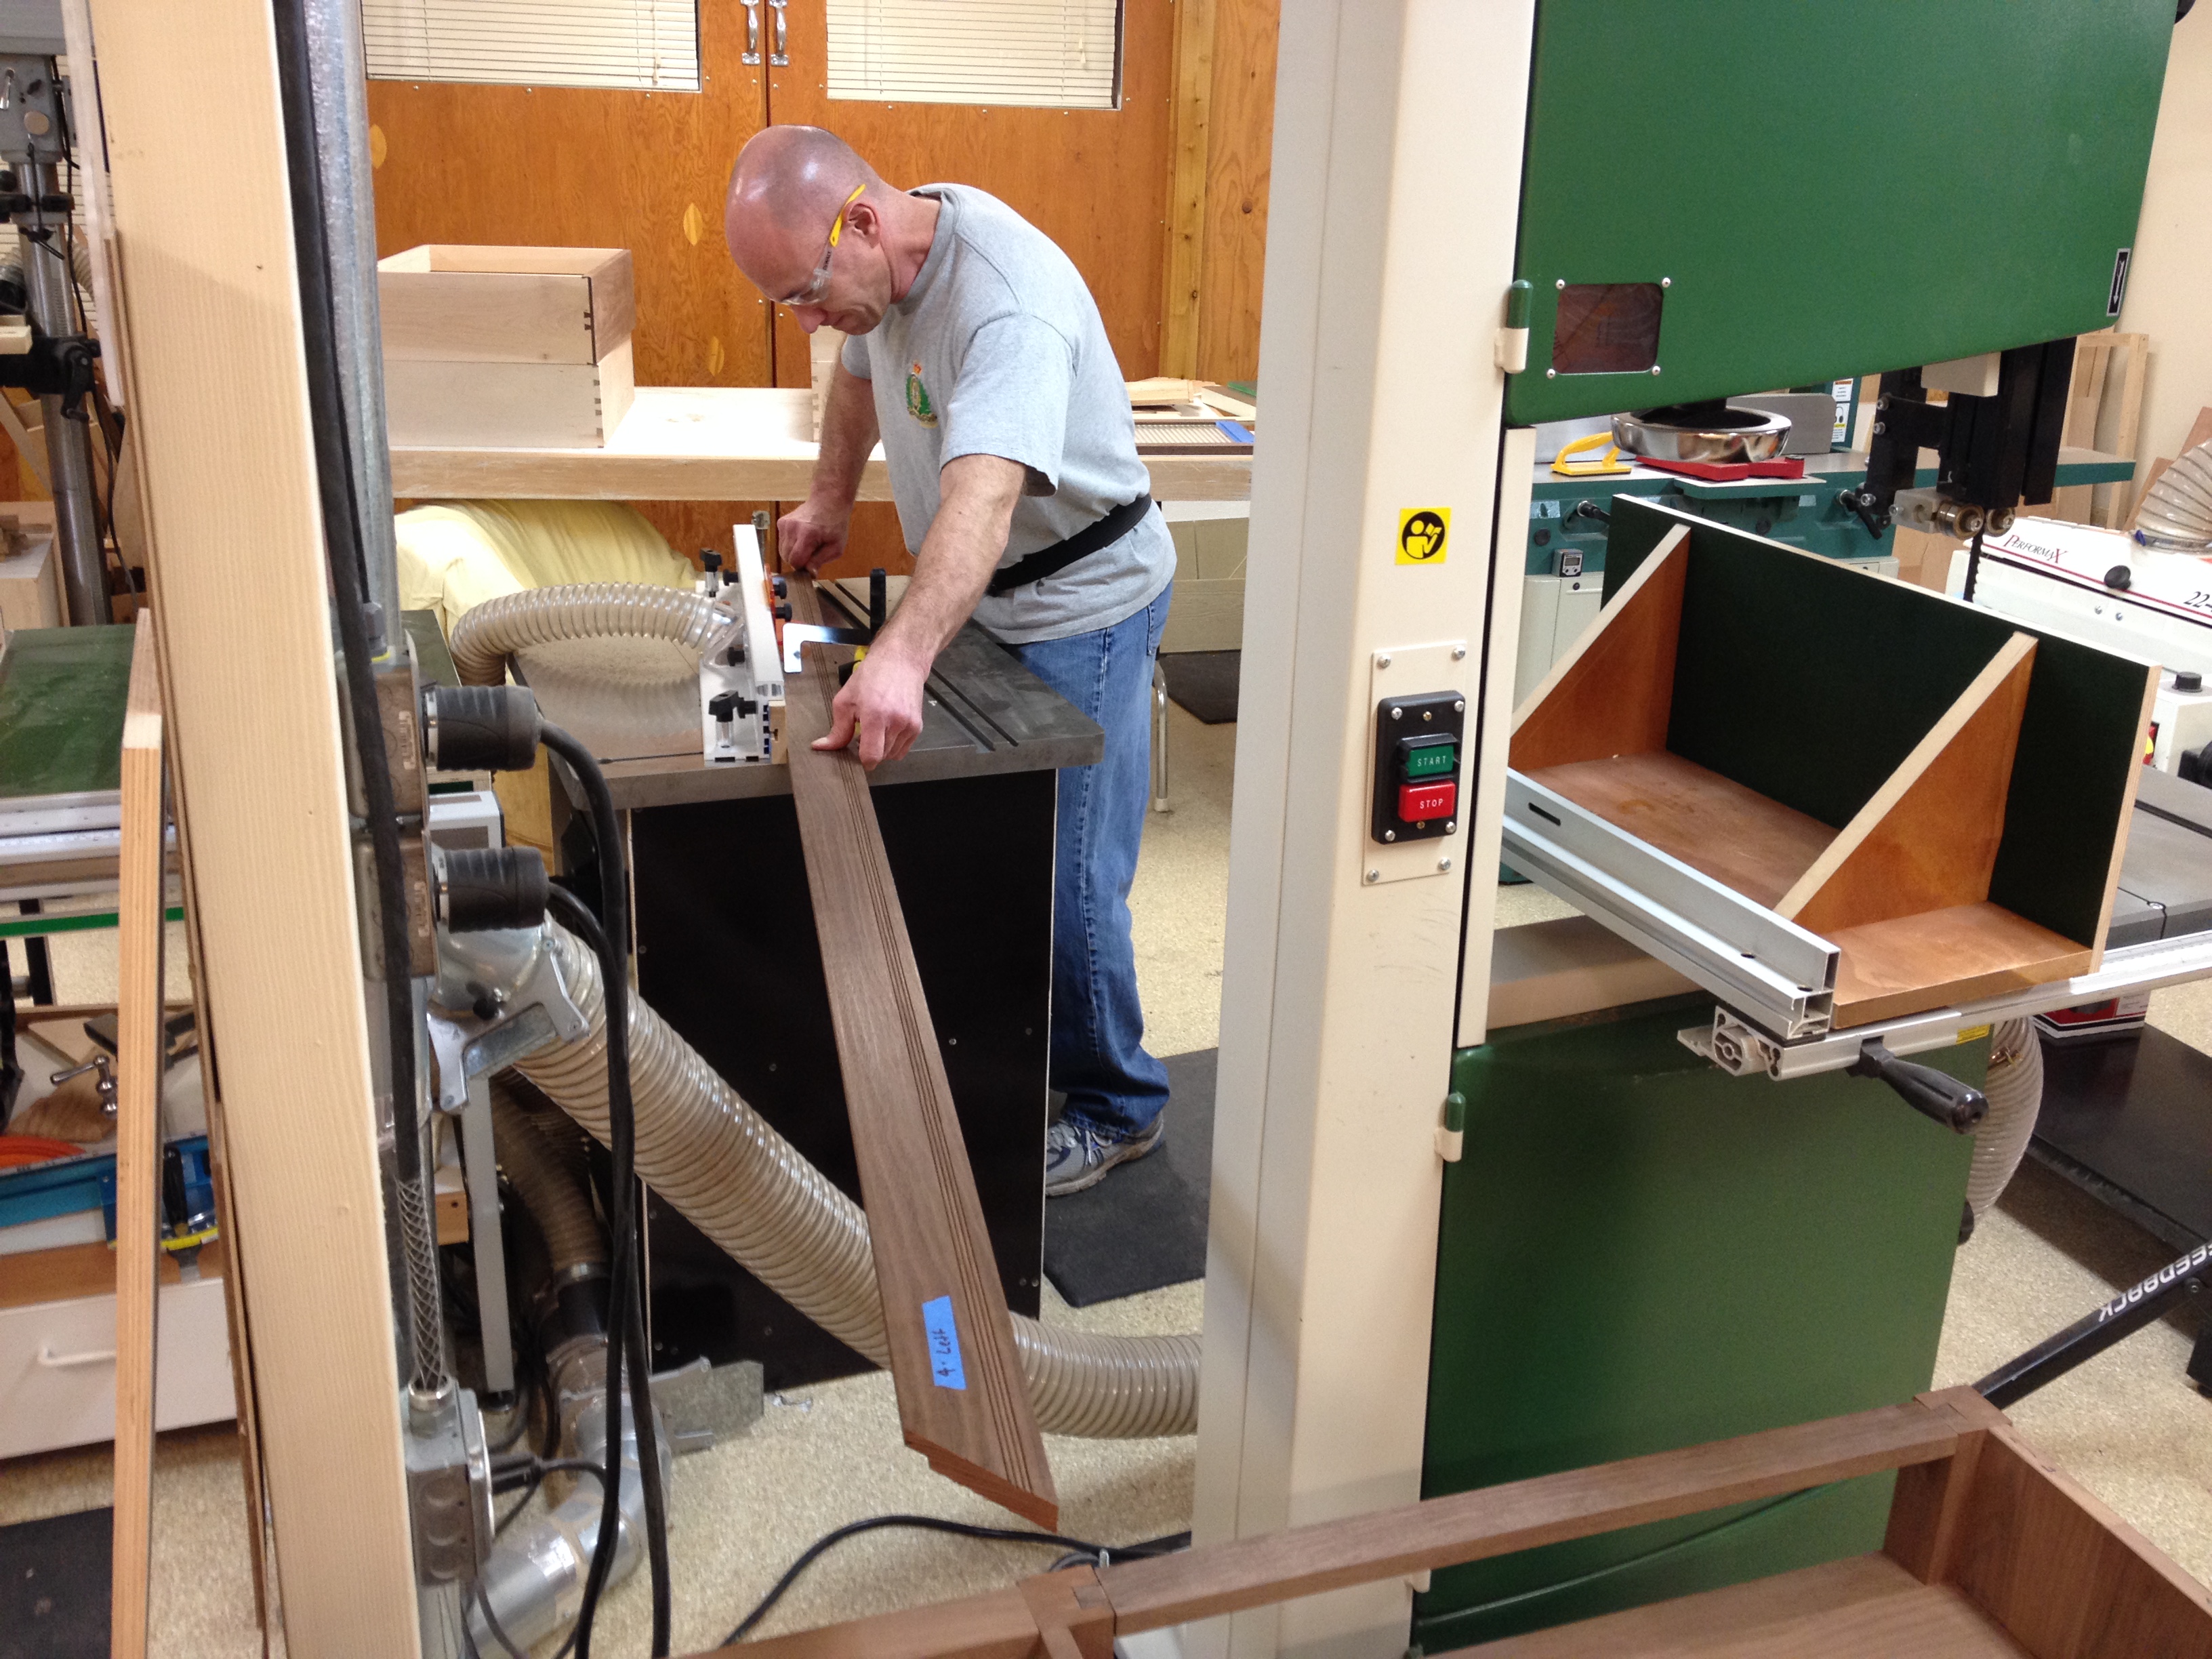
Then, it was on to cutting miters. I do have a miter saw, but you can’t really use that for furniture. Yes, it works for cutting 45 degree angles on crown molding and such. But those are situations where you’re filling gaps with caulk and then painting over them. A miter saw, even a good one, doesn’t really produce gap-free miters on furniture. To get the accuracy needed for furniture, I built a jig to use on my table saw.
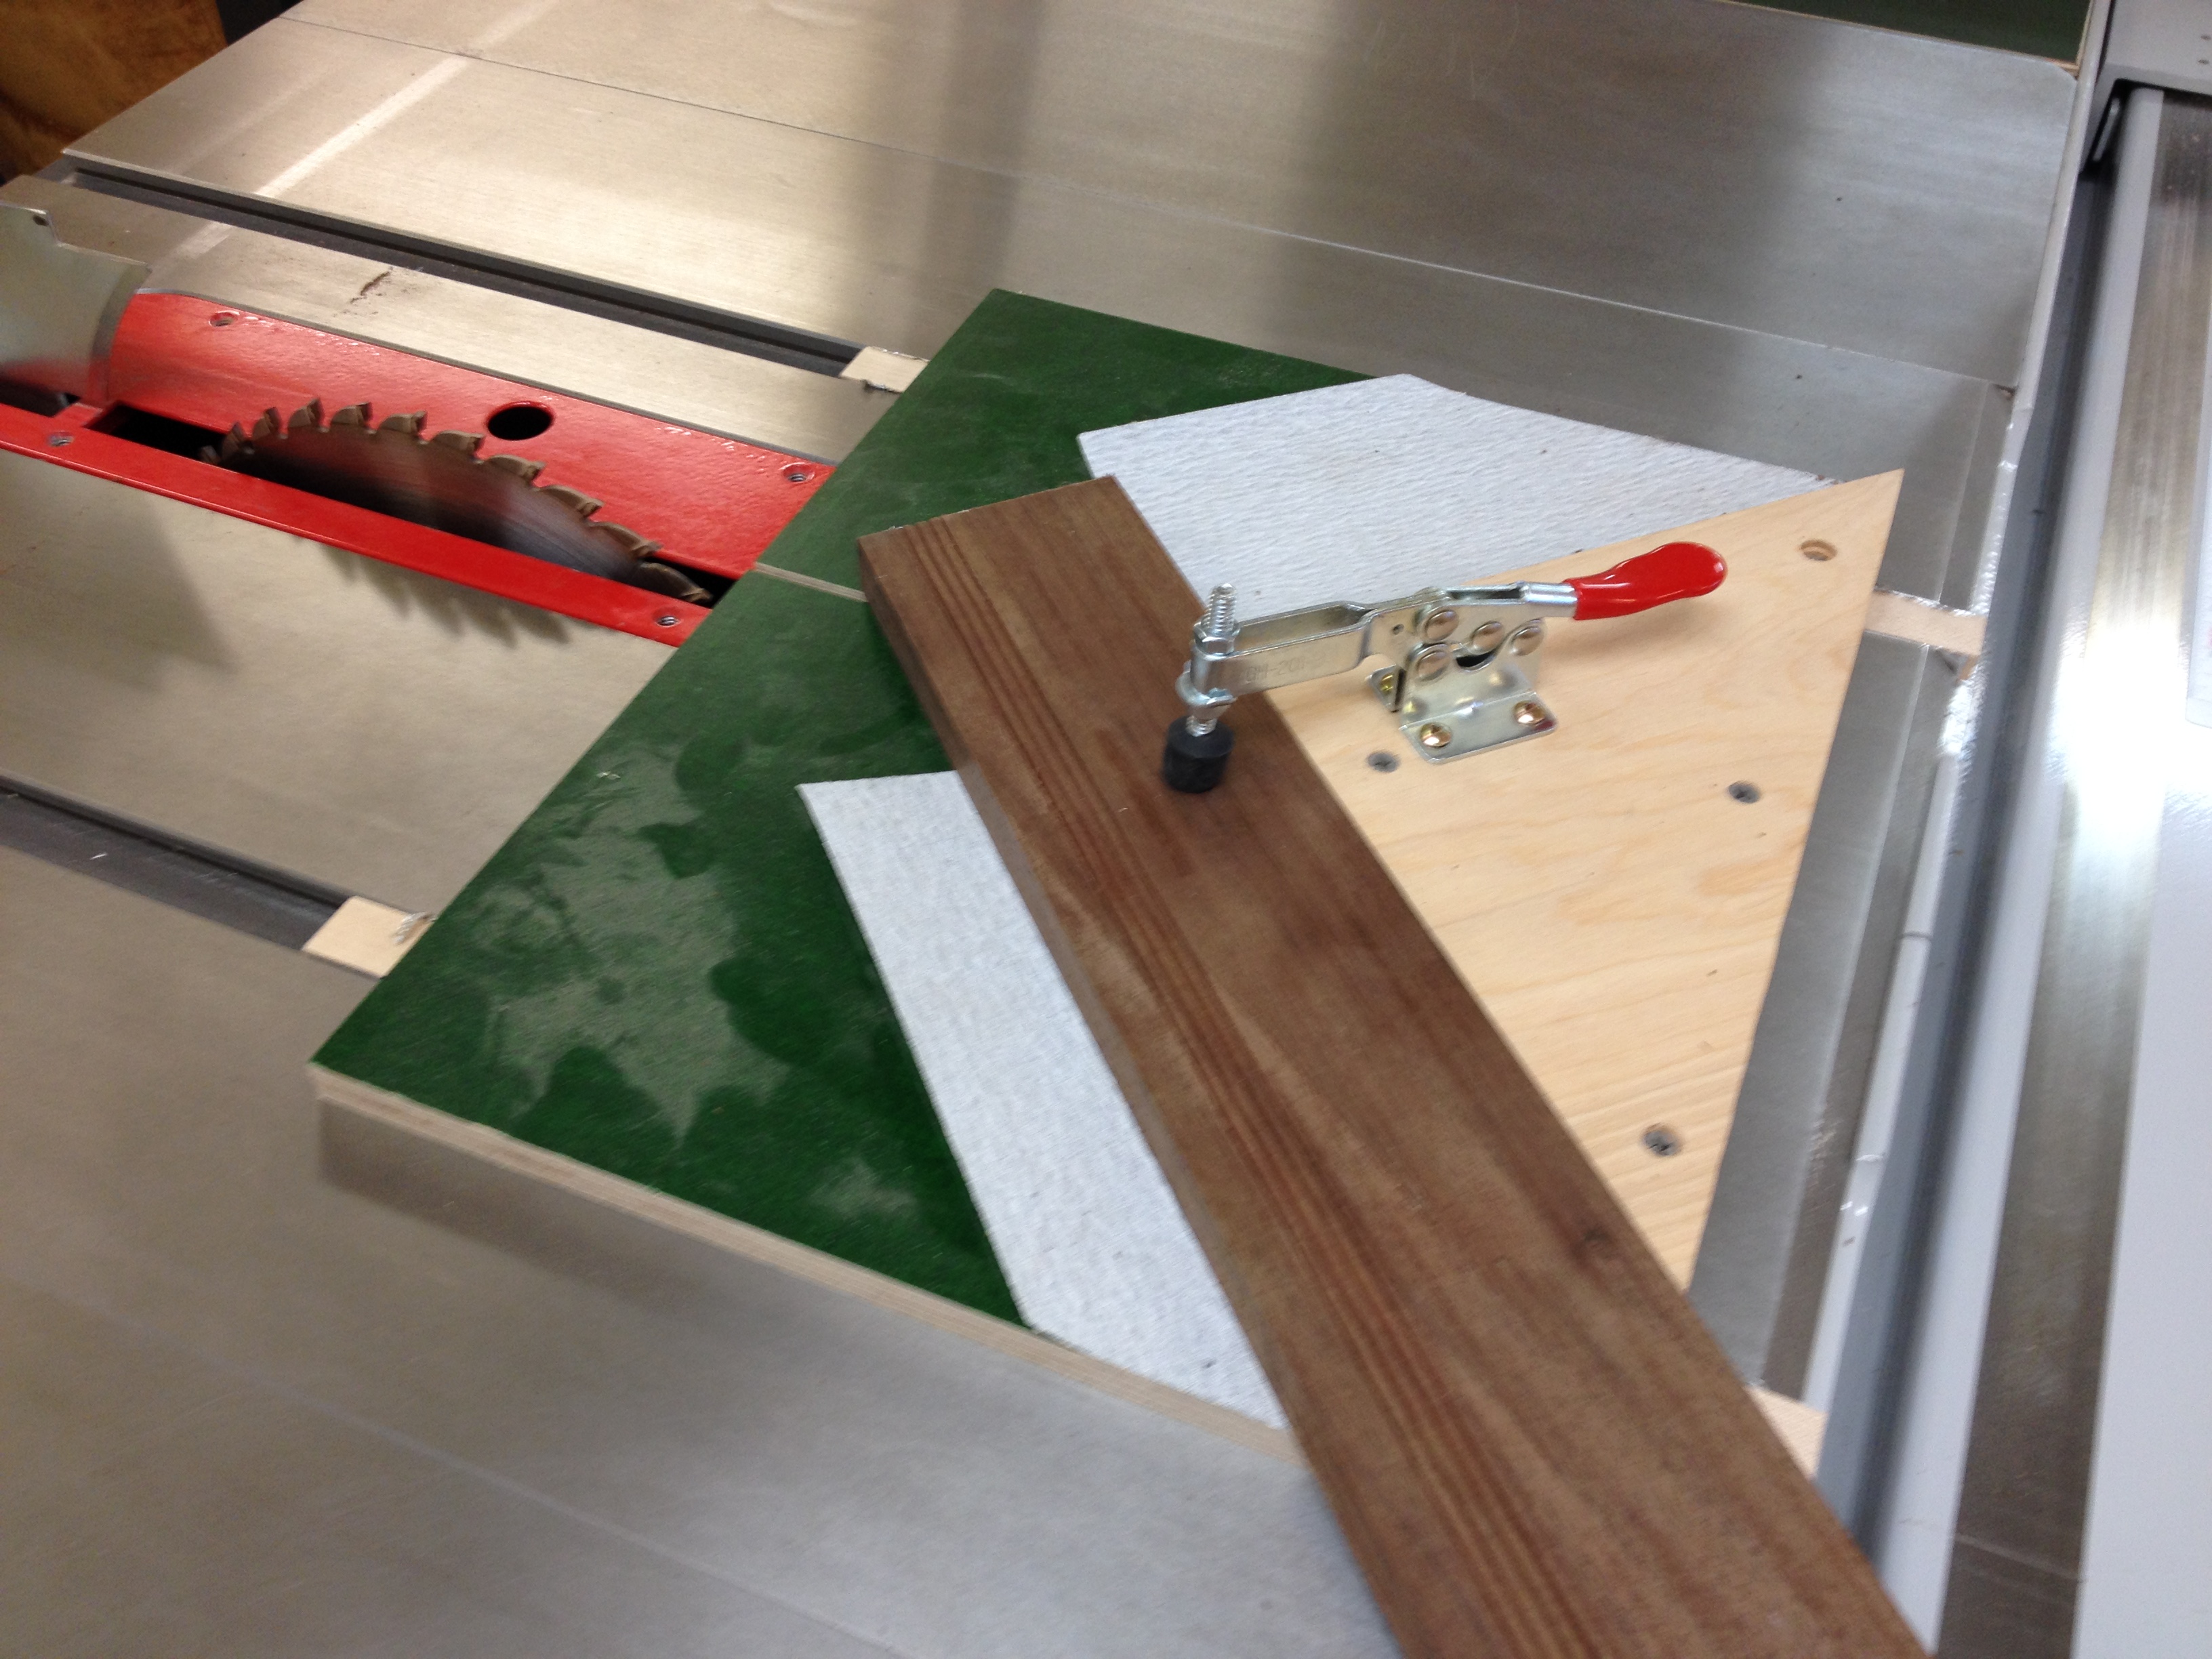
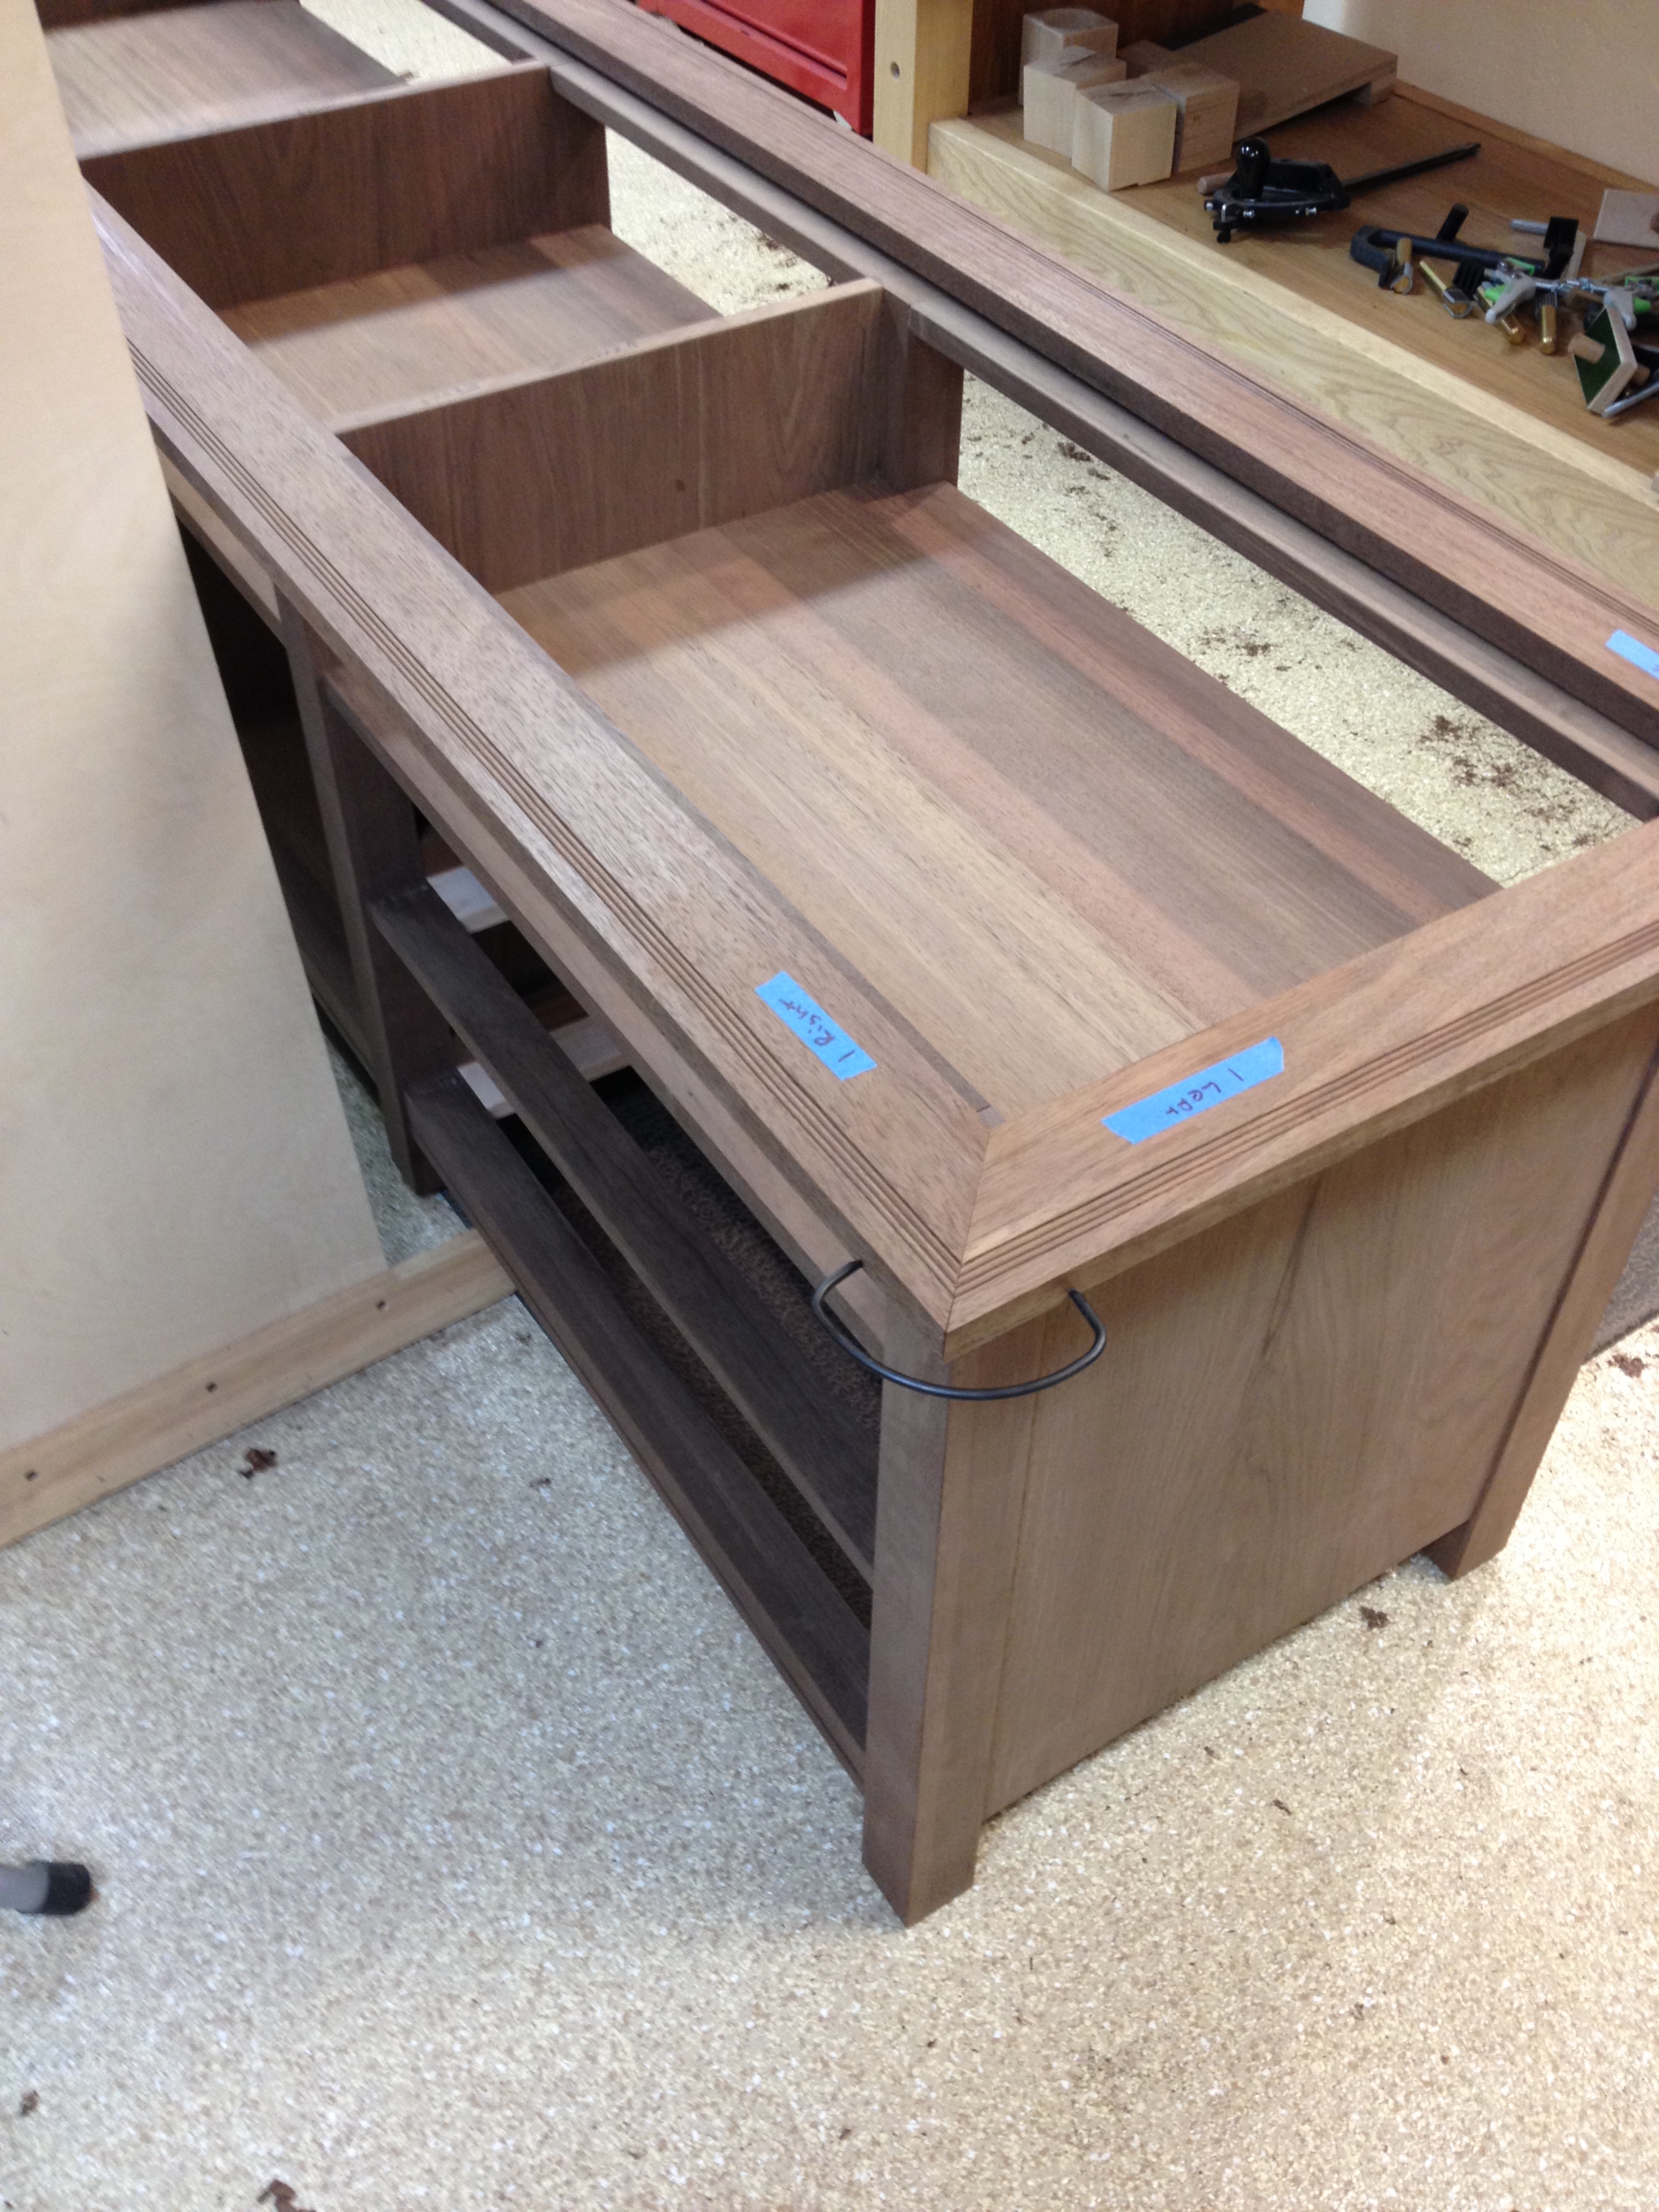
Here’s how it works. That block in the middle is cut to be a perfect 90 degrees. So, for each mitered corner, I cut one piece on the left side of the jig like you see there, and one piece on the right (I have to label them to keep everything organized). By doing it this way, even if something becomes misaligned, the two pieces will go together to form that same perfect 90 degrees. One of the pieces may be at 46.3 degrees, and the other at 43.7 degrees – but they’ll add up to 90 every time.
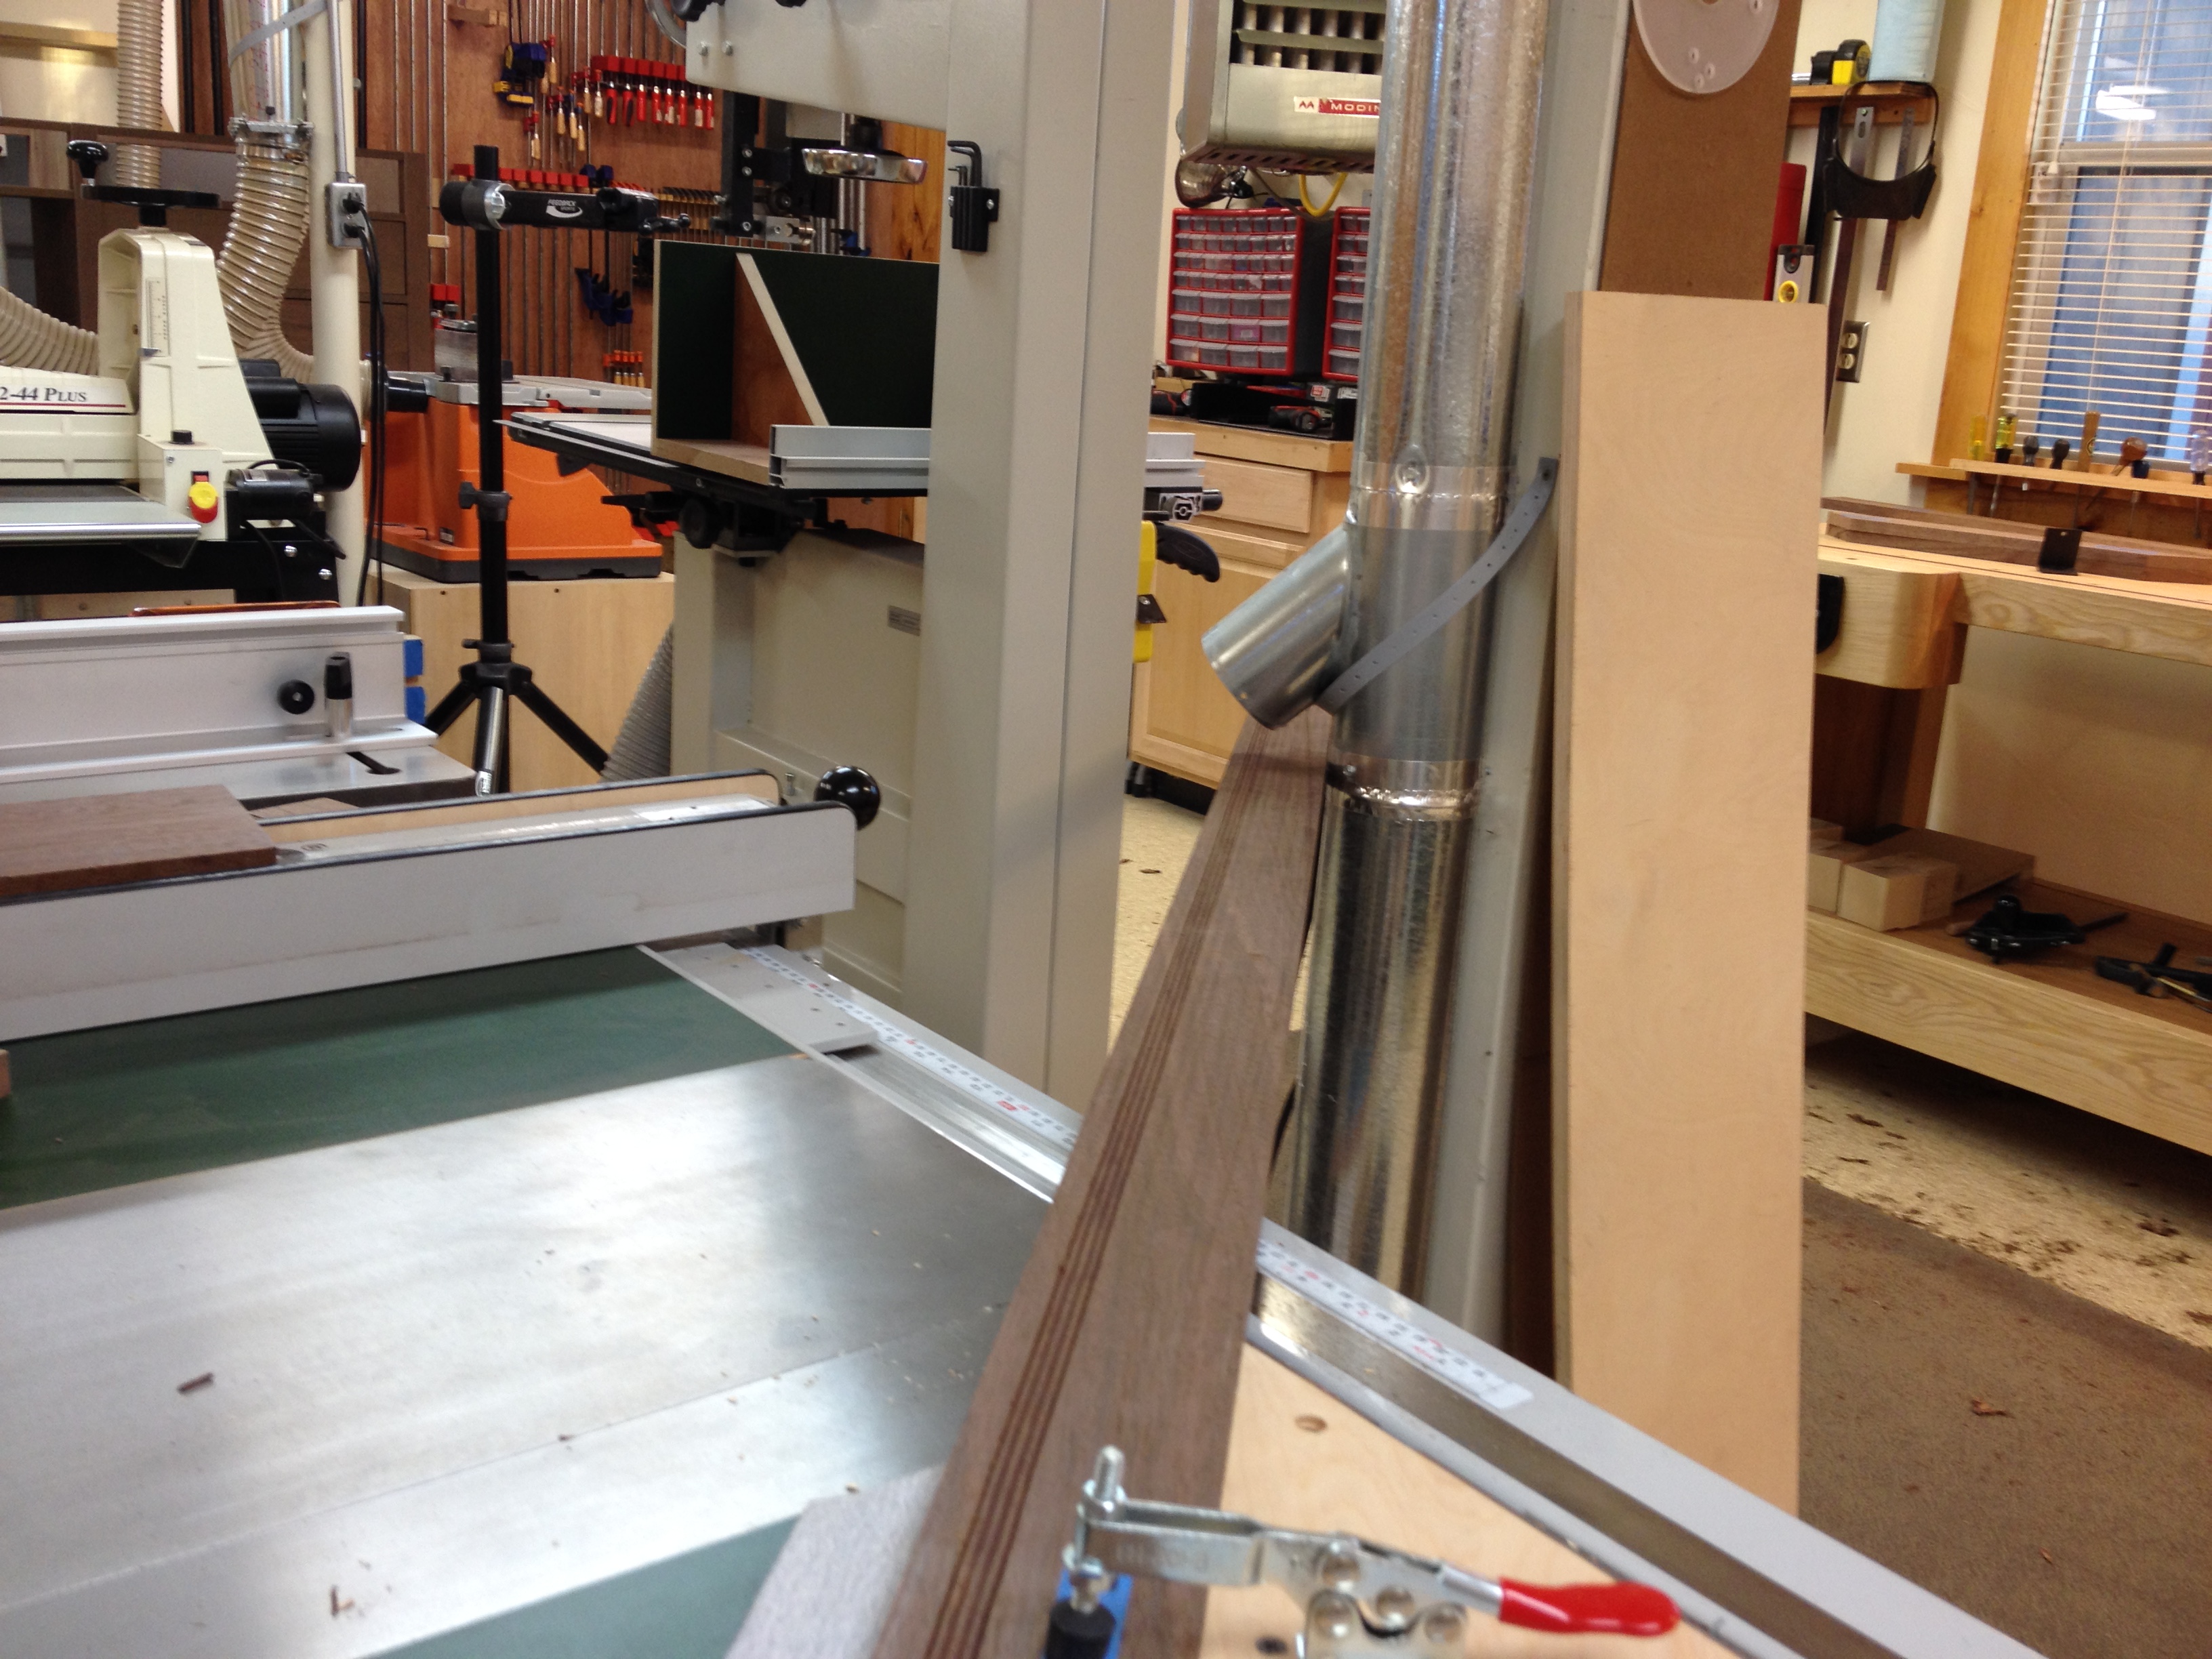
Well, my jig works great until the pieces get to be seven feet long… Then I have to start disassembling parts of my dust collection system and moving the band saw out of the way so they can take their ride across the table saw. And also, they start wanting to lever the jig off the saw when they’re that long.
It was a very awkward way to get the miters cut, but I eventually did, and then I reassembled my shop. When I was done, I clamped them temporarily with a picture framer’s pinch clamp system (think, hog rings), and it looked pretty good to me.
Then, I had to rabbet out the recess for holding the panel that will fill the top. I did this at the router table. (I still hate routers, by the way.) Again, I had to move machines around in the shop to make room to rout these ridiculously long pieces. And again, the length of these things wanted to lever the tail end of the boards up off the table. But hey, I got it done.
I don’t really trust plain miters for strength, so I decided to reinforce the corners with some domino slip tenons. I cut those next (but forgot to take pictures).
The final thing I had to do before glue-up was to bevel what will become the underside of the frame. Doing this required bevel-ripping seven foot long pieces across the table saw. I don’t have any pictures of this, because I didn’t want Stef around. I wore a Kevlar apron, made sure I had an accurately tilted splitter (my saw doesn’t have a riving knife because it’s old), and worked a bunch of hold-downs and push-sticks to get it done. It was completely terrifying. When you consider all the precautions I took, it shouldn’t have been. But it was. When I was done with that bevel ripping, I cleaned up the bevel with hand planes while I regained my nerves. At the end of that, this is what I had on each of the four corners, ready to glue up.

It’s a wonder the mortise for the domino didn’t poke through the miter on the other side where it’s beveled. I could tell you I calculated that out, but we all know it was just luck…
The largest assembly table I can put together is exactly seven feet long. That’s only one inch longer than this mitered frame. Besides being further proof I need a bigger shop, this meant, realistically, that I didn’t have a good place to glue and clamp this thing up. I couldn’t use the pinch clamps, because the dominoes required more force to drive home than those clamps could produce. I tried to use a band clamp – but I didn’t have one with 20 feet of band. Plus, without a table to set it on, the one I did try to rig up from two smaller band clamps wouldn’t stay put because of the bevel underneath. Finally, I realized that I didn’t have any kind of clamps at all that would span the 7 foot dimension. So basically, this glue-up had disaster written all over it.
I had asked Stef to try to help with the glue up. But as I started throwing (Literally! Throwing!) things about the shop, swearing, and getting covered in glue, I was wishing I had spared her the horror. It was awful. In the end, I had to just rely on the dominoes to keep things lined up, and I clamped along the short dimension as best as I could. Here’s the thing in clamps.

Waterloo
In the end, Stef didn’t exile me to Saint Helena, the frame stayed together, and some of the corners don’t even look so bad. Remember, since I had that detailed beading around the perimeter, any place it doesn’t line up perfectly will be pretty noticeable. Here’s one of the corners so you can see what I mean.
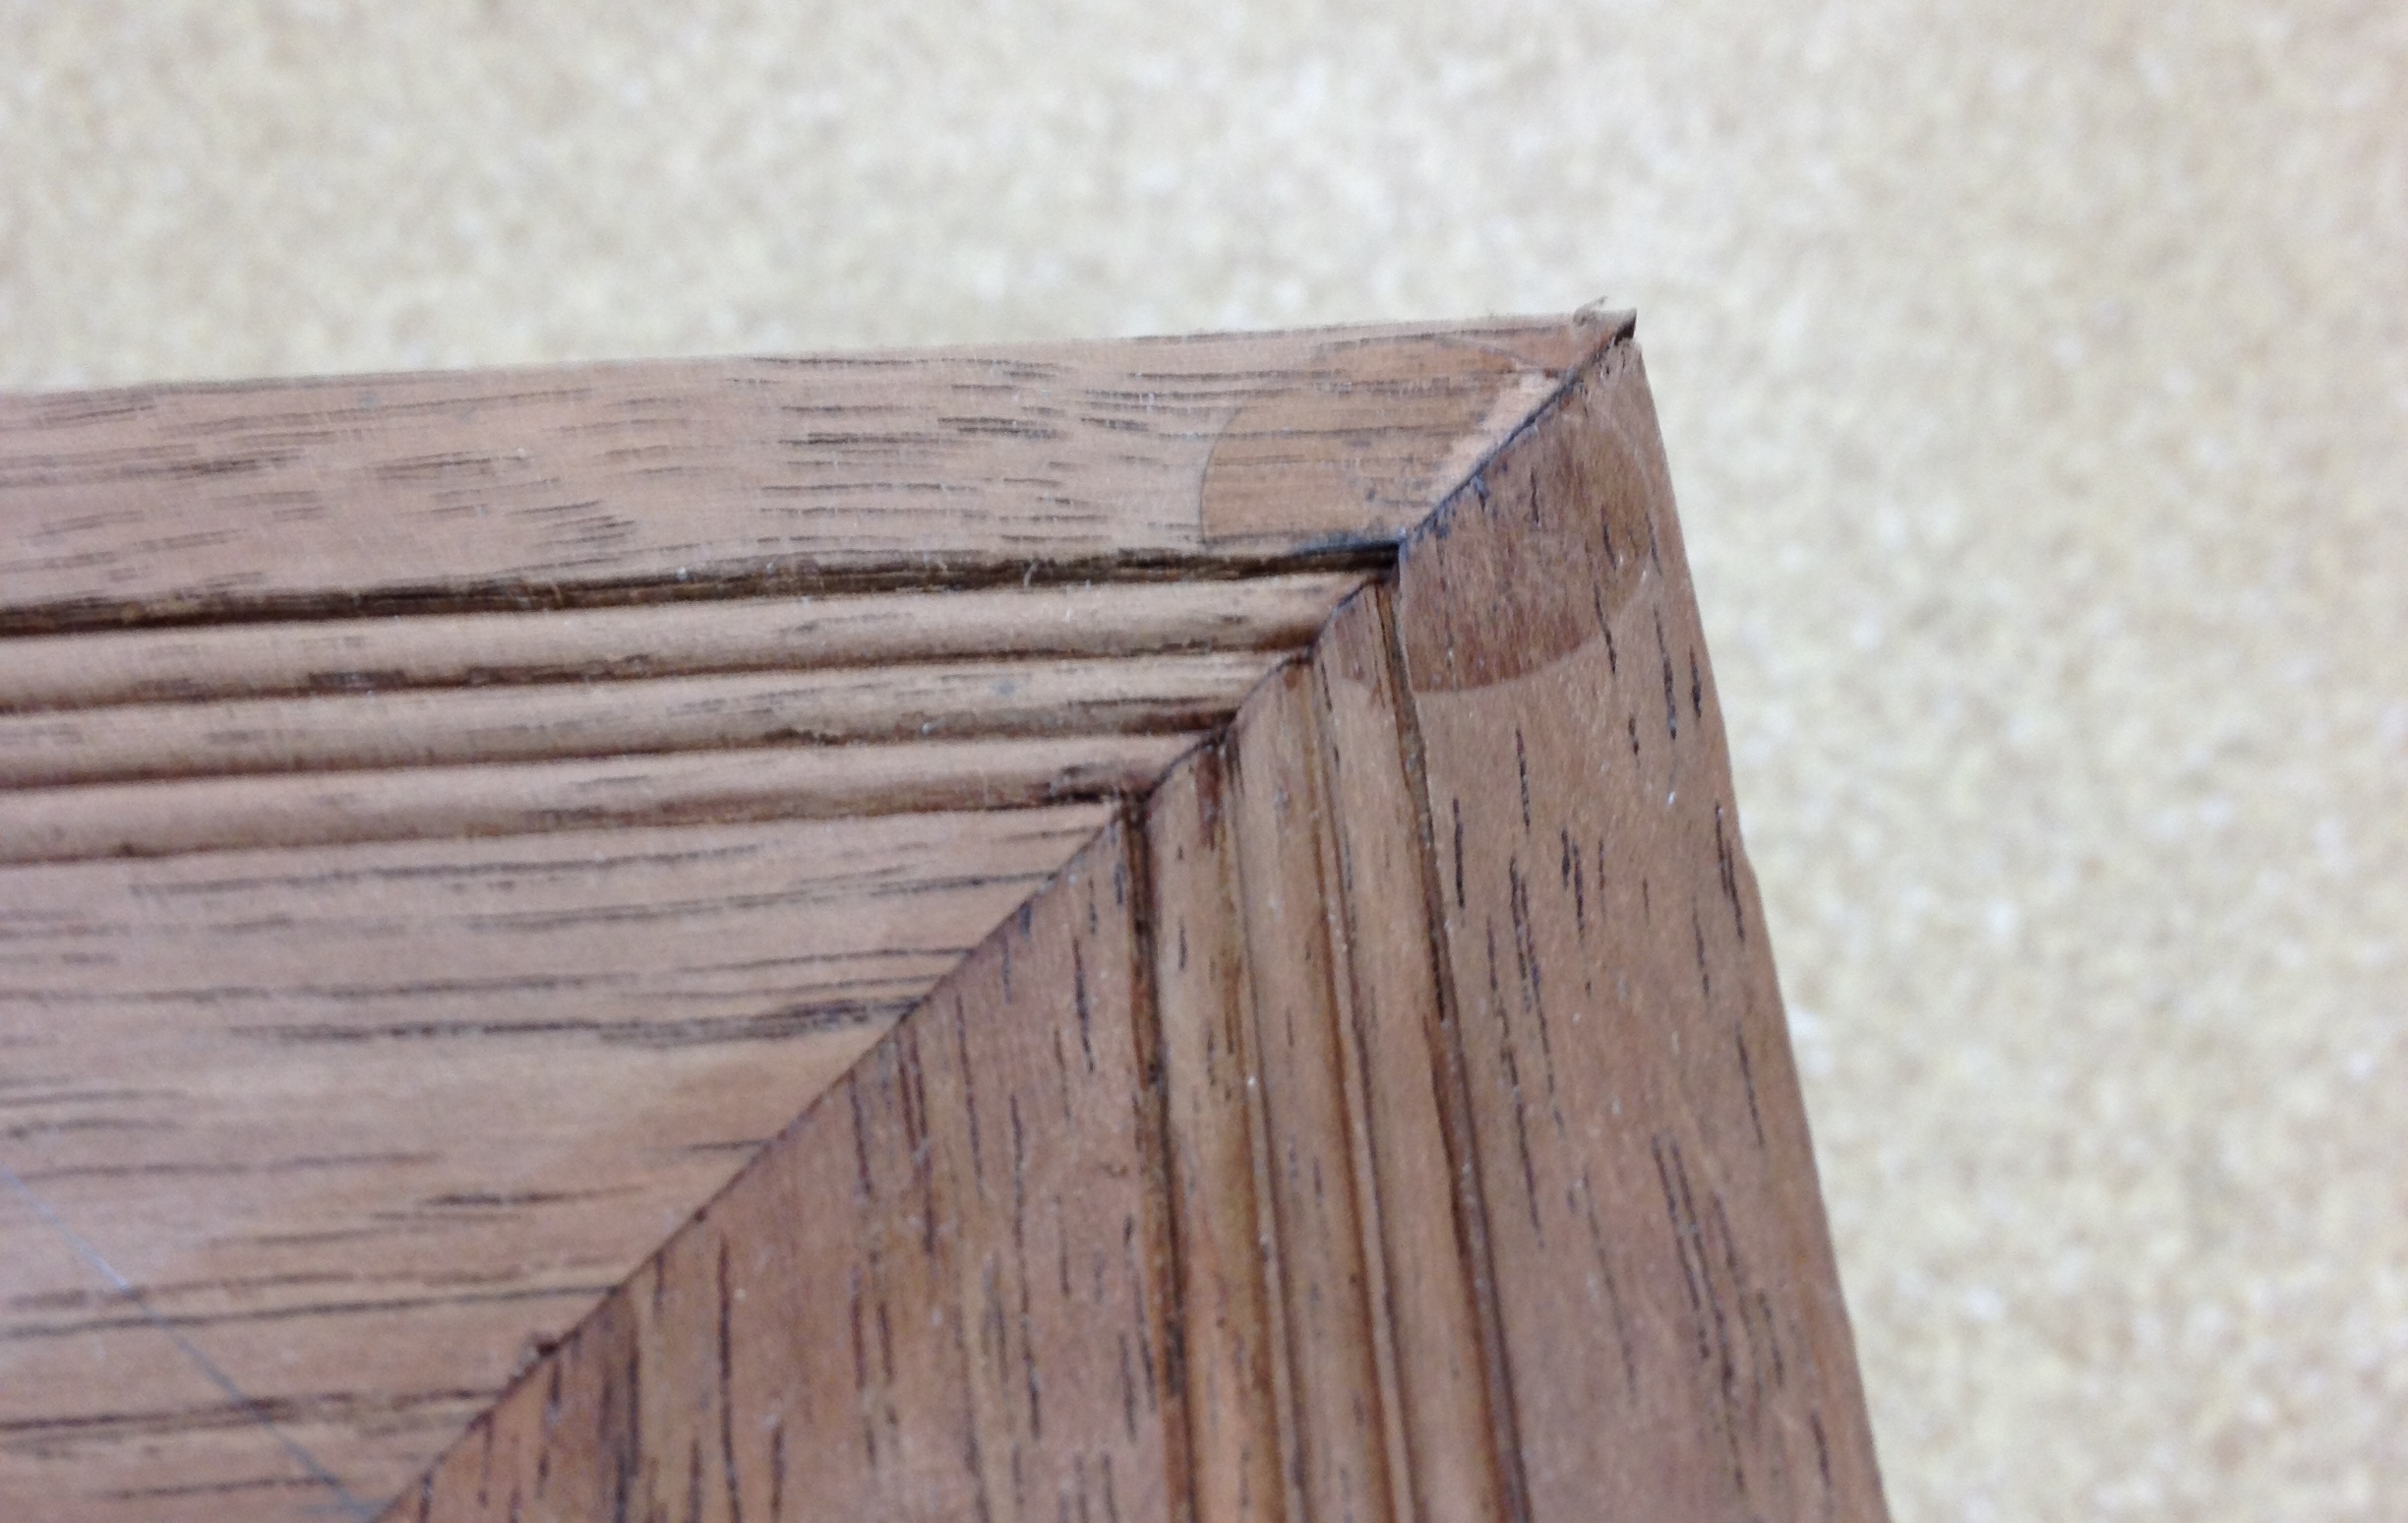
This is a good one. I won’t show you the worst one…
And just for reference, here is a picture of the actual frame engulfing Stef. To give you the scale, she’s 5 foot 6.
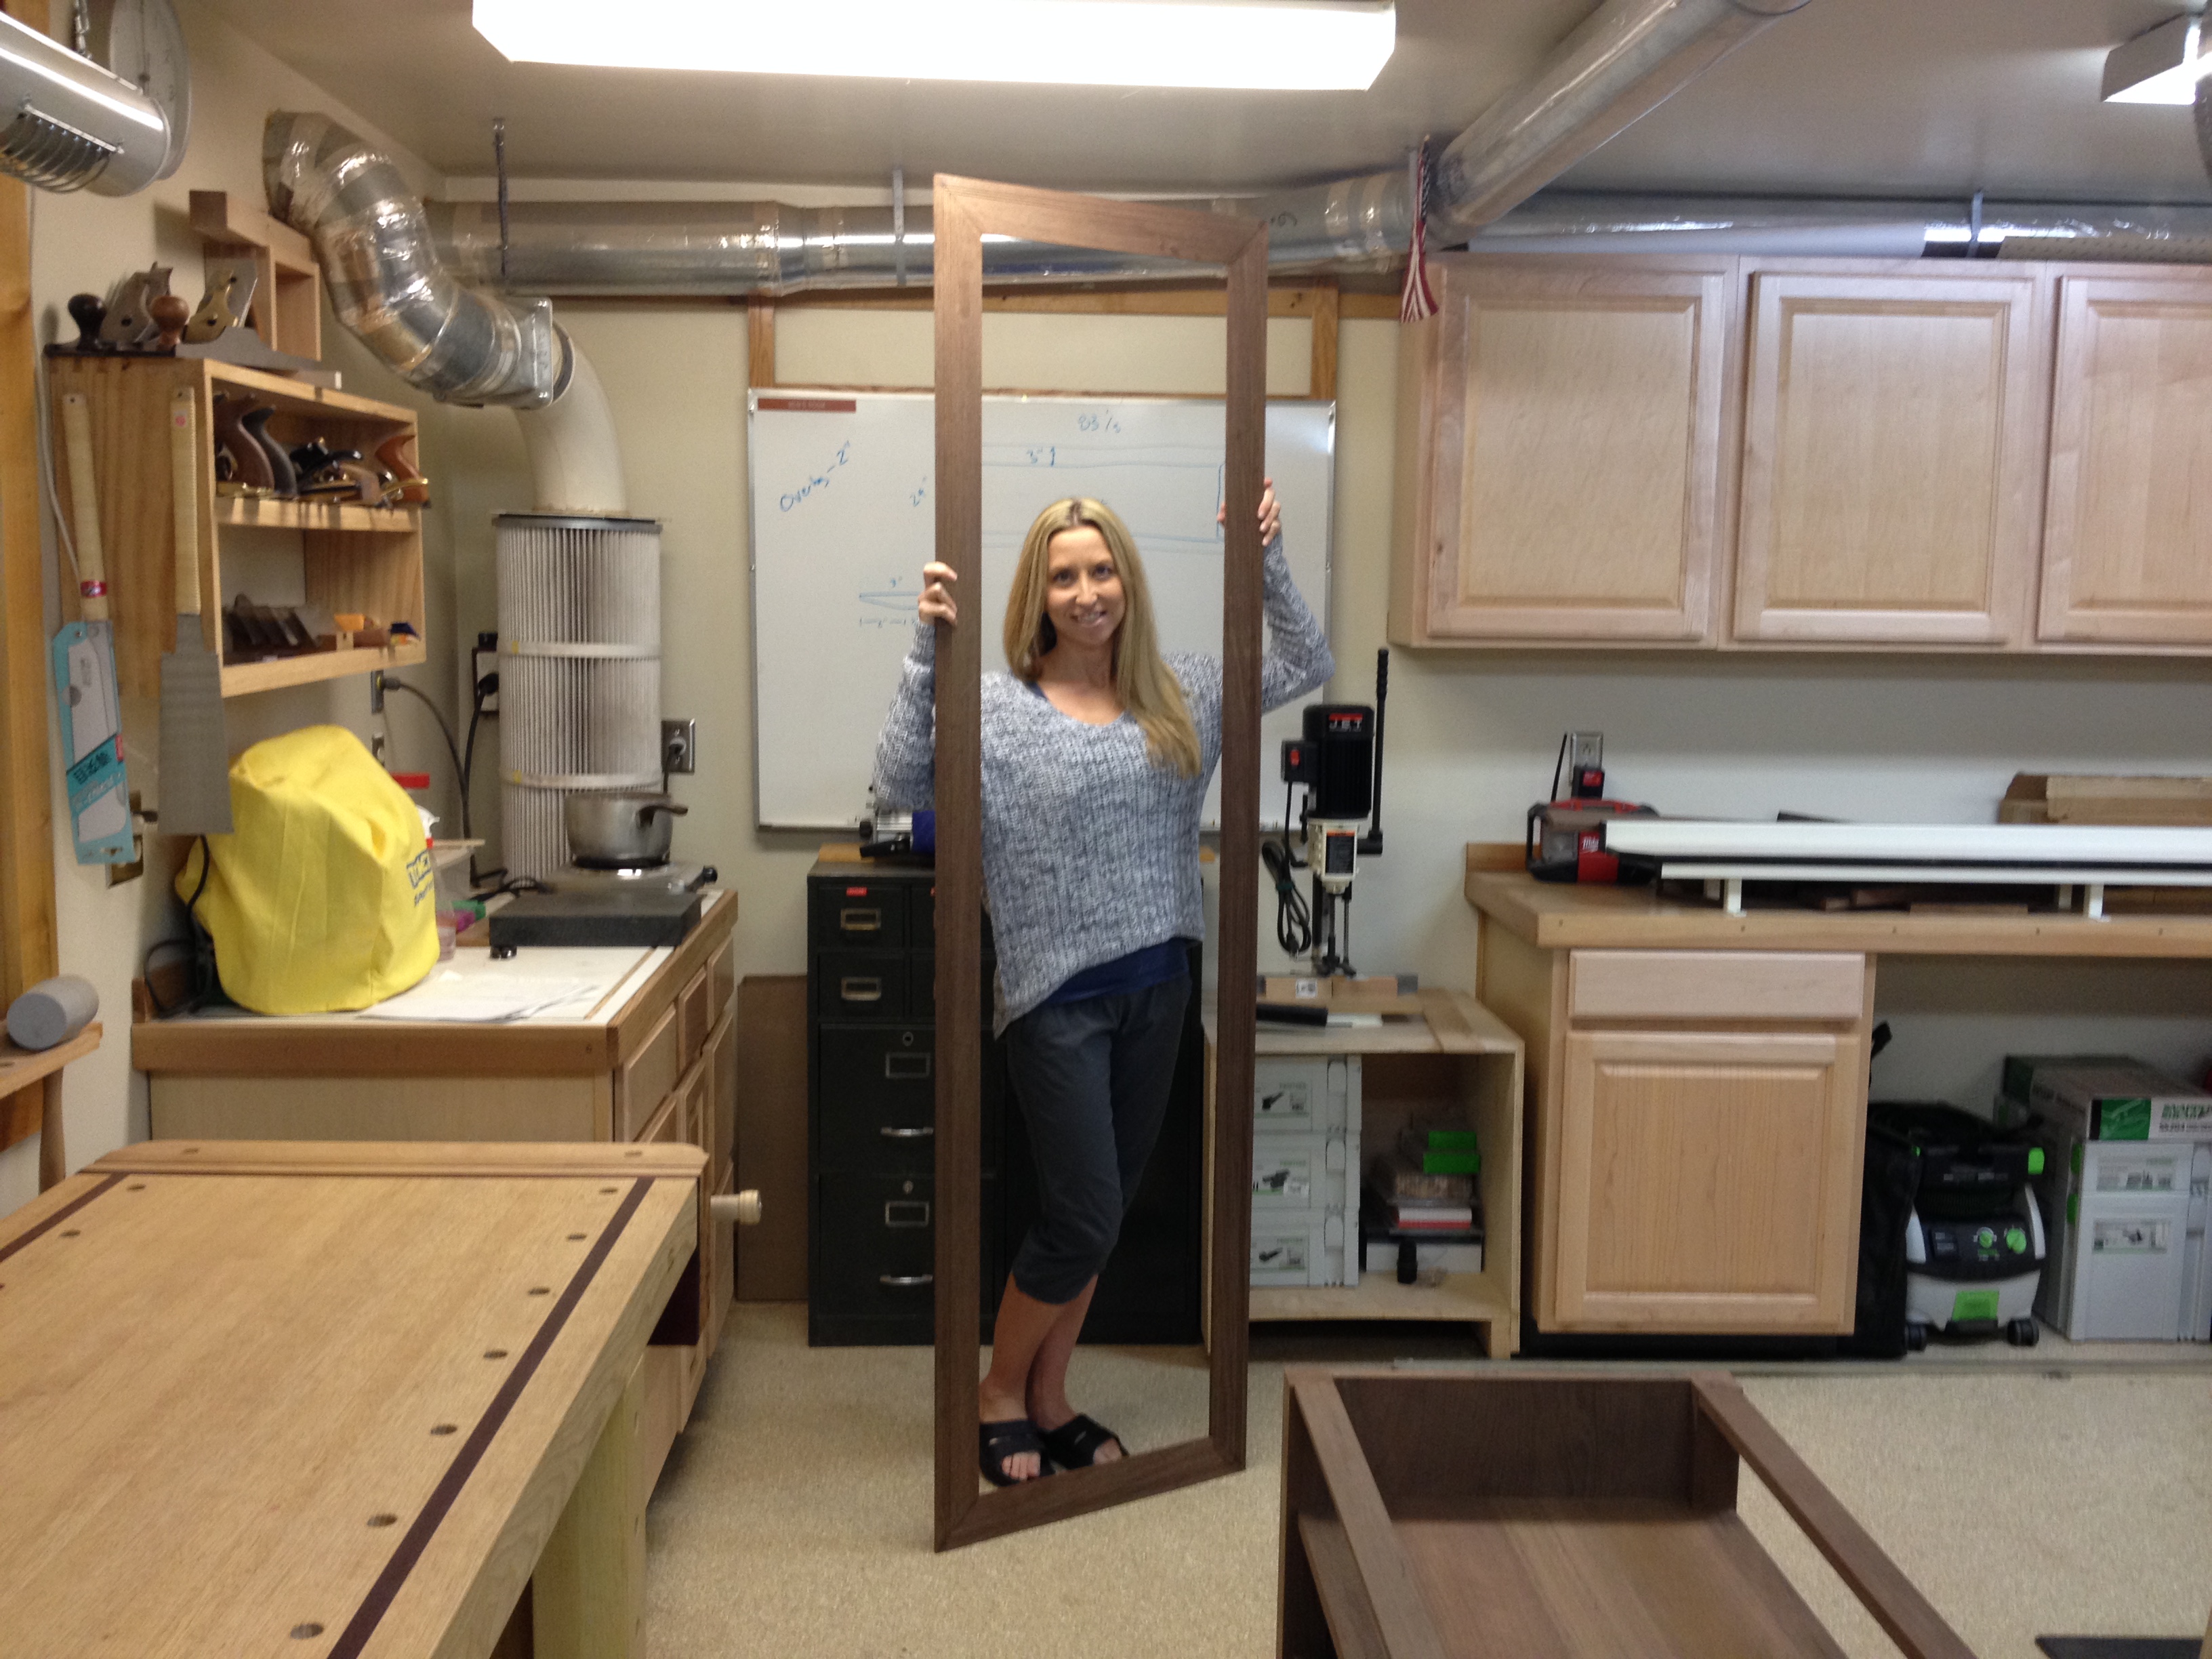
Even the ceiling of my shop is too small!!
That’s as far as I got this week. By now, I’m sure everyone can agree: I need a bigger shop. (Feel free to email Stef about this.)
Next week, I plan to work on the substrate and the zinc top, which I’ll treat chemically to make it look old. In other words: veneering with metal and trying to remember Inorganic Chemistry. Awesome. I think I’ll use that for the title of the next post!


Excellent – glad I helped in some small way! 🙂
James / Dude,
I look forward to your posts as much as I do the next chapter of a good book 🙂
You are quite an entertaining writer not to mention capable in your too-small shop!! Your entertainment center looks awesome already. Cant wait to see the completely finished product!
Michelle
Aw, thanks Michelle!
I have to admit, at this point, I can’t wait to see the finished product either! (because it means I’ll be done)
I think I’ll have one more construction post, and then it’s on to applying a finish.
Thanks for reading!
I think the frame looks great. You need a bigger shop! Would it help if I offered to take your old shop off your hands? Would shipping to Victoria BC be overly-exorbitant? 😉 I could offer beaver tail, donuts, and gift cards to Canadian Tire. Heh.
Maybe, if you could tell us how to get some Tim Horton’s K-Cups down here!
(But the low ceiling really does get to be a problem more often than you would think.)
Horton’s K-cups? Heck, I could send you some! Send your address to my email, and I’ll export a batch 🙂
You know – I had looked for the Tim Horton’s K-Cups over a year ago, and couldn’t find any. I had assumed they didn’t exist. But when I saw your comment, I checked again and BAM! There they were. I guess they’ve been available here in the States since last December or so. Thanks to Amazon, I’ve got a box on its way here right now. Thanks for prompting me to check!