This post may contain affiliate links.
For those of you who have been following the entertainment center project, I’m happy to report that it’s now 100% complete. But it’s not very entertaining yet. Well, maybe it’s entertaining for you, but since I’ve been working on it since November – I’m just happy to have it out of my shop! There are TONS of pictures (25!) in this one, since it’s sort of the last hurrah, so let’s get started. Here it is:

Getting to this point from the last was a bunch of small projects. I started by installing the reeded glass in the door. I did this mainly with Glaziers Push Points.
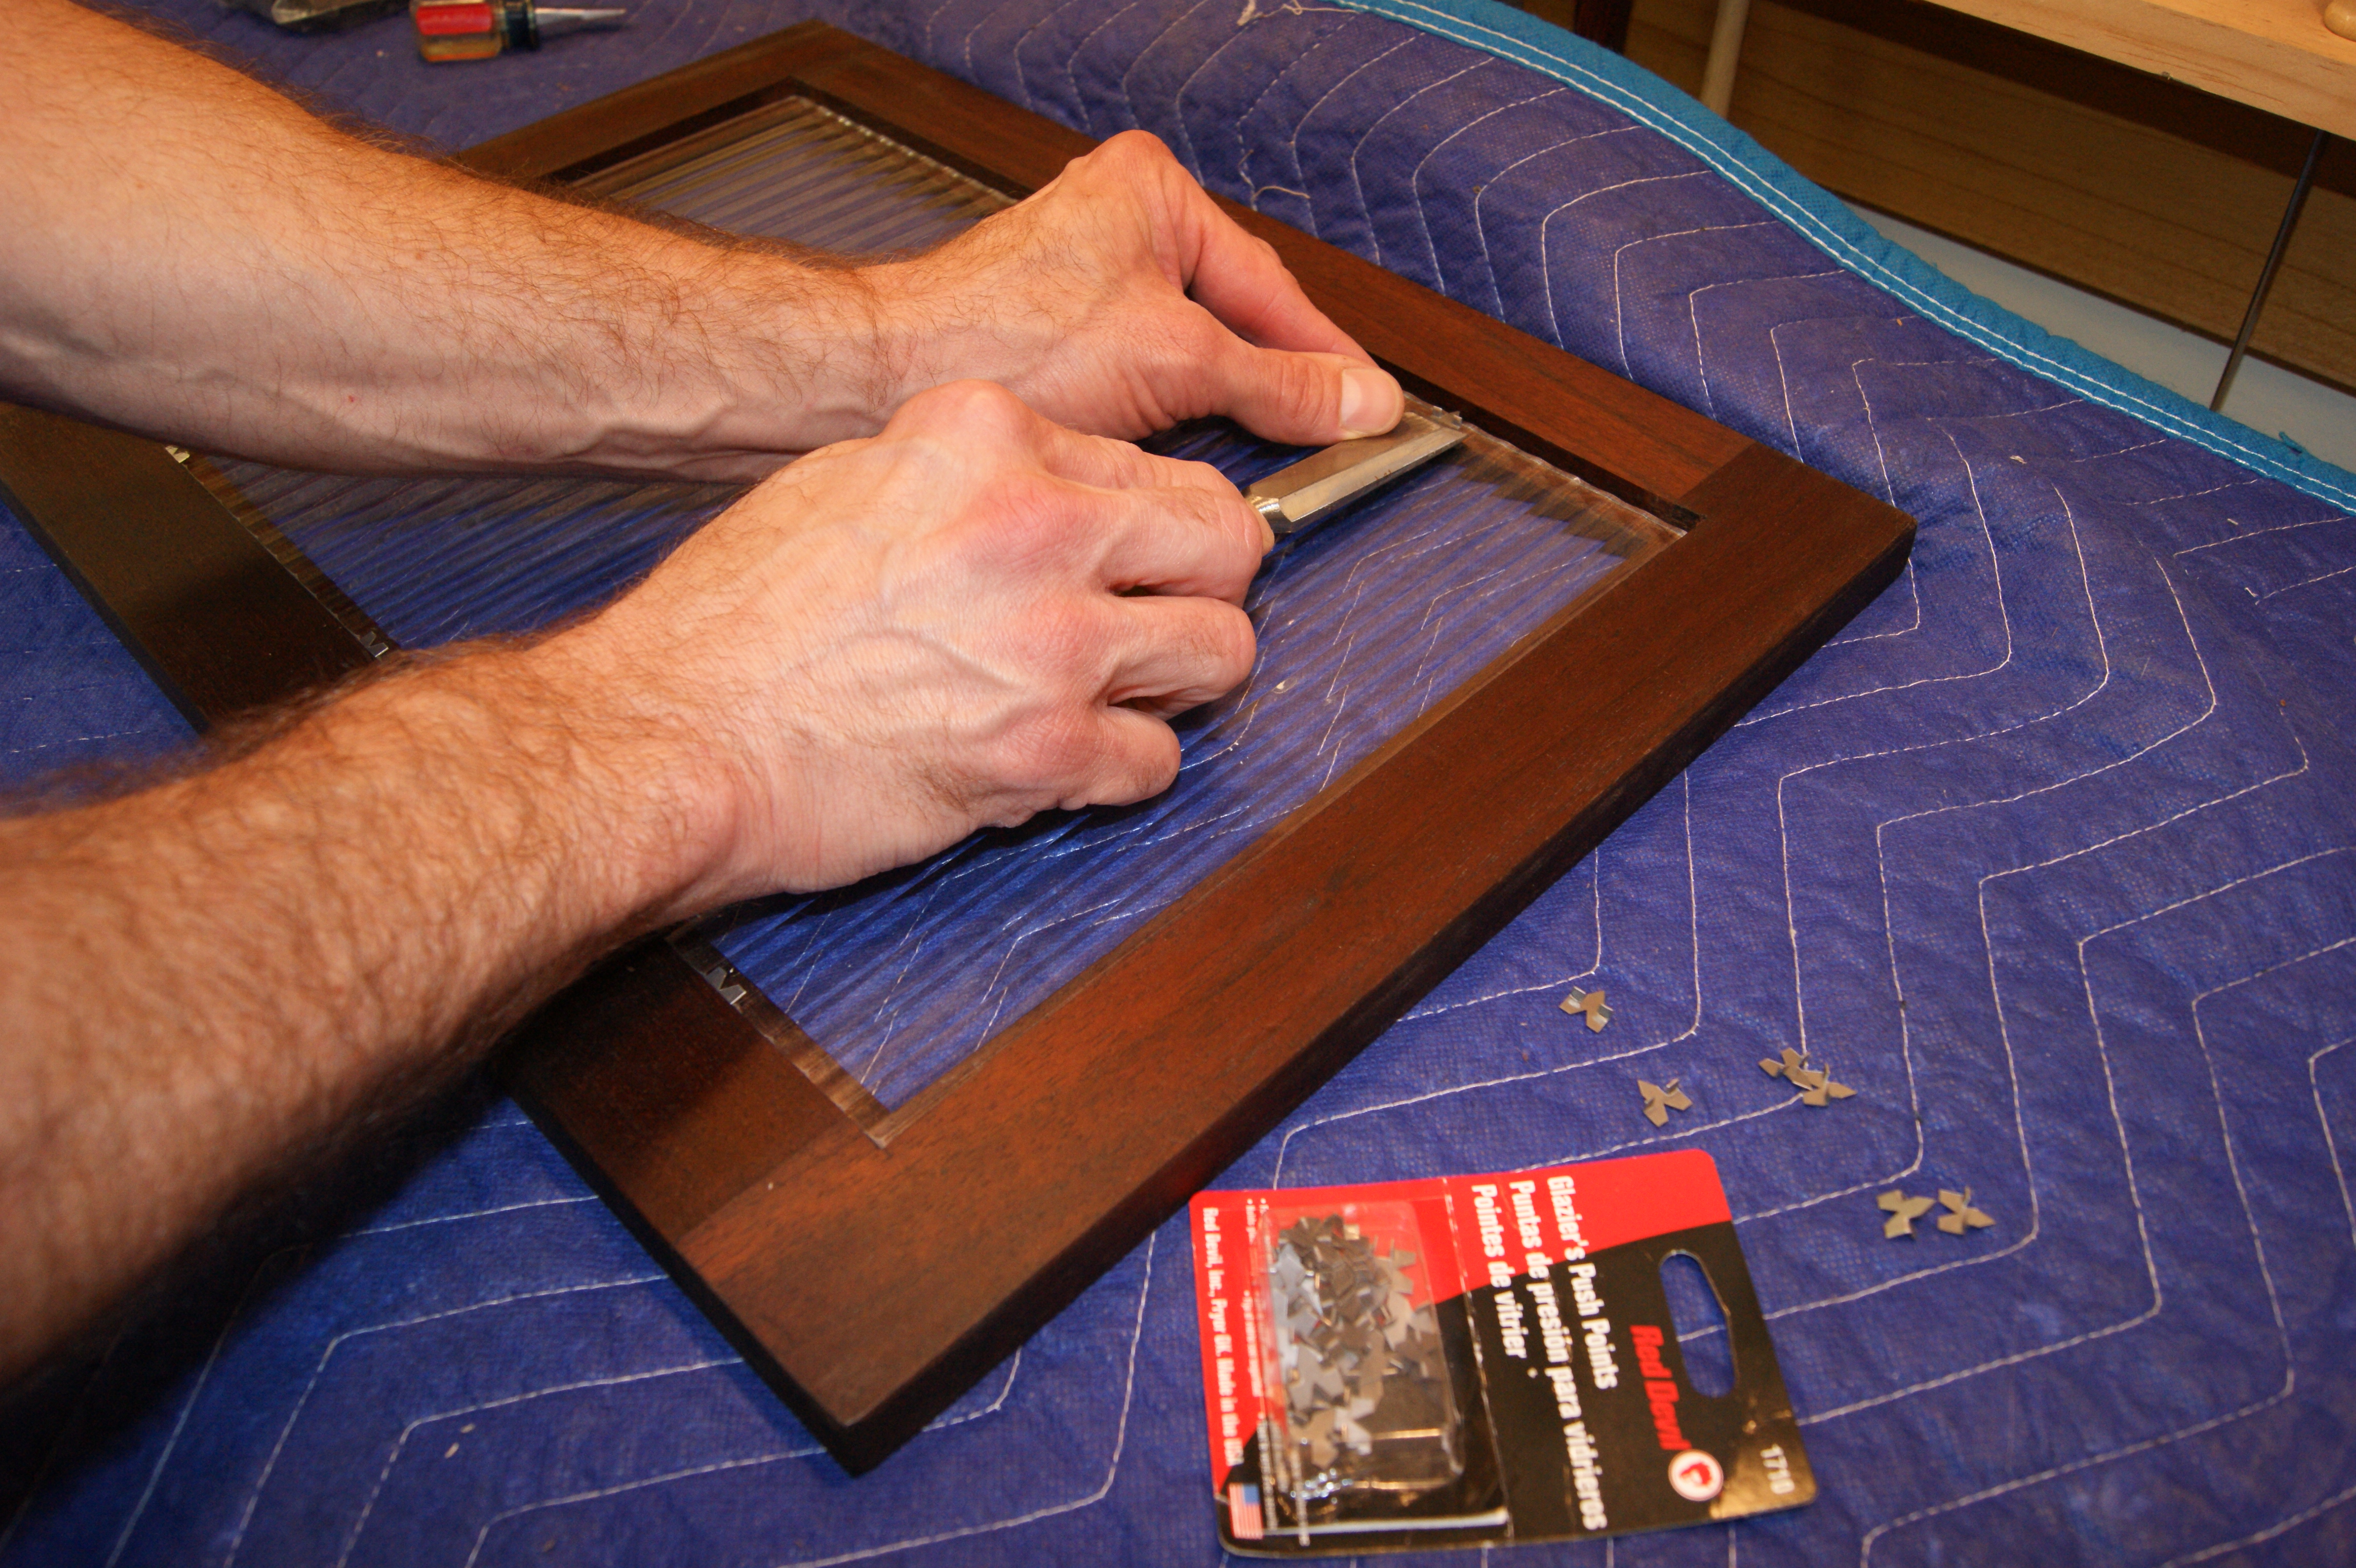
After that, I ran a bead of silicone around the edges (to keep rattles quiet), and when it was done, I had this:

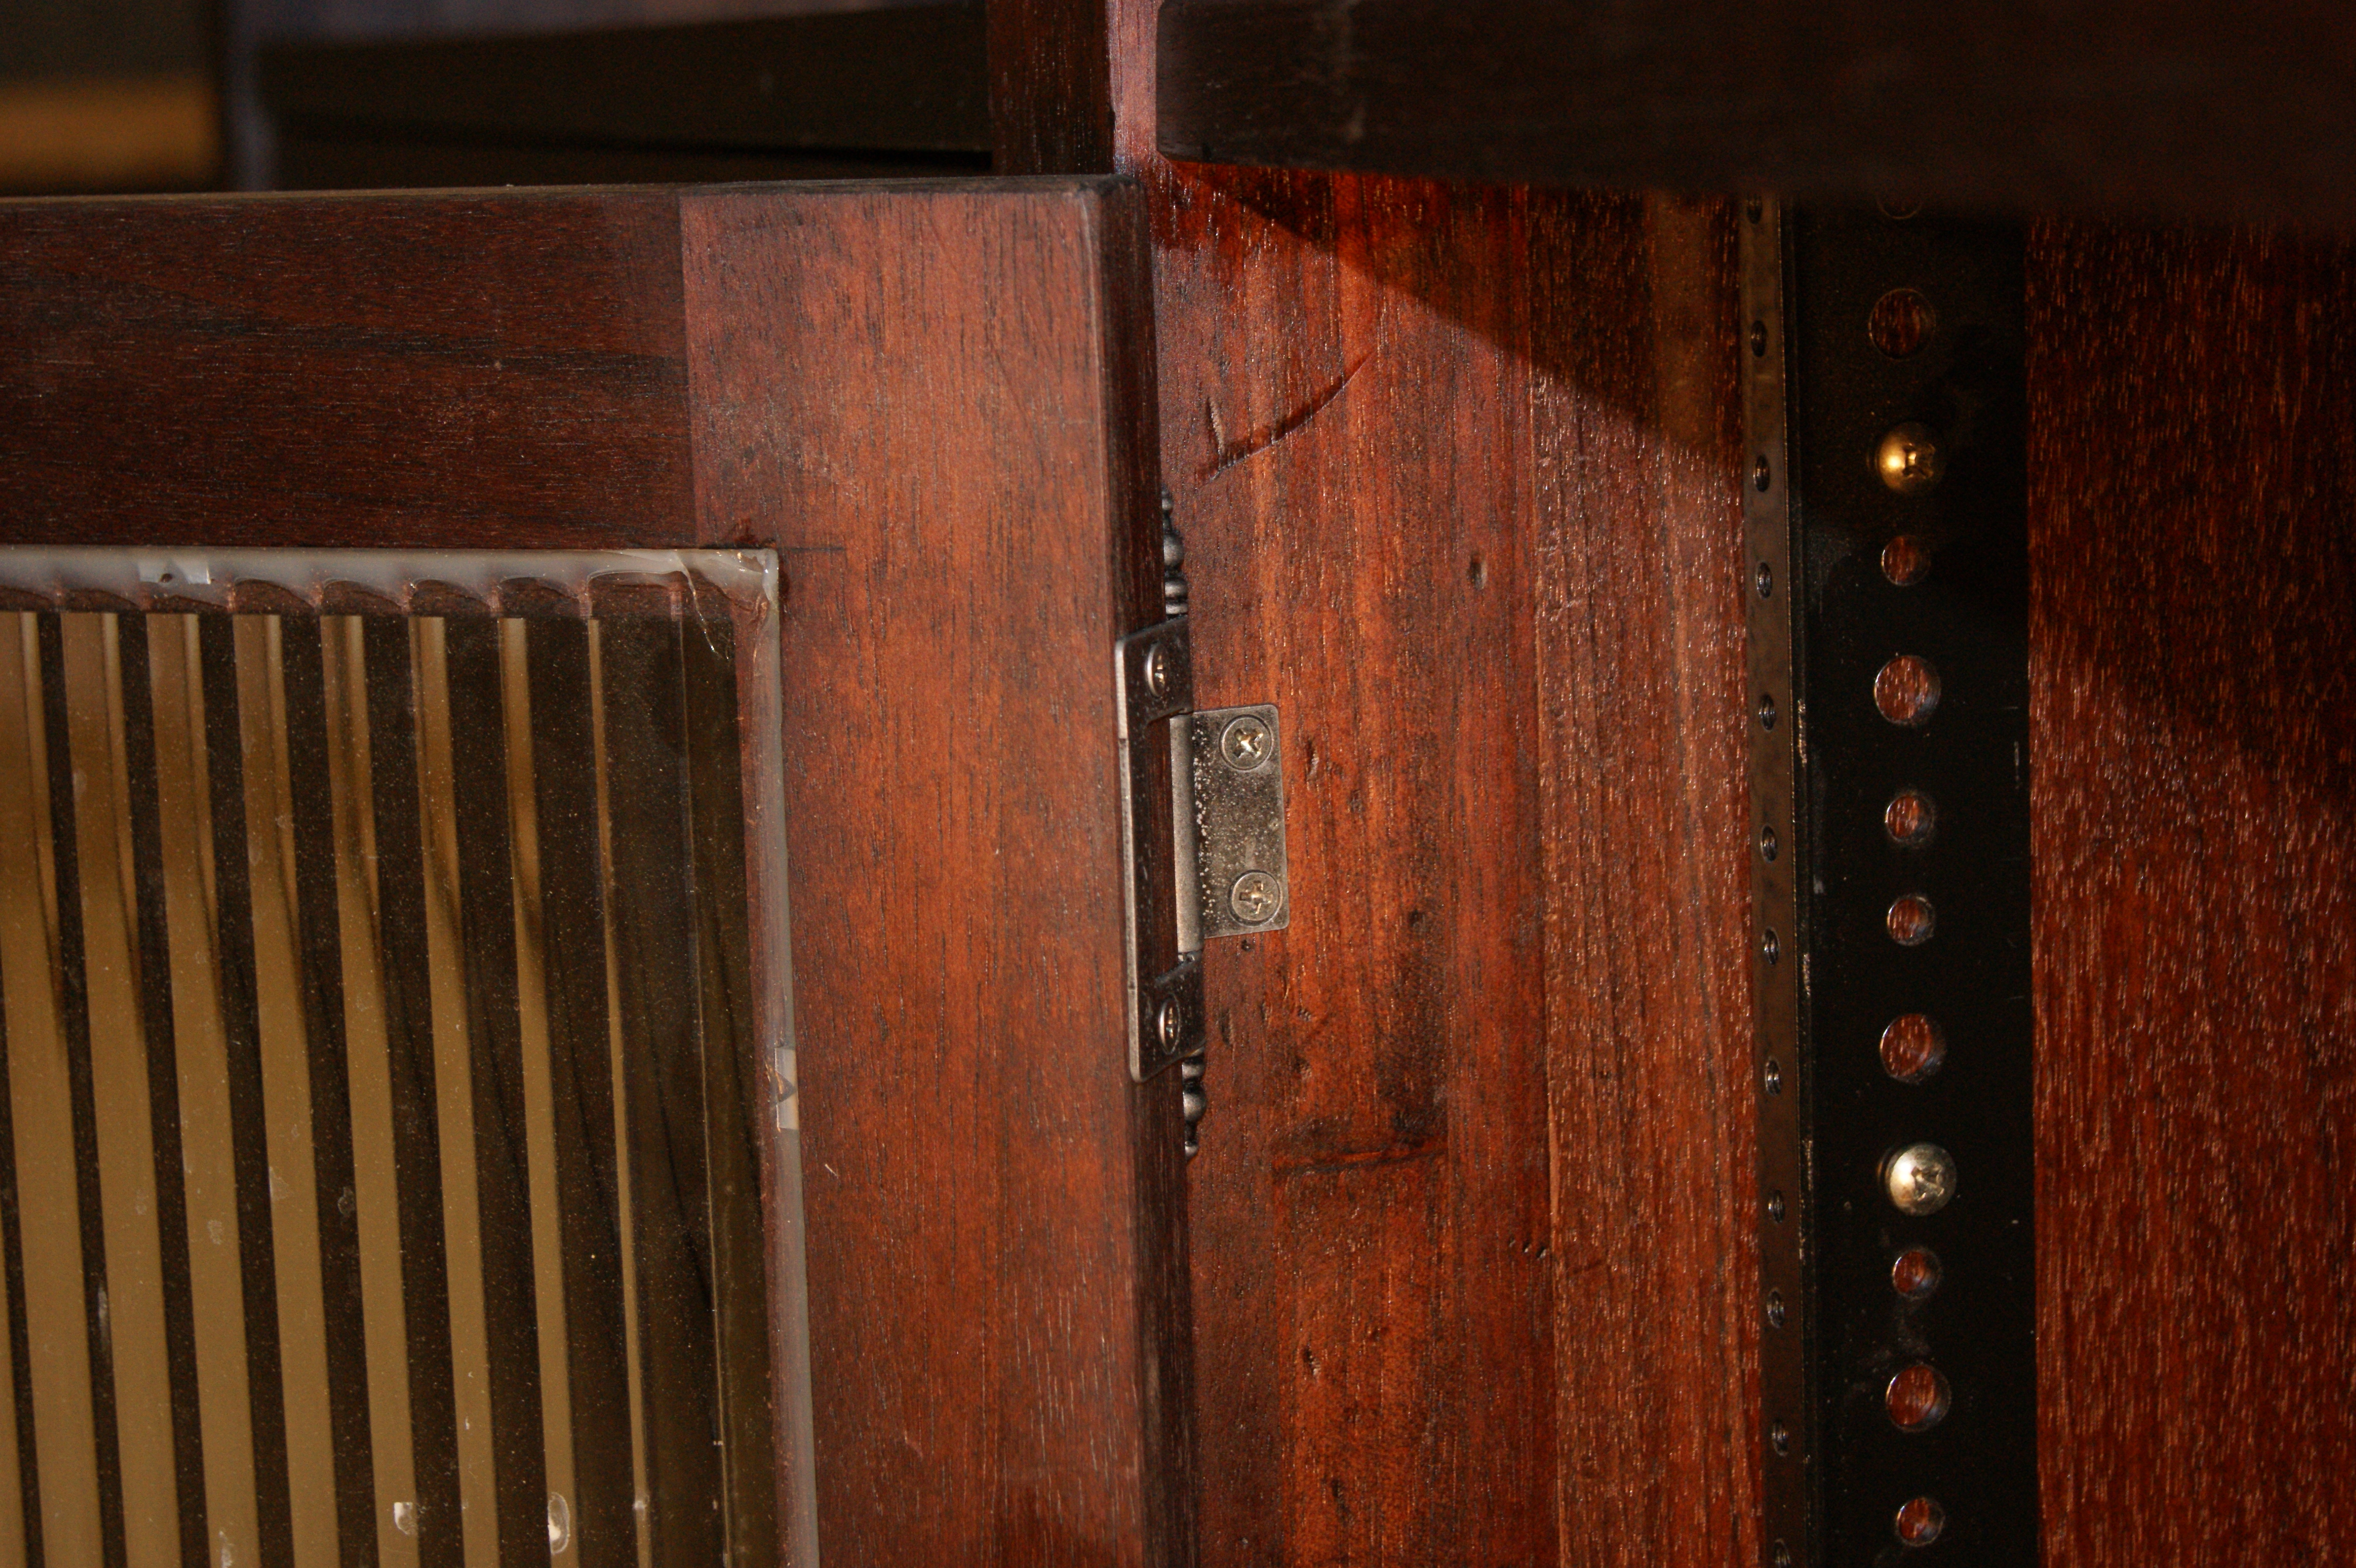
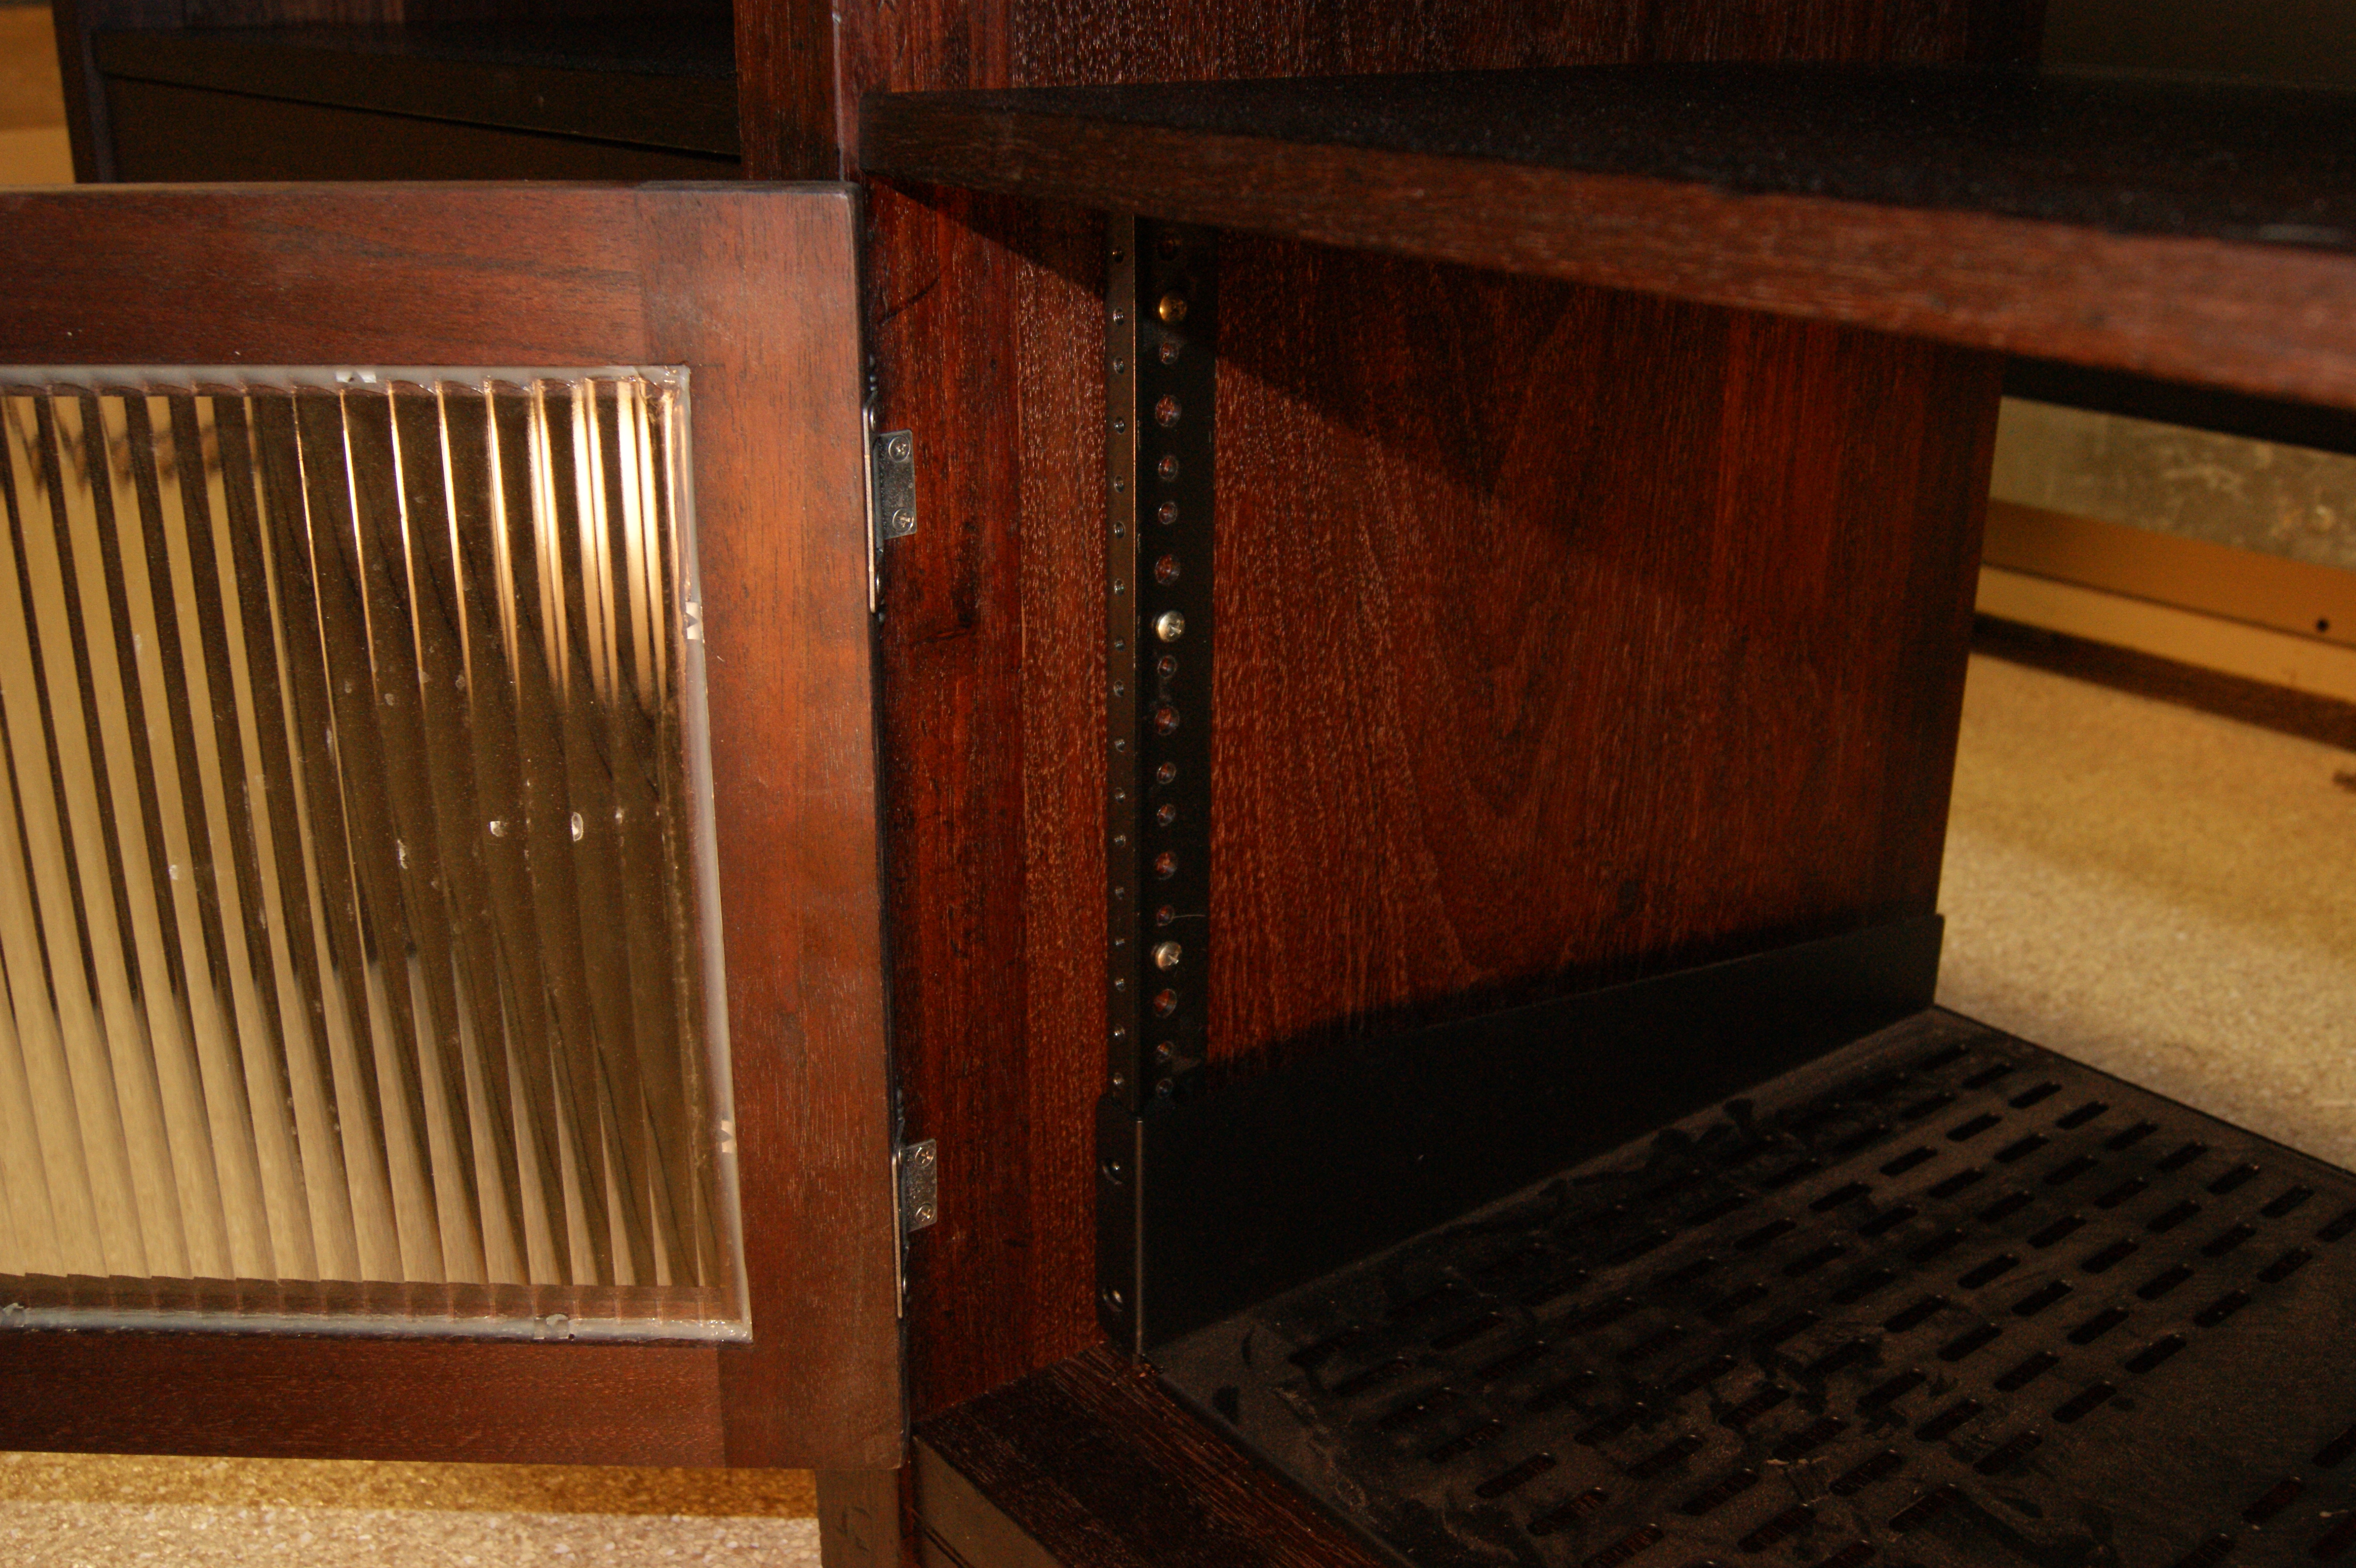
Then I installed the door into the case. To do this, I just used surface mount hinges. I couldn’t use butt hinges, because I wasn’t installing into a face frame, or even a frameless cabinet, and I hadn’t cut the mortises for them beforehand anyway. If you remember, way back when, I was pondering what kind of hinges to use, and this is what I came up with. If I had planned them in from the get-go, I would have used some knife hinges. But I didn’t. So here are the hinges:
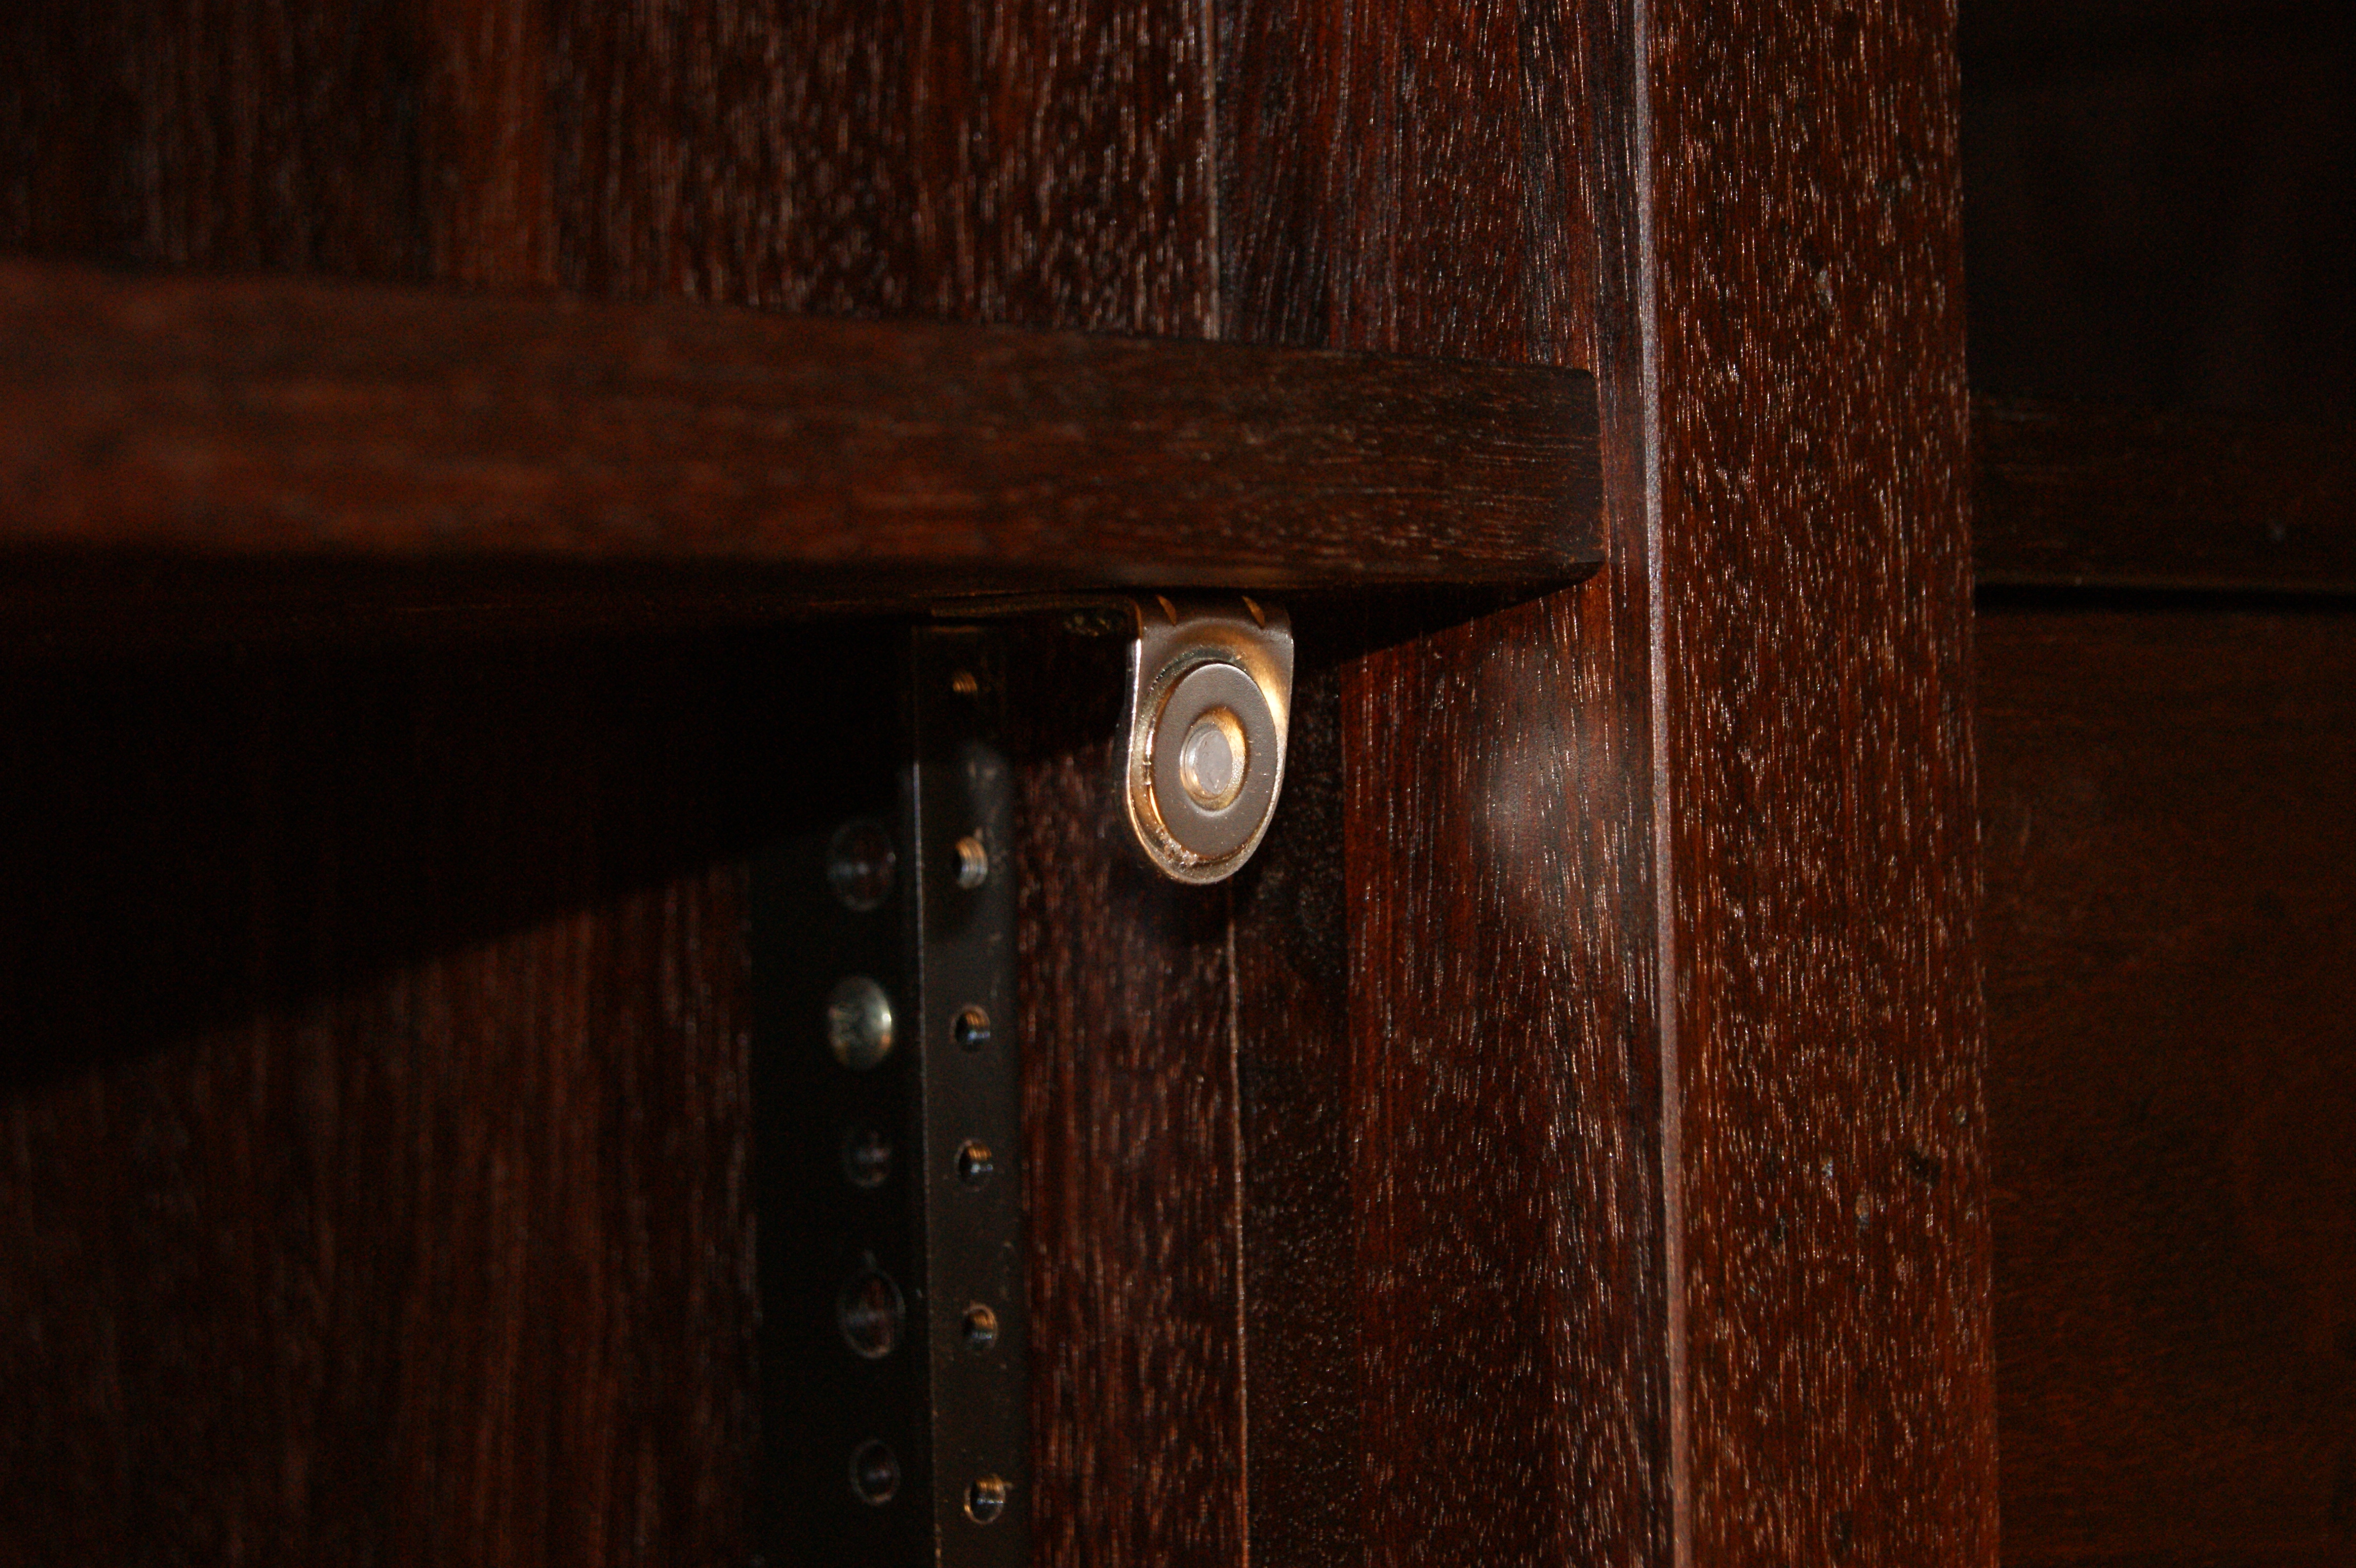
Also in that picture, you can see how I’m going to mount audio equipment. It’s a throwback to the days when I owned a “Sound Guy” business (which was actually called “The Sound Guy”). I mounted some rack rails into the center cabinet – which was designed to be the appropriate 19+ inches wide. You can see the rails here, with a removable shelf I was using to make sure I got them level.
And finally, on the other side of the door, I installed a magnetic catch to keep it closed:
Then, it was time to pay a little attention to the drawers. Since it was intended to look sort of old, this piece doesn’t have “full extension drawer glides” like you might find in your RV. There’s no metal hardware to make the drawers work. Instead, there are old-school wooden drawer runners, guides, and kickers. To keep all that wood moving smoothly, even when loaded down with movies and CDs, I installed some UHMW tape (Ultra High Molecular Weight). It’s clear, so you don’t notice it much, and it slides like Teflon. It’s good stuff.

So with all that done, I turned attention to the top. This is another place where I have to pay attention to wood movement. The top itself is plywood with a wooden frame that won’t move much at all. But, as we’ve previously established, the sides of the case can grow and shrink in width.
The most important place to have everything line up and stay that way is at the front of the case, so I just drilled holes there to screw the top on tightly across the front.
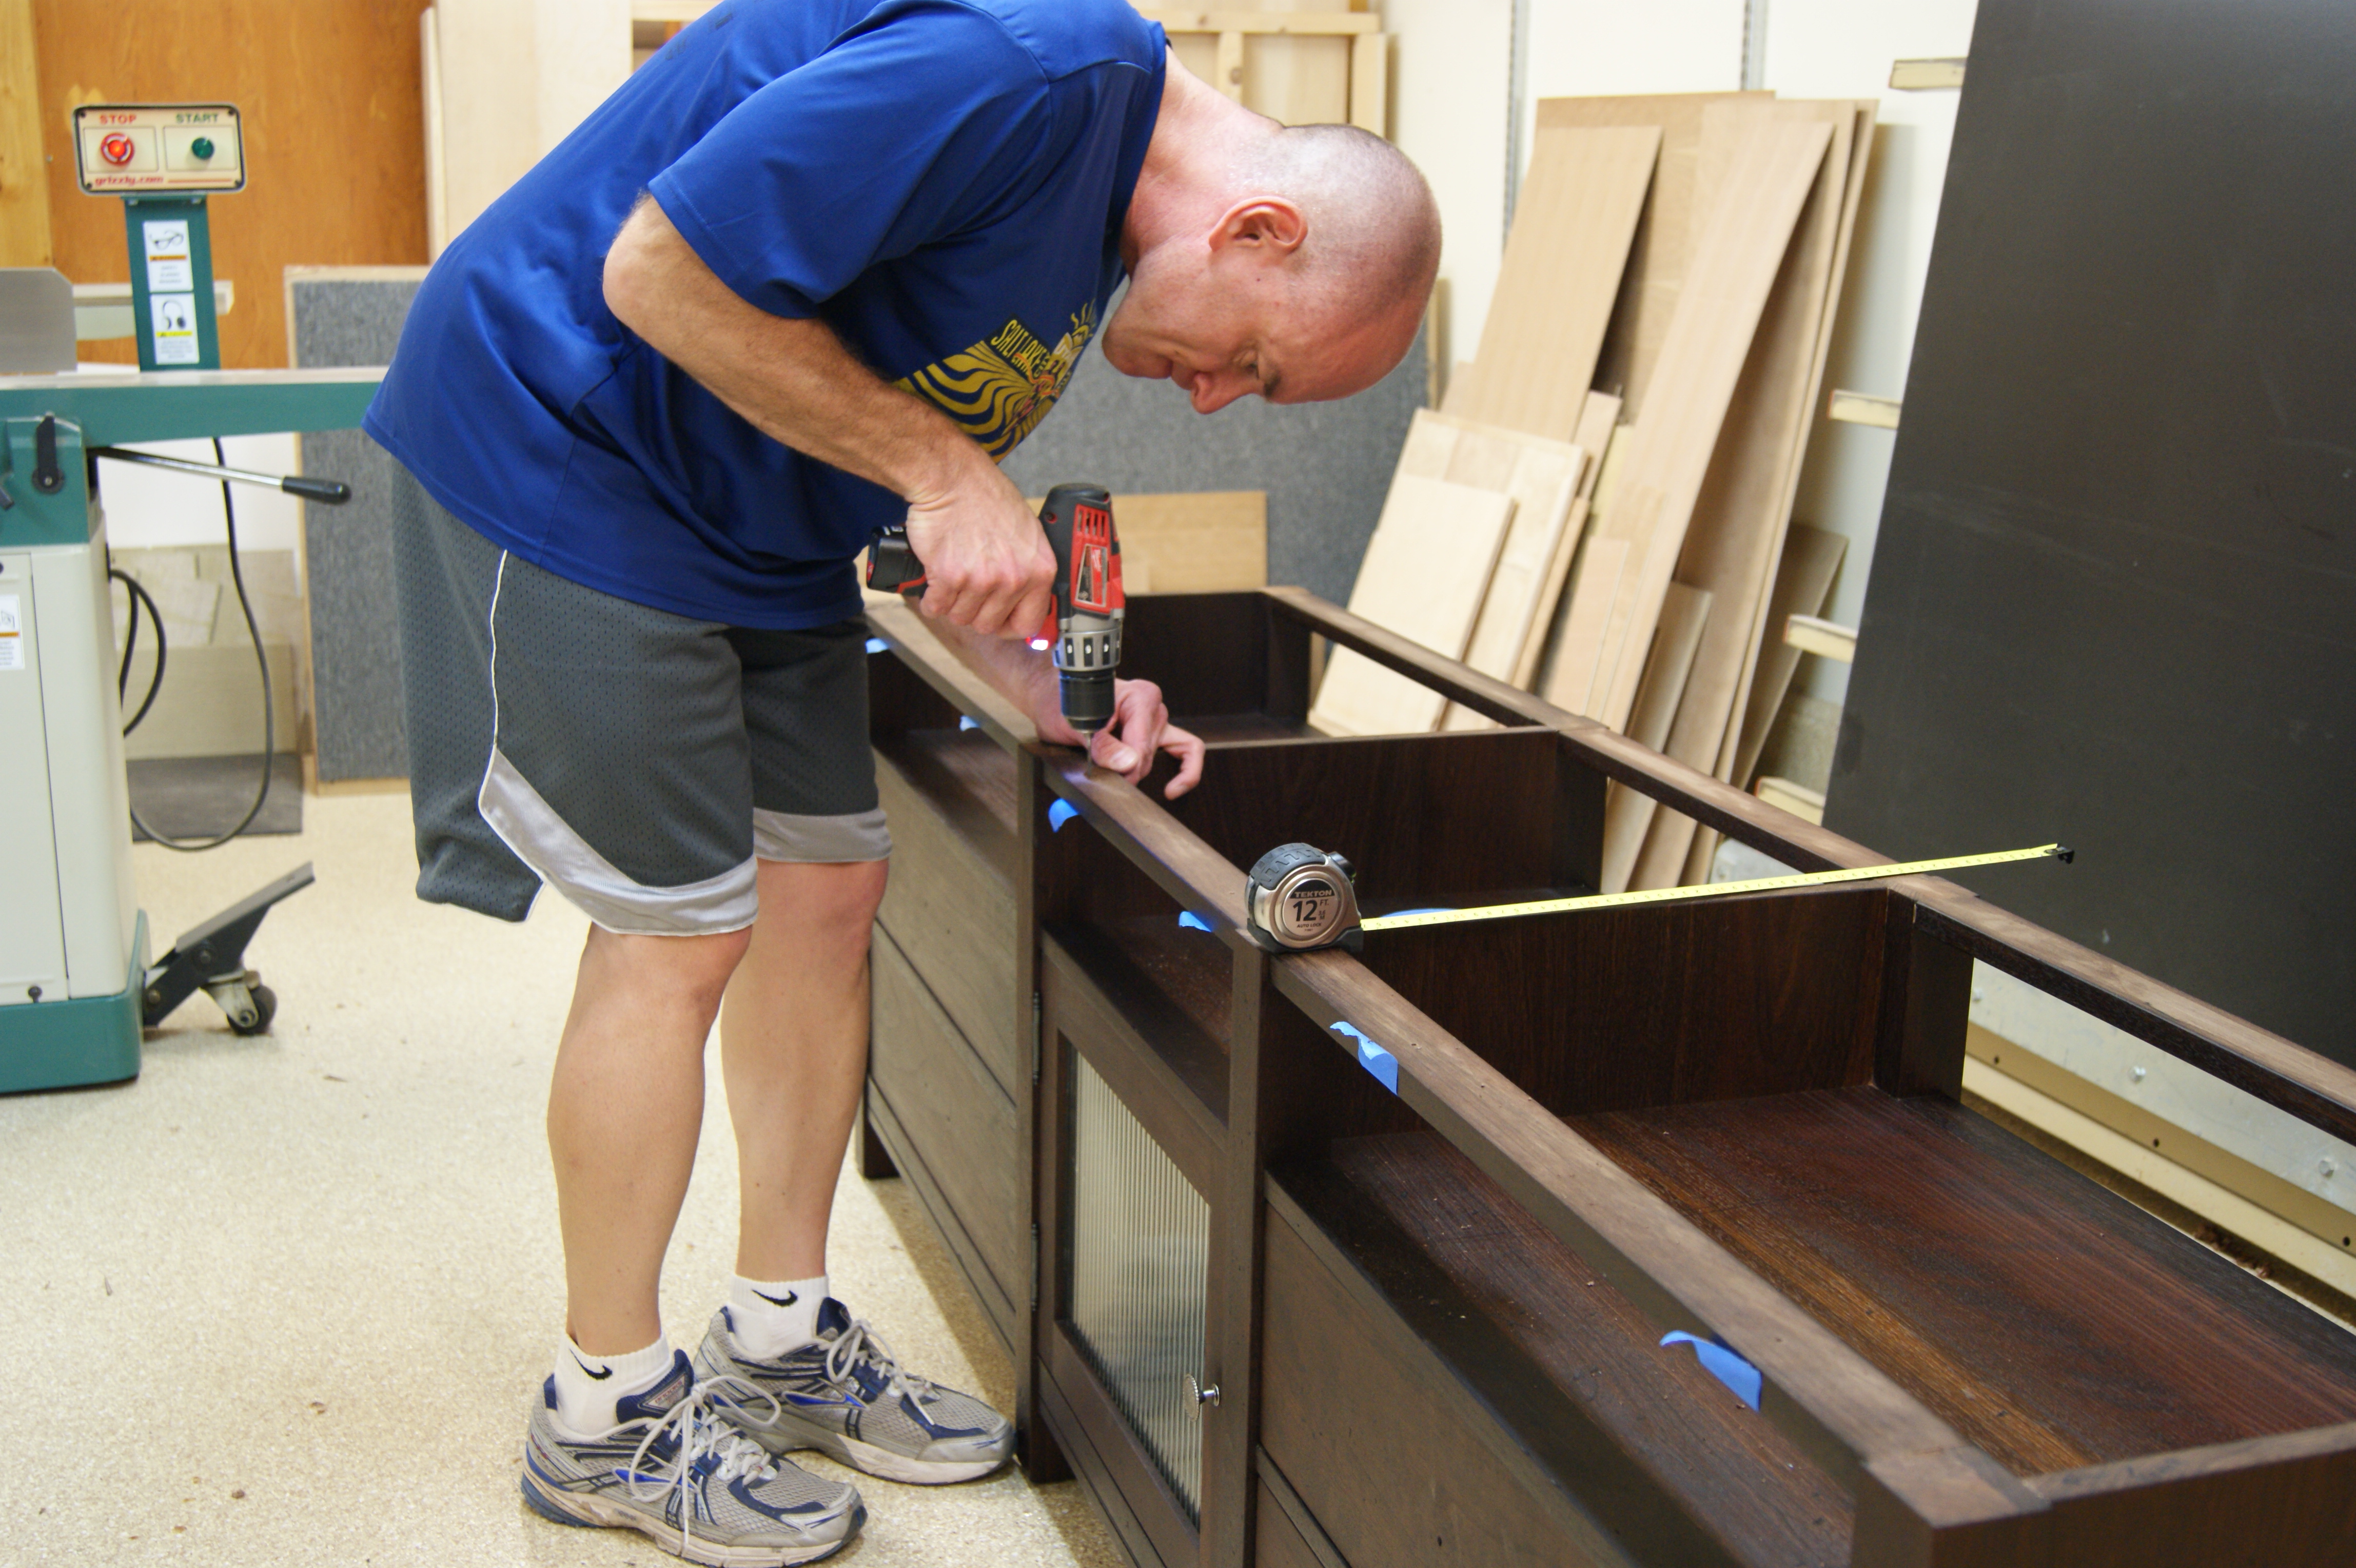
The blue tape is to help prevent blowouts on the underside of those rails when the drill tip busts through. If I had been super motivated (ie: if someone was paying me) I would have clamped wood underneath to back it up. But nobody was paying me, and I was going to countersink the holes anyway, so tape was good enough.
After the holes were drilled, I had to flip the whole thing over so I could countersink the holes on the underside.
And while I had the thing upside down, that was as good a time as any to attach some nail-in glides (or “feet” if you prefer) to the bottom of the legs. Except this thing has 8 legs, so it takes two packages of glides.
Attaching the top along the sides is accomplished through some “figure 8 fasteners”. These will pivot slightly to allow the sides to move relative to the top.
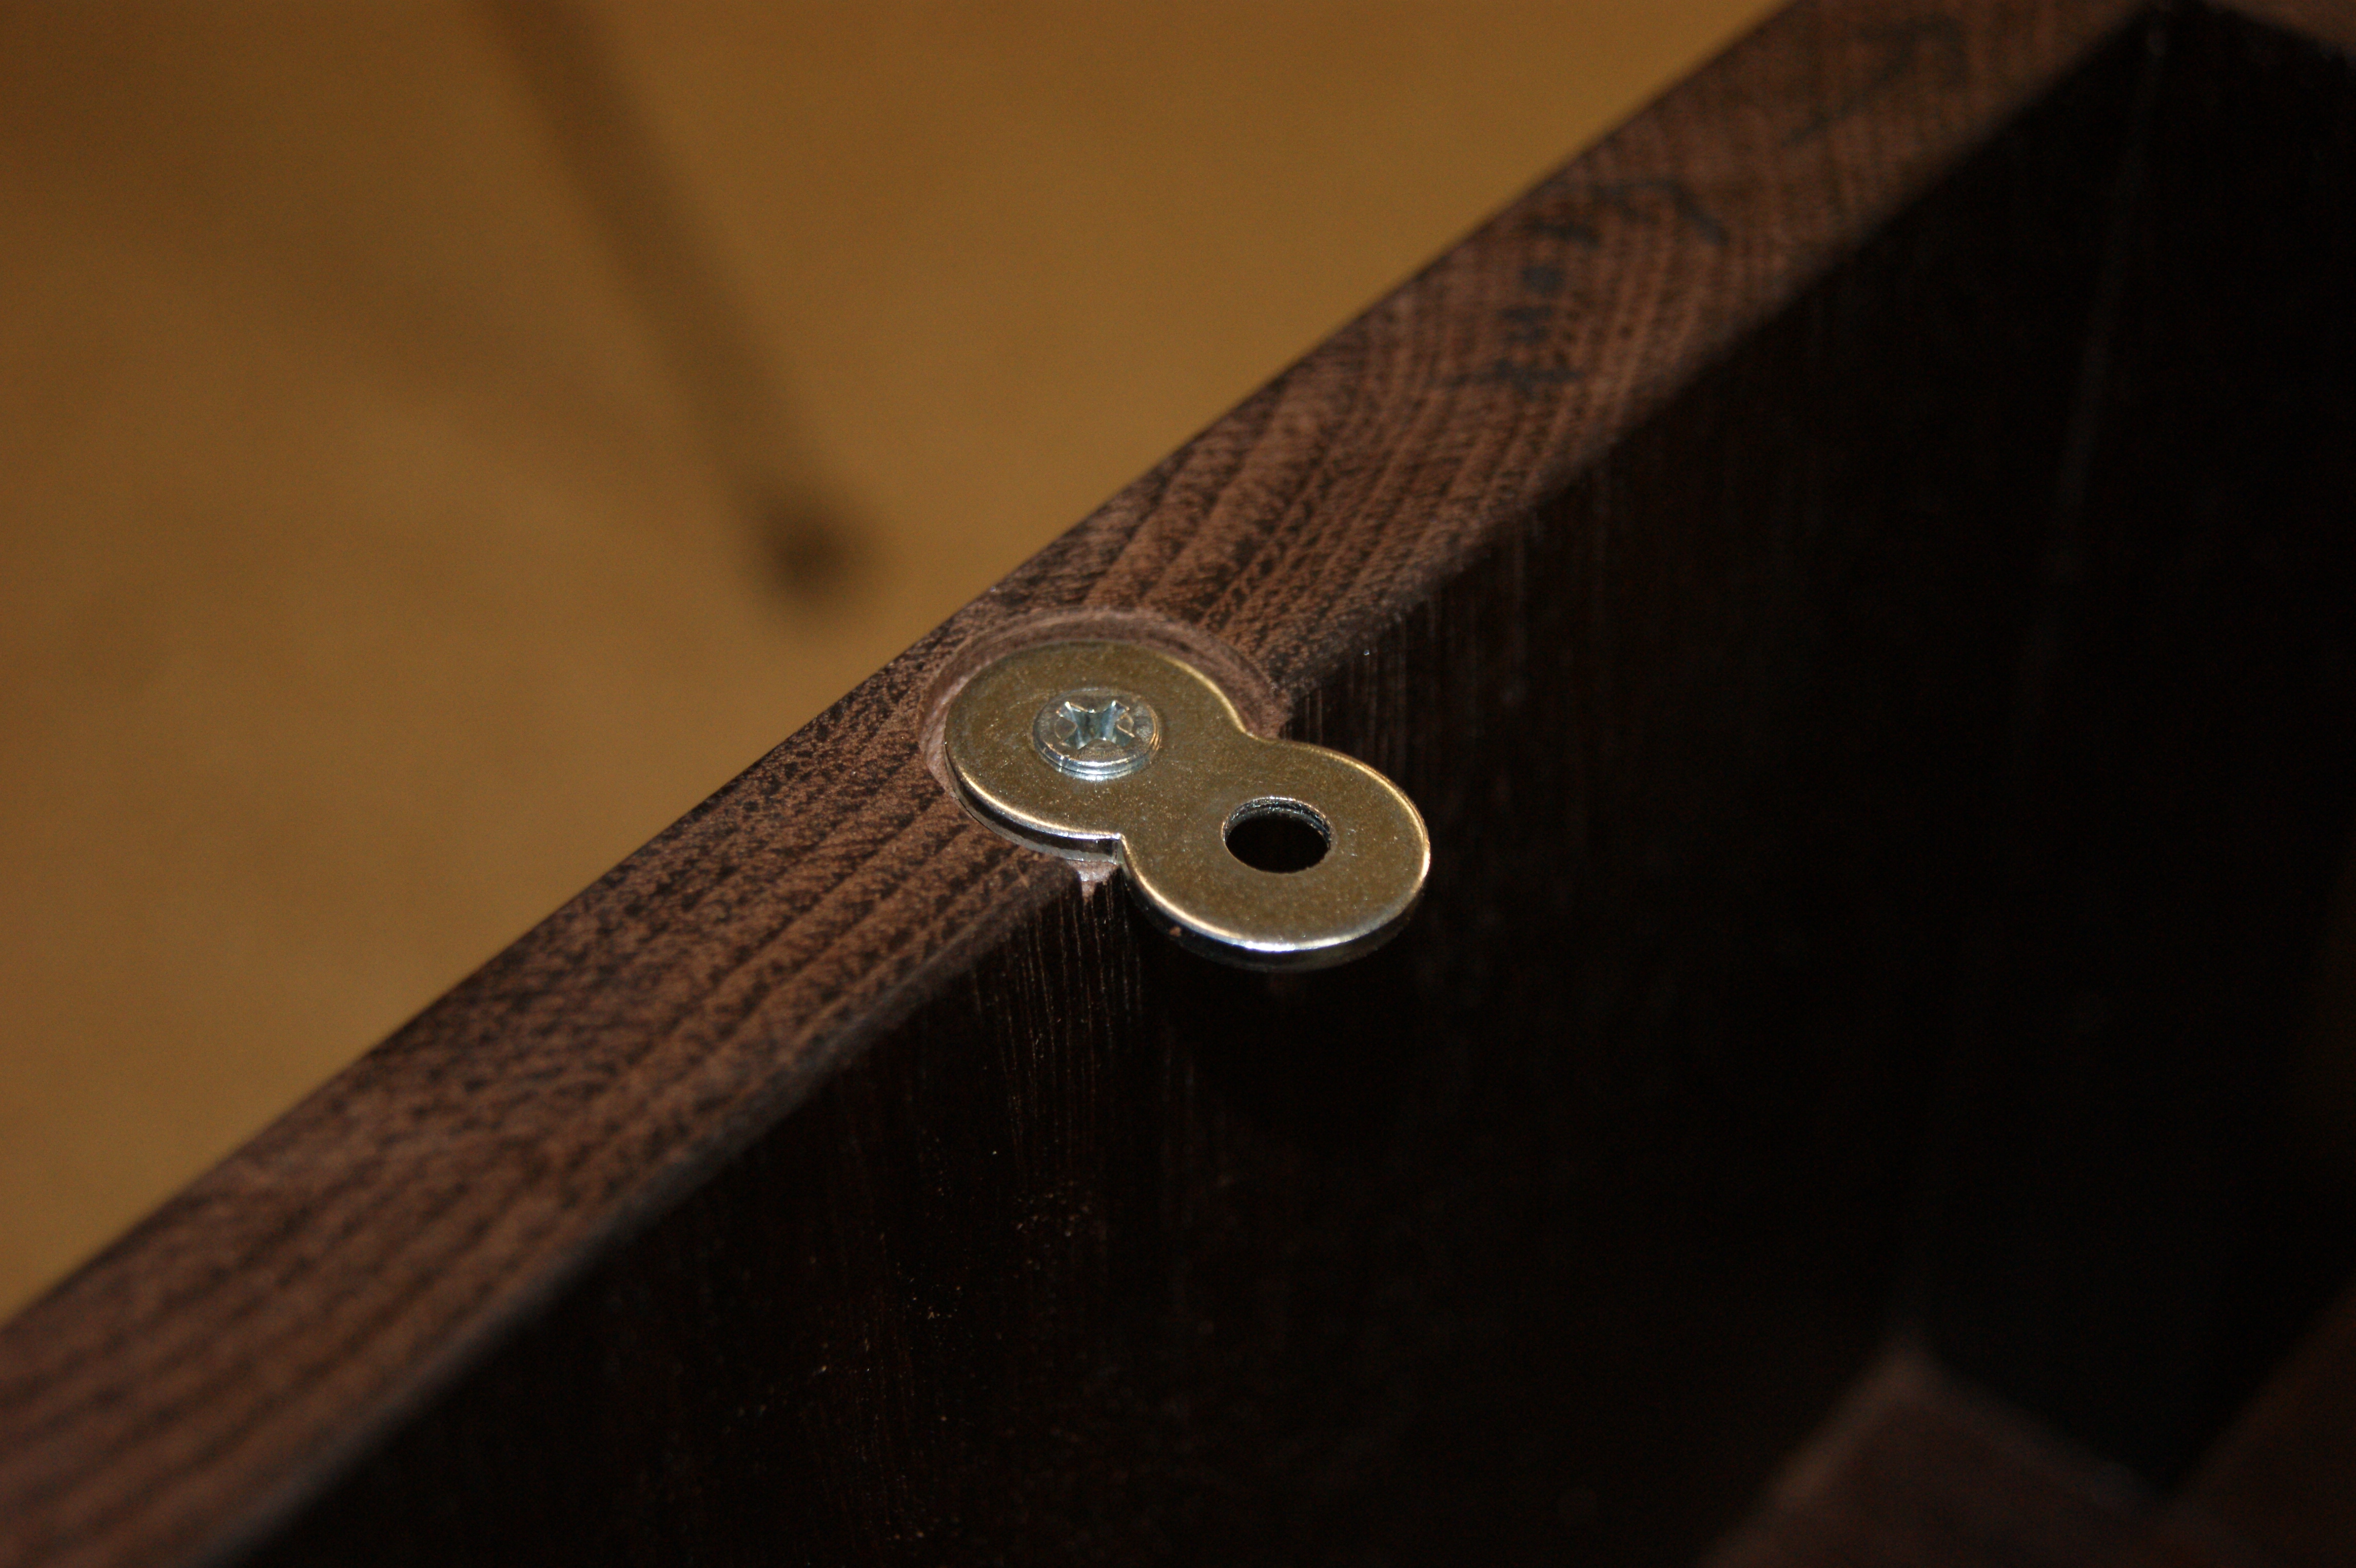
I realize screwing into end-grain isn’t the most secure way to attach these, but there are going to be 12 other screws holding the top down. These are just to keep it flat along the sides.
Along the back – where I wanted to direct the movement – I decided to use some slotted screw holes. I did this using a Dremel tool.
Why you should never use a Dremel Tool
A Dremel tool, for those of you who don’t know of them, is a terrible tool that should never be used for any purpose whatsoever. Oh sure, their advertisements and literature will show them being used for just about every task under the sun. Cutting, polishing, flush trimming, deburring; these are all supposed to be simple work for the Dremel tool. The reality is much different.
I’ve attempted to use a Dremel tool for each of those tasks and more. The tool has failed miserably at all of them. Now, I’m not without skill in using tools; so at this point, it’s unreasonable to conclude that every single attempt to use a Dremel tool has failed due to operator error. No. Twenty consecutive years of abject failure are simply because the Dremel is an idiotic whirring do-nothing of a tool that burns and ruins any workpiece you touch with it – all while making the delightful sound of a dentist’s drill.
The Dremel is the only tool that is more likely to ruin your project than a router. So why in the world would I choose to use one?? Well, the simple answer is: I didn’t have a router bit small enough to cut screw-shank sized holes, and I was too lazy to go buy one. I had the Dremel, with a small, supposedly spiral up-cutting bit, and I even had the “router base” for the thing. So against all better judgement, I tried…

I did everything possible to make this turn out properly. I made test cuts in the same wood species to get a feel for the thing. I pre-drilled at both ends of the cut. I clamped a support piece to guide the cut. Even so, the Dremel refused to cut straight, and lurched about in random directions in fits and starts. This is because Dremel tools are stupid. (I think I just gave up the chance to be sponsored by Dremel.)

That is the BEST of the slots I was able to cut with the Dremel. And it only looks that good because I spent 15 minutes straightening up the Dremel gouges with files afterward. The cool yellow lines on the dark wood are brought to you by the Pica pencil, which actually IS an awesome tool.
To wrap up my thoughts on the Dremel tool, I’ll leave you with this: If you need to cut something, buy a saw. If you need a spinning bit, use a router. If you need to deburr something, use a file. If you need to grind something down, take it to the grinder. In other words, be a man (or a woman) and just use the right tool for the job. Don’t get an impotent $25 plastic noisemaker that claims to do all things – but really does none of them properly.
Ugh. OK. I’m done with the Dremel thing.
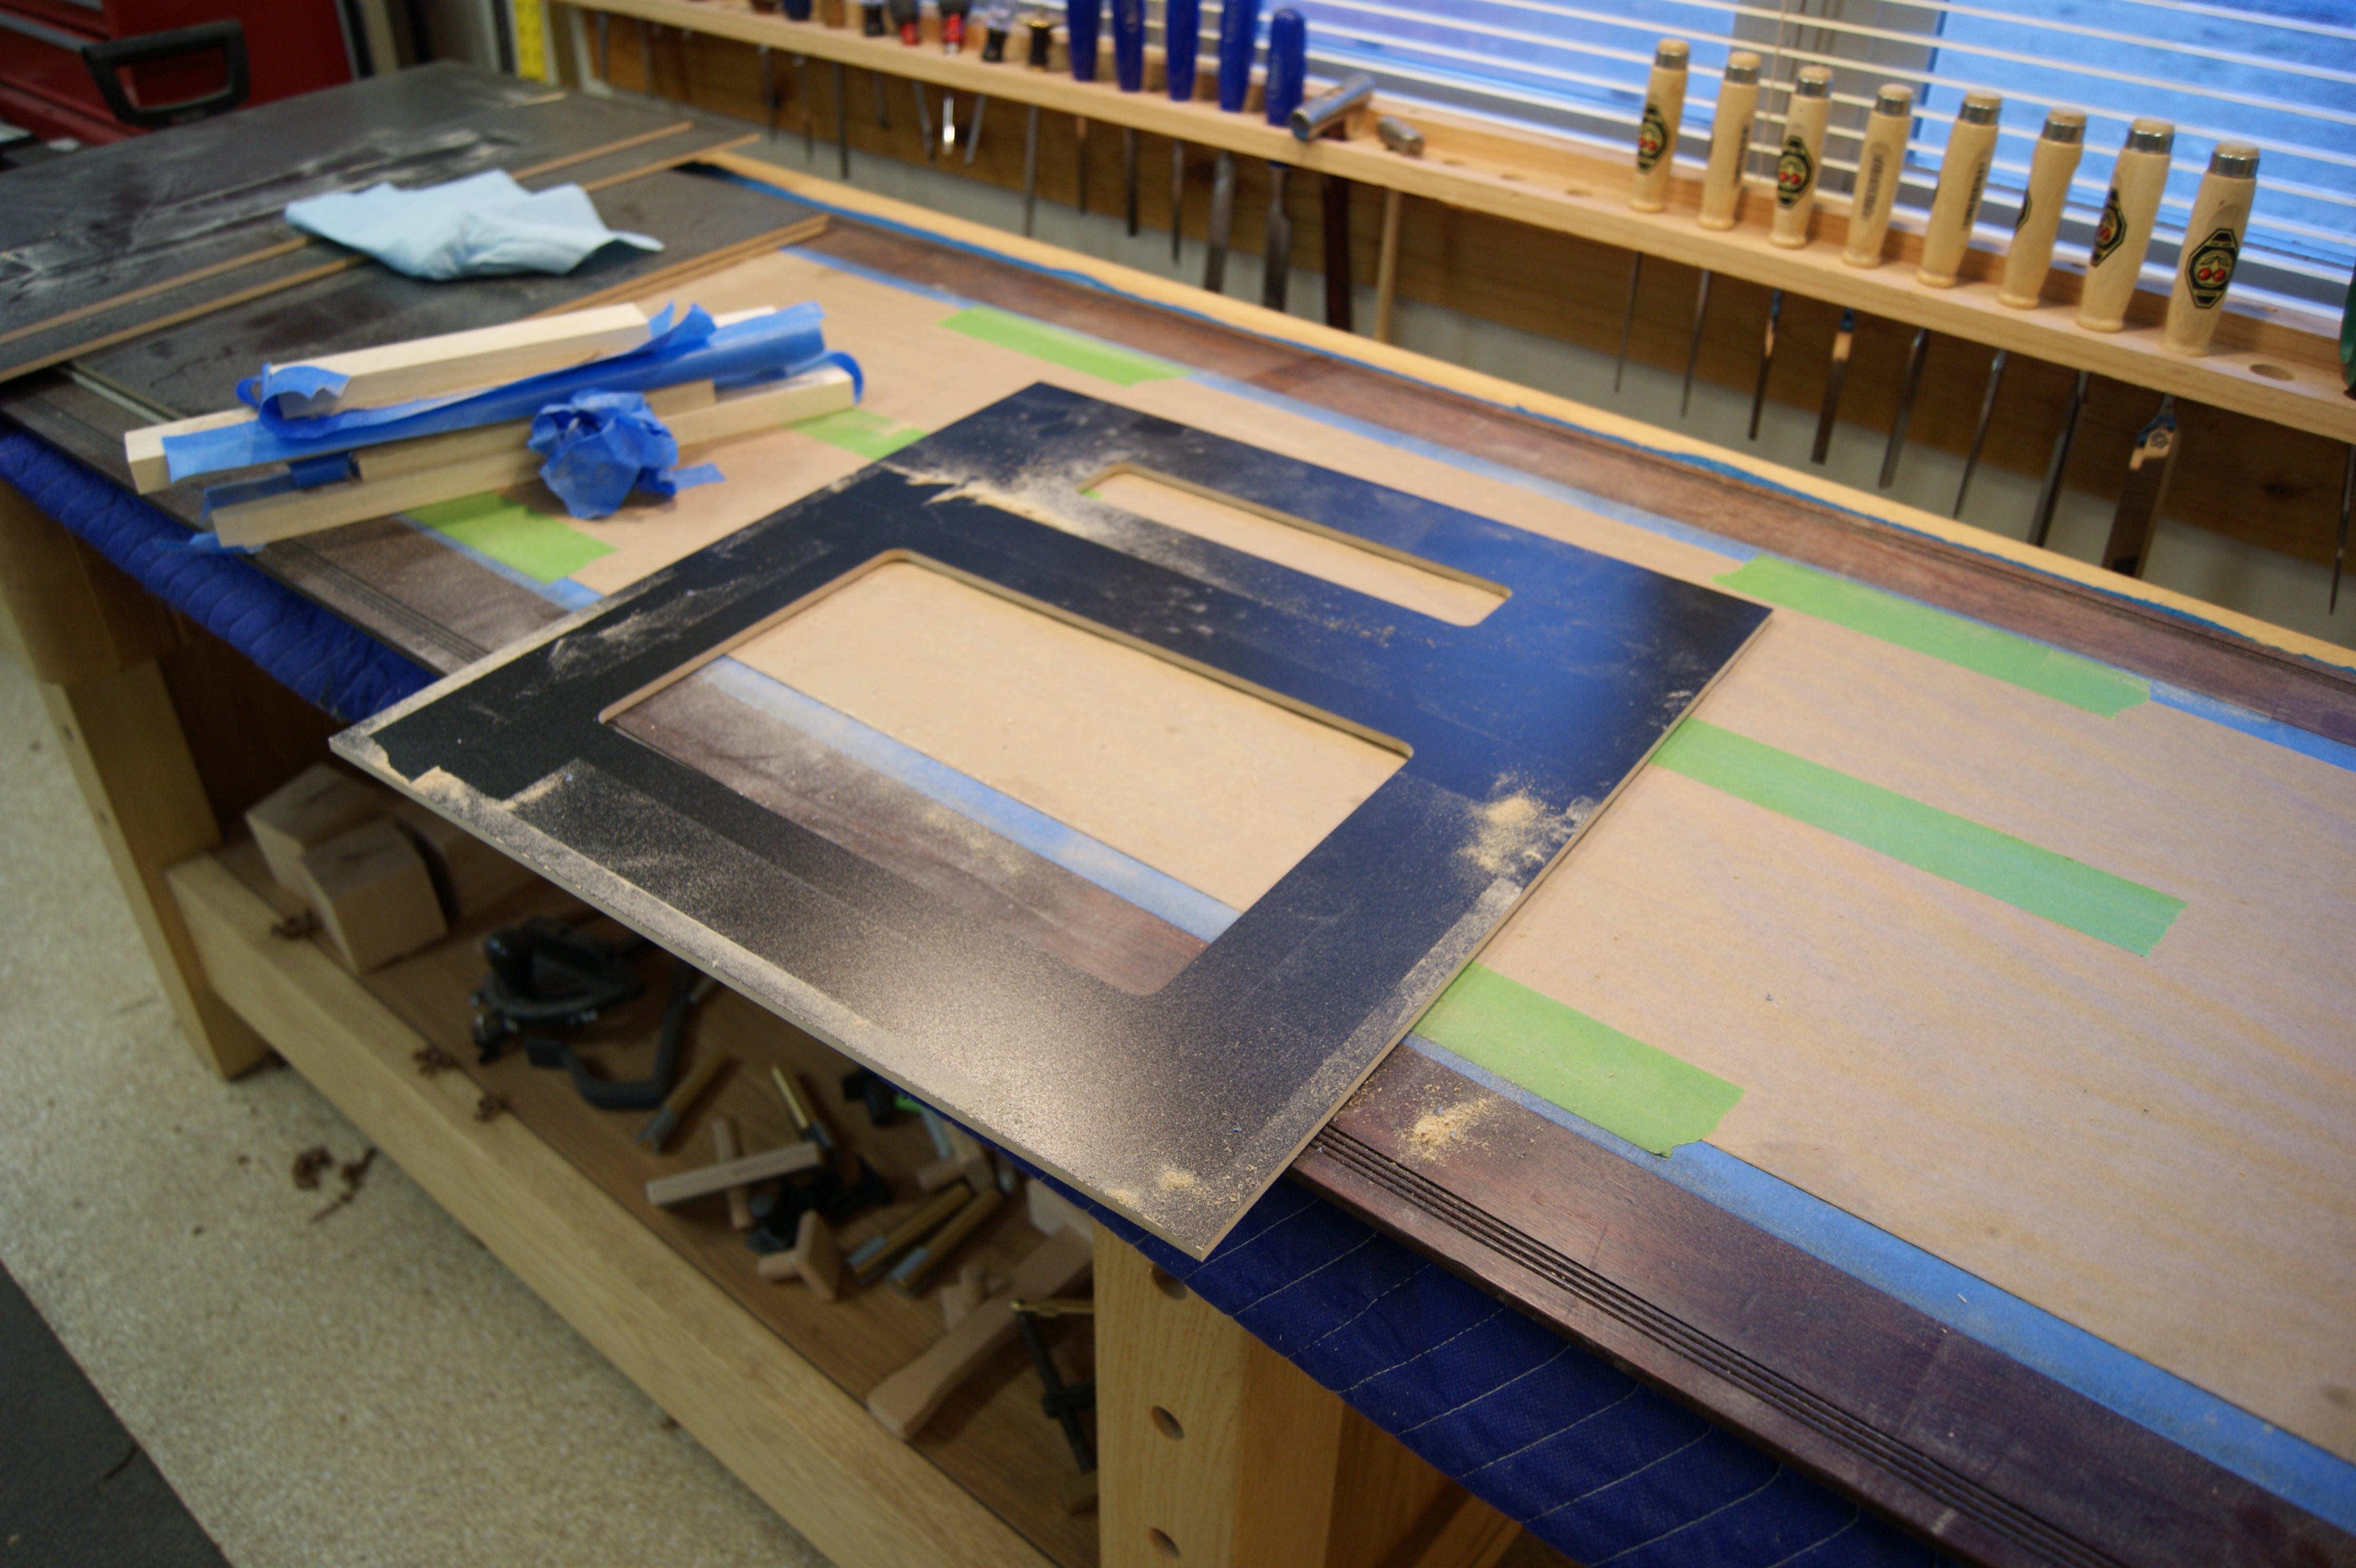
Back to the project. I also had to make some pieces for the back of the entertainment center. I just used some quarter inch black melamine for this. I had already left rabbets in the back of the case to hold the backs, but I needed to cut the holes in the melamine for cables, ventilation, and electrical connections. I could have tried to cut them with a jigsaw, but then they would have looked like I cut them with a jigsaw. So instead, I came up with this elaborate setup on the router table using a bunch of tape and clamps, and a bearing guided router bit.
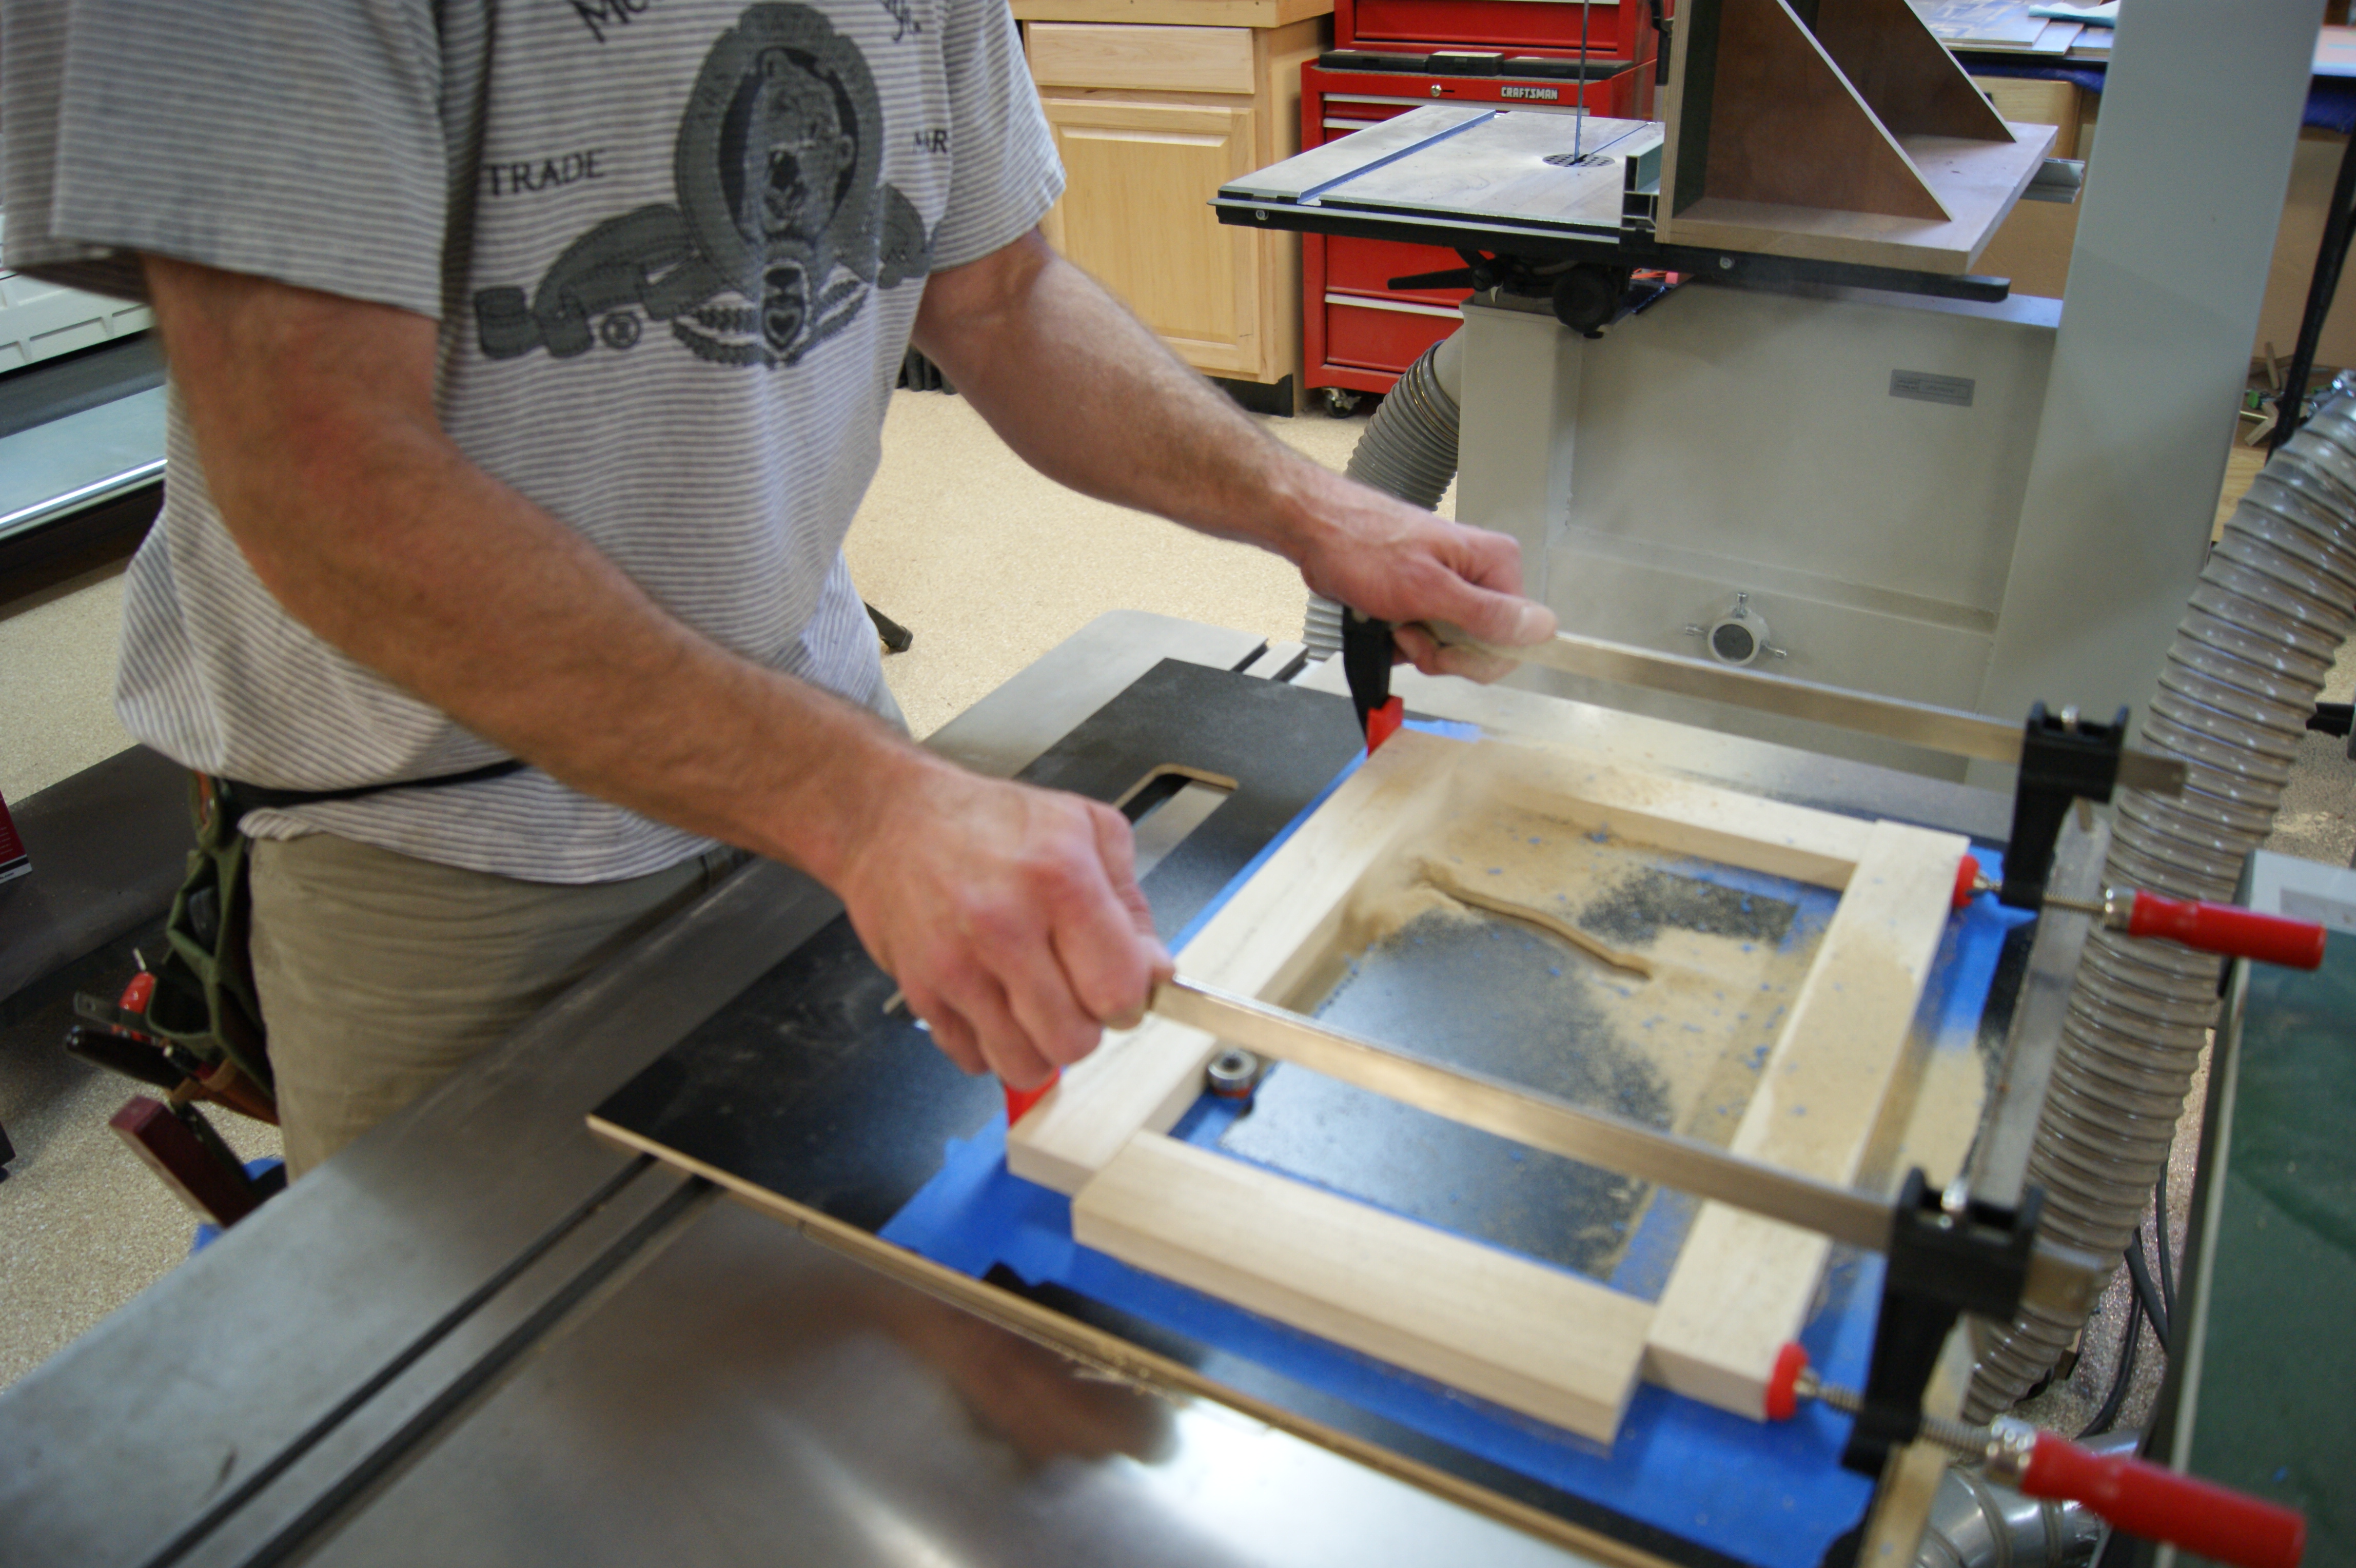
I hate routers, but they’re better than a Dremel tool.
It took a while to set up to make basically two cuts. But when I was all done, instead of jagged, chipped out jigsaw cuts, I had these, which turned out not too shabby.
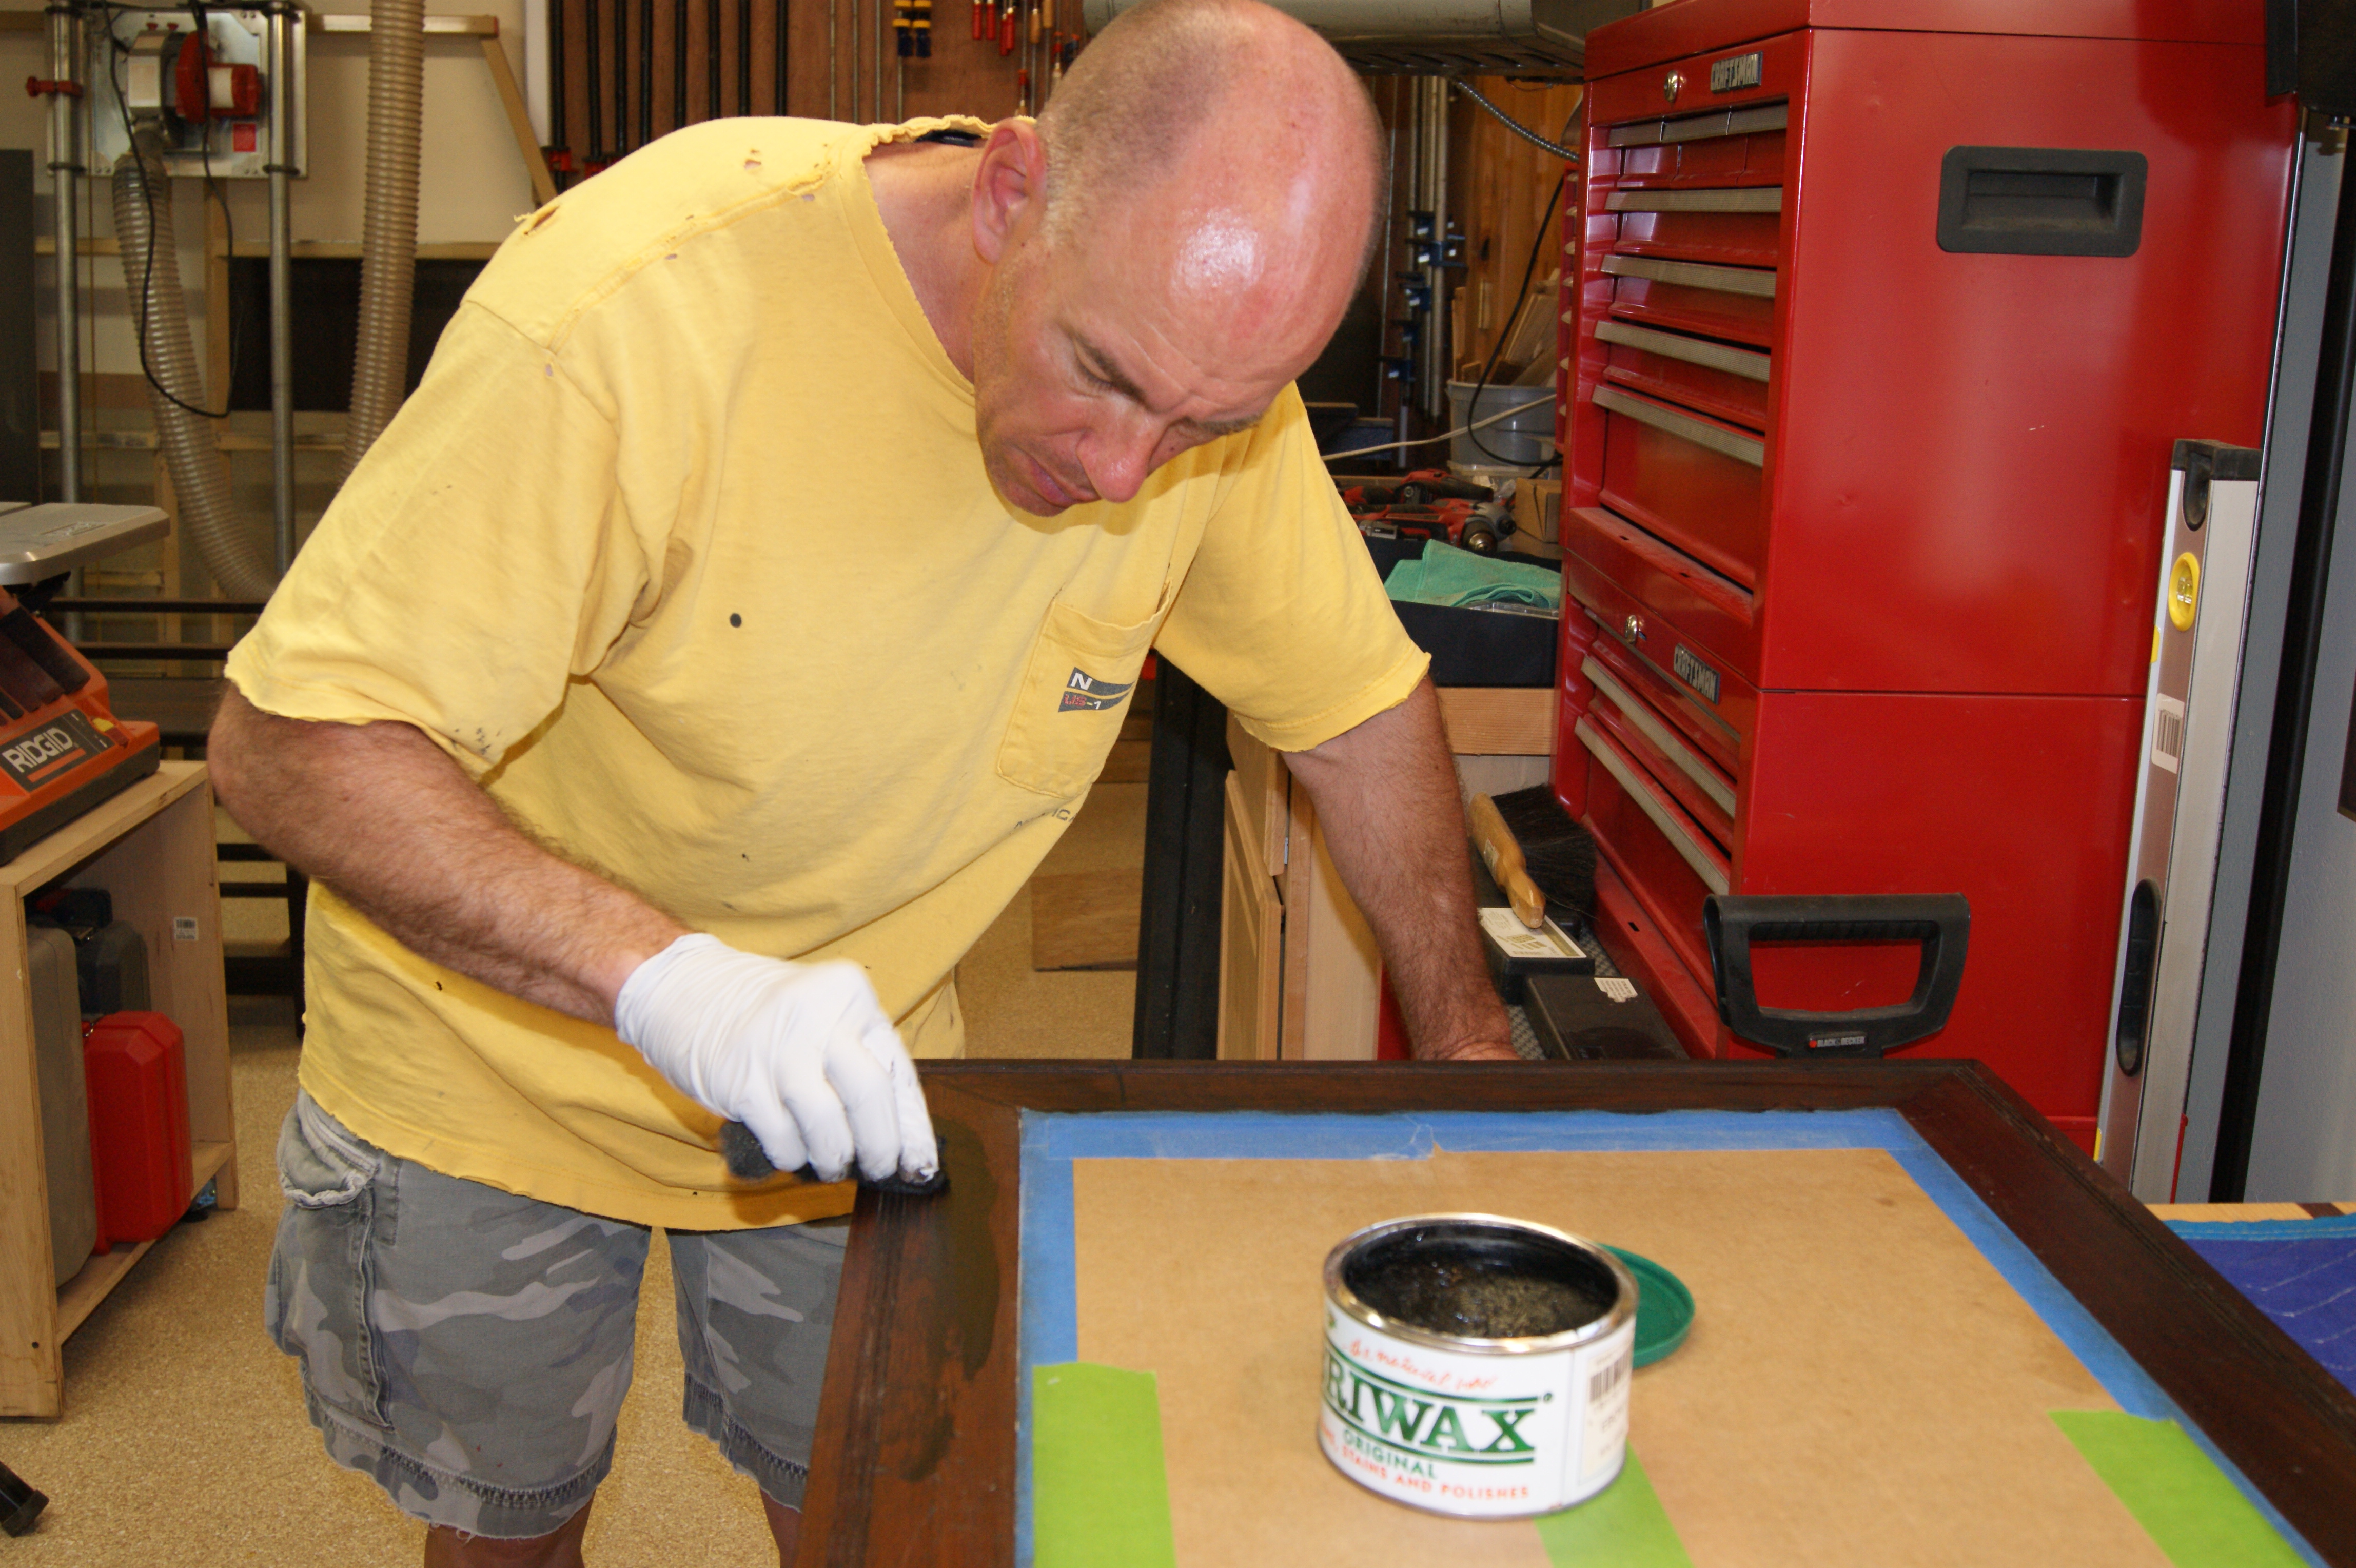
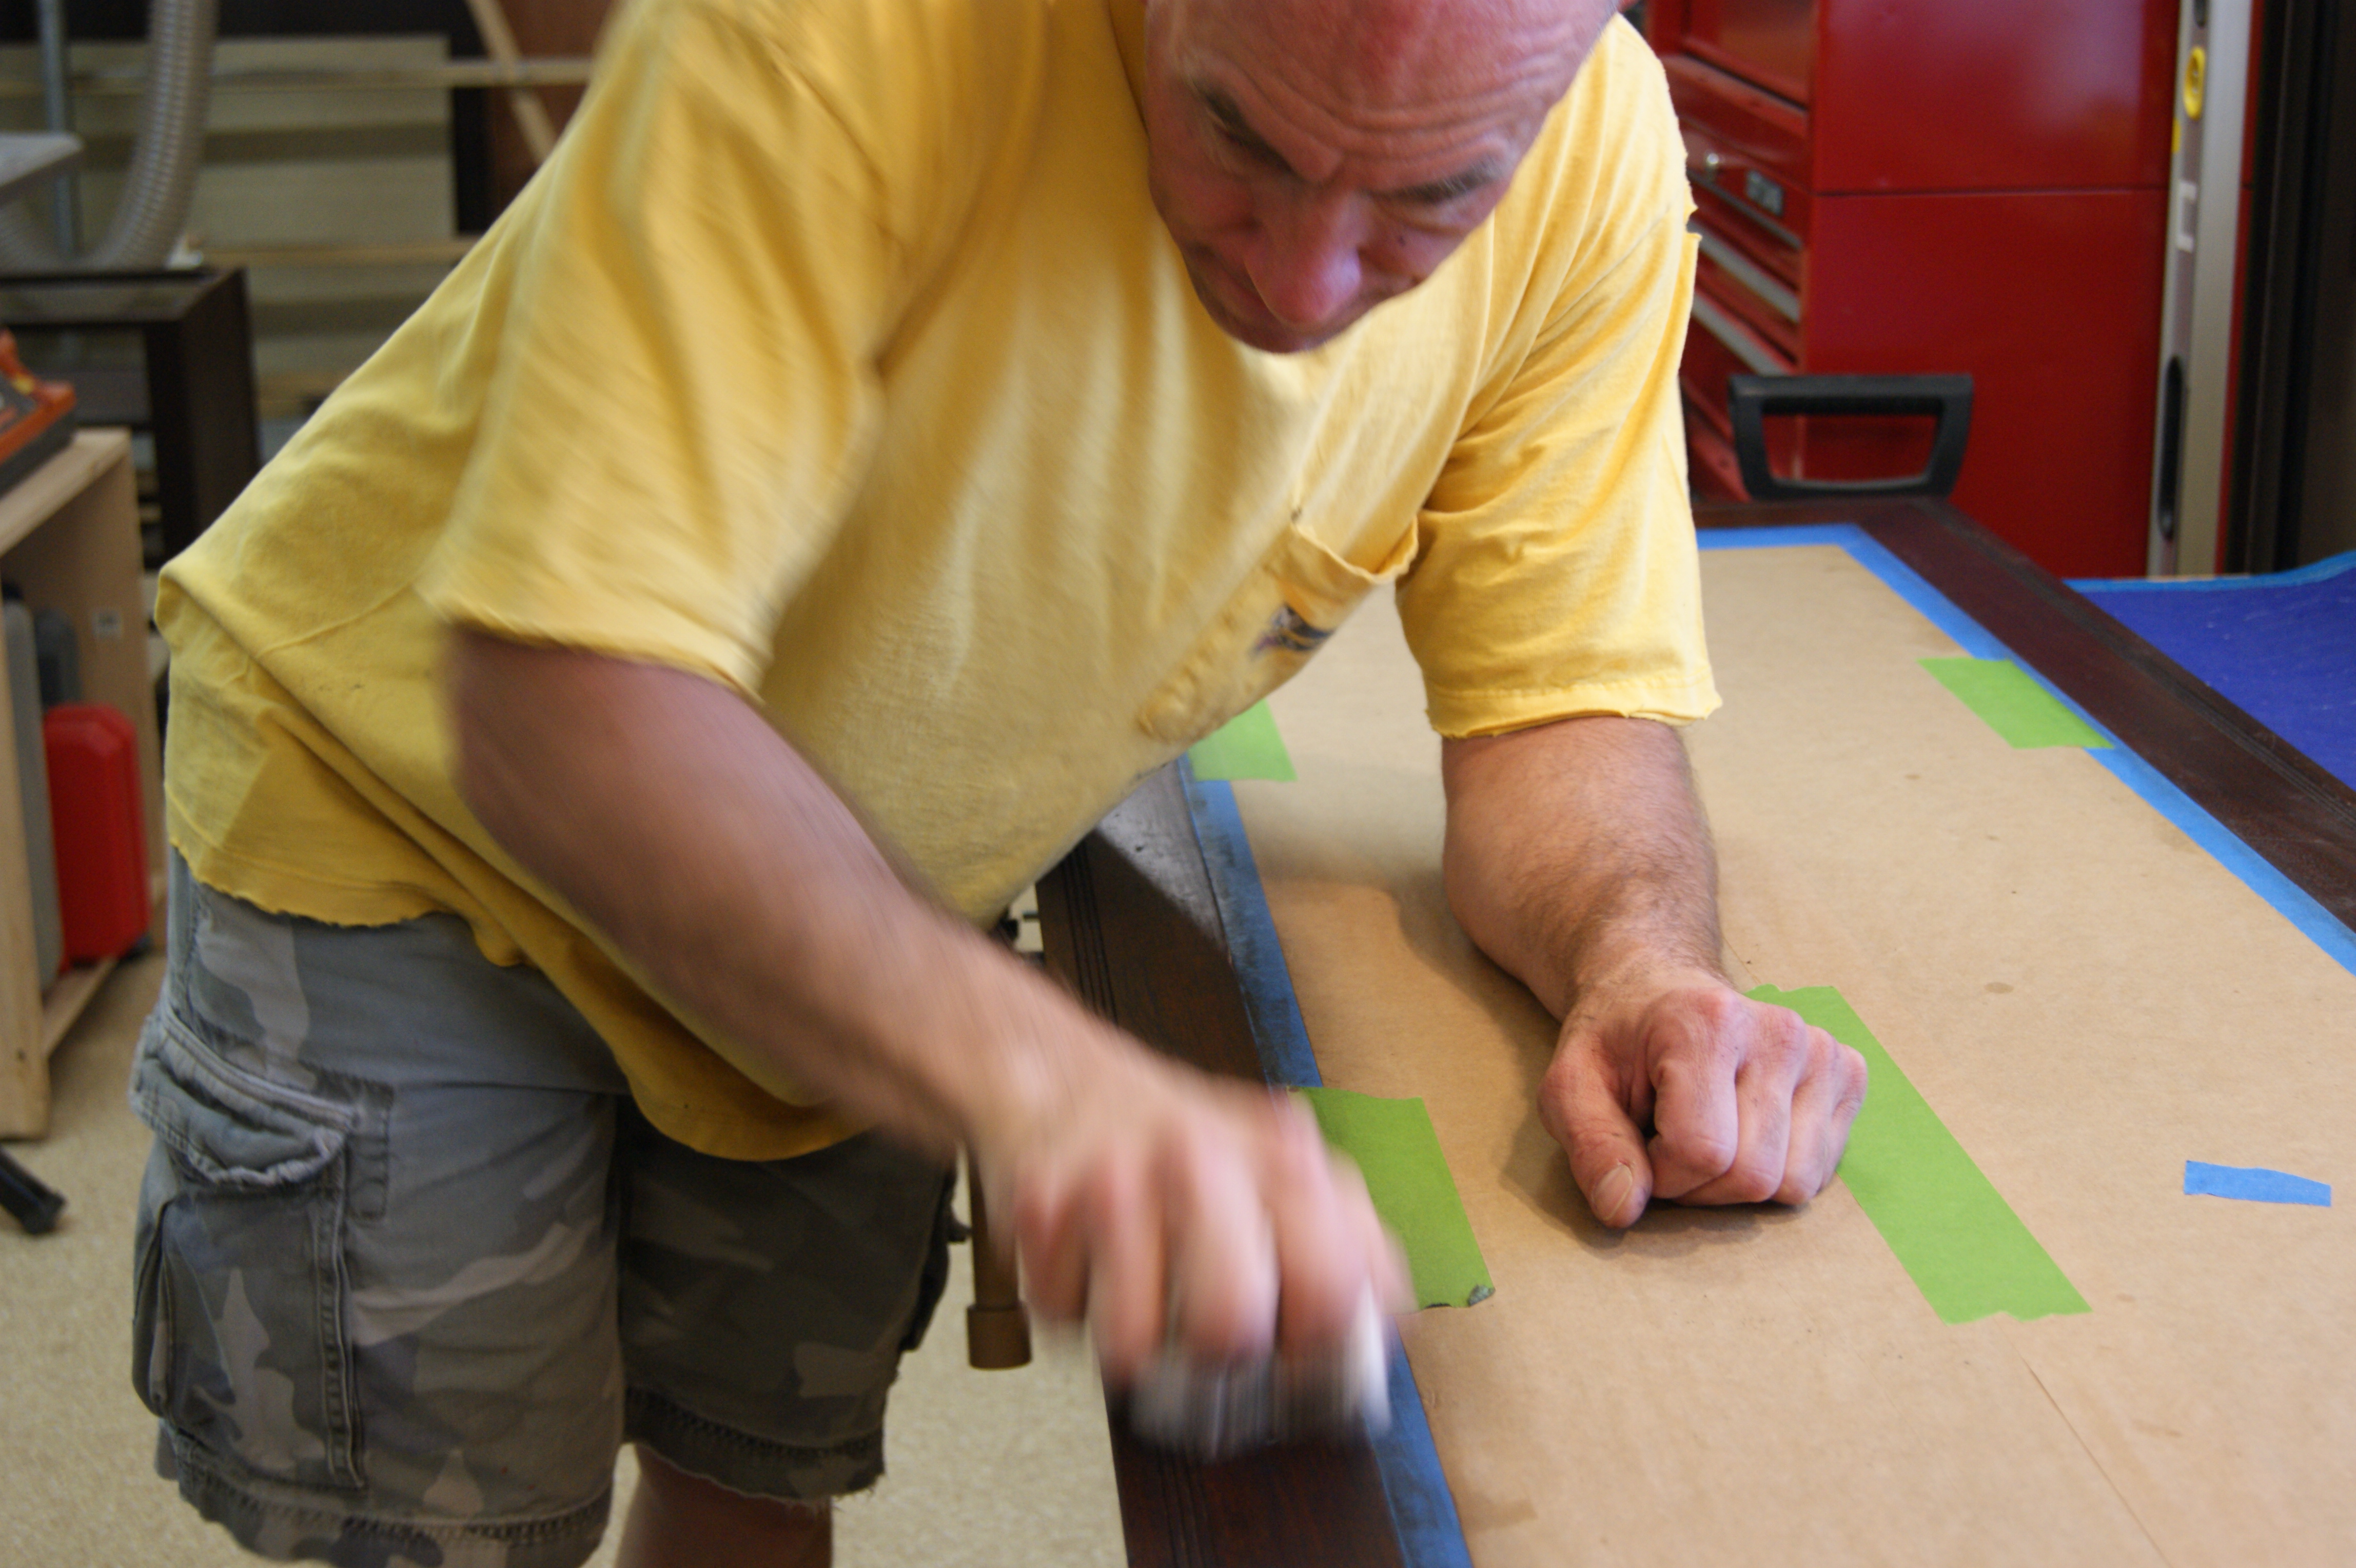
The last thing to do in the shop was apply a coat of wax. I used black wax, because it can accumulate slightly in the dings and other imperfections in the piece, and look like 80 years of dust and pledge all gunked up in there. It’s a subtle thing, but you’ll see what I mean at the end. First, there was applying the wax:
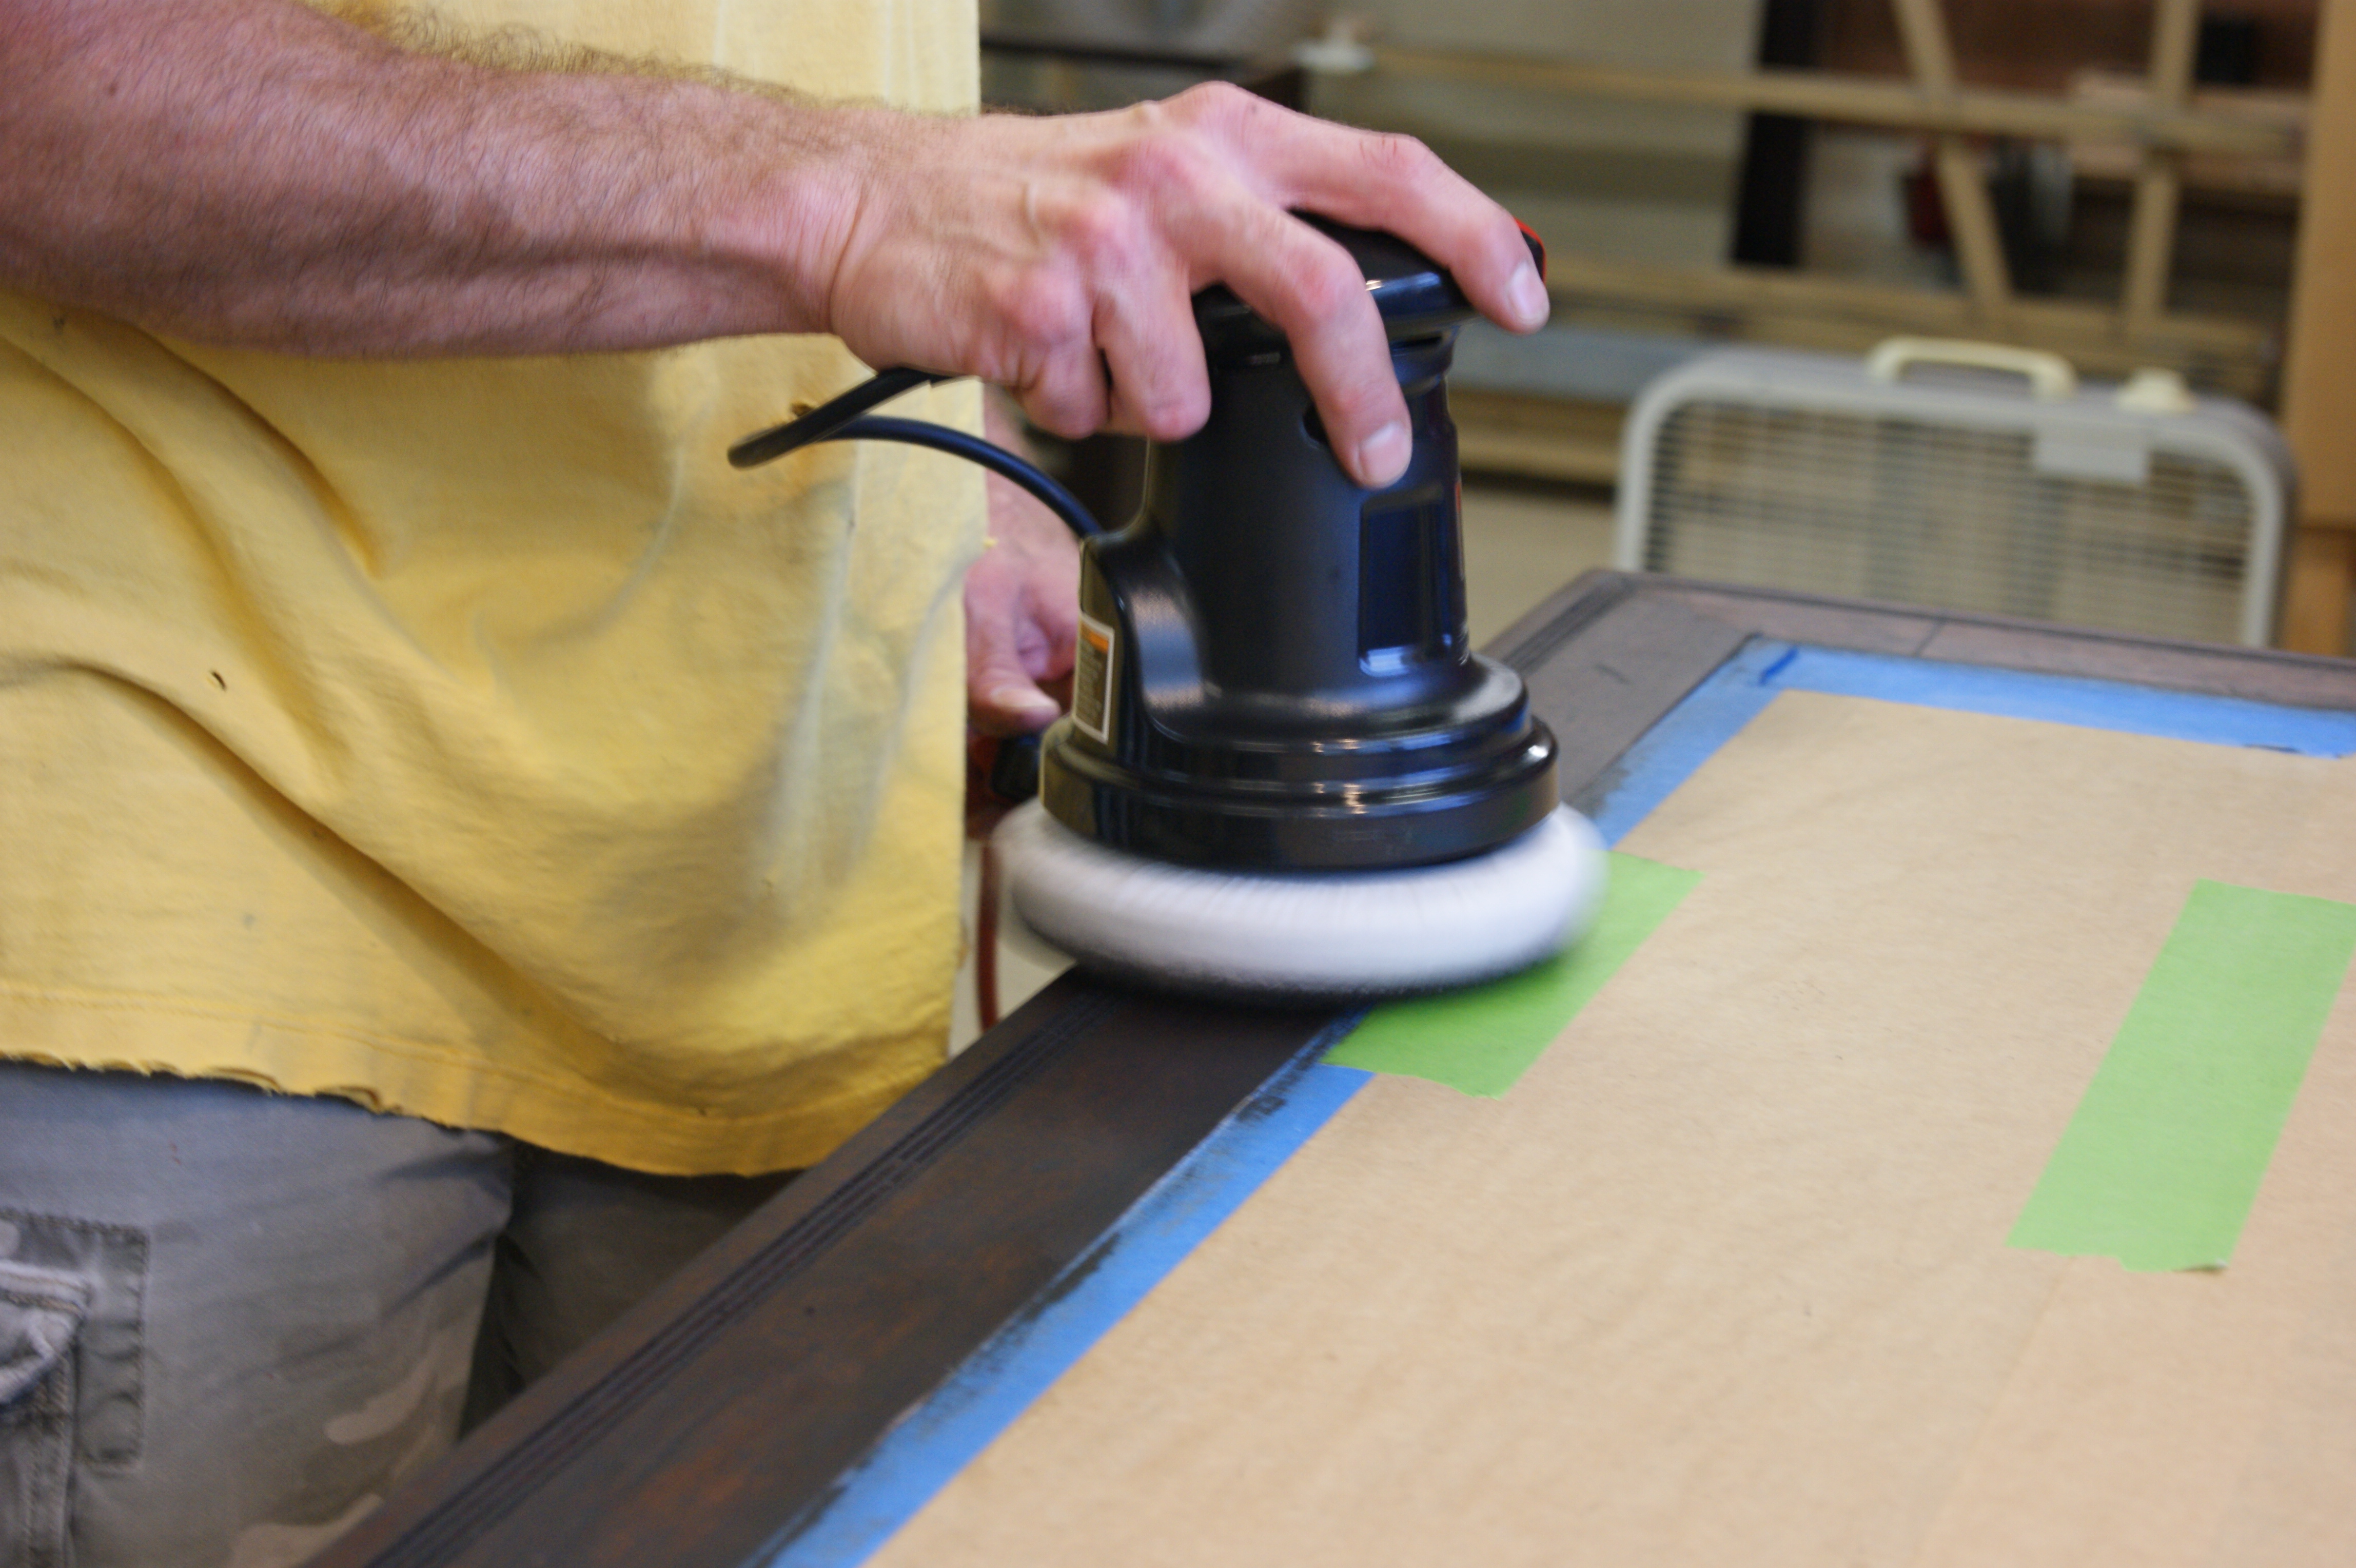
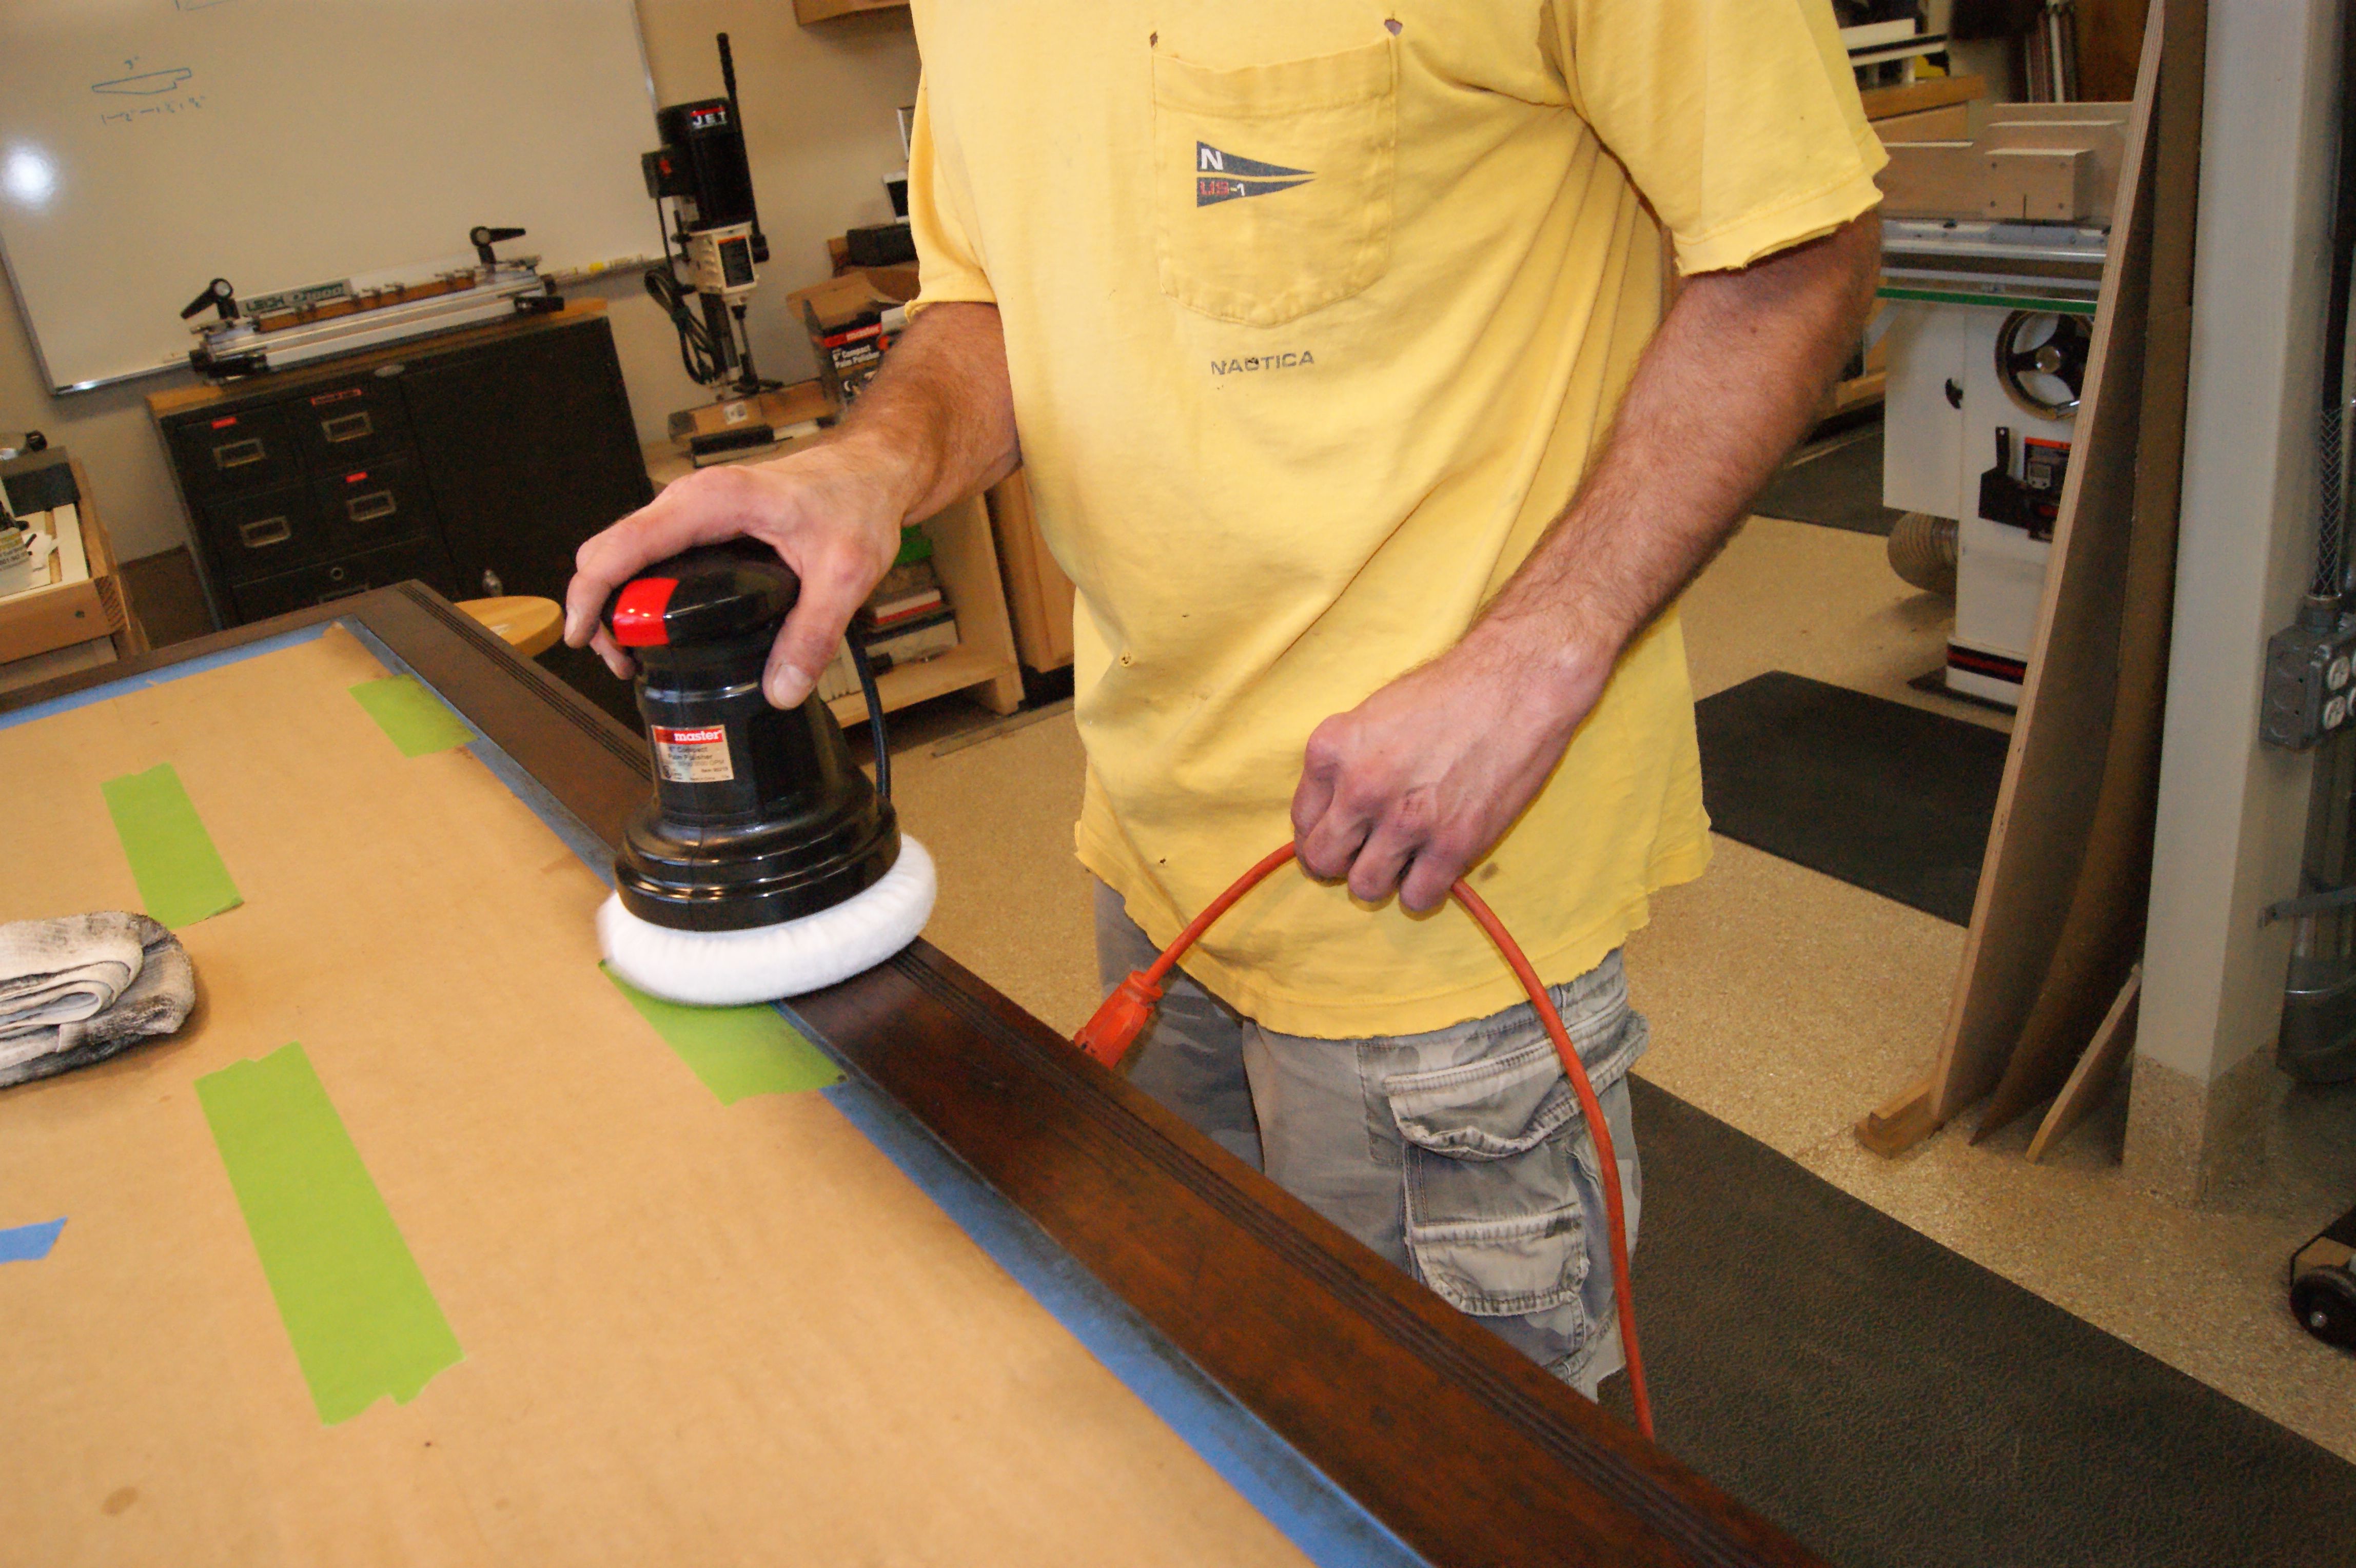
Then, after it dried, buffing it off with a random orbit polisher:
That still left a little more wax on than I liked, so then I went back at by hand for more buffing:
And I still wasn’t happy with that. So finally, one more time around with a terry pad on the random orbit polisher to remove any last streaks:
Stef says my shirt is too ratty to wear in pictures anymore and I have to throw it away or use it for rags. She can be mean like that.
Yes, it took a really long time to do four drawer fronts, both sides of the top, and the entire outside of the main case. But when I was done, I had wood that looked generally like this:

And THAT was the look I’ve been going for since February. You can see the bits of wax in the dents and scratches. But hopefully, it just looks old.
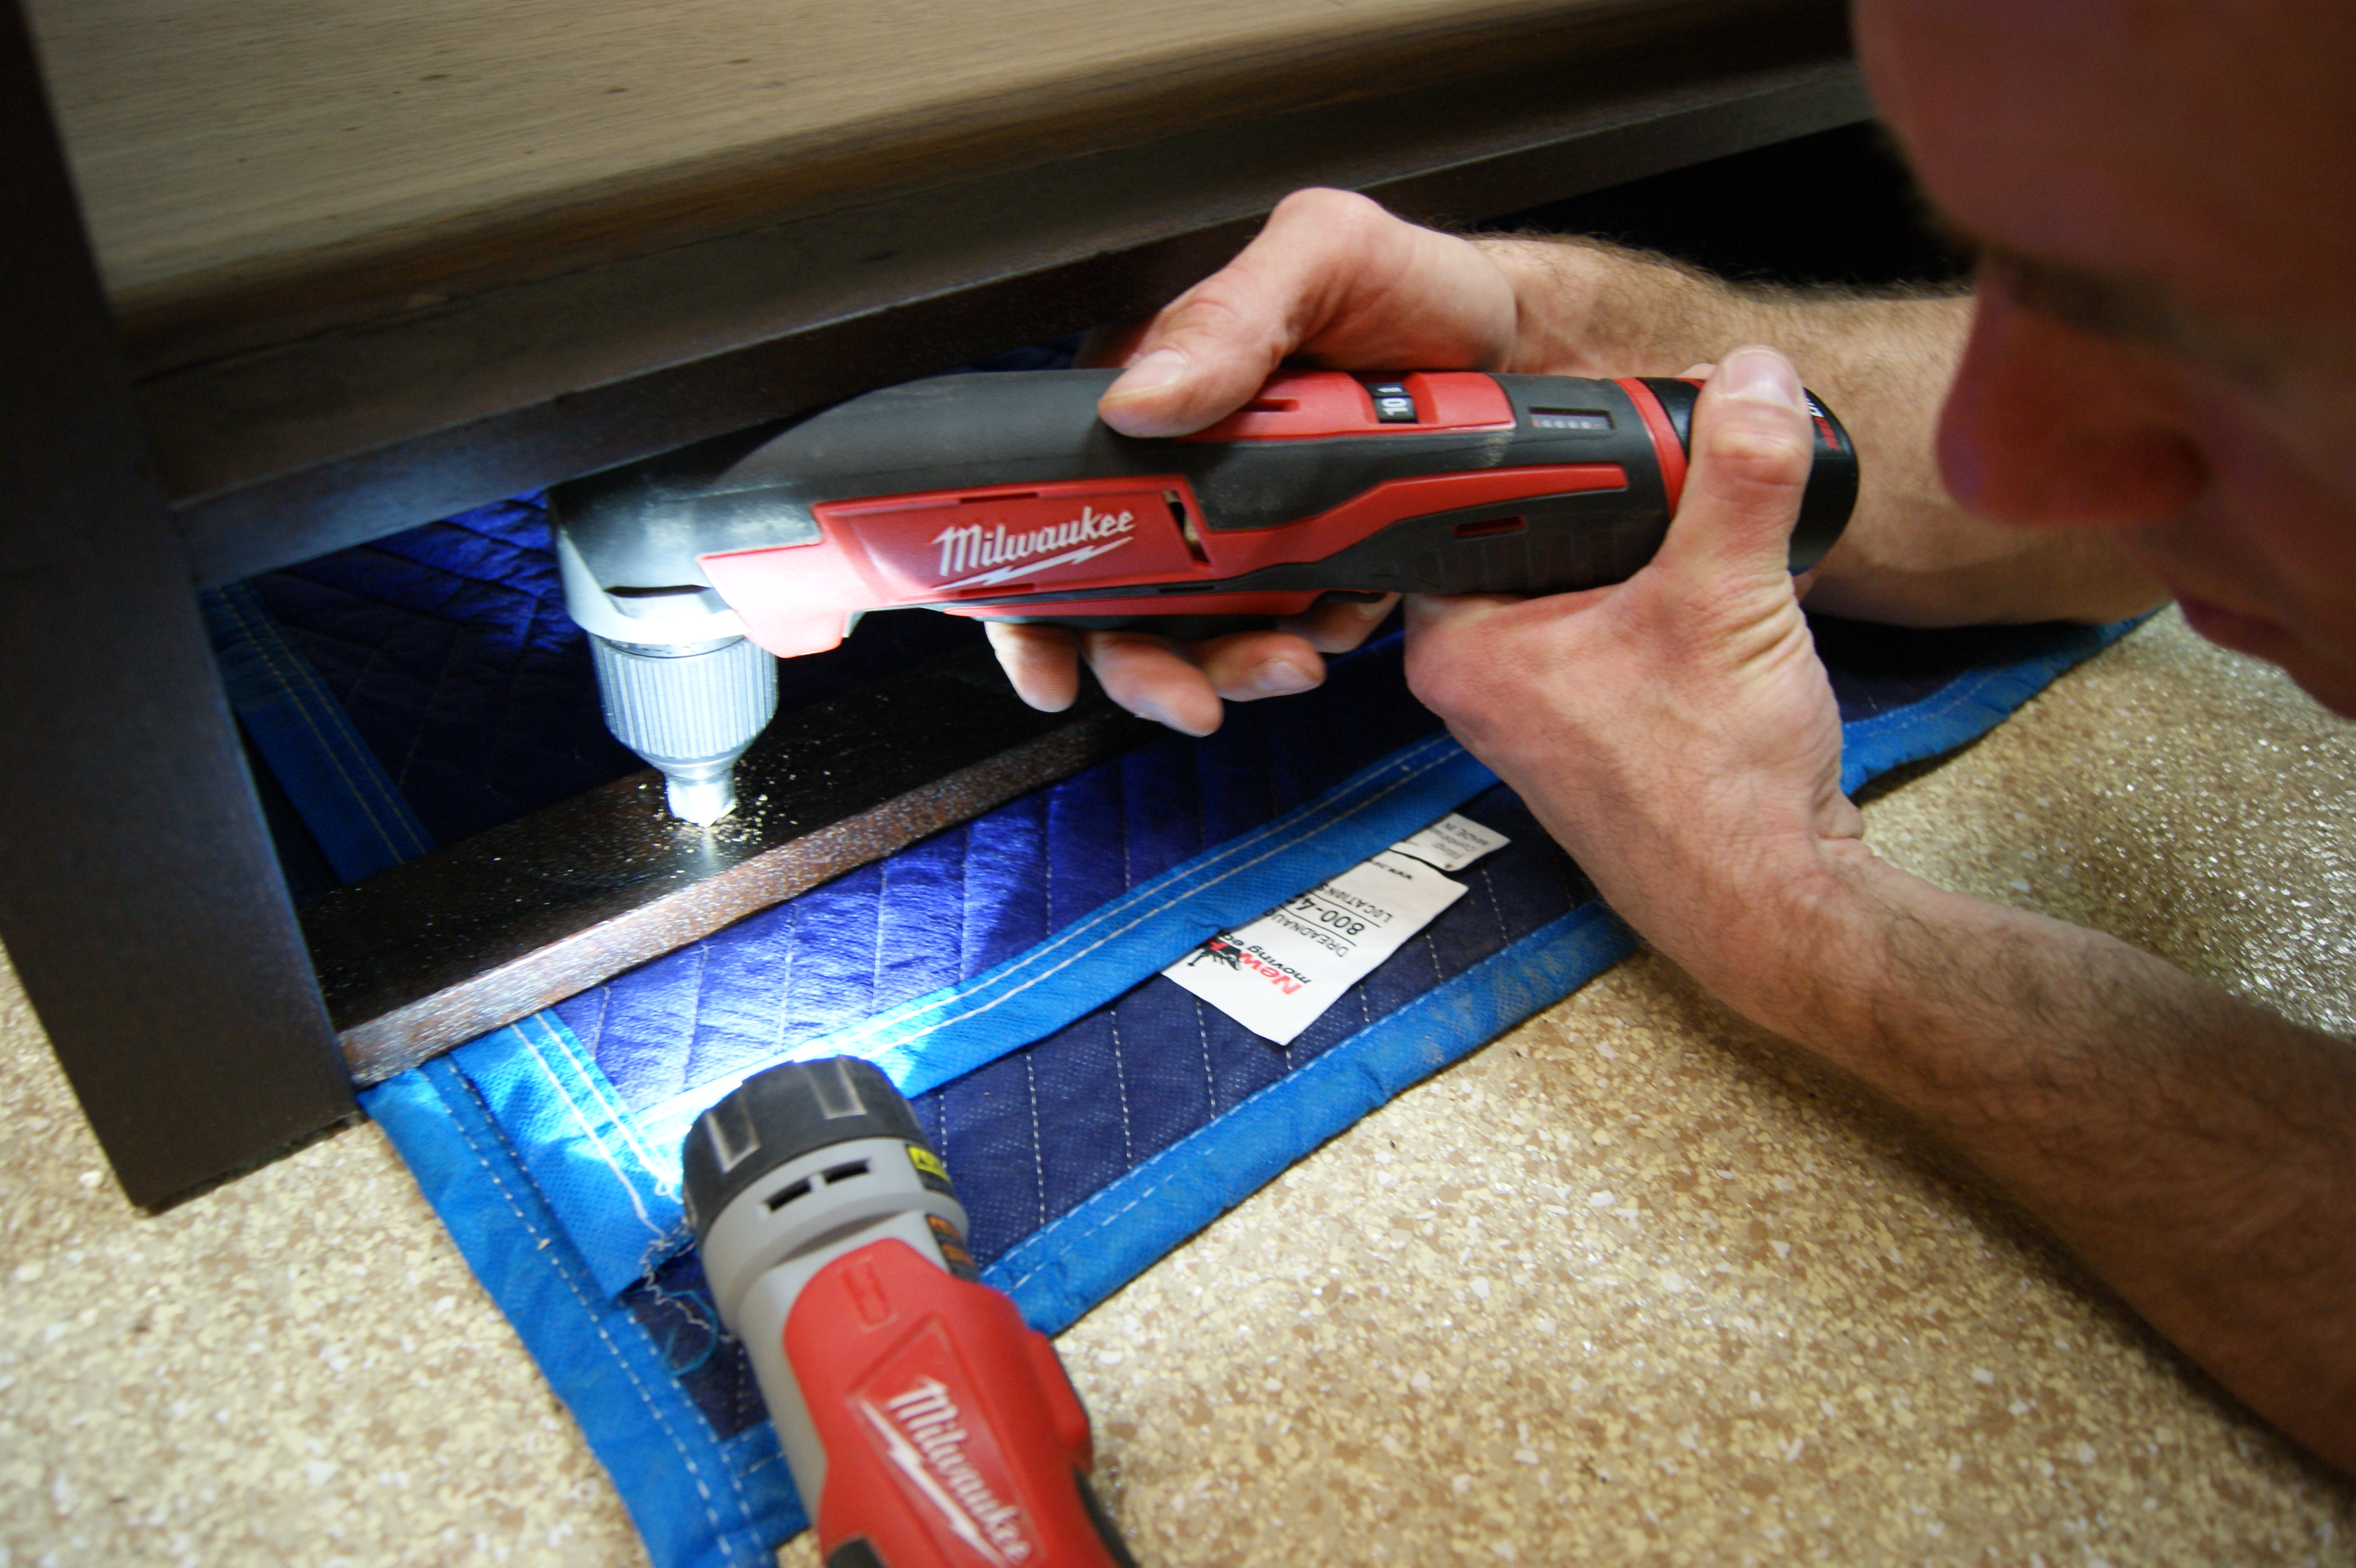
After that, the entertainment center made its pilgrimage inside (in pieces). At that point, all that was left to do was flip it over to attach the top
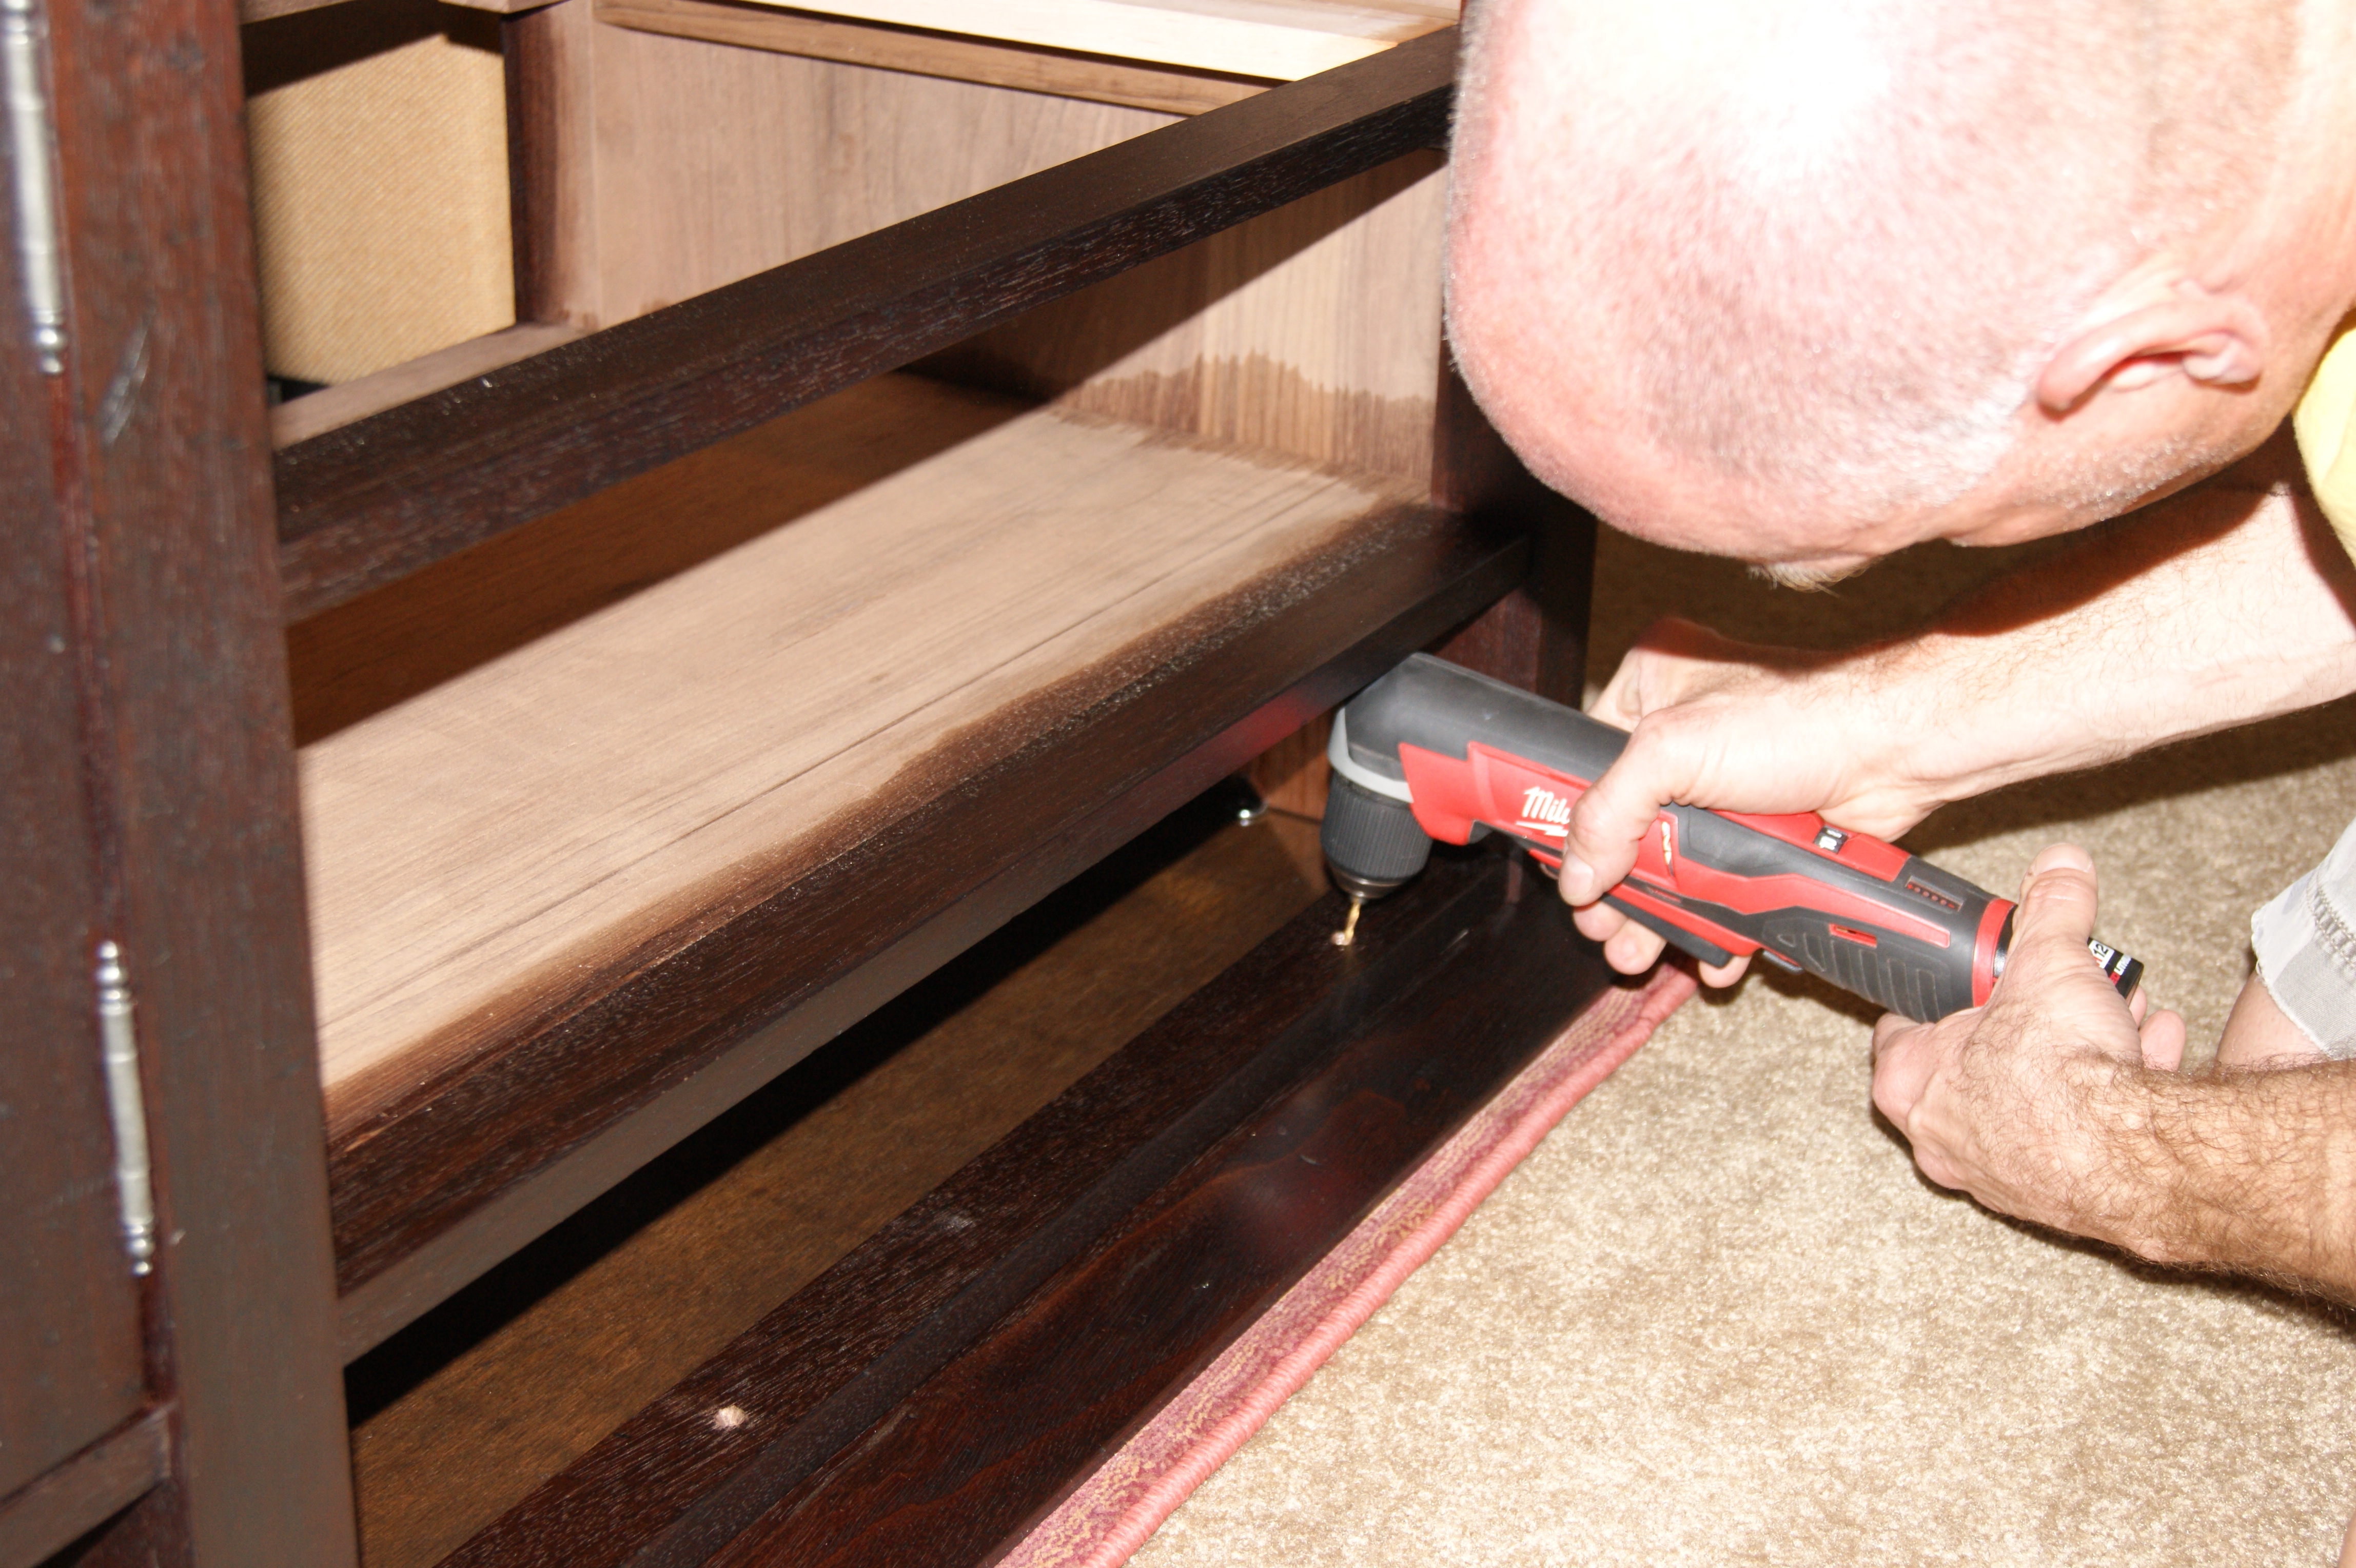
I actually had to shorten a drill bit to work in such a small space.
And then add the drawer pulls and doorknob, and install some drawer dividers. The drawer dividers are adjustable, but to get the spacing right, I used a CD as a measuring stick.
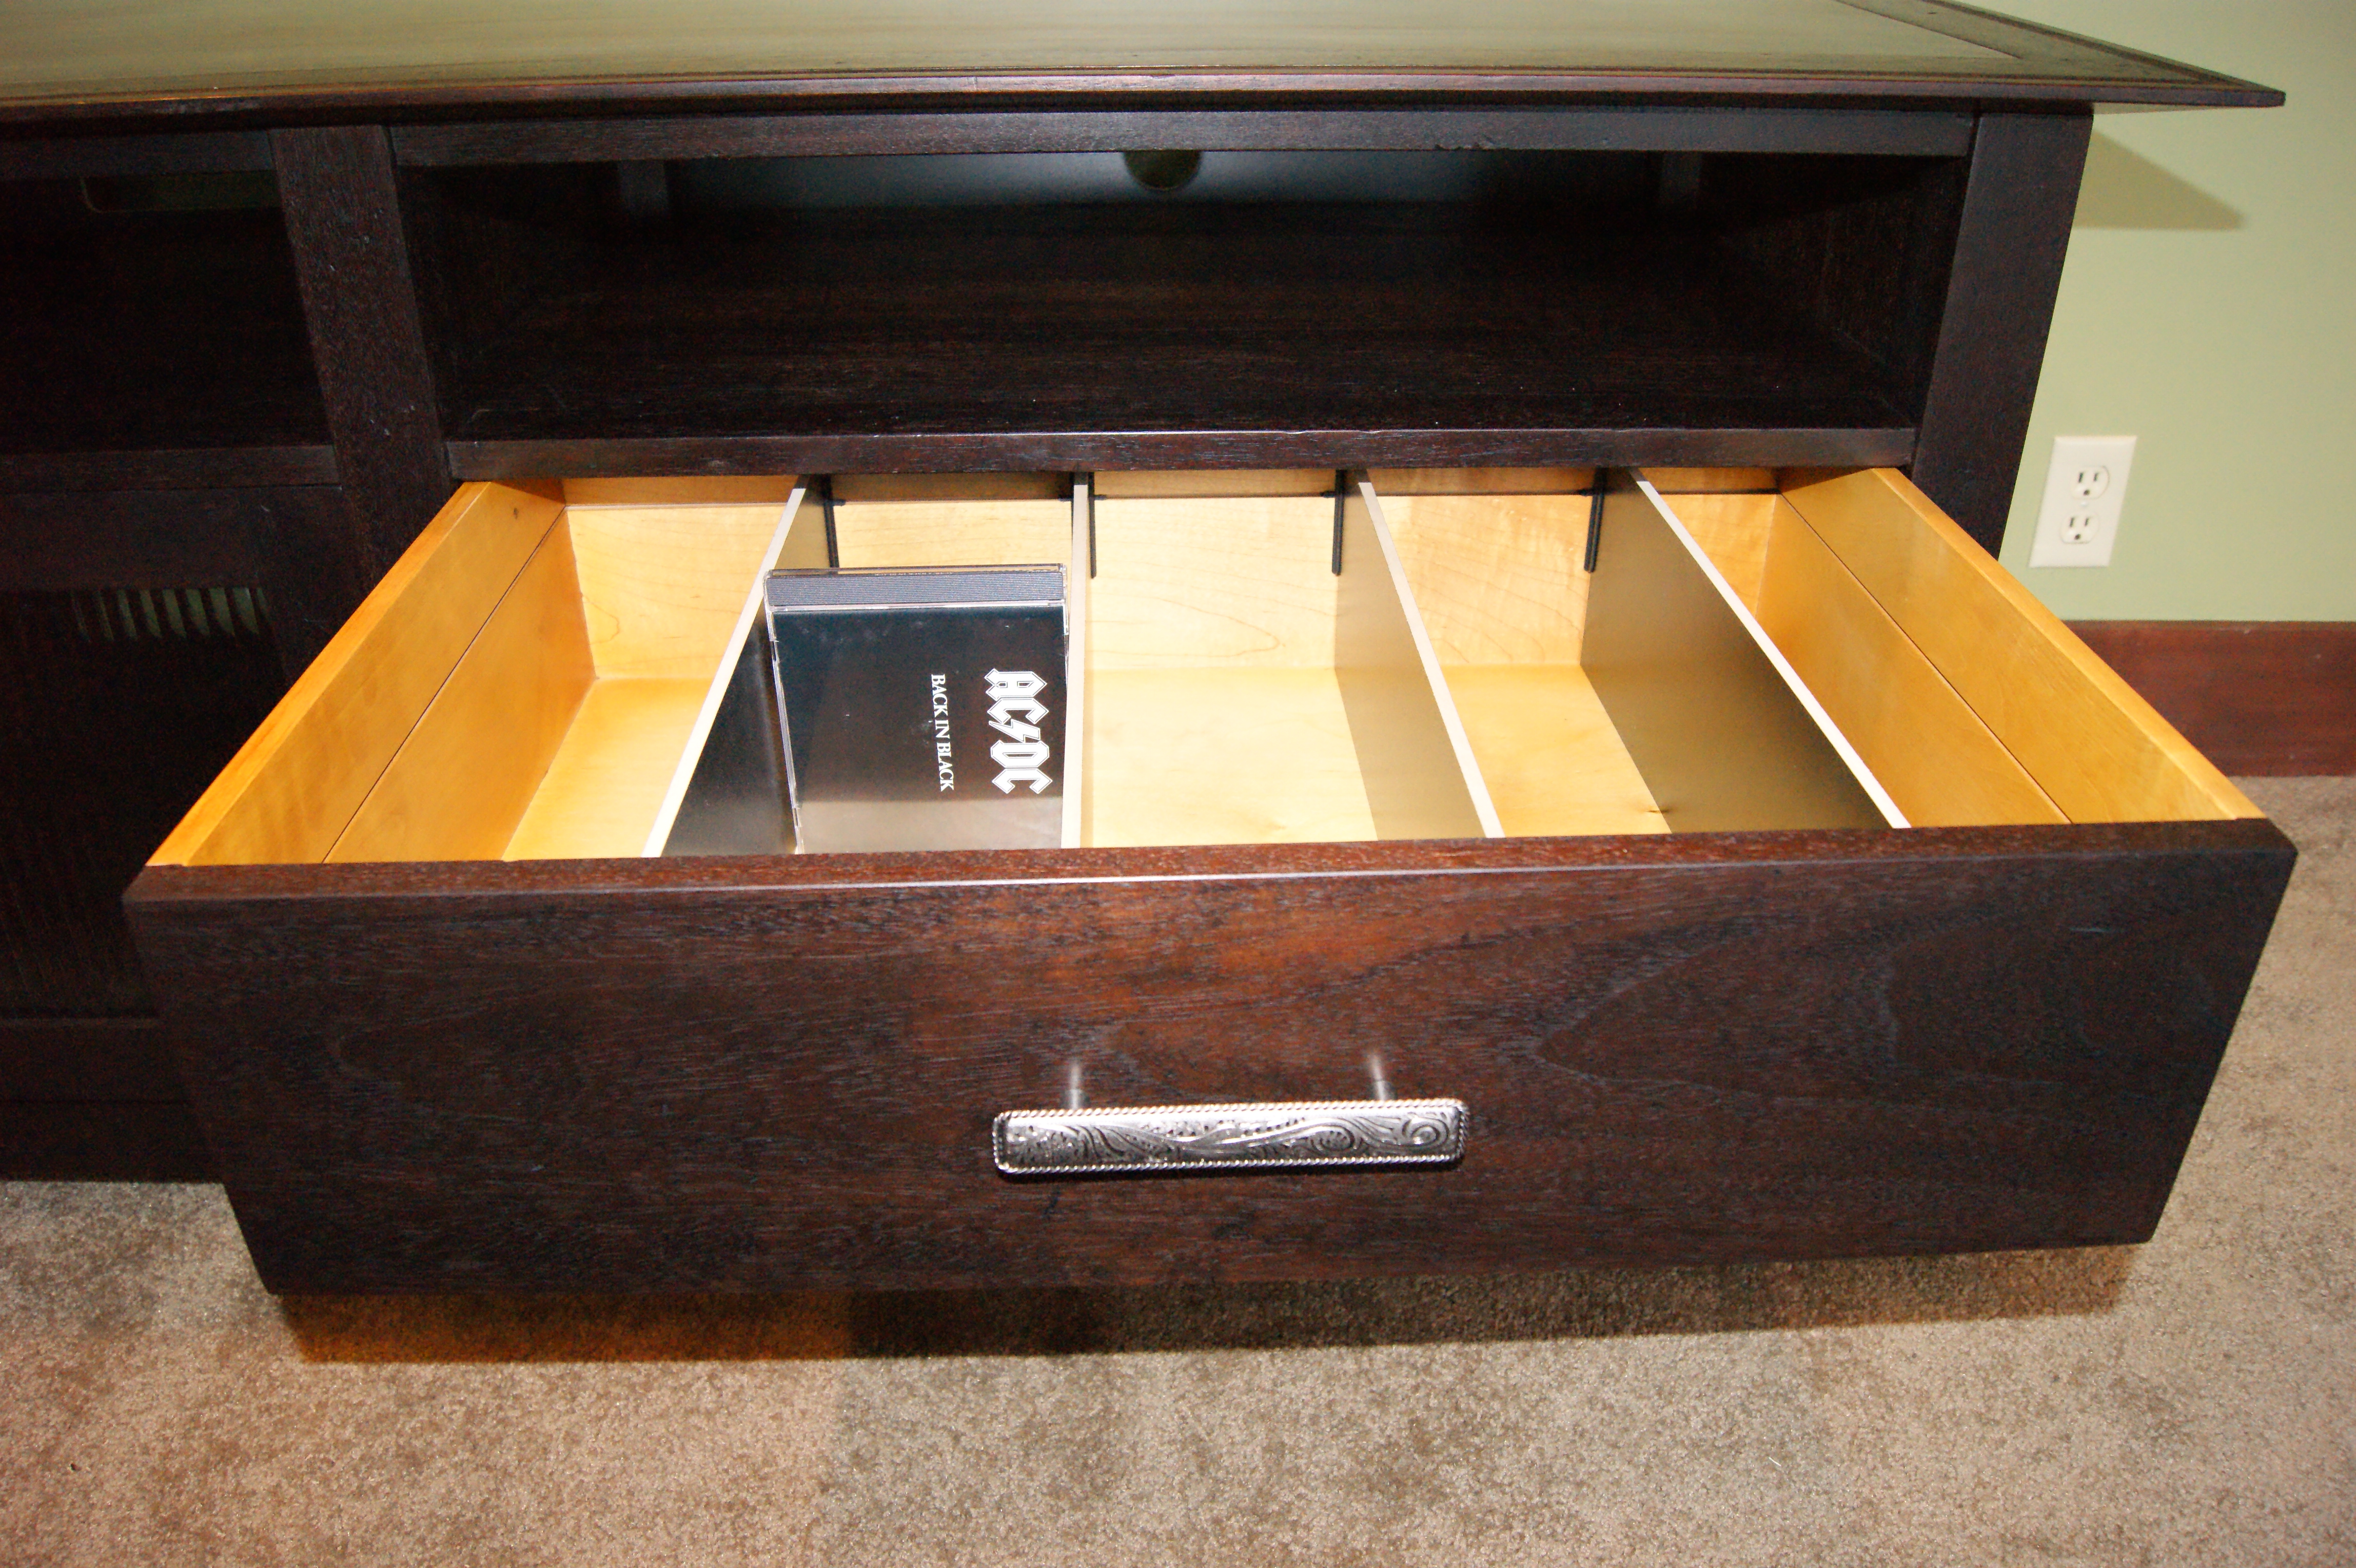
Appropriate, since, according to ISO, this is the CD by which all others are measured.
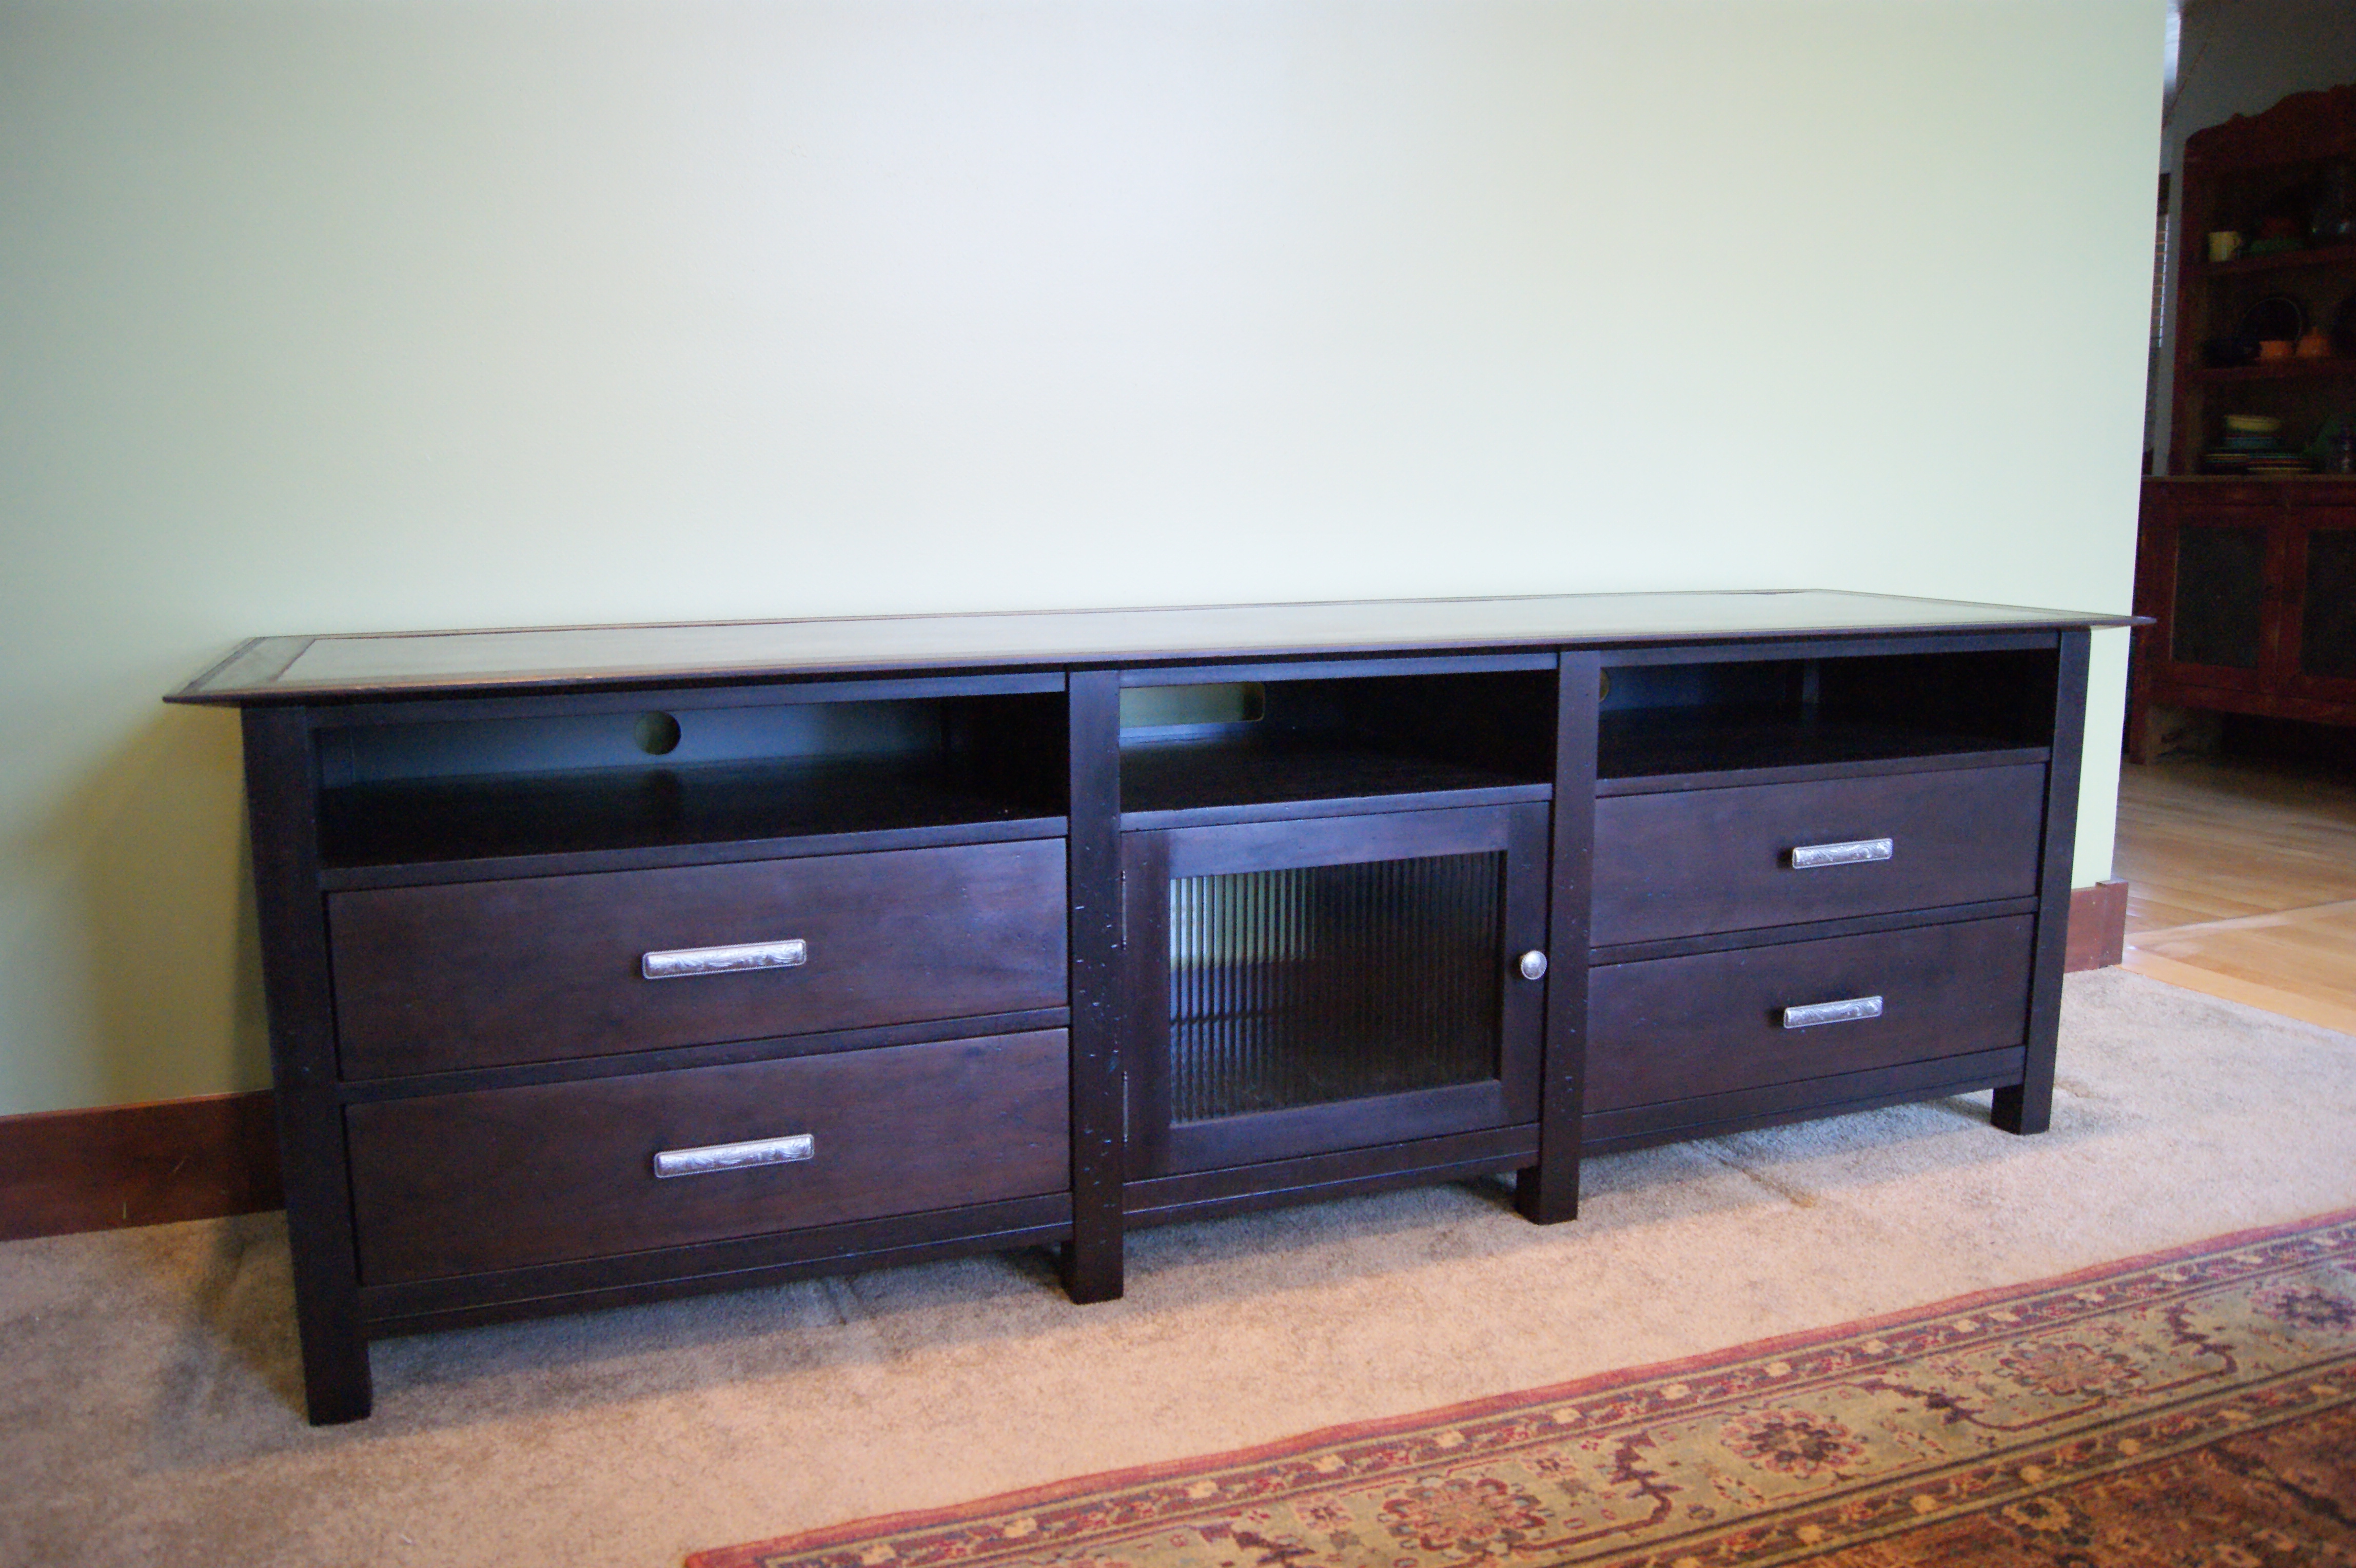
And with that, I’m done. And it only took me seven months.
So, to get the full effect, here’s what it looked like before with the non-functional ‘90s TV, dying plant, and monolithic wall unit.
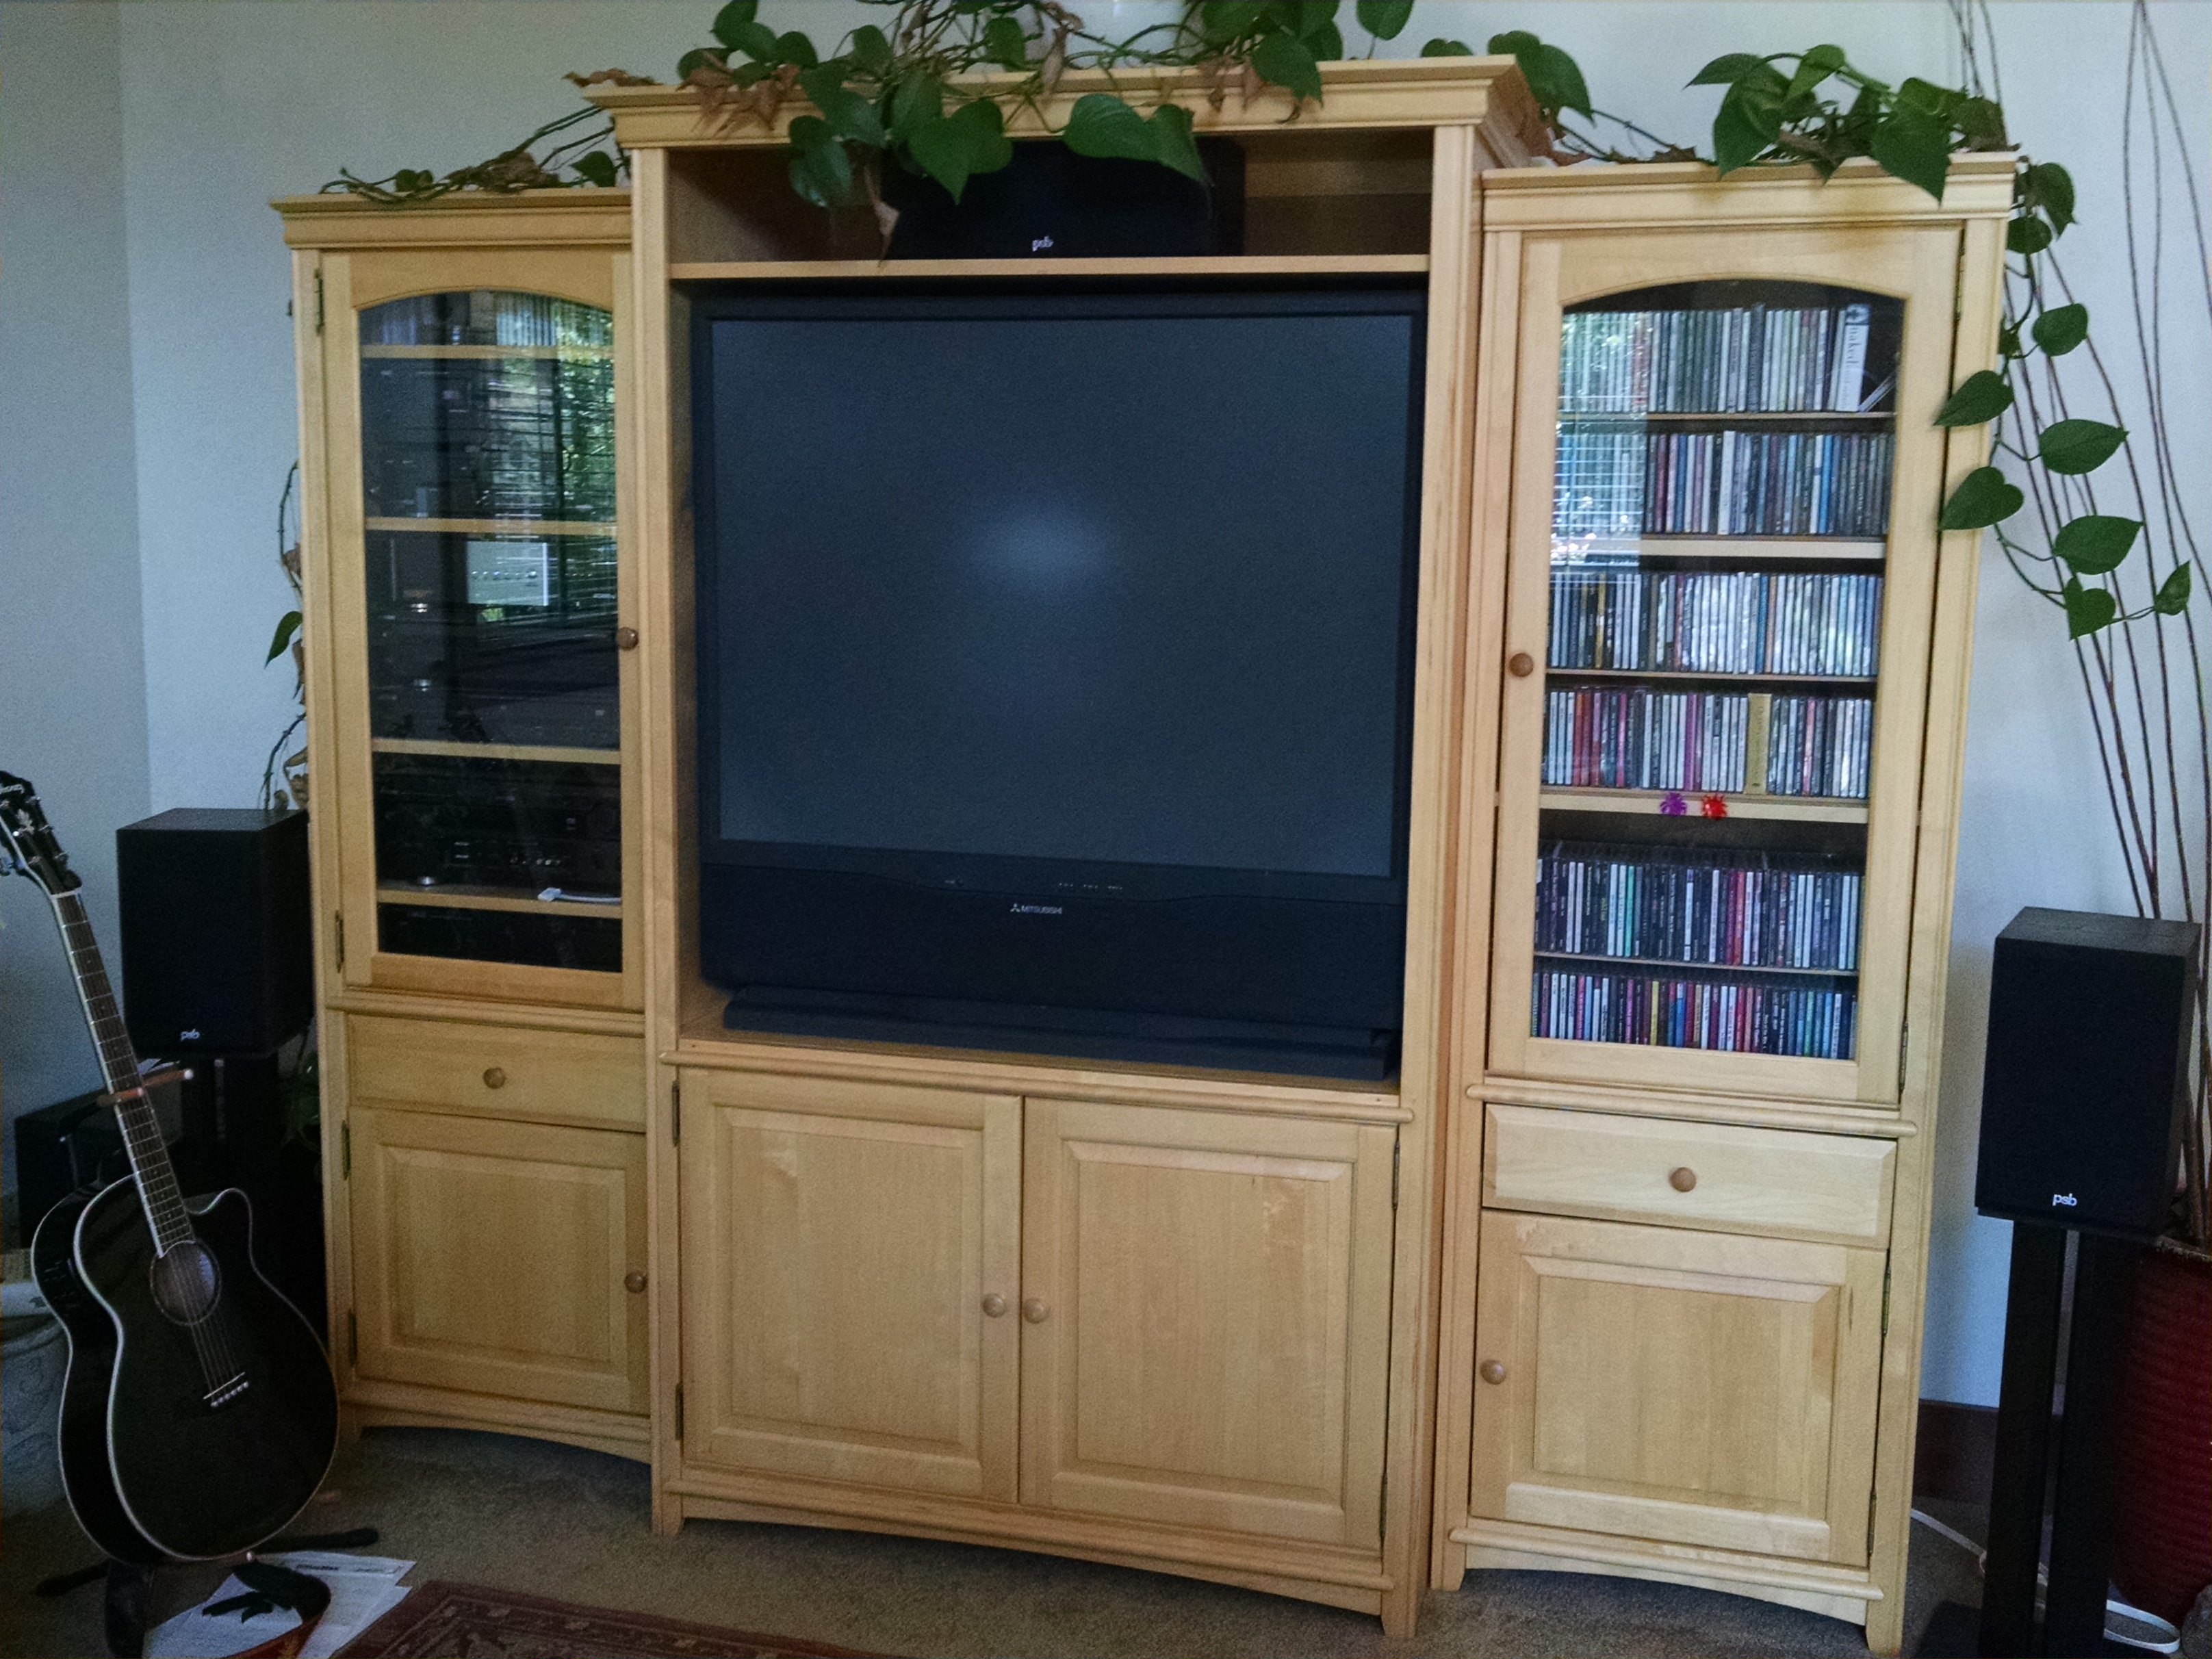
Ick.
And here’s what it looks like now. (OK, we did some painting too.)
I’ve got RV projects piled up that have been waiting MONTHS for me to get this thing out of the shop. So it will probably be fall before I pick something like this up again. Hope you enjoyed the lengthy diversion from RV topics. And now, I can finally get some RV projects back into the shop.


Hi James, Thanks for sharing your incredible project with us. You did it like an expert. I am also curious to do this. Can you give me the list of tools those you used to make this?
Uhhhh. I used about a thousand different tools that I’ve collected over twenty years or more.
There’s no way I can list those out.
My 100 pound dog was really pissed at me trying to use the grinder on his toe nails. It probably is the better tool, but I’m just too old to hold him steady. And, I’m not smart enough to figure out the jig to use to help, or will that be 4 jigs? It’s back to the dremel for us. Besides, my wife is really good with it on the dog’s feet. 🙂
A glorified nail file for pooches? Maybe the Dremel isn’t so bad after all!!! 😉
Nice job. I have found one use for the Dremel – I use it to grind the dog’s nails. It does a nice job and smooths the edges so they are not so sharp.
I’m surprised the dog stays put with the noise the thing makes!
Very nice indeed, congrats on the finished product – looks great!
About the only thing I use my Dremel for is a) Cutting off nails/screws in a blind area where a hacksaw won’t fit; b) Trimming small bits of metal on projects where a hacksaw is just too big and will bend the metal; c:) Using the small 90-degree drill chuck when I need to drill a small-bit hole in an area that I can’t fit a regular drill in (i.e. where I didn’t plan ahead and pre-drill the holes!); or d) Grinding away the profile of contoured baseboard moulding when I cope the inside joints (for a nice tight joint, instead of trying to miter the joint).
You know, after completing this, I found myself at the BORG (Big Orange Retail Giant). Even though I don’t need it right now, I was able to find and buy a 1/8″ router bit – so I won’t be tempted to use the Dremel again.
(I have a Bosch Colt that would have worked out much better.)
It would be nice, if during your travels you could snag a sample of the composite materials they use for building walls lighter and more durable than wood like Azdel, and Vixenite from a manufacturer and build something in your shop to test and compare to the industry standard Lauan plywood. I can picture you conducting flammability and crush testing in a fun and imaginative fashion.
Now that’s an interesting idea. I wonder what Stef would let me get away with?…
Dremel tools are meant for one purpose- to screw up jobs the should be reserved for gunsmiths. Any other screwing up is an amature attempt to use a Dremel.
Nice work!
I have a “monolithic wall unit” (yes, I got it in the ’90s) which contains a cable box, DVD player, receiver, CD changer, VCR, and cassette player (the last two of which I never use; the CD changer, which I rarely use).
My question: Where will you put your “stuff”?
… and I thought it was just me with the Dremel. Thanks.
I don’t know where those positive reviews on Amazon come from. Dremel must have an army of reviewer minions…
OK – we’ve got about the same amount of stuff. The Preamp will go top center in the opening. blu-ray/DVD player in the left top, and CD changer in the right top. In the glass door cabinet will be the 5 channel amplifier (it’s a Carver and I refuse to give it up), the power conditioner/switching unit, and either the cassette deck or the VCR. (We don’t really use either of those much either, and both of them may fit. I lean toward the cassette deck, because it’s a NAD, but Stef wants the VCR. Anyway, even if both of them didn’t fit, there would be enough room for one of them and a cable box. The drawers will hold CDs, DVDs, whatever.