This post may contain affiliate links.
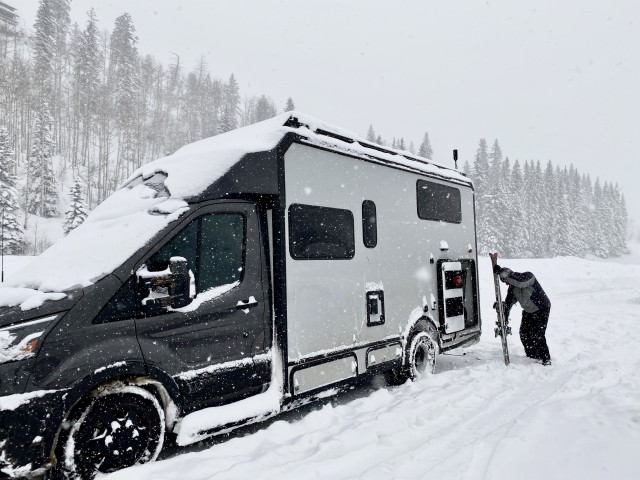
Ever since we got our very first RV ‘Das Bus’ over a dozen years ago, we’ve been RVing in the winter. It’s our favorite time of year to hit the road. Why? For various reasons – no crowds, ski trips, and also less power requirements (since there’s no need to run the energy hogging A/C), which makes it easier to camp away from hookups and stay out longer.
But winter RVing has its challenges. The most obvious challenge: things can freeze. Nothing ruins a winter vacation faster than a frozen toilet or a burst pipe. But with a little forethought, you can overcome the challenges and enjoy winter RVing—even if you don’t have a 4-season RV with a ridiculous amount of battery power like ours. So here, I’ll share with you our top ten tips for wintertime RVing that anyone can use to get started. Some of these (like the frozen toilet), we learned the hard way. Regardless of what type of RV you have, or what style of RVing you participate in, perhaps there will be something here that will help open a whole new season of RVing possibilities.

Tip #1: Know Your Rig.
This is the first tip because it’s the most important. RVing in the winter depends on more than just your RV… it depends on YOU making good decisions. And you can’t make good decisions if you don’t know how your rig works.
For example, you need to know which of your water lines are exposed to the outdoors or run through un-heated compartments. Identify all the weak points that could be vulnerable in freezing temps. That way, you can make smart decisions about them when the temperatures drop. If, for example, the water supply lines to your rear bathroom run outside; you may decide to take that bathroom out of service for a winter trip. The same can be said for your drain lines and tanks – you should know which fixture drains to where, so you can keep track of what needs to be kept warm.
It can be a lot to learn, and it may take a while to figure these things out, but I promise that time will pay dividends. Like… when you’re enjoying a hot coffee in your RV at the ski slopes, and nothing is freezing up!
Tip #2: Learn How to Heat Tanks and Water Lines.
If you’ve already done Tip #1, then you know where any exposed plumbing lines or tanks are on your RV. What do you do about that? The easiest solutions are running heat tape along your vulnerable water lines and adding heating pads to your holding tanks. On the big scale of RV mods, neither is all that difficult to DIY. But if you’d rather not tackle it, an RV service department should be up to the task.
Aftermarket tank heaters and heat tape are generally electrical, so you’ll need to pay attention to your electric consumption to use them successfully. You’ll need adequate battery power or shore power to run them when the temperature drops.
One last lesson, which we learned the hard way. When you’re heating your waste tanks, don’t forget to heat the drain lines and drain valves. It does you no good to have liquid contents in your black tank if the dump valve is frozen solid! (Don’t ask me how I know this.)
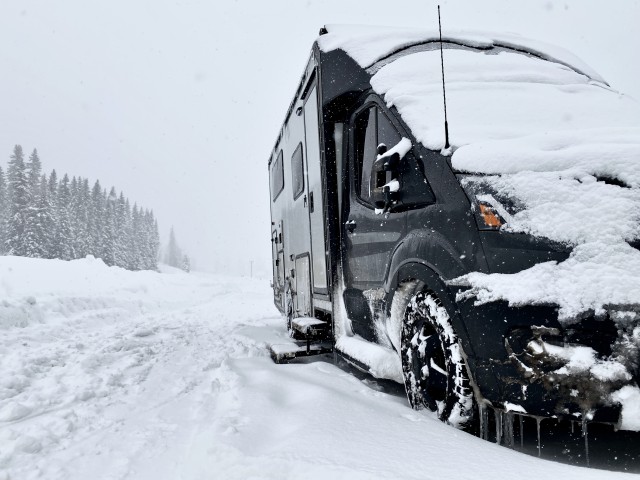
Tip #3: Snow and Ice Happen; Get Road Ready.
It’s no secret that driving during the winter months is more challenging. All the wintertime driving tips you’ve collected over the years also apply to RVing; perhaps even more so. Just remember you’re rolling a house down those snowy, slick roads!
If you have a motorhome that can accept them, investigate snow tires for your rig. We maintained a separate set of snow tires with both Das Bus and Lance, and they never let us down. If you’re headed somewhere that requires tire chains (like ski areas), investigate which ones are appropriate for your tires and don’t forget to pack them. Be sure that the chains you purchase can stand up to the weight of your rig. It’s also a good idea to carry traction pads just in case you were to end up stuck. Don’t forget to top off your windshield wiper fluid before taking off. And finally, an ice scraper and snow brush tool is something you might not normally RV with, but if you plan on RVing in the winter, you’ll need one capable of clearing snow and ice from your RV’s windows. This may mean a special scraper with an extra-long handle.
Tip #4: Deal With Your Windows.
A single pane of glass has an R-value of about one, which is quite poor. So if you only do one insulation mod, covering your windows is one of the best things you can do. It will make a huge difference in how much heat you’re able to keep inside your rig.
Typical RV window coverings like pleated shades or roller blinds don’t do much to insulate. This is an area where RVers either look to aftermarket products, which are pretty limited beyond motorhome cab windows, or make something of their own. We’ve seen people DIY solutions using weather stripping, heat shrink plastic, rigid foam boards, foam insulation tape, and quilted coverings. The couple from Far Out Ride hand-sewed some thermal window covers out of Thinsulate, Low-E (a much better alternative for Reflectix), and fabric. The good news is that literally ANYTHING is going to be better than leaving your windows bare when the temps get way down there. So get creative and get those windows covered!
Tip #5: Find and Deal With any Drafts.
You’ll probably wait to implement this tip until you try winter RVing at least once. But just about any RV will exhibit some cold spots. Some of these, like a draft in the garage where you carry snowmobiles, may not matter too much. But a draft by the head of the bed will certainly get your attention.
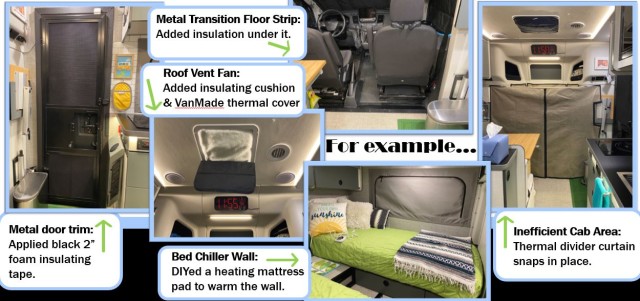
Two noteworthy examples from our current RV (in the pic above): Number One had two weak spots that would get frigid cold to the touch and would also build a ton of condensation– the metal frame around the entry door and the metal floor transition strip that separates the cab from the house. The door frame was a simple fix– I covered it in black foam insulation tape. Since the frame was black anyways, it didn’t change the look at all. As for the the transition strip on the floor; once I unscrewed it, I saw there was plenty of open, empty space there. I was able to add insulation under the metal strip. I can’t tell you where your own weak spots might be, but with a little creativity and time, improvements like these can make a big difference.
The good news here is that you can take advantage of most home-focused draft solutions and adapt them to your RV. We’ve used draft-blockers in the past by our RV doors. We’ve also added many feet of weatherstripping to our RVs over the years.
Tip #6: Know the Limitations of RV Antifreeze.
Here’s the thing about RV antifreeze: it actually does freeze! RV Antifreeze really should be renamed Antiburst, because that’s what it’s actually protecting your plumbing system from– offering burst protection, not freeze protection. If you weren’t aware of this, you might try to take a shower at -12 degrees F, having poured RV antifreeze down the drain… only to find yourself standing in very cold ankle-deep water (true story). RV antifreeze can get slushy as high as +20 degrees F for RV antifreeze that’s labelled to protect to -50F. The brand “Splash” lists their Pour Point at 6.8 degrees F on their -100F RV antifreeze–pour point being the minimum temperature it will pour; anything lower will be slush. RV antifreeze will freeze solid at whatever burst protection rating is labeled on the bottle; something like -50F or -100F. So in a nutshell, RV antifreeze does lower your freeze point, but don’t think that means it doesn’t freeze or slush at all.
Although it does solidify, RV antifreeze doesn’t expand and break things when it does. That’s great for putting your RV in storage, but not so great if you poured it down your toilet like water, thinking you’d still be able to dump the black tank. What’s worse, as you dilute RV antifreeze even with just a little water, you’re bringing that freezing point closer and closer to that of plain water.
This is not meant to disparage RV antifreeze. Far from it! Just realize it’s not a silver bullet, but a tool – and you should know the limits of the tool before you learn the hard way.
Tip #7: Accessorize for Success.
There are some accessories you’ll want to bring that are unique to winter camping. For example, your winter boots can track in a ton of snow. Having a small rubber boot tray near your entry helps keep your floor dry. You might also find you want a clothesline, or drying rack of some kind to dry snow-soaked clothes. A telescoping snow broom works great for clearing off your solar panels, as long as you can get up there safely. For that, you might want to bring a telescoping ladder.
And for Pete’s sake, DO NOT forget a snow shovel! (Although if you do, turns out a cutting board is a solid backup plan.)
The accessories you ultimately bring will depend on your experience, and your own personal style of winter RVing. The key here is to be mindful of them, and think through all the things you might need, as you’re packing up for your trip.
Tip #8: Keep the Heat On.
Most RVs have a heater that should be sized appropriately to keep the rig at a comfortable temperature. Rather than turn that on and off as you enter and exit the rig, you’ll want to keep this heater running – at least at a minimal safe temperature – for the duration of your winter RV excursion.
Even if they don’t freeze completely, your RV’s batteries and water systems will work better if they’re not hovering just above 32 degrees. Further, the design of your RV may even take passive heating into consideration for winter camping. If you have heated storage bays, for example, they may be heated with ducts from your rig’s main heater. So keeping the heat on can keep the contents of those storage bays from freezing.
Tip #9: Be Prepared for Everything to be More Difficult in the Winter.
As an RVer, you rely on services and facilities that may be closed during the winter months. Campgrounds are the biggest gotcha here – many of them just shut down over the winter, so you may not be able to stay at your regular locations. Even boondocking spots could be impossible to get to if it’s snowing.
But the difficulties go beyond campsites. Filling up with fresh water in the winter is a challenge because many of the potable water spigots are simply turned off. The same can be said for dump stations, and even propane filling. One time, we were camping just outside Bryce Canyon, Utah in zero degree temps. The only place around selling propane was willing to sell it to us, but the store’s propane hose was frozen shut and no matter how hard he tried, it wasn’t happening. Our options were to either freeze or change our trip plans. Things like that happen, and sometimes there’s no way around it. My best advice is to plan ahead, have backup plans, and just be flexible.

Tip #10: Put ‘er Away Right.
If you’re not a full-timer, the end of your winter RV trip will mean putting your RV back into storage, and if you live anywhere in freezing temps, this means winterizing it before putting it away. You really don’t want to neglect this step.
But if you decide you like winter RVing, this could mean repetitive winterizing and de-winterizing, so you’ll want to develop strategies for getting those chores done efficiently and with a minimum of fuss. Example: Once we realized we liked winter RVing, one of the things we did was start using compressed air to winterize instead of filling our water lines with pink antifreeze that we would have to spend time rinsing out. That’s just one simple strategy. I can’t say what your exact winterizing steps will be, so I can’t give you a specific shortcut. You’ll identify and develop your own, but your goal is to properly winterize and de-winterize – without increasing your freeze risks – in the shortest time possible.
So there it is! My 10 tips to get you started becoming winter RVers yourselves.
I like to think of it this way. An RV is an investment. If you’re only using it during the warmer months, it’s only getting 2/3 the value of your investment. So, get out there and give winter camping a try. Hopefully some of these tips will help you not only get 33% more from your RV, but also have fun doing it!


You didn’t mention strategies or solutions to keep your DEF from freezing and your thoughts on diesel cloud point lowering gels/liquids. We assumed last place we filled up had winter diesel, but our Espar feed line froze anyway.
Good points. We also didn’t cover things like engine block heaters, for those who travel where it’s really frigid. Most people who live or travel in these areas already think of these things, but you’re right, they’re worth a mention.
For identifying cold spots in the van, I have found the temperature monitors “SensorPush Wireless Thermometer” quite useful. Data from them can be viewed directly on your cell and downloaded and displayed in Excel. It records the temp each minute and keeps a year or two of data.
We have a spot in the back of the van (the garage) that gets below freezing in sub zero (F) weather and unfortunaltey thats where the water comes out of our water tank, so I keep a monitor there all the time; sometimes it means we don’t turn down the heat at night to keep the plumbing clear.
The wireless temperature monitors are very popular these days.
I do have some data-logging probes I’ll put out if I’m going to do a specific test – but generally, the EKKO is capable enough that I don’t feel the need to monitor it all the time.
Well, I agree that the Ekko is nicely designed or the winter, and I am jealous. But, what about when you are running your electric heater when the van is in your driveway? Is the periphery as safe then? That’s where I can have troubles (or worries) in just mild freezing weather.
We just turn the Truma Varioheat fan on and let it circulate the warm air to the various compartments. Seems to work fine and we’ve never had any issues.
How does one provide heat to the drain lines and valves?
Electric heating pads and heat tape can be added to any RV. They typically run off 12v.
RVs that are designed to be 4 season, like our EKKO, are usually designed to keep things warm. In the EKKO, just running the regular “person” heater will keep the fresh and waste water lines from freezing – no extra effort required.
With two MHs I’ve learned that the front cab area is typically poorly insulated and can be a big heat loss. So we use reflectix in all windows plsu front sliding drapes and hang another blanket between the can and living space.
RV antifreeze can be purchased in multiple levels of protection. I see it sold in -50, -80 and -100F ratings. Keep in mind that like the -50F stuff will freeze at about 20F while the -100 variety freezes at about -20F. They do not get to burst level until they reach their rated protection level.
Besides using heat pads for any exposed waste tanks and pipe, dump valves, etc I like to use foam pipe insulation for the 1 1/2 & 3″ drain pipes. You would need 2″ & 3 1/2″ ID for the drain pipes. You can buy heating pads for straight pipe, elbows and the gate valves. Just pay attention to the total wattage and number of circuit/wires you’ll need to power these heating pads.
Recently we were at Bryce NP one day was clear and sunny they next day there was about 4″ snow in the park. A very different sight and experience.
Bryce is beautiful. (And, it can get crazy cold!)
All good ideas. Using insulation on top of pipe heating tape would really help to keep the heat in.
Thanks James, always a good read! I do have a question…we have a ModeLT (Storyteller) and I love the Transit. However, we don’t love the cramped space and we don’t need the modularity it has to offer. About your Winnie EKKO, what would you get in place of it? It seems like the perfect size (B+) but the Winnebago quality seems to be lacking, AND is street parking a real issue?
There’s nothing out there now that I would get in place of the EKKO. Seriously. That garage and floor plan is everything.
We haven’t had trouble parking anywhere we’ve chosen to go. Of course, we don’t try to sleep parallel parked in downtown SFO, either.
But as far as width, the EKKO is no wider than a regular dually Transit.