This post may contain affiliate links.
I’ll admit it. Having our own toilet was why Stef and I got into RVing. We’re cyclists and the thought of being able to skip the port-a-john lines at events to enjoy our own private RV toilet oasis was too good to pass up. But as important as the toilet was when we decided to buy our first RV, we really didn’t know anything about RV toilets. We had no clue there were entirely different kinds of toilets used in RVs. We just got what Das Bus came with and didn’t think anything of it.
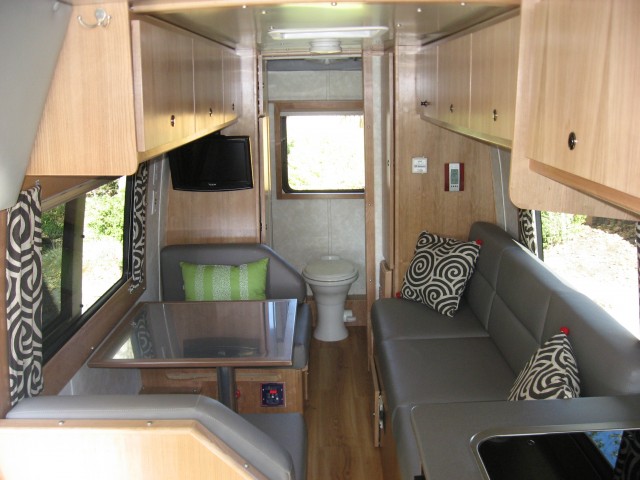
Our 1st RV, Das Bus. I gutted and replaced everything–except the toilet.
That was over a decade ago. Since then, we’ve had 3 different RV’s. Each of them has had a different type of toilet:
- 1st: Das Bus (2003 Class B Forest River MB Cruiser): Traditional RV toilet.
- 2nd: Lance (2016 Class B Winnebago Travato): Composting toilet.
- 3rd: Number One (2022 Class C Winnebago EKKO): Cassette toilet.
Since I’m in the unusual position to have personal experience with these 3 types of RV toilets, I’ll give you an overview of each of these systems. So if you’re just getting into RVing, read on. This will be a beginner level introduction.
Hopefully you’ll enjoy this glimpse into how the other half lives or, uh, goes.
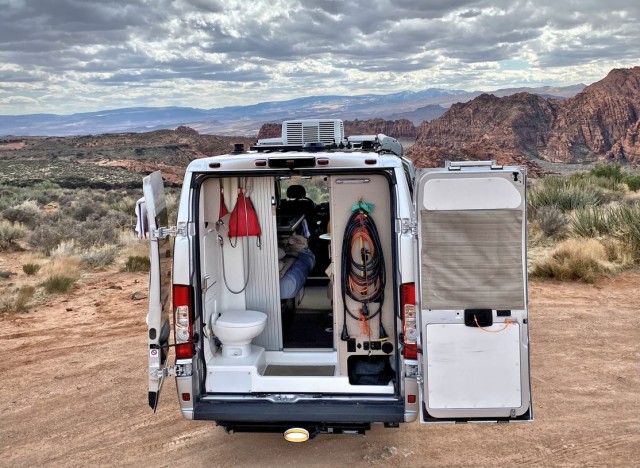
First Up: Traditional RV Toilets
A traditional RV toilet is by far the most common RV toilet type in North America, and it’s the most like the home toilets you’re already acquainted with. They look reasonably familiar, minus the tank on the back. Water flow for this type of toilet is typically handled with a foot pedal. You depress the pedal halfway to fill the bowl with water for use, and all the way down to flush.
From an end-user perspective, there’s little training required to use them, so the traditional RV toilet gets points for having a very short learning curve. That makes them great for first-timers.
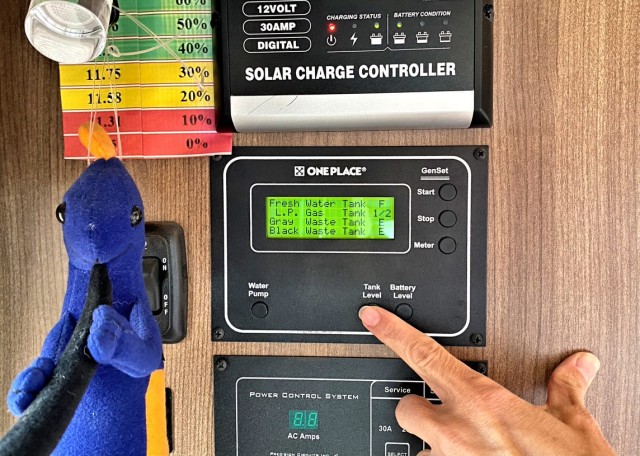
However, once you flush the toilet, the similarities to residential toilets end. In a home, once you flush the toilet you never think about that waste again. But in an RV, toilet waste goes into your rig’s black tank. That black tank will eventually fill up, and you’ll have to deal with it. Keeping tabs on the level is easy, as there’s typically a monitor panel of some kind inside the RV to check it.
You’ll want to become familiar with black tank additives. There are many types and brands, but they all aim to do two things: 1) keep unpleasant odors in check; and 2) break down any solids in the tank to ease emptying.
Black tanks need to be emptied at RV dump stations. When you’re there, you’ll use special dump hoses and fittings to drain your RV’s black tank into a land-based sewage system. If everything is working right the whole process is relatively quick, clean, and trouble-free.
But problems can and do occur, and you need to be ready to deal with them. First off, *everything* doesn’t always drain out of the black tank as you’d hope, so you’ll need to learn how to rinse out your black tank from time to time. Clogs and leaky valves also happen and aren’t particularly fun to deal with when they do.
Another common problem has to do with the tank level monitors giving inaccurate readings. This is more common with monitors that use “probe” style contacts, as debris in the black tank can foul the sensors, especially after being used awhile. It’s less common with sonar-based tank sensors, which are mounted outside the tank and cannot become fouled.
Traditional RV toilets and the black-water holding tank also need a moderate amount of water to work properly. You can trace most black tank issues to not using enough water when dumping the tank. If you’re at a campground with unlimited water, this is not a big deal. But if you’re boondocking and trying to conserve your freshwater supply, flushing it into your black tank doesn’t feel like the best use of that resource.
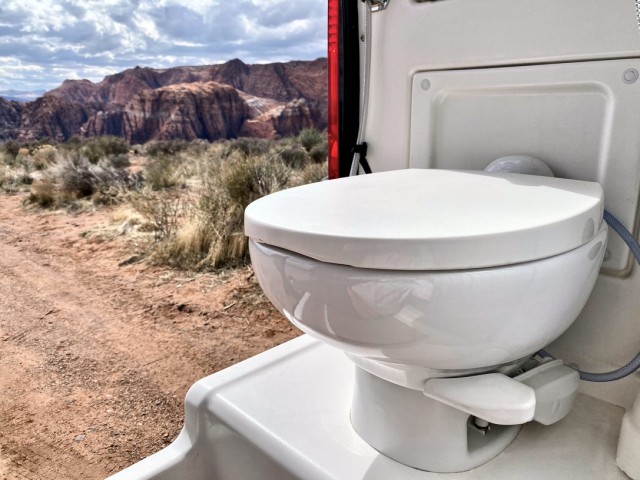
The other thing to remember about water is that it can freeze. With a traditional RV toilet, the flush water supply line can freeze, and the wastewater in your black tank can freeze, too, along with the dump-valve mechanism. (This actually happened to us!) The potential to freeze makes these kinds of toilets, in RVs not fully set up for cold weather use, and less than ideal for winter RVing.
Second: RV Cassette Toilets
On a scale from most home-like to least, the cassette toilet would land somewhere in the middle. In some respects, they’re a lot like traditional RV toilets, but in other ways, they’re closer to a port-a-potty.
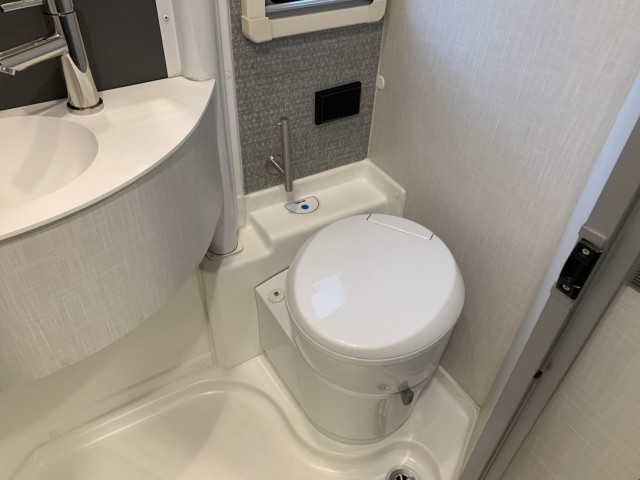
Cassette toilets aren’t yet common in North American RVs, though you can find them in some smaller motorhomes, campervans, truck campers, and overlander vehicles. But in Europe, almost every rig uses cassette toilets.
We first became acquainted with cassette toilets during our European RV vacation.

We hit the highway… er… autobahn… in this baby!
On the inside, the cassette’s “user interface” is like a traditional RV toilet, but instead of a foot pedal to flush, there’s usually a lever that operates a trap door. Unlike the traditional RV toilet, there are separate controls for opening the trap door and adding water. And while you can find traditional RV toilets made from porcelain like a home toilet, every cassette toilet I’ve come across has been plastic. Not that a plastic toilet makes much difference to the overall “going” experience; that’s just an observation.
Similarities to the traditional RV toilet end at that trap door. Once you flush a cassette toilet, the waste falls into the cassette, which is like a self-contained, miniature black tank. When it’s time to dump, you remove the entire cassette from your rig, and take just the cassette to where you’ll dump it.
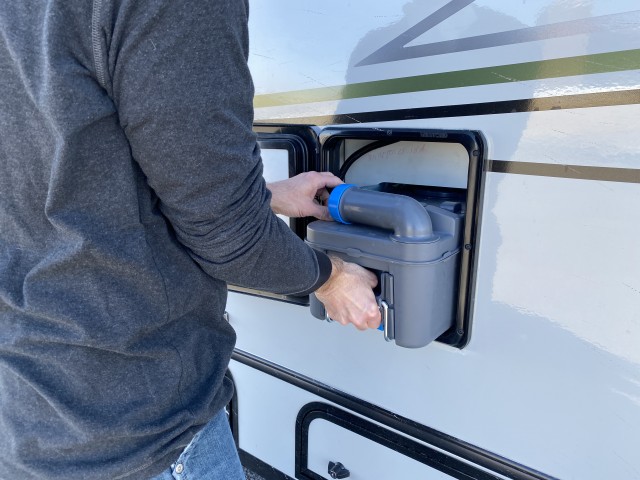
Cassettes come in various capacities, but most of them are about five gallons.
The portable cassette opens some interesting possibilities for where you can dump (where permitted). It’s possible, for example, to take the cassette into a restroom and dump it directly into a toilet. Plus, you can dump the contents into vault toilets and pit toilets. On top of all those options, you can also use RV dump stations by attaching a hose and the Americanizer.
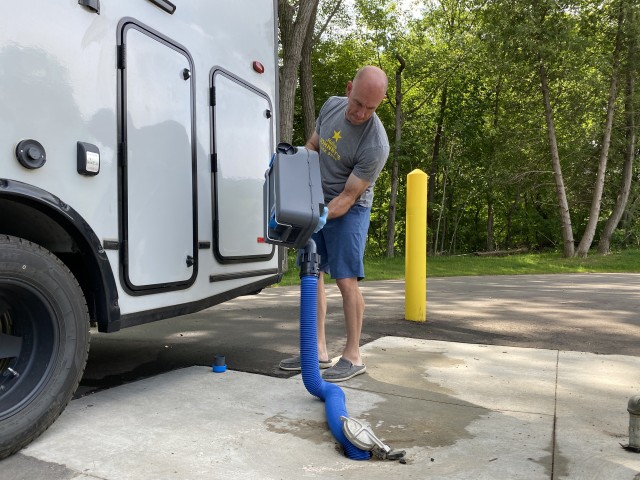
So, the cassette toilet gives you more options for dump locations. But the small tank means you’ll be emptying it quite a bit more often. The two of us can use a cassette toilet for two days before we need to dump it.
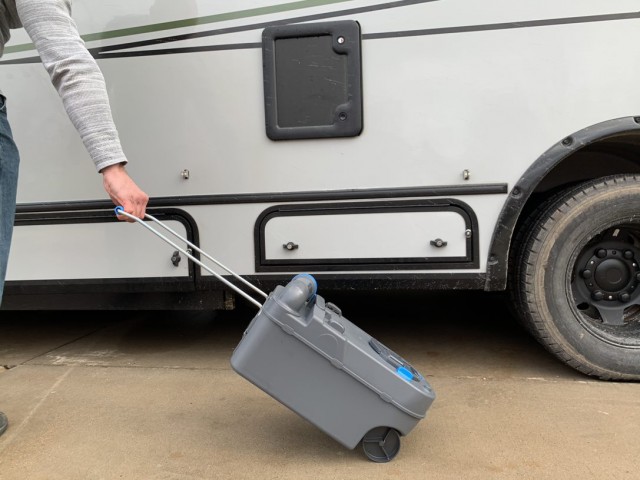
Checking the tank level on cassette toilets is pretty easy. There’s typically an indicator that changes from green to red as the cassette fills. These indicators are usually based on a float, so if gravity and density are still working, inaccurate readings should be rare.
Since the cassettes are small, they are usually located above the RV’s floor. This means they should be fine to go winter camping without freezing. There is still the flush water supply to think about, but at least your black tank won’t freeze.
Cassette toilets do have their challenges though. Waste breaks down differently in a small, anaerobic environment than it does in the relatively breezy spaces of a black tank. So, your choice of tank additives is much more critical. We learned this one the hard way!
Since you can dump the cassette without a hose, you’ll also be getting considerably closer to the effluent than you would with a traditional RV black tank. Now you know why I said the toilet chemicals were important. This is the main issue people have with cassette toilets.
Last (but certainly not least): RV Composting Toilets
When we got our second RV, Lance, we immediately had a composting toilet installed. At first glance, it looks a bit like something you’d see on the space shuttle.
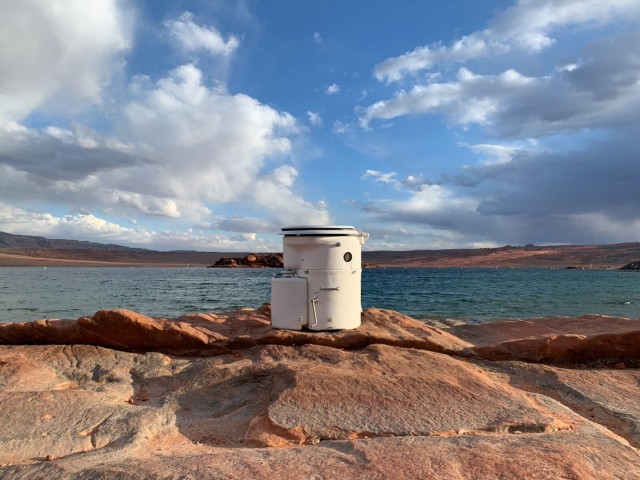
The composting toilet uses no water whatsoever, which makes it a great option for those who want to conserve water while boondocking. That also means it won’t freeze, so it’s fantastic for winter camping. These two advantages are why we chose a composting toilet in Lance.
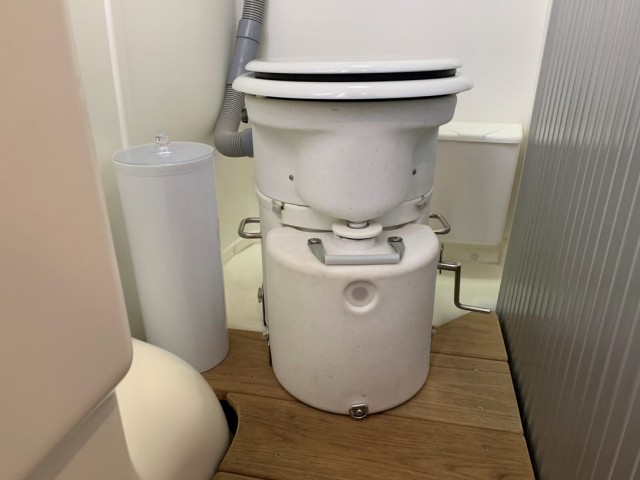
Composting toilets deal with waste in an entirely different way. They work by separating liquid and solid wastes through slopes and trap doors. Liquid waste is drained into a jug. You can dump this jug into any toilet. For the two of us, dumping this jug is a daily task.
The solid wastes are dropped through a trap door into a bucket where they’re mixed with some organic matter and left to decay, much like compost (hence the name). When it’s time to empty, you’ll be bagging (or, double-bagging) the waste and looking for an appropriate place to discard it. Fortunately, emptying the solid waste doesn’t happen nearly as often as the liquids jug. Depending on conditions, two adults could expect to use a composting toilet’s solids tank for anywhere between a week and a month between dumps.
But it’s not all unicorns and rainbows with composting toilets!
First off, they’re not very intuitive to use. Be prepared to have a personal conversation with your guests before letting them use your toilet.
Next, the liquids waste tank fills frequently, and the daily emptying task won’t be the most fun you’ve had RVing.
To empty the solids tank, you’ll disassemble the toilet, invert it into a bag, seal up and dispose of the bag, and prepare additional organic material to restart the composting process. It’s not difficult, but it requires getting far more involved with waste management than simply hooking up a hose and pulling a lever, as you do with a traditional RV toilet.
So there you go! A look at each of the 3 toilet systems we’ve had in our RVs over the years.
Make no mistake about it, having your own private toilet everywhere you travel is one of the best benefits of RVing. And while it’s about 90 percent likely your RV has a traditional toilet with a black tank, it’s good to know there are other options available. Like most things in RVing, there are trade-offs with any option, and choosing what works best for you should reflect your own personal RVing priorities and style.
Author Note: A version of this article was featured in RV Magazine in the May 2021 issue. I write regularly for RV Mag, to subscribe, CLICK HERE!




can you tell what toilet is in the top picture … ceramic and sitting up on yhe black tank?
thanks
Sherry
The very first picture in this post is our old RV, Das Bus. It is sporting a Dometic 310 – a very common traditional RV toilet.
thank you … having used all three which type do you prefer?
Well… none of them… and all of them…
They all have good and bad points. There are tradeoffs all around.
It’s about picking what works best for your style of camping. Any of them could work.
If our RV came with one or the other, I don’t think we have enough of a preference to make a switch.
Hi James,
What your thoughts on sewer hose length when dumping a cassette vs. traditional toilet? I realize you may be using the hose you used previously to save cost. Would you recommend a shorter length – like 3 – 5 ft for a cassette?
I have not found that it matters at all for dumping a cassette.
In fact, if you will also be using the sewer hose to dump your grey tank, then longer is better. It can be difficult – often impossible – to pull your sewer outlet less than three feet from the dump opening. A longer hose can also let you dump your grey tank without moving your RV within your site at an RV park. If I had the room, I would carry two ten foot hose sections.
Now that so many of us with dogs bag their poop when walking them in the neighborhoods, dealing with the composing toilet, albeit bigger, is really not so bad. The composting toilet is certainly less smelly than dog poop. (Not sure if that is an real selling point, but…)
Also, and I think you might have made this point in your old composted article, when you are using the composing toilet 24/7, it really doesn’t “compost” the poop; it sort of just stores it in a user friendly format. However if you use the toilet just on weekend trips, you get more “poop days” of use from a single change because some real composting is going on in between the weekends (and perhaps a little drying).
We did find that to be the case: You can get more days out of “weekend usage” than you can of “continuous usage”, without a doubt.
James, in your experience, which style of toilet *when properly operated/maintained* produces the fewest odors inside of the rv? When I think about living in an rv for extended periods, that might be the most important criterion for me. Thanks!
The composting toilet – when it’s working correctly – is the most odor-free. Counter-intuitive, I know.
The thing is, with a composting toilet there’s ALWAYS a fan, 24x7x365, pumping any bad fumes outside.
The toilet is a negative-pressure device. Hence, no smell inside if everything is working correctly.
I have, however, been able to smell the composting toilet from outside the rig. It isn’t pleasant.
So what would be your second choice if unpleasant odor outside the rig is also a problem?
Also, with 8x chemicals and an Americanizer, how are you feeling about the cassette now? It’s hard to imagine you with one after your initial reaction to emptying it out.
Thanks for your quick response!
You’d have to include other criteria at that point to make a good decision. Are you willing to make mods to the RV?, then cassettes can be fairly odor free inside if you install a SOG. Are you staying mostly in RV parks or campsites with dumps? Too many variables.
As for the Americanizer – it does what it’s supposed to do and does it well. My only real gripe with the cassette anymore is the capacity. Emptying every other day can be a bother.
Thank you that’s all very helpful! I’d never even heard of SOG before but I’ve got it bookmarked now.
Hi James, we love the Ekko, but coming from a Forza 34T and now Travato 59GL, the cassette toilet is a bit of a deal breaker for us. With that said, do you think a black tank could be installed on the Ekko? It appeared that there was some space below the cassette toilet area with the generator delete option. Thanks!
I’ve never seriously considered this. I suppose anything is possible. You’d need a toilet with a rotating head, if you wanted to keep it in the same place. And probably a macerating toilet, just to make the plumbing easier.
Don’t take this the wrong way, but…
Talk about cassette toilets being a deal breaker is something we only hear from people who have never had them.
There are trade-offs with any RV toilet system.
I expect if you got an EKKO and started using it, that the toilet replacement would fall off your list of projects before you ever got around to it.
What are your thoughts on replacing the Ekko’s cassette toilet with a composting toilet? Perhaps building in your own using a separett and diverting the urine into the cassette? Venting the solid waste through the cassette door?
Probably too much of an undertaking to be worth doing. However, I am curious to hear your musings on it.
Having now used the cassette for several months, we are not at all interested in doing this. So I haven’t thought about it at all.
Your biggest challenge would be finding a composting toilet that is short (to fit under the sink when it rotates) and that has a rotating bowl.
Honestly, it just seems like a lot of work so that you can do more work once you have the toilet in place.
Great review. In other words “Pick your poison”.
Did you ever look at using a urine diverter into the grey tank for the composting toilet? It seems like a great idea, but I wonder why if it’s such a great idea I don’t see more people using it.
Never looked into it. Mainly because it would have made the grey water more gross. And, because of where the tanks were, it would have required a pump to get it into the grey tank. The idea of maintenance chores on such a pump wasn’t too appealing.
Urine is an “organic medium”. While urine is essentially sterile the moment it leaves your body (well, if it’s not sterile, then you need to see your physician), urine has ingredients that serve as a wonderful growth medium for microbes (germs). The idea of microbial growth in a grey tank sounds a bit troublesome, although folks do wash down small amounts of organic matter (vegetable bits, perhaps) from their kitchen sink, and body detritus from showering/bathing. Sanitizing one’s grey tank sounds like a good idea… but with urine, the grey tank could begin to develop unpleasant odors very quickly, and would need sanitizing that much sooner (I would think)
More good reasons not to put urine down the grey tank.
(Especially considering how the urine jug smelled…)