This post may contain affiliate links.
It’s a lot easier than you might think. I show you how I did it in this video:
When we were reviewing the Winnebago Travato 59k recently, I was impressed by the number of USB outlets they built in. I think it was 9 of them. Then I compared that to the number of USB outlets built into our current RV, Das Bus. Uh… Zero.
I don’t like losing any contest by a factor of infinity, so I set out to see how I could rectify that. Besides the tools I had in my shop, I only had to buy four things, and I got them all for about $30 combined. They were:
- Magnadyne’s Wall Mount RV USB Dual Port Charging Station
- An inline fuse holder
- A 10 amp fuse
- A wallplate
Once I had those, it was just some very simple 12 volt surgery, and now Das Bus is rolling with two, hard-wired USB outlets that can each put out enough amps to charge an iPad. The Travato 59k still has me beat by 450%, but that’s better than infinity.
Now, if cutting into your RV walls seems like too much for you, you could always take the easy approach and go for something like this:
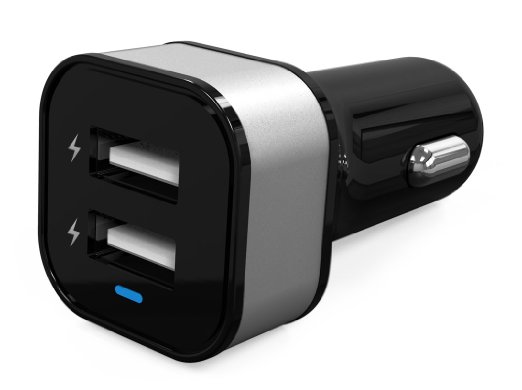
But, as I explain in the video, I’m not too crazy about those because they take up your 12 volt outlet (meaning, you can’t plug anything else in then), and many of them have limited charging capacity (but actually, the one in the picture and link would be OK). This solution DOES get you USB charging capability when you’re off the grid.
Anyway, enjoy the video. It really was pretty simple to do, and hopefully you’ll be inspired to try it yourself. And if you’ve got any questions, ask away in the comments!


I notice you have 2 x 120V outlets just above your 12V socket. Why not just use one of these items from Monster that not only gives you two 2.1A USB chargers labelled Tablet and Phone/MP3 but also a bonus 3rd 120V outlet for under $12 … already fused and surge protected. This one is from Amazon, but they are available at dozens of retailers for about the same price. A lot less work, AND moveable!
https://www.amazon.com/Monster-Power-EXP-350-USB/dp/B00FAZWJYU/ref=as_li_ss_tl?s=electronics&ie=UTF8&qid=1510376883&sr=1-4&keywords=monster+power+usb&linkCode=ll1&tag=tfr0b-20&linkId=c6443aff519759f887b7582774f481c3
The problem with that solution is that it only works when you are plugged in to shore power or running a generator.
That won’t charge your phone if you’re spending the night someplace remote. The demonstrated 12 volt solution will.
I’m curious if you’ve planned a similar project for your Travato 59G. We’re waiting for ours to arrive, but the lack of USB or 12V ports is something I expect I’ll have to address.
I’ve already done one! I think Stef will be throwing some pictures to our Facebook page soon. On our coach, since it was custom, they provided extra USB outlets near the dinette for phone charging, etc. I tapped into that, and added a standard 12v lighter socket next to it so I could run a small inverter to power a laptop if I needed to. (Check your wiring and fusing, as I did, against any sockets and devices you intend to add.)
Hello James:
I found this tip really interesting. Thanks for the inspiration to tackle a little problem we’ve experienced. Our 2011 Navion does not have dedicated 12v receptacles where they could be “handy”. After reading your post I looked around Amazon and found another alternative that might be pretty spiffy. The link below shows a pic of a plug that has one 125V plug, and two USB plugs in the same recpecticle.
http://ecx.images-amazon.com/images/I/81IKS-1nplL._SL1500_.jpg
It is a Leviton T5630-W 2.1-Amp High Speed USB Charger/Tamper-Resistant Receptacle, 15-Amp/125-Volt The 2.1 A charger should work well with current electronic devices. It is also supposed to incorporate a smart chip that recognizes the device used, and charges accordingly. I haven’t yet tried this, and have no proprietary interest, but I could envision this making recharging of our two iPhones, and iPad much quicker, and simpler. It sure would be nice to avoid the tangle of stand alone chargers at the plug near the dinette. Good luck with your new RV!
Glad you found it inspiring! For those of you looking for the product, you can find it on Amazon at the other end of this link.
You may not want to get it from Amazon though. Last week, at the local BORG (Big Orange Retail Giant), I was picking up electrical bits for the house, and I saw USB/electrical outlets there.
Getting it locally might be preferable for a non-RV product. Here’s why: The walls in your RV aren’t likely made with 2×4 framing like in a house. They are probably quite a bit thinner. Often times, the outlets inside an RV wall are pretty shallow. If you get a “house” fixture, it may be too deep for your wall. The problem is even bigger when you consider that the house fixtures typically require mounting inside a box. If an outlet is designed for mounting in a box, you don’t want to have it bare inside your wall – you might short something or create another dangerous situation. So if you get the parts locally, they’re easy to return and stare at until you find something that both works, and is safe.
I did use an electric receptacle with two USB outlets. The outlet should be placed in a box to protect against arching, which can lead to a safety h hazard.
The walls are thinner, so I built a box using those blue pvc cut in outlet boxes you get at the hardware store. I cut it down to the depth of my wall. I used a faceplate for the backing and glued the whole box together with 6000 cement.
I then drilled a hole in the top and one in the bottom for wire access and installed the new box and outlet where the old outlet had been. Looks and works great, plus it is safe. BUT, a lot of work and does not provide D.C. power when boondocking.
For boondocking, I wired in a 400 watt inverter as shown in the video. I ran wires inside my wall from an AC source to the inverter, which I attached to the wall and installed under a table top for concealment. Works great too….
The problem with this solution is that the USB ports will only work when you are on “shore” power, on generator, or have an inverter running.
Well, I can’t speak for everyone who might try this, but in my case, that outlet was a 12v outlet to start with. So it worked whenever the coach battery was on.
I would add one thing to check before doing this type of project. The existing circuit that your connecting into needs to be at least 10 amps, otherwise, there is a risk of the wires being too small of a gauge to handle 10 amps without over-heating and creating a possible fire hazard.
Hi James,
I love your posts, especially the ones on the black water tank. I learned a lot from those.
Watching this post though, it was clear you aren’t as comfortable doing electrical work. Some notes:
– the fuse is not a good idea; you already had a circuit with a 12 V outlet that would be fused. If you plug in a 12 V appliance while a USB device is charging, you may pop that 10 A fuse that is now buried behind the outlet. At least put a label on the outlet that there is a fuse behind.
– there were two blue splices in the supply wires; it would have been better to cut the supply wires before those splices. You now have two more points of failure.
– when crimping, you want to make the crimp in the center of bared wire. It looked like you were very close to the end of the crimp barrel. Get too close, and the act of crimping can cut the wire.
– the tape isn’t necessary; if you want to, you could use crimp connectors with heat-shrink insulation. Then you get to use a heat gun or torch. Cool! But honestly, it isn’t needed in an interior application like this.
Cheers,
Dan
Hi Dan –
Thanks for the comments. All good points. A couple responses if I may…
– I included the fuse because the circuit that outlet was on had a 15 amp fuse (didn’t show how I determined that), and the outlet I installed was rated for 10. A fuse at 50% over seemed like a bit much. Good idea to label the wall plate though. It will make it easier to remember down the road. Often, there’s an inline fuse with the water pump, and people always forget about those – this could be the same kind of thing.
– I did notice those two splices in there already. I thought about removing them (especially since I revealed my distaste for them earlier in the video). But in the end, I left them mainly because it would have made me work 8 inches closer to the wall and would have been very difficult for Stef to film in that corner. I was actually relieved to have the extra room. Basically, it was a compromise for the video. But you’re right about those splices. It made me wonder why they were even there in the first place. (Unless the original upfitter wanted the extra room to work too.)
– If the crimping appears too close to the ends in the video, that may just be the camera work. I’m comfortable with where they are, and they all seemed firm. If anyone wants additional pointers on crimping the butt connectors, there are plenty of YouTube videos out there.
– I actually had heat shrink tubing ready to go, and took it off the bench just before filming!!! (lol) I debated using it, but then I didn’t want to be responsible for someone burning down their rig! Plus, I thought tape would be more relate-able to more people. I realize the tape may be overkill, but I included it for two reasons. First, the space between the interior wall and the metal wall of the van (ground) was pretty close. I didn’t want to take a chance on a stray strand causing a short. The second reason is – I wrap a lot of things in that cloth tape because it makes it a bit quieter if it rattles into something. Call it sound insulation if you will. Stef will vouch for my pathological rattle obsession.
Anyway, like I said, all good points. I think I actually did consider most of them. I’ll probably label the wall plate tonight.