This post may contain affiliate links.
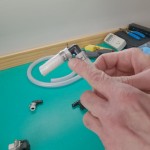
If you’ve followed our site for a while, you know that I’ve got a thing for sound deadening and insulation. After adding it to the cargo doors of our Travato (which is based on the ProMaster), I wanted to add it to the driver’s and passenger’s doors. The first step there is to remove the trim panels on the insides of the doors. Since that isn’t as straight forward as the cargo doors, I thought I’d make a little video to show you how.
What I show you here is applicable not just to the Winnebago Travato I’m demonstrating on; it should be exactly the same on any ProMaster-based RV, or even just the ProMaster van itself. It’s not terribly difficult, but you will need a couple tools. First, and most important, you’ll need a Torx T27 bit or driver. (Not 25, and not 30… 27.) You won’t even be able to get started without it. The other thing you’ll need are some gentle prying implements. I got my set for like $5 from Harbor Freight Tools, but in a pinch, you could probably improvise something.
Once you’ve got that, watch the video and it’s a 10 minute process (allow yourself 30 if it’s the first time you’re doing it). Then you can go nuts with the Dynamat, Fat Mat, Hush Mat, or whatever you want to add.
Enjoy!


Hey James,
At the off chance you read this comment. I was trying to take the trim apart on the passenger/driver door on our 2022 Travato, (Promaster 3500 chassis). In the video you just pry off the trim that holds the buttons that raise/lower the window. What is the trick here? I have the prying tools and cant for the life of me get that piece of trim removed. What is the trick to get those clips undone?
I wish I remembered, but I just don’t. We don’t even have a ProMaster anymore, so I can’t run out and check for you. Perhaps they changed it between our model year and yours? I don’t remember anything too tricky, and I put everything I learned in the video.
Sorry I can’t be more help!
thanks for the YouTube video. I did this yesterday on my 22 Promaster.
For others: door switches were tough to get out. Look for metal clip on the rearward side of that part and depress clip with small screwdriver to get it out of the panel. Also, it appears that Ram has changed the Torx screw to T30 size (at least mine was).
Excellent video. I need to replace R/S mirror assembly and would like to know which screws to remove to get to the connectors without removing the entire panel. Can you help?
Lev
It’s been a long time since I made this. I don’t remember any more than what you can see in the video.
Sorry! Wish I could be more help.
This video is fantastically helpful James, thank-you for making it. What sort of insulation did you install so as not to impede the downward motion of the window? I have Noico sound deadening and Thinsulate. I haven’t taken the door apart yet but I do wonder whether there’s enough space behind the black plastic panel to just replace the paper that covers the holes in the door with Thinsulate?
I’m getting a new Kenwood system installed this week!
I used similar products (FatMat and some foil backed denim), but was just careful where I put them so that they wouldn’t interfere. I also used some foil backed foam that was pretty thin.
I did this a while ago, so I don’t remember how much room was back there. I suppose you could just try it with your thinsulate and see if it fits. (That’s what I’d do anyway.
How do you like your JBLs? Did you upgrade your tweeters as well?
Have you noticed a difference after adding the damping? We’ve been pretty happy with the noise level in our Travato, but if I had a reason to pull the trim off, I wonder if it would be worth taking it one more step…
I wish I could tell you it made a world of difference. But you’re right – the noise level in the Travato is pretty darn good to begin with.
Honestly, it’s just slightly quieter. I notice. Stef doesn’t.
The big thing you notice with our doors now is how solid they feel when you close them. The sound and feel is of a much more substantial car.
I also did the rear doors, and the back of our Travato is almost dead silent when underway now. Those did make a difference. As did the slider.
If I were a car stereo enthusiast, I would probably notice more.