This post may contain affiliate links.
I got a new sewing machine last week. A Janome HD 3000. I like that name; sounds like a full-size truck. It’s an awesome machine, and putting it through its paces reminded me that I never posted a final write-up on our curtain project.

That’s how they look with the seats turned around. We had tried several commercially available ways to cover up the cab windows, but weren’t really happy with any of them. Suction cup things. Roll up things. Reflective Foam-core things. We didn’t really love any of them. Our big hang-up was that almost all of them required you to store something, and storage space in our ProMaster-based RV is at a premium. Another problem we had was that they all seemed to leave gaps or cracks around the sides where someone could see in or light could get out. I even tried working with the Remi guys – from Europe – to bring their Ducato shade over to this side of the Atlantic. No dice.
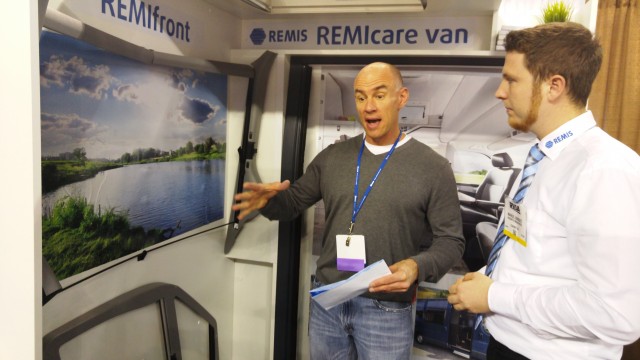
Dude! I Promise! You will totally sell like a million of these things for the ProMaster if you can get them over here…
So eventually, I resolved I had to just make my own. A few sewing lessons later, I was able to make these – so the skill level required isn’t very high. These curtains work great in our Travato, but they should work with ANY ProMaster RV. So if you don’t like your RV’s cab shades, read on! I’ll give you the materials, dimensions, and links to the parts. It still may take a bit of trial and error based on your particular RV, but this should get you really close.
Design
In our Travato, both front seats swivel to become part of the living area. So this curtain needed to both drape behind the rotated seats, and not lay on your head when it does. Most of the designs I found for other RVs had a curtain track that went all the way around the windows, up by the windshield. The profile of the ProMaster headliner made that impossible. So rather than screw buttons, snaps, or Velcro into our RV’s headliner, I elected to use magnets to hold the curtain up over the seats. There are 8 points where the curtain attaches with magnets, and I’ve pointed 4 of them out in this picture. The other side of the cab is the mirror image.
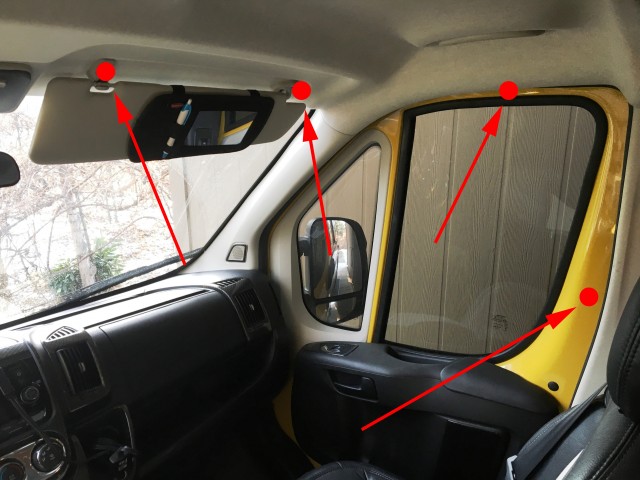
They are:
- The metal of the door by the B-pillar
- The metal of the door by the top
- Outboard visor bolt
- Inboard visor bolt
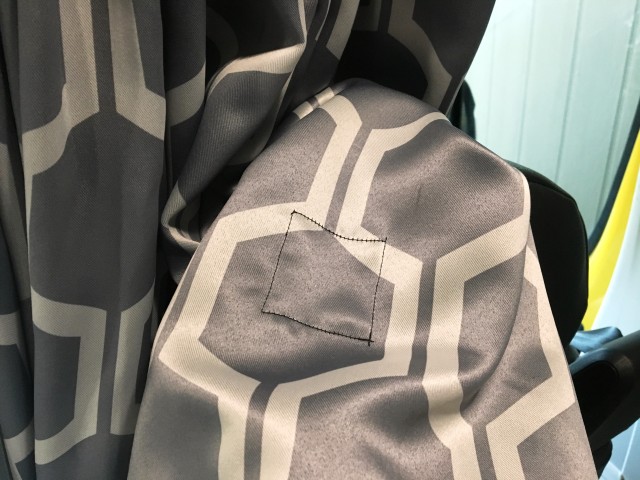
But in addition to that behind-the-seats-thing, I also wanted the ability to just pull it straight across to cut off the cab, like this:
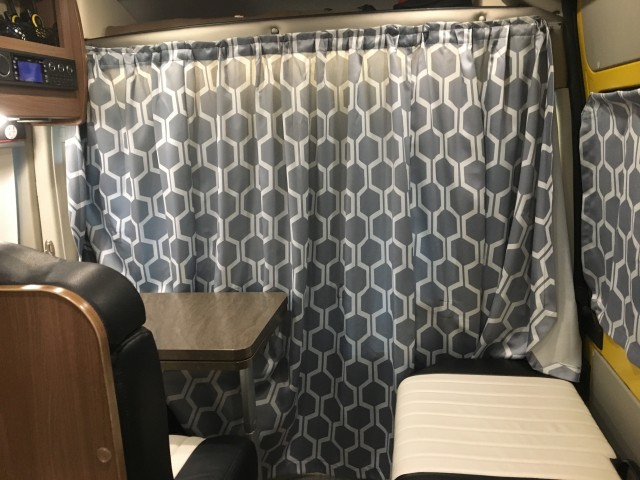
This is actually a winter RVing strategy. Closing off the cab and its giant windows means less space to heat, and less heat will escape. But I didn’t want the curtain dragging the ground, so that meant the curtain couldn’t be too long. 60 inches was the max height.
I started with a mock up. I got some cheap cloth from the fabric store and sewed it into a giant rectangle 154 inches wide by 60 inches tall and cut, taped, tacked, and magneted it into place until I had something I was happy with. Then I marked it up and used it as my pattern.
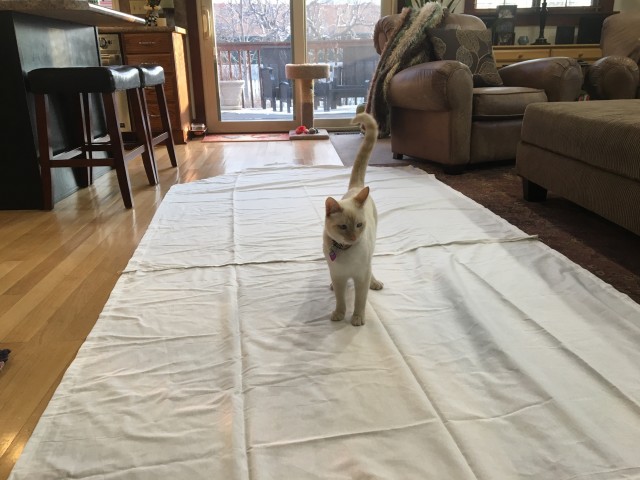
I actually don’t recommend doing this with a cat. They’re not at all helpful.
How to do it
First, get some material you want to use for the curtains. You’ll need enough to sew a giant panel 154 inches wide by 60 inches tall (those are the finished dimensions). When I made ours, I wanted a blackout fabric. A heavier fabric will hang better, will block out more light, and will save you from having to use drapery weights in the bottom hem of the curtain. BUT… you can’t pick anything too heavy – because then it might be so heavy that the magnets won’t hold it up.
These are the curtains I used: Style Selections Quinn 84-in Room Darkening curtains. As far as weight, they’re right on the edge of what the magnets can hold up. I did not line them, and they do a decent job in blocking out light. I cut off and discarded the parts with the grommets.
Unfortunately, I can really only “kinda” sew, so I can’t tell you what to leave for seam allowances, etc. I left about two inches because I’m not very good. But now that you have the finished dimensions, I’ll leave you to figure out how to get there. My material was pretty thick, and at the end, when I was sewing through pleats on top of seams on top of seams, it got pretty tough. Hopefully, you’re better at it than I am, and you can plan accordingly.
Next, once you’ve got your giant panel, you’ll want to cut it down and finish it into this shape:
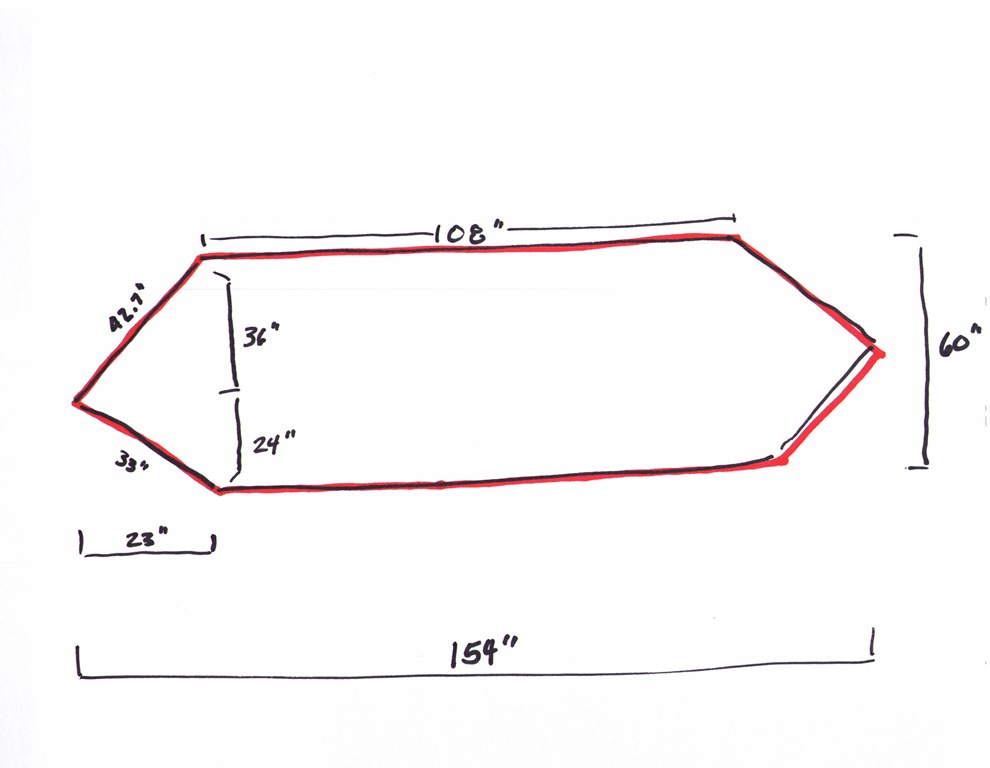
Oh sure! I had intended to give you a full-on scaled and dimensioned CAD drawing. But learning a CAD program would have taken about a week. This took 90 seconds.
Those “wings” on the sides don’t really factor in much when the curtain is hanging straight down. But they keep the side windows covered adequately when the curtain is pulled behind the rotated seats.
With that done, it’s time to locate the magnets. The best way to do this is with the van itself. I’d recommend going at it in the following manner.
Step one, get the magnets. The bolts on the visors aren’t particularly magnetically strong, so I’d recommend getting some really strong magnets to make up for it. I used something like these:
Then, you need to finish off your curtain and hang it. You’ll use the magnets to hold the curtain in place as you’d like it to drape, and then mark those locations. (I’d say you should mark the locations with pins, but… you know… magnets.)
As far as hanging the curtains, I decided to go with a Snap Tape solution because it seemed like the easiest thing to sew. You’ll need to buy three things:
RECMAR 3091 Snap Tape – This is the only place I could find it sold by the yard. I purchased 4 yards to allow for mistakes, but I didn’t use it all.
RECMAR 3060 Plastic Snap Glide – These come 14 to a bag. I purchased 3 bags.
RECMAR 3294 Aluminum Curtain Track – I purchased one 8 foot length.
The first step is to sew the pleats into the curtain and sew the snap tape on to the curtain. You can do this all in one step. There’s a pretty good online demo of this that I found on YouTube.
But it didn’t go quite that smoothly for me. Like I said before, I had pleats on top of a seam, and on top of two seams in some places. This was a big chunk of material to go underneath the presser foot of Stef’s old machine. There was a good bit of time where I was operating the sewing machine manually by turning the knob. It was pretty tough, but if I got through it, you can.
Once you’ve got the snap tape mounted to the curtain, you just snap the carriers into it. That completes the curtain part of the deal. Then you have to mount the track. Mounting the track is easy enough – you just screw through the flat part of the track and into the panel over the cab area. But the challenge is to make sure you’re actually screwing into something. This is where it gets different for different ProMaster owners. On our Winnebago Travato, I was able to just pop off the covers and unscrew the snap caps holding that piece on.
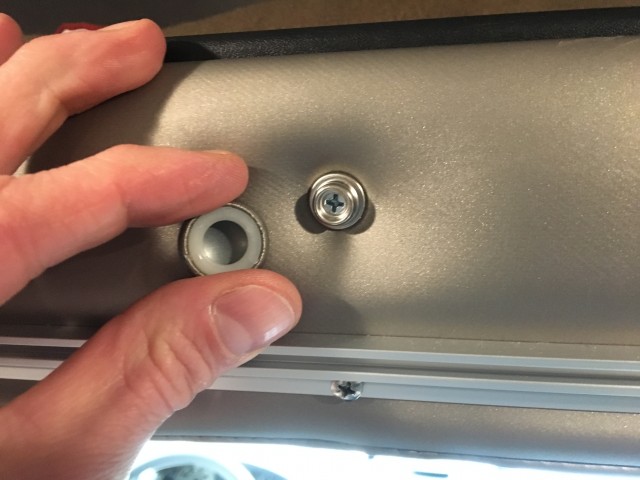
Snap Caps like these are pretty common in RVs. If you see one in your rig, there’s probably a screw underneath it you can use to remove parts from your RV. FUN!
Then make note of which places would be good to screw into, and which places you should avoid. If you have a different RV – or even a newer Winnebago Travato that has the plastic cover instead of the vinyl-wrapped one – you’ll need to figure out something that works for you.
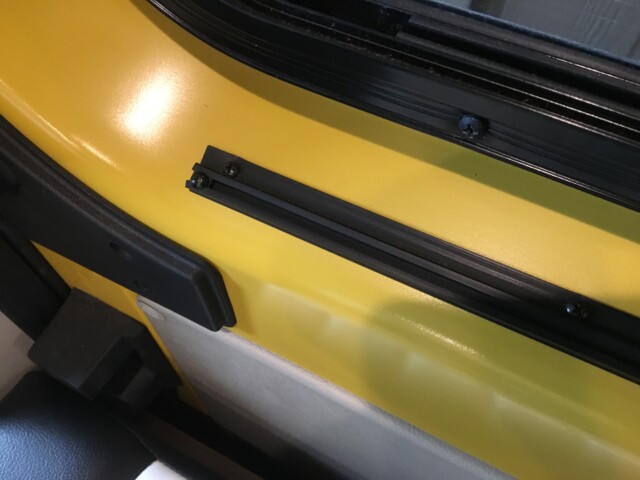
In my case, the curtain track is mounted 2 3/4 inches down from the top of that piece at the center. The exact length of the track isn’t terribly critical, as long as you get close enough to the ends on the driver’s and passenger’s sides. And you will want to make sure to tuck the curtain track back between that cap and any cabinets next to it. This is why I went with the aluminum track – I had to push it in pretty good.
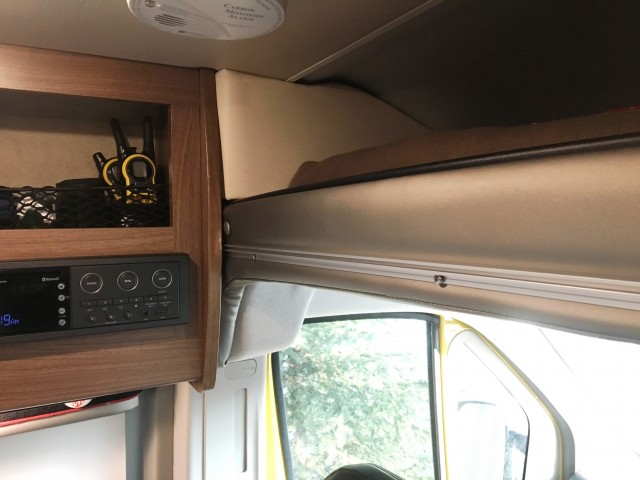
It’s a pretty tight fit on that far end by the radio…
Oh, and one last item. You’ll want to get a couple of these to screw into the ends of the track. They keep the curtains from coming out the ends.
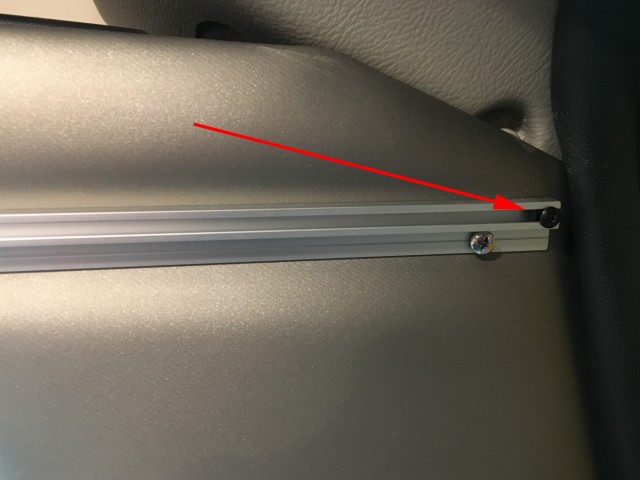
The stop is at the end of the arrow. You can also see the screws I used to mount the track. (I used 7.)
RECMAR 3030 Steel End Stop – They come 10 to a bag. You’ll only need one bag.
A word of advice here. Put the end stop on the far end of the curtain before you spend 10 minutes forcing it into any narrow spaces. (Don’t ask me how I learned this.)
Once you’ve got the carriers installed and the track mounted, just thread the carriers into the track to mount the curtain. Then, as planned, use the magnets on the points I indicated, and hold up the curtain, getting the drape of things to your taste. When I had that settled to my liking, I outlined the magnet positions with tape (because I couldn’t use pins). Then it was back to the machine.
I sewed rectangular pockets around each of the magnet locations. The pockets have to be a bit larger than the magnets , like this:
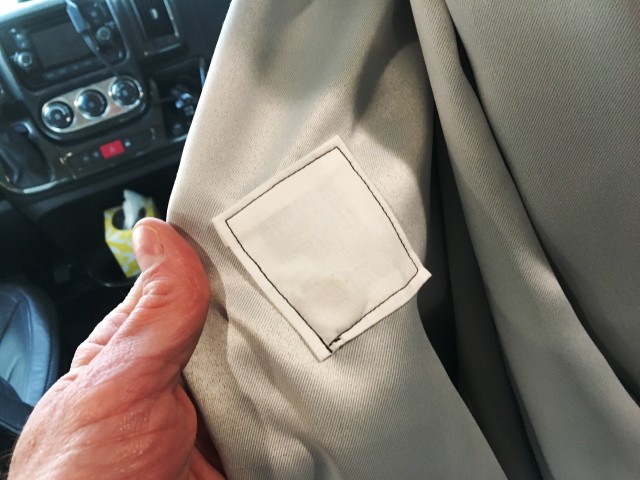
Because your sewing machine is metal, you have to sew up 3 sides of the pocket, insert the magnet, and then hold the magnet away from your needle, presser foot, feed dogs, etc. while you sew up the last side. This was a challenge I hadn’t anticipated for my very first sewing project… I got it done, but there was some swearing.
I just sewed straight through onto the show face of the curtain. If I were doing something fancy like attaching a liner I could have made it look better I suppose, but as it is, the pockets show through on the front of the curtain.
And that pretty much does it. Once you’ve got the magnets in, just re-mount your curtain into the track. Tuck a bit of it back behind any cabinetry on the driver’s side if you have it, and add another end stop to the passenger side. If you want to, you can make a tie back, as I did. Mine is just a strip of the material and two rings from Home Depot. The hook on the B-pillar trim is just a 3M Command Hook.
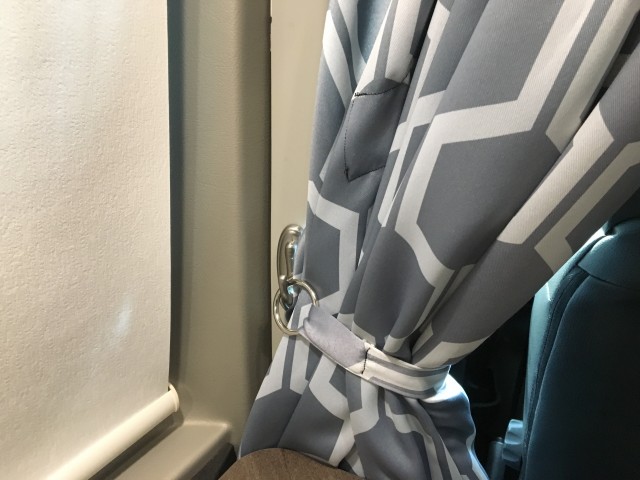
Surely I can’t be the only person who gets sewing notions from a home center?
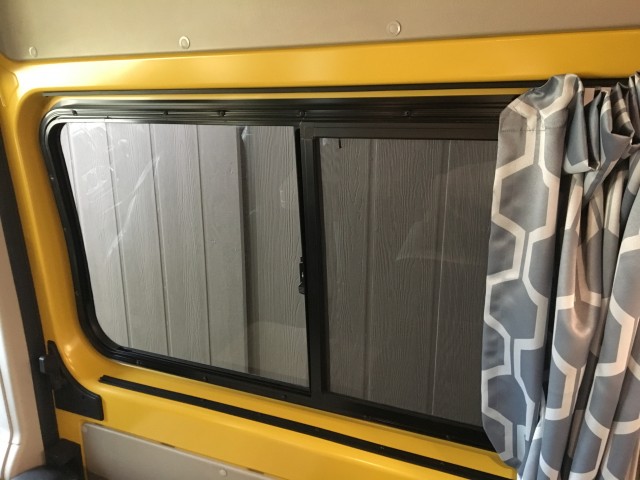
Don’t Forget the Sliding Door
A number of people have asked about the matching curtain I have on the sliding door. It looks like this.

This was actually done before I learned to sew, so I didn’t do this one. I made a pattern and handed it off to someone who sews better than I do. So I can’t tell you exactly what she did. But I can give you a few details to help you finish this off yourself.
First off, you’ll need this for the curtain track:
RECMAR 3110 Plastic Curtain Track. I got one 8 foot length.
I went with plastic here because I was mounting this track INSIDE the window well on the sliding door. That’s curved slightly, and I figured the plastic track would bend to conform. I mounted the track in the same way as the aluminum track – you just screw right through it. Only in this case, you’ll want to pre-drill some holes since you’ll be screwing directly into the sheet metal of the door. Oh yeah, and use sheet metal screws. You’ll need top and bottom tracks, mounted one directly above the other.
For the carriers on the curtains, I used these:
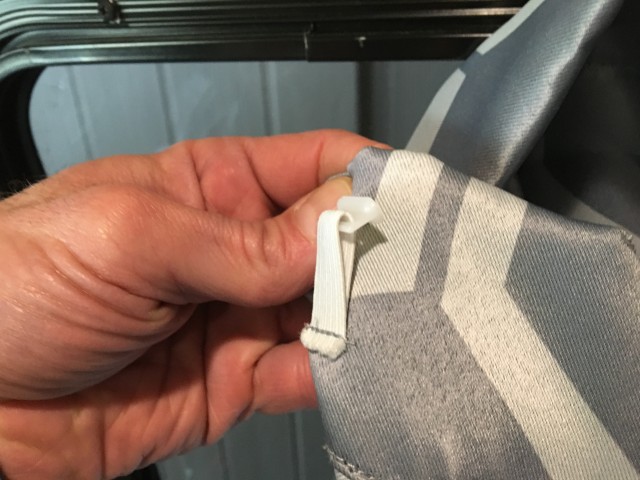
RECMAR T Glide w/ Elastic – Airstream – They come 14 to a bag. I got two bags just to be safe.
I used the elastic because I wanted this curtain to be under a bit of give, and a bit of tension to keep it taught. Finally, in the four corners, I am again using magnets to hold the curtain into place. Jenn got her magnet pockets much smaller than I did. I attribute that to her having skill, whereas I kind of don’t.
The last parts you’ll need are four of the end stops. But if you bought the bag of 10 in the first bit, you’ll still have 8 left over, so you should be good.
I just made a template out of a piece of fleece, and pinned the elastic carriers where I wanted them. I turned it over to Jenn and poof! I had a side curtain.
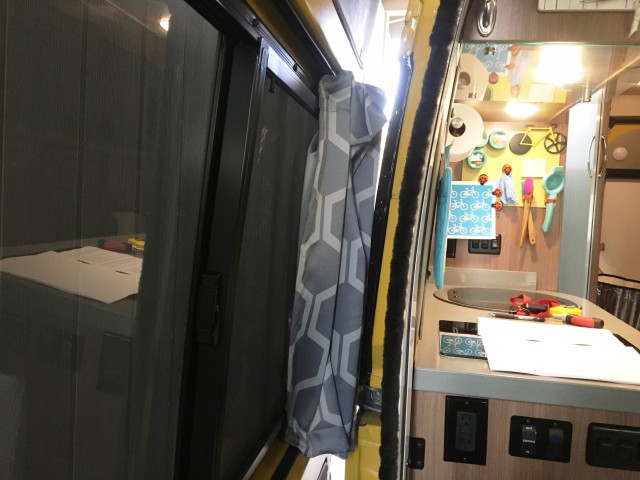
There is, however, one problem with this design…
When the curtain is open, the material bunches up on the stern side of the curtain. It’s fine when you’re looking out.
Just pretend that you’re looking out at something more interesting than our carport.
But when you open and close the door, that material can and does brush up and down the side of the van. Depending on how filthy your van is at any given time, this may or may not be a problem for you. If anyone has any ideas how to solve that issue, sound off in the comments below.
Dirty Van = Dirty Curtains. Less than ideal.
So there you go. Best of luck with your curtains!


Stefany, I am leaning toward making these curtains with blackout curtains. I am wondering how much the curtains bunch behind the driver’s seat when pulled back to drive. Do the curtains inhibit looking out the window over the table in the dinette when driving? Thanks.
Well, it was actually me that made the curtains. They do bunch behind the driver’s seat, and you won’t be looking out the dinette window from the driver’s seat while they’re there.
We’ve found there’s nothing you can see through that window that a properly adjusted set of mirrors doesn’t show you.
Unless maybe you’re an owl…
James & Stefany, we love these curtains and purchased all the materials. However, I think I goofed on cutting the rail, taking to heart the length is not that important. If I don’t slide it very far behind the radio panel, it looks like I should have good coverage, but not if the curtains actually get jammed in there too. How many inches did you slide the rail in between cabinet and headboard? Thanks so much for all your great advice on mods and Travato life.
Well, on ours, it’s *REALLY* tight. I don’t remember the exact number of inches I shoved the rail in there, but it absolutely does go in there some. I cannot fit the curtain on the rail behind there though. Basically, on that side, I just jam things in there until I get the coverage I want.
Thanks for responding. I didn’t leave enough to push more than an inch. Thinking maybe I should re-order, or do you think the screws will hold it well enough without it being slid between cabinet and headrail?
The screws should be enough to hold the curtains. Unless you’re climbing on them!
I am about to make curtains for our Travato. Just wanted to ask if the pleats are required or could you do it without them?
Hi Sandra! The pleats are not technically required, but the curtain is 150+ inches wide, and you’re putting it on a 65” track. It’s either pleats or giant loops of extra material along the track…
hi James
Love the curtains.
Did you get one pack with 1 or 2 panels?
thanks
Uh. I don’t remember. I got several packs. I believe I sewed 3 panels together width-wise to get the width I needed.
Hi James
I love the look of your curtains. We just got our T and my first project is the curtains.
Do you still use the shades for the front and side windows? I really don’t like then!!
How many curtains did you get? 1 pack with 2 panels or 2 packs?
Amazon don’t have your curtains any more 🙁
Thanks
We do not use the side shades any longer. We do use a different, roll-up one in the front sometimes. Our front shades are always changing. We may bring the originals if, for example, it’s going to be really cold and we want some more insulation.
I believe I used 3 widths to make the front curtain. I actually bought about 8 of them, and still have some left if I decide to do other windows. I also figured I would mess up a time or two and wanted spares.
May I use one of your photos for a video I am currently working on? Thanks!
Thank you for your design and video tutorial. We recently made these curtains for our Travato K and turned out perfect. We did find that the magnets mentioned were not strong enough to hold ours so we tried the pawn magnets that came with the T and worked perfecr. We ordered eight more pawns for the curtain and plan to use those in the strategicly placed areas and not sew the magnets to the back.
What a great idea, Linda!I can imagine not having them sewn in might make placing them easier!
Right on! Glad my design was useful for you!
We are copying your curtain design. You state that you bought three bags of the plastic snap glides. How many did you actually use to hang the curtain? Does the track/glide system still work smoothly?
Thanks.
The curtain slides smoothly. I believe you could get the job done with two bags. If I remember to count the snaps next time I’m out there, I’ll respond back again.
Could you explain the pleats a little more? I am guessing you used the pleats to shorten the top side where the tape is attached. What was the shortened length? Are the pleats uniformly spaced or concentrated at the ends (or the middle)?
Well, the pleats are more or less evenly spaced. The pleats align with the snaps in the snap cap tape. If you watch the video in that post, you can see them sewing more or less as I did.
I matched the length of the tape to the width of the curtain track inside the van. I don’t remember the number offhand. (And I didn’t write it down, sorry!)
So basically – cut snap tape to width of van; sew pleats on top of snaps. ish.
I would like to clarify, on behalf of my own cat, that cats don’t work.
Mel was there to SUPERVISE.
And clearly your success was due to this feline supervision. I mean, come on now. Credit where credit is due.
(BTW – my cat supervised the writing of this email.)
lol.
If I didn’t know better, I’d swear you and Mel had met.
Fantastic documentation of your impressive curtains. Thanks for the links which make it even more valuable. I’ll be implementing some of your installation. When I say “I”, I really mean my wife, who was a costume designer and sewing instructor, will be making these! (the payback is that I fix everything else on the property) The side door thing is a bummer. Guessing you have to have the curtain pulled closed so as not to bunch up and hit the side of the van? Anyway THANKS!
Nice work James. Your attitude to try projects as this is why you succeed. Way to go. On another note, I asked a Leisure rep if they had any plans on building a unit on the Promaster chassis and his reply was that they heard too many bad things on that chassis. Had you heard of any issues and what mileage does Lance have presently?
Lance has over 30,000 miles now, and we haven’t had any issues with him that I didn’t cause myself…
Not really aware of any major issues with the ProMaster chassis. It DOES have a lower weight rating than the Transit or the Sprinter. I suspect that’s the real reason Leisure doesn’t build on it. The LTV rigs usually run on the heavy side. All those solid wood doors add up!
I have remis blinds (side and front) on my U.K. ducato. They are great for the summer but in winter are just not enough even with our wimpy winters. So I have external thermal blinds too, that fit over the cab door corners, then all around cab and front Windows but like you say, they are something else to carry. So I have been thinking of a solution like this but without the need to blackout the windows, just to drape behind the rotated cab seats. So thanks James, for this little lesson. However Its my better half that owns a janome, so I will let her skills impress.
Nice. As long as you’ve got the skills “in house” you might as well use them!
Best of luck with the project!
Do you know anyone thought does a blog on class a motor home we plan on living on the road for a couple of years and wanted a class b until we went thru them at Tampa show any figured they will by too small. We looked at Newmar and the Thor but then there is the gas versus the diesel again. We only want something below 34′ we like a few class c’s but some of them look so cheap inside. The manufacturers really need to get away from or parents rv deco. It is a shame they aren’t in the 21 century. We are in our 60’s and don’t like the old look. Thanks so we missed you at he show.
I don’t follow any Class A blogs regularly, but from time to time, I have looked at the RV Geeks. There were a bunch of “Gas vs. Diesel” type discussions over at Gone With the Wynns – but they’re no longer in an RV.
I’m sorry we missed you at the show, Sandy! There are some nicer RVs that are class Cs under 34 feet. You just need to look at better brands! Winnebago, Leisure Travel Vans, and Pleasure-Way come to mind immediately as better class C rigs.
James and Steph. Nice meeting you at the Tampa rv show. Judy and Bruce
It was great meeting you, and all the folks who came out to see us!
James, you are a renaissance man. Period.
Oh, I don’t know about that. But there’s not much I’m afraid to try. I think that helps more than anything.
Pretty impressive James!!! They look awesome! So much more convenient and nothing to store away. Perfect!
Ding!!
😉
Hey James, Jim here. I suggest you make a little vinyl cover for the curtains on the sliding door. You could easily attach it over the curtains if you want to keep them clean. Why not use strip magnets attached to the vinyl on top and bottom of the vinyl. Might work.
Glad you are comfortable sewing. I have been a stay at home Dad, but sewing is something I have not considered… Just old fashioned I guess !
Not a bad idea…had we foreseen the issue, we should have just made the slider curtain vinyl from the start!
James, please give sewing lessons for men the next time you appear at an RV show. I know that you’ll probably require that students not have any sand on their shoes because of your sand “allergy,” but seriously, classes like that would be appreciated!
What an interesting idea, Larry!
Nice job.
Do you know if the Remi shades for the Ducato would be an exact fit for our north american Promasters? They look real cool, and since my brother lives in Switzerland, he could probably buy them and ship them to me.
Sadly, it won’t fit. The North American ProMaster has airbags in some of the places where the Euro version does not. The shades won’t fit…
James, your “Renaissance Man” levels of intellect, skill and showmanship are always enjoyable an appreciated!
You’re too kind!
Thanks for reading!
This is a terrific idea! We are getting tired of the evening/morning ritual of unfolding and installing/taking down the window covers. We also have a K that we love. Would you be willing to give us a photo from the kitchen area showing the whole front? I am curious about how bulky the curtain looks when closed/tucked behind the drivers seat. Wonderful work! Thank you!
Well, there is a fair amount of curtain that winds up there. In a G, it’s basically in dead space. In a K, I think it would wind up in in-used space at the back of the galley counter.
If I remember, I’ll take another picture of it.
Kudos for resisting the urge to sew in a “suspiciously” cat shaped lump into the curtain lining.
It could be like a hammock for Mel! Mel would probably love it!