This post may contain affiliate links.
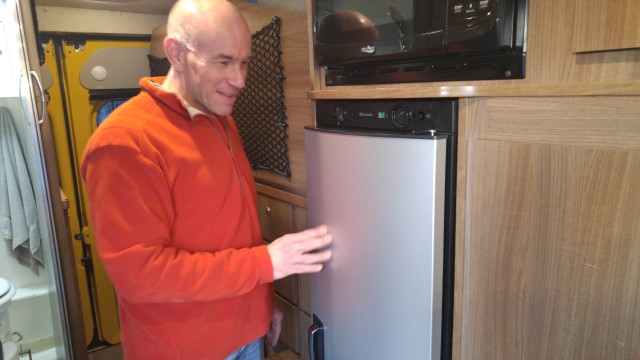
One of the things Stef really wanted in a new RV was a larger refrigerator. And she certainly got that in our Travato. The refrigerator is a Dometic RML 8330, which is a 3 way fridge. It’s also a manual changeover fridge, which means you have to access the controls to change it from 12 volt to 120 volt to propane. And it also has manual ignition, which makes it kind of like lighting a grill. It doesn’t always light on the first try, so there are times when you may need to access the controls for a minute or more.

The controls, Stef! Look at the controls!! They’re behind the door! That’s just wrong!
And therein lies the problem. The design of the refrigerator is sleek and modern, with an uncluttered front. The Italian in me loves the look. But the German in me is driven absolutely insane because you have to hold the door open to access the controls. As in – “Shut the refrigerator! You’re letting all the cold out!” (Thanks for that, mom, I can still hear you…) It seems a strangely inefficient design. It had always bugged me, and in the end, let’s just say I’m a lot more German than Italian…
I finally realized I could, possibly do something about this. The gasketing on the refrigerator actually only covers the compartment proper. The controls are not inside the gasketing, and are just covered up by a piece of plastic. I reasoned I could remove the door, cut it down, and thereby have access to the controls without opening it. I had a little free time this afternoon (OK, not really. I never have free time. I was just goofing off.), so I decided to tackle it. Here’s how it went.
Step 1: Remove door.
This is actually very easy. Open the door. Remove two screws holding the control panel on. Then, use a right-angle screwdriver to remove the three screws where the hinge pin attaches to the case.
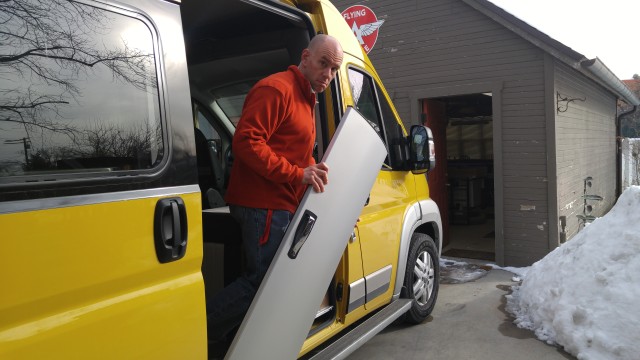
When your wife finds you bringing the dismembered refrigerator door into the shop to saw it, that would be a good time to verify that she will still love you even if you destroy the RV refrigerator.
Step 2: Hacksaw the door.
Exactly what it sounds like.
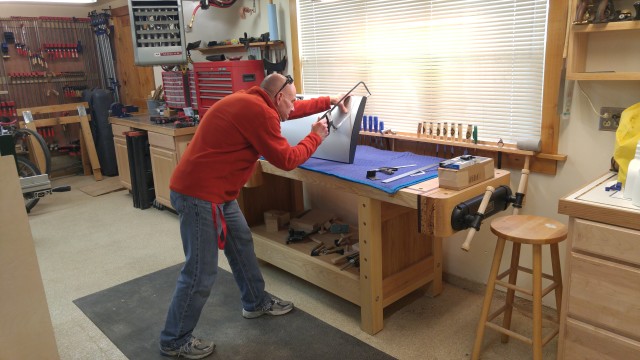
It’s plastic, so you’ll need a saw with fine teeth. A hacksaw works fine, but I realized later I could have just run the door through my bandsaw. I cut the top of the door off right down to the mount for the hinge pin. I did it freehand, and it came out surprisingly well. Do make sure you save the offcut, because you’re going to need it for the top.
Step 3: Salvage the top.
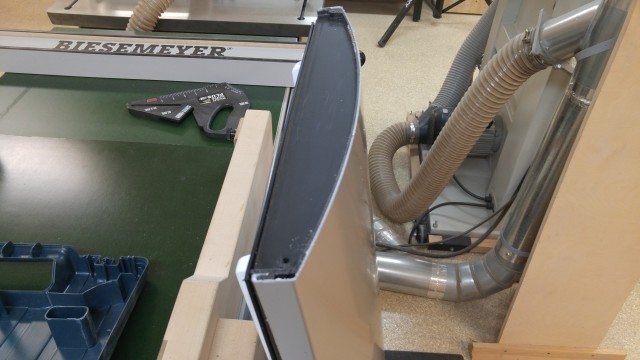
I suppose I could have stopped there and just mounted the door back. But it was ugly. I wanted the wife to think I was awesome, and not just still love me out of obligation even though I massacred her refrigerator. I needed the door to look nice. The next step was to free the very top of the door from the offcut. I did this at the bandsaw, but it still wouldn’t fit back on the door because of the remaining bits of the original door still stuck in it. I tried to pare it out with a chisel, but that wasn’t going to work. I would have broken the top if I had kept trying.
Step 4: Build a jig and rout away the waste.
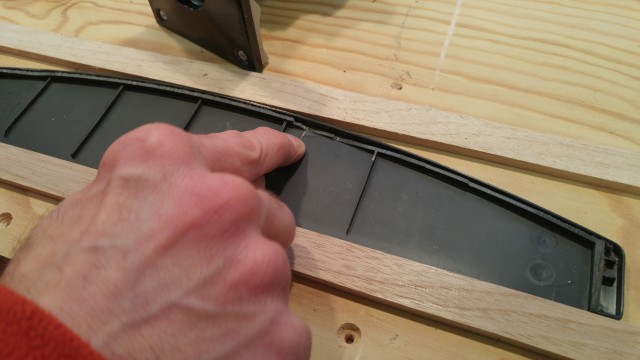
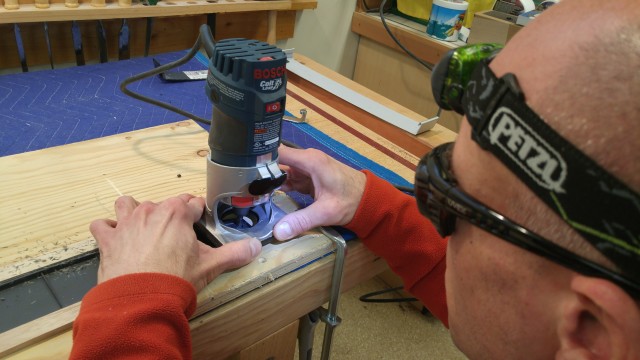
I decided to use a trim router with a small straight cutting bit to remove the remaining rim of former-door-waste. But long story short – that method wouldn’t work unless I could come up with a way to hold the router level as it moved over the inverted top. Hence, the jig. It’s just two runners, taller than the top, and close enough together that the router could span them. My trim router is a Bosch Colt. I like it well enough, even though I hate routers in general. This time, it all worked like a charm.
Step 5: Reassemble the door.
With the extra plastic removed from the top, it actually fit back onto the shortened door really well. I did have to drill a hole for the hinge pin, but once that was done, I used a little silicone adhesive to make the top stick to the door. By this time, Stef had quit fretting about her fridge, so she had gone inside and didn’t take any pictures.
Step 6: Gloat.
All that’s left then is to put the door back on the refrigerator, put the control panel back on, and soak in the awesomeness.
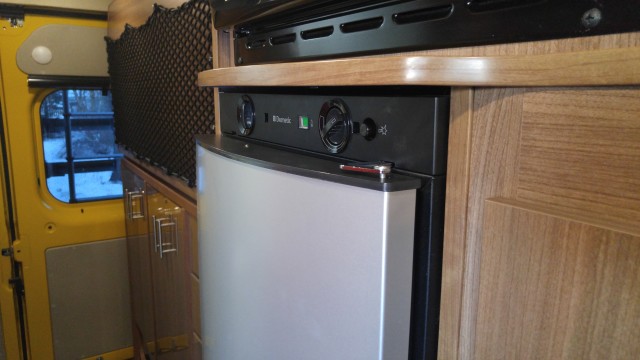
This all worked out much better than I had feared it might. Usually, when I’m working “without a net” or, in this case “without a backup door”, something goes terribly wrong. Not this time! The door almost looks like it was made that way now. The only difference is, you can see the controls and the hinge. All clearances are fine, the function of the refrigerator as a whole is completely unaffected, and we can get to the controls without letting all the cold air out of the refrigerator. I’m calling it 100% successful.
So there you have it. My inner German is at peace, our refrigerator is more efficient, and Stef’s glad I didn’t ruin her fridge. That was my Saturday afternoon!




An excellent video with a good step by step procedure. I did it in June 2021 and I’m very happy with the result. Thanks for sharing this excellent idea.
Glad it was useful for you!
I am considering cutting down the door on the refrigerator in our 2016G: I do not have a trim router, only two standard size (larger) routers. I have never used a trim router, only the larger routers. Q1. In your opinion, would I be better served to purchase a trim router? In particular, do i need the variable speed feature that the Bosch Colt you used has? Seems to me that I can still use your idea for the templates/guides to keep the router level and control the bit depth. Q2. Did you free-hand the path of the router as you cut away the material to allow the top to fit onto the refrigerator door? Q2a. If you free-handed, were you able to get a cosmetically good fit/gap between the inside contour of the top cover where it fits against the front surface of the door? (Thanks for your trailblazing with your Travato modifications. I too am a bit hesitant without a backup in case I mess this up. A new door costs $1200 to $1400.)
I think you could probably figure something out with a regular router and not necessarily need to buy a trim router. While I like the visibility to the work it provides, I’ve largely fallen out of love with the Bosch Colt, due to annoying sticking collet issues. I don’t think the variable speed is that important and I don’t much use it. Mainly, the only thing I use variable speed for is really large bits on larger table-mounted routers.
I just cut the part free-hand, and it looked pretty good when I was done. It really wasn’t that difficult.
Another option for you might be to use a Dremel tool if you have one. I HATE Dremel tools, and I threw up in my mouth a little just now when I recommended one. But in this instance, it might work as it would allow you to grind away at the bits of plastic and would afford you good visibility while you were doing it. Of course, there’s a 50% chance that using a Dremel tool would melt the plastic and completely ruin your project because, well, it’s a Dremel. But perhaps you could practice on some of the offcuts from the door before using it on anything that matters.
Good Luck!
Thank you very much for suggesting the use of the Dremel rotary tool: Yes, I do have a Dremel rotary too and, also, the Dremel oscillating tool. Consistent with good engineering practice, I will practice cutting with these tools on some similar, but expendable, plastic so that I can reasonably perfect the technique prior to cutting on the actual refrigerator door. Now that I have thought about it while writing this comment, I will use either Dremel oscillating tool or my Bosch flush cutting tool to cut off the top of the refrigerator, as the door is too large for my band saw.
I like your fix for the door on the Dometic RML8330.
I am having trouble finding repair parts for this fridge? Specifically I need a new ignition cable with pezzoil lighter and a new thermocoupler. I also need a new door for the freezer or at least repair the broken top hinge.
Dometic no longer carries these parts
Where can i get these repair parts?
Thanks
I wish I could help you, but we no longer have that fridge.
If Dometic doesn’t have the parts, I don’t know where to tell you to turn.
Perhaps look for an old Travato owner who wants to change their refrigerator?
HI James, very impressive. I just purchased a 2018 PleasureWay with this fridge and was hoping I could swap it out for a compressor fridge. Did you consider that option? Thanks!
BTW, my previous 2016 Leisure Travel had the auto switch. Why oh why didn’t they do that with this one??
Yes. I did consider swapping this fridge for a compressor fridge… then I did it!
It turned out to be a big project.
You can see the whole thing starting here: Replacing our RV Fridge – Part 1: The Old Fridge Sucks
Hi James. You are very brave to do this mod! I have the same fridge in 2016 Era. As of this past weekend, I am unable to turn the power selector dial and the fridge won’t work. The dial is really jammed. Yesterday, I connected to shore power, did the usual trouble shooting, fuses, gfci, etc. No luck…just rang Dometic and the phone service is currently experiencing problems. Any ideas what it could be? Thanks in advance for any suggestions you may have.
Sounds like a bad dial to me, but I don’t have any suggestions for you on how to fix it without seeing it firsthand. Sorry!
Hey great job, Do you know if the door can be switched without buying a new door, I bought a used fridge from a crashed camper van, unfortunately my new build plan changed since buy it and I need the door hinged on right side now not left as it is currently hung.
Any help and knowledge would be much appreciated.
On that refrigerator, due to the unique shape of the cutout for the handle, the door is either right or left swing, and you can’t change it.
You’d just have to order a new door.
James,
I agree totally that the design of the 8330 door (hiding the controls) is nuts and enjoyed your solution.
We have just purchased a Winnebago 70A which has the 8330. What is not made clear by W’go is that this refrig has no thermostatic control when operating on 12VDC. That little nugget is only found deep (pg 16) in the 8330 Operating Instructions. YET, W’go say you should operate the refrig on 12VDC whenever driving OR on shore power – which means that everything will FREEZE solid over time. Incredible.
Our ancient Norcold 3163 (vintage 1997) has the same problem. For $10 for 2 relays I was able to solve that problem. I would like to do the same on the 8330 but have not been able to find a schematic. Do you have one or know where I can get one? Dometic Customer Service as not responded. My W’go dealer hasn’t come up with one.
Really enjoy all your videos. Keep up the good work.
“Always on on 12v” is inexplicable. You’d have to ask Dometic why that is, because I can’t think of a good reason to disable the thermostat on a refrigerator at all. Ever. For any reason.
But… Sorry, I don’t have a schematic of that fridge. I don’t even have the fridge anymore! We sold it when we got the Nova Kool working. Good Luck!
Thanks for the reply. Yes, inexplicable but true AND explains why users experience frozen food when following W’go’s advice to run on 12VDC.
Actually you would not have to ‘disable’ the thermostat. If like the Norcold (which I suspect it is), the t’stat controls gas flow with a solenoid but also has a parallel electric (SP/ST) switch for the AC. My solution simply used that on/off switch to control a relay which in turn drove another relay to which both AC and DC were connected. The front panel then determines which source (AC or DC) gets power and this second relay directs that power to the associated heater element when more cold is called for. I’ll keep searching the world for that schematic…
James since you’ve replaced your fridge can I trade you doors from your old fridge? I like your mod to prevent having to open the door to change power positions.
Well, you *could* have it if I hadn’t already sold it. Sorry!
James
Just saw this on the Travato page. You really out did yourself…amazing! Time for you to open a mod shop for us Travato owners. I’m tempted to drive to Salt Lake to get this done! Numerous times while dry camping lost precious cold air while hitting the igniter. Did buy a wireless temp unit to keep from opening door. Btw – getting rig out from storage today will forward over dinette modification we talked about.
Tony
At the very least, there are a few people who want to send me their doors!
Looking forward to seeing what you’ve done to the dinette.
James,
Steph is a saint…and a true believer in your talents and abilities.
I swear guys I didn’t put Kimberly up to saying that!!! (thanks, Kimberly!)
No guts, no glory! And you definitely deserve the glory on this one!
Very nicely done.
It is so gratifying to “work without a net” and actually have the job come out right.
All too uncommon an occurrence (at least in my house). 🙁
Kudos to you James, you’re my new hero!
PS- are you selling signed posters yet?
Hey thanks, Wayne!
Some day (never), when I’m famous (not likely), you’ll be able to say “I knew him when…”
Always, ALWAYS, enjoy your articles. Keep up the great work with photos and instructions.
great job, I’m very impressed with the end result
I really laughed out loud at the look on your face in picture one. Stef really looked delighted on the picture above yours. I am amazed that you were able to cut that with a hacksaw but it looked pretty good. O bay the way your shop looks very clean and organized. Picture number four looked a little rough around the edges but still acceptable. Picture number five looked very tedious and but professional. Picture number six was a look on satisfaction. The last Picture was a job well done. I just enjoyed reading and looking at the pictures that you two created from this project and it helped me with my stress while waiting for my R V. Thanks Don
Here’s hoping you can lose those “RV waiting” blues soon!
James,
This is really nice looking work- terrific job! I wonder though, how often does one really need to make changes in the refer controls?
Drew
More often than you think! Class Bs move around a lot. We run on 12v when traveling. But since that runs at about 10 amps, we switch to propane when parked for any length of time. We never stay in one place very long, so the fridge is switched over a lot. (Auto Changeover would be a huge win on this one…)
Whoa!, dancing into the “Danger Zone” this time. If anything went wrong I’d expect them to find you pummeled under a pile of pistachio nuts.
I’m just trying to figure out using the headlamp with the router.
The Headlamp: I was working with a black-on-black target, 3/32 of an inch from a surface I couldn’t damage. The extra light and strong shadows from the headlamp really helped!
Wow, that was an exciting project! One wrong move could have spelled disaster, but the end result is fantastic.
If you had done a video you could sell it to the TLC channel as a reality show.
“Dr. James: RV Surgeon”!
Just imagine the drama as Stef sits in the waiting room as her “baby” goes under the saw.
Just a thought ;-p,
Andy & Kim
I don’t get it … why is this fridge a “MANUAL” change over? Has Dometic and Winnebago taken a step backwards with their refrigerators? I have a 2012 ERA that has a Dometic fridge. It is 3-way operation with the AUTO selection. In four years I have never had to made any changes to the AUTO section since they are made automatically. <<>>
I think this fridge was selected more for its narrow width than anything else. It’s not the end of the world, but I do agree an auto changeover would be more convenient.
(But if we had that, I probably wouldn’t have bothered with this mod!)
Err, good job James. Hugs to Stef, who much like I’ve done for nearly 40 years, puts up with our “creative” men!
Great Job James!!
I knew that would work, as we discussed. Glad that you took the plunge.
Now, how do we send our individual doors, and what’s the turn-around time? !!
You wouldn’t like my labor rates… 😉
ha! try us… you never know. hehe….
The engineer in me has also internally wailed at the design of the door. I never thought to actually do anything about it. Now I must. Thanks James!!
Cutting a straight line with a hand tool across the curved door is the toughest part.
Go For It!
So, I hope Russ is reading this.
Well, he might, but I don’t think it’s something Winnebago can do anything about it. I mean, yes, they could make the mod, but if they spent 3 extra hours per coach on delicate mods where one mistake ruins a refrigerator door… well, let’s just say I’m sure Travatos would start to cost a whole lot more.
Who I really hope is reading this is Dometic! It would be a super easy change for them to make. They would have to make a new plastic mold for the doors, but that’s about it. If anyone has a contact at Dometic, please pass this on!
(Oh, wait, maybe Russ has a contact at Dometic!)
Holy chopped refrigerator James! That turned out so well that the refrigerator manufacturers will have to take note and ask themselves what were they thinking! Very brave but of course it was the talent and German ingenuity that won the day.
Great job! Winnebago should take note. I admit I had my doubts too yesterday when Stef posted posted that awesome photo of you coming out of your RV with the door!
I honestly had my doubts too. Plastic is different to work with than wood, and it’s really easy to chip, crack, melt, or otherwise damage it.