This post may contain affiliate links.
This post is going to be of interest mostly to Winnebago EKKO owners, and those that are EKKO-Curious. The EKKO is a unique RV, so most of this information simply won’t apply to other RVs.
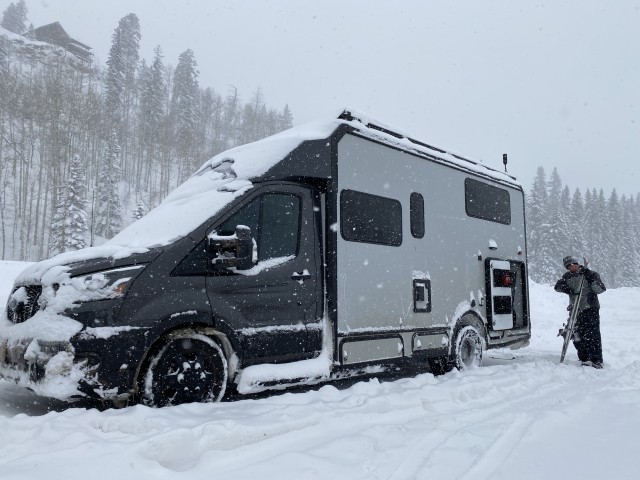
Stef and I have always liked RVing in the winter. It’s generally less crowded (because most RVs can’t hack it), and there’s a special feeling to coming back to your warm and toasty “fort” after a day in the snow. In other RVs, like our previous Travato, I made numerous modifications so that we would be able to handle the cold temperatures. The EKKO does away with most of that. I’ve made very few cold weather mods thus far in the EKKO, and on our recent RV ski trip, we camped consistently below freezing, without hookups (mostly), and at temperatures at or below zero degrees – with FULL USE of our rig. That’s right, we were showering in our RV when it was zero degrees outside, so we didn’t hit a whole lot of limits.
So, how does one pull that off? It’s surprisingly easy in an EKKO. (Not so much in other RVs.)
Heating
There’s really just one rule you need to know here, and that’s
!!! LEAVE IT ON !!!
Always. 100% of the time. Just leave the heat on. You don’t have to set it to 80 degrees or anything, but don’t set it below about 65. Here’s the deal – the heat in the EKKO is provided by a Truma VarioHeat, which is incredibly efficient. The heat is ducted, and some of those ducts run to all of the things that you want to keep from freezing. There are heating ducts that end under the bed, to keep the fresh and waste water tanks from freezing. There are heating ducts that run to the water center cabinet. There are heating ducts that run to the exterior storage cabinets. Winnebago has made it really easy. All you have to do to keep all that stuff from freezing is LEAVE THE HEAT ON.
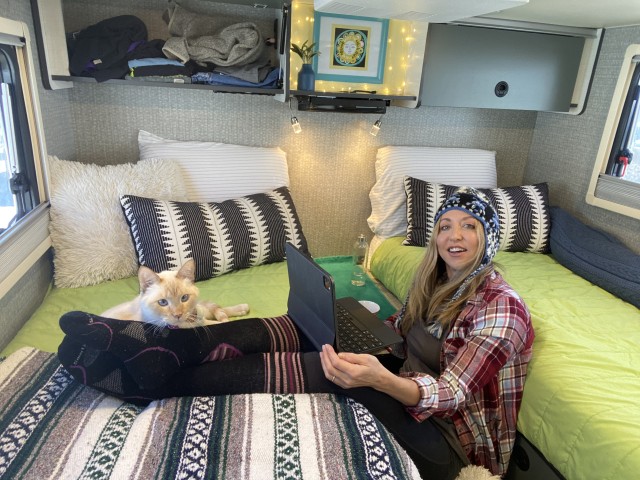
It’ll keep the residents warm and happy, too.
You might think you’ll save some propane by turning the heat off during the day or something. But the Truma has a thermostat, and if the temperature warms up, the heater won’t run. Plus, even if you did save a few minutes of heater run time, the VarioHeat is so efficient you probably won’t notice any savings anyway. So you’re not being all that smart by turning it on and off – you’re just giving yourself unnecessary work.
Also – and this is key – the thermostat is on an interior wall. There are NOT individual thermostats in each of the storage compartments. So even if you might like it colder than 65 in the main coach, depending on the outside temperature, it could be considerably colder than that in some of the exterior compartments. There’s not a consistent offset you can apply, but I can tell you that at least down to zero degrees Fahrenheit, 65 degrees on the thermostat inside kept everything from freezing in Number One.
This brings up another point about the heating ducts. Don’t close any of them. Ever. For any reason. The VarioHeat likes plenty of air to move around, and by closing off vents, you’re depriving it of the circulation it craves. Not only that, but eventually, you’re going to forget to open one and something is going to freeze. In our coach, I physically removed all of the shut-off doors from all of the vents and just replaced them with the “Lamella” louvers from Truma. I suggest you do the same.
Supplemental Electric Heat
We’ve installed an electric heater in our coach (since we have a bazillion watt hours of battery capacity). We used it occasionally on our winter trip. It’s right by the door, so it was nice and warm as you were coming in, which made the RV particularly inviting. But mainly, we saved using this heater for those occasions when we had hookups. Why is that?
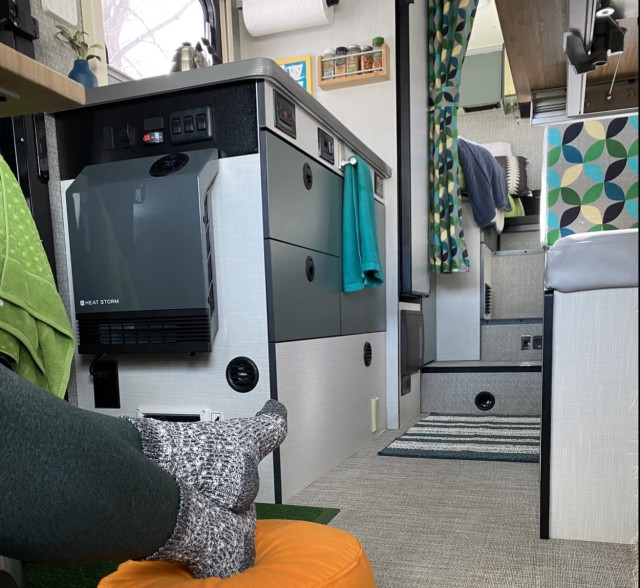
The electric heater has its own thermostat, which is independent of the Truma thermostat. So it goes on and off of its own accord, and is not governed by the Truma. In fact, if we have it set high enough, the heat works its way back and Truma VarioHeat won’t turn on. This is a problem because only the VarioHeat pumps warm air to the exterior compartments. If the VarioHeat doesn’t turn on, then it can’t keep things from freezing. For this reason, we ran using mainly the Truma for heat while dry camping and driving.
We did use the electric heater when we had hookups. But in order to do this, we set the fan on the VarioHeat to run continuously – to ensure the warm air was circulated to all the compartments. That seemed to work just fine. I eventually need to figure out a way to have the two thermostats work together, but things are warming up now, so that project may have to wait until next fall.
Propane Use
Our coach has been modified so that the only propane-using devices are the VarioHeat, and the Truma AquaGo. (Well, we still have the external propane connection, but nobody really felt like busting out the grill at zero degrees!) We started our trip with two full tanks of propane, and I recommend you do the same. We both showered in Number One daily, and we ate all of our meals in the RV, so we used both the heater and the water heater quite a bit.
What we found was that we went through one of the two 20 lb propane cylinders in about a week. This seems pretty reasonable to me, and I don’t have any plans to do anything further to reduce propane usage.
Insulation Topics
First, let’s talk about the Winnebago-provided thermal curtain that separates the cab from the rest of the rig. You want to use that. We did – every night.
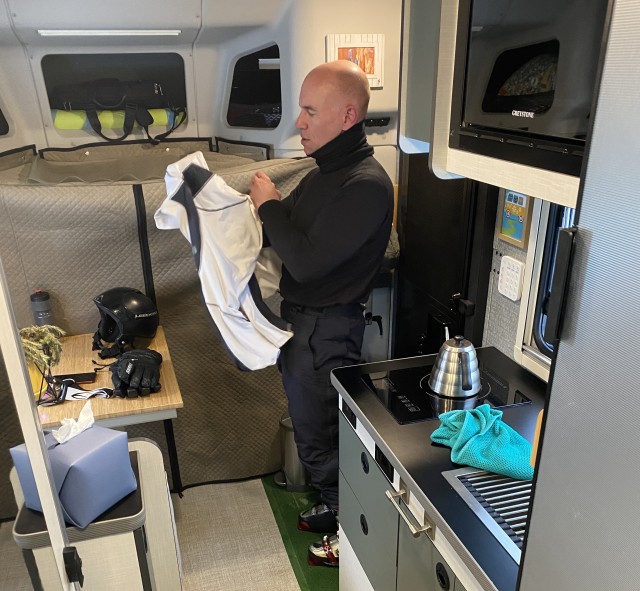
The cab has a lot of single-pane glass, and it can get quite cold. Keeping it sealed off from the main living area is smart, and will reduce your propane usage to more reasonable levels. We did take the curtain down most days as it warmed up. We also have the thermal shades from Vanmade Shades, and we used those in the cab windows consistently, too. They help, but they’re just not enough by themselves to keep things toasty in the cab. Just use the curtain. You’ll be glad you did.
I’ve only really made two insulation mods in the EKKO since getting it. The first was to insulate the metal channel that runs across the coach at the transition between the cab floor and the “house” floor.
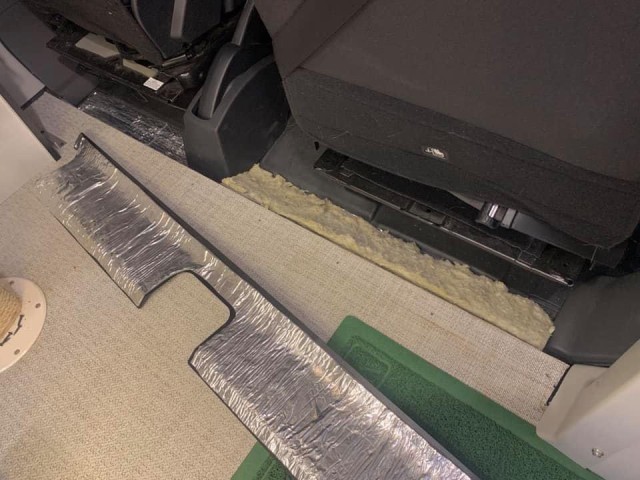
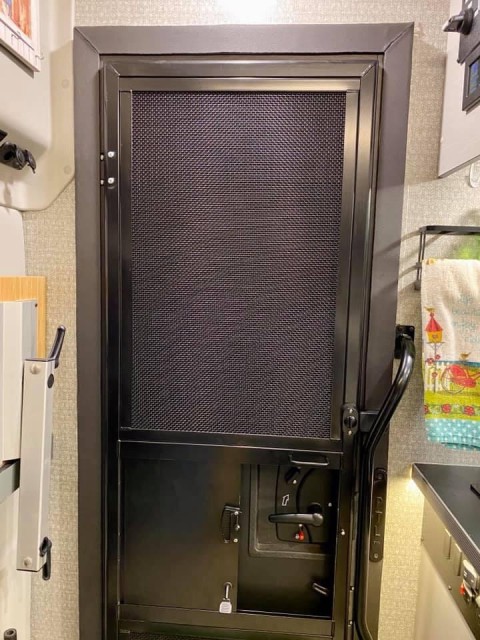
That also happens to fall right along where the thermal curtain falls, and I’m happy to report that with the insulation and the thermal curtain in place, this transition strip was not a cold spot for us. The other thing I insulated was the metal door frame around the main coach entry door. We had noticed this frame getting pretty cold even in milder temperatures, so I applied some foam tape to the frame to insulate it. I’m also happy to report that this worked well.
Based on our experience down to zero degrees, I’m confident that extra insulation is *not* needed in the water center compartment. I know some people have added insulation there, but if you keep the heat on, it’s simply not needed. Plus, that insulation is going to be a wet, messy blob when you need to dump. And when you’re outside and it’s freezing cold and your hands are wet, nobody wants an extra step that wouldn’t be necessary if you just kept the heat on.
Finally, in our exterior storage compartment where we have Mel the cat’s executive washroom – well, Mel never complained, so I guess that stayed warm enough. Our water filter cartridges are in another section of that compartment, and they were fine without any additional insulation or ventilation.
As far as batteries… ours are inside since I completed the 20k project, so we have no need to insulate or warm them. Even if they were outside, I would just leave them on and let their internal heaters do their job.
Water Use
With all its tanks inside and heat applied where it needs to be, if you just keep the EKKO’s heat on, there’s no reason to do much more with the water system. Just use it. You do need to observe a few common sense precautions though.
First – don’t hook up to campground water. We never do. With an EKKO, you’ve got up to 50 gallons of water on board, so the reasons to hook up are minimized. It’s much easier and safer to just fill your tanks occasionally. I’m not sure how efficient Stef and I are relative to other RVers, but 50 gallons of fresh water will last us a week, easily. By the time a week passes, we’ve always found someplace else to fill up.
If you were to try to hook up to campground water in the winter, you’d need to find a way to keep the water hose heated. You could use something like the Pirit Hose, but even so, that’s a challenge I don’t need. We’re never going to use more than 50 gallons of fresh water in a day, so we just don’t bother.
The other thing you’ll want to pay attention to is the AquaGo water heater. It’s right on the outside of the coach, so it has the potential to get pretty cold. That’s why you need to KEEP IT ON – just like the heat! Most of the time, you can just keep your Truma AquaGo on “Eco”, and you won’t have to worry because it will keep itself from freezing.
But if you leave the AquaGo on the “Eco” setting while driving, it won’t be able to stay warm due to the rush of cold wind outside the vents. (We actually tried this once, and got an error that basically said it couldn’t light.) That’s why we installed the Truma Electric Antifreeze kit. Before driving, I would just set the AquaGo to “Antifreeze” and the kit would take care of the rest. You’re supposed to insert a flue plug when doing this. One time I forgot, and then later realized nothing bad happened. Eventually, I only inserted the flue plug if it was going to be really cold. For temperatures that hovered around freezing, just setting the kit to “antifreeze” seemed to be enough. But those aren’t the official Truma instructions, so use that knowledge at your own peril. Officially, I’m saying you should insert the flue plug.
Dumping the grey tank and the cassette worked exactly as it does in warm weather. If you keep the heat on, there’s nothing to worry about. But one time after driving through a snowstorm, we had a buildup of ice on the underside of the water center compartment.
It was a couple inches thick. Inside the compartment was completely fine, but I had to chip away that two inches of ice in order to dump. Apart from that though, dumping works as normal.
Condensation
This is the biggest issue we ran into on our trip, and this is not unique to the EKKO. In other RVs, the condensation problem would be much worse. But this is definitely something you’ll want to pay attention to.
Here’s the deal: humans camping produce moisture. Cooking, showering, even breathing. It all produces moisture. In the summer, you don’t notice so much. But when it’s zero degrees out, that moisture will condense on cold surfaces just like on the outside of a cold glass of lemonade. That’s just life, and it’s not an EKKO defect.
We noticed the most condensation on the windows in the cab. Like, a lot of it. Even with the thermal curtain up, we would wake each morning to soaking wet cab windows. Just plan on mopping up with some towels and spending a few minutes running the defroster before you drive off. It might also be a good idea to lay a towel along the junction of the windshield and the dash – just to keep water from getting behind the dash. On the coldest nights, some of this water would even frost over. It might have been a good idea to *not* put up the Vanmade shades – to keep the water from being trapped behind them. I may experiment more with this in the future.
We also noticed condensation along the edges where the ceiling and walls meet. There are metal frame members that come together there, which is why it gets a bit colder. This happens both inside and outside of upper cabinets. Just be aware of it, and be ready to deal with it if it happens. Towels are your friends. Again – at the temperatures we were seeing, condensation is to be expected.
One final place we would get condensation is along where the batwing awning mount. I hate awnings with the fire of a thousand suns anyway, and this is just one more reason for me to hate them. The batwing awning mount/bed chiller is present in the EKKO whether you order the stupid awning or not. It runs along most of the length of the driver’s side bed, right at mattress height. It’s a super efficient bizarro radiator – it brings the cold temperatures inside. I first tried to make Mel the cat sleep along there, but he wasn’t having it. So to make it comfortable for sleeping, I had to fold up a spare blanket and put it along the awning mount/bed chiller so I didn’t touch it in the night and wake up from shock.
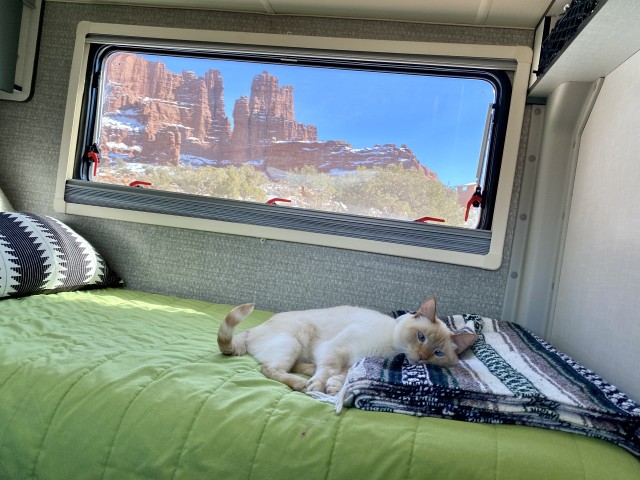
The batwing bed chiller system is under this window and runs the length of the bed. Pro tip: Claim the passenger’s bed before your spouse does.
Anyway, some mornings, I would wake up and there would be moisture along the bed chiller from condensation.
I really could write a thousand more words about the awning mount and how much I hate it and awnings in general. Heck, I even made a 15 minute movie about why awnings are terrible!
I have a couple ideas for reducing the condensation in general, but they may have to wait until next winter to test our properly.
Driving
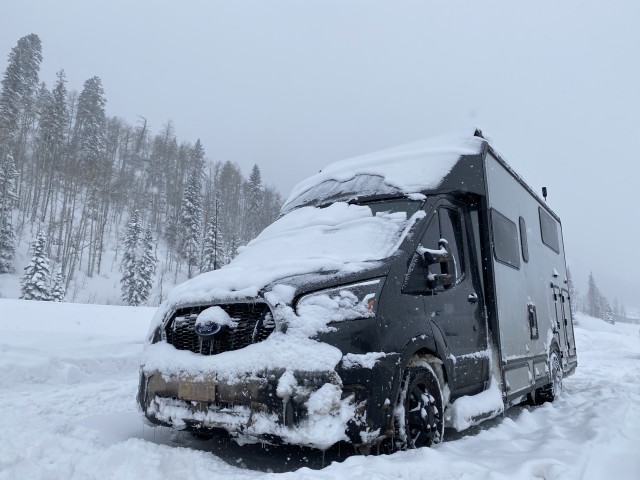
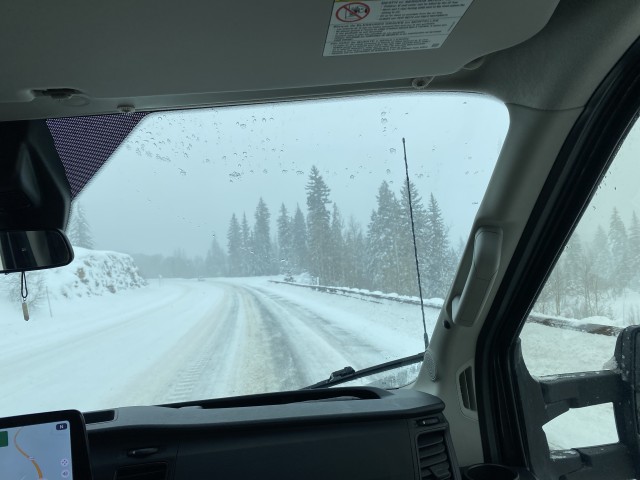
We drove to and from Purgatory ski resort on days when they got well over a foot of snow. We did this with the stock tires. We just put it in slippery mode and went for it. Neither did we use any chains. (We don’t even have chains for the EKKO yet.) The EKKO is pretty heavy, and it stayed planted on the pavement with a minimum of fuss. There were times leaving the ski resorts where we saw 2WD vehicles spinning or getting stuck. Not us. We just drove over or through it – whatever it was. There’s not much to report there. We do have after-market air suspension, but that has more to do with ride height and comfort than traction, so I don’t give the air suspension much credit for our snowy capability.
Now keep in mind, we were staying on pavement, or in gravel parking lots for our entire trip. We did not do any winter off-roading. Even in the summer, we do a lot of cycling, but we’re road cyclists. We don’t typically venture far from the pavement. So do I recommend bumper weights (winches)? No. Do I recommend speedometer invalidators (larger tires)? No. Would I recommend a sway inducer kit (lift kit)? No. Not for what we do. Sure, they look cool, but we just don’t need them for how we RV. If you have a different EKKO use case, you might find reasons for that stuff. But they’re absolutely not required for heading to ski areas in the winter.
Cleaning Solar Panels
One morning we woke up with over a foot of snow on our roof. Nothing bad happened – there were no leaks or anything – but we certainly weren’t going to get much solar power like that. So I headed up to the roof with a snow broom to try to push or drag some of that snow off the solar panels.
So here’s a super giant tip: if you want to get up on your EKKOs roof while it’s covered with snow – don’t. It’s way too slippery for that to be safe. You can try to crawl around on all fours like I did once I realized I was standing on a sheet of ice on top of waxed fiberglass 10 feet above the ground… but that’s no fun. Better to just travel with a snow broom with an extendable handle and work it from the ladder.
After I did that, I kinda gave up on solar (not much sun that time of year anyway).
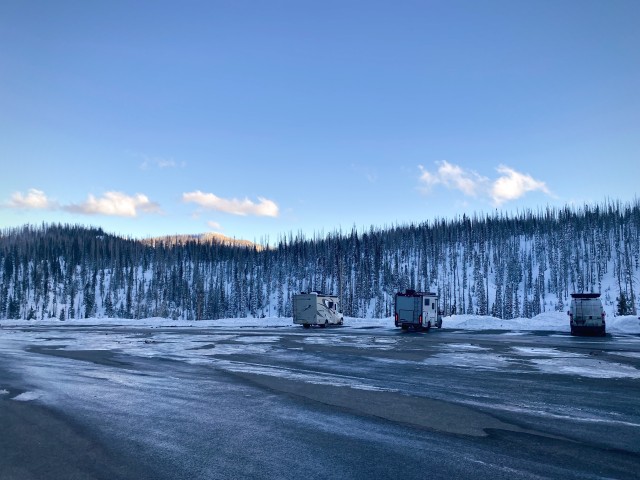
The EKKO will charge just fine while driving (we still have the stock 170 amp second alternator). But I did want to keep the roof from getting too much snow on it and getting me a ticket when we drove away. I just stuck to the ladder when I did so.
Other Best Practices
Here are a few more random tips I can think of that don’t merit an entire section to themselves.
Bring a shovel – We camped in a ski area parking lot and it snowed a lot overnight. Though there were no signs or directions, the plow operator didn’t like where we parked and decided the best thing to do was to be a jerk. We woke up with a 4 foot berm of icy snow surrounding our vehicle – right up against the rig.
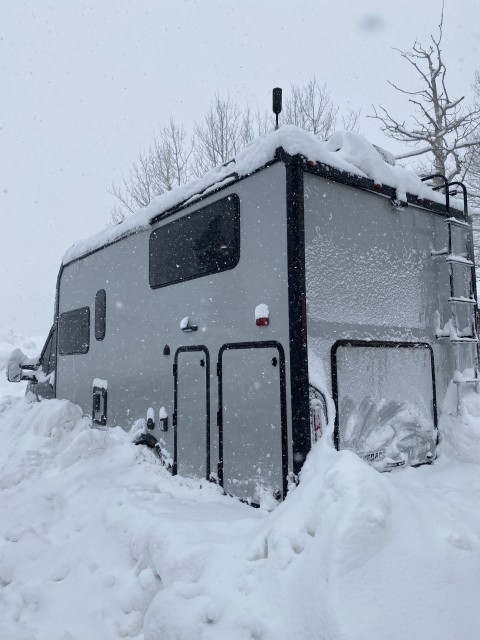
Digging out from that was no easy task, especially since we hadn’t brought a shovel. Stef did most of it with a cutting board of all things; which worked surprisingly well! We have a shovel now though, and we’re bringing it along on any winter trips going forward. And the cutting board, too.
Use the drip tray – The EKKO comes with a waterproof tray for the cargo area. Use it, you’ll need it. I took our bike mounts out of the cargo bay for the winter trip specifically so I could use the drip tray. Which brings me to the next tip.
Wipe off snow! – Even if you’re just putting your skis and boots in the gear garage, you want to wipe off as much snow as you can before putting them back there. Why? Because the gear garage is heated and vented to the rest of the coach. If you put snowy gear back there, the snow will melt, adding more water and yet more condensation to your rig. (Reference the entire section on condensation above.) I just used a snow brush from a car scraper, and brushed off my skis and boots before putting them in the garage.
Leveling blocks – Well, it sucks that we have to use them, and I hope to have a leveling system installed this year. But… if you use those stacking leveling blocks in the snow, and it gets warm enough in the day to melt some snow, and then gets cold enough at night to turn that snow back into ice… don’t count on taking all your leveling blocks with you when you leave. Some of our dual leveler blocks may still be frozen to the ground at Purgatory!
Congested parking Lots – We like to say that we can take our EKKO most anywhere, and we did. But some of the ski parking lots we found ourselves in had little organization, and two way traffic in one-lane spaces. We did OK, but 5-point turns in a crowded parking lot with traffic backing up all around you just isn’t fun. The EKKO is small enough to get the job done, but it certainly isn’t our Subaru!
Keep vents clear – If it’s snowing, be aware that you’ll need to keep the Truma vent clear. Or, even if it isn’t snowing and you’re dealing with a jerk plow operator, keep the Truma vent clear. If you’re going to run the engine, you’ll also need to make sure that the tailpipe is clear and not just filling under your rig with exhaust.
And that’s about it. Is hardcore winter camping in an EKKO possible? Absolutely!
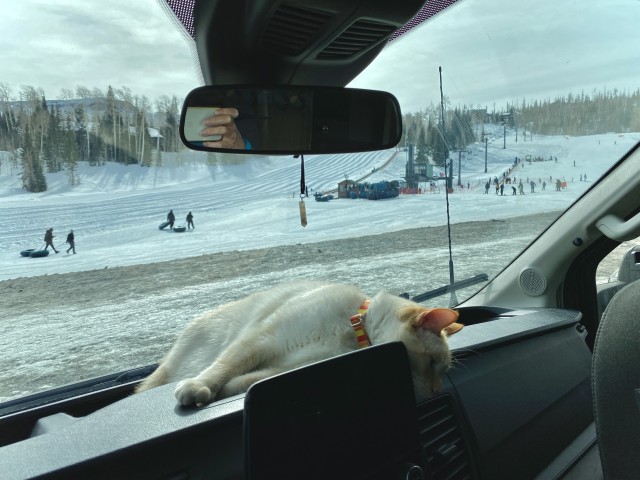
Is it effortless? No. But it’s a heck of a lot easier than in any other RV out there.
Hope this information is helpful to you, and we’ll see you out there on the (snow covered) road!




James, great article as always and we love your videos. Do you carry tire chains now and if so which ones? Thanks in advance.
Best,
Don & Amie
We do carry tire chains.
We’ve never needed them, but have driven through places where we were required to carry them.
These are the ones we have: https://amzn.to/4cd3loK
Very good review and many of your comments apply to all RV’s used for 4 season camping. Our Pleasure Way Ontour 2.2 in 0f-10f type Northern Michigan weather uses about 1.2-1.5 gallons of propane per day. That Truma furnace is WONDERFUL. Because of lack of dump stations (and the exterior dump valves) we switch the OEM toilet for a Port-a-Potti in the winter. With only 200Ah of lithium batteries we only camp where we can plug in. Didn’t hear you mention tank heaters? EKKO is fine without them? Cheers and safe travels.
The tanks on the EKKO are above the floor in the heated space, so there’s no need for tank heaters. One of the things we love about it!
James I love your detailed focus and use of good science! I lived in a 1996 Scotty Serro class c which was built on a Ram 3500 chassis. had a heated underbelly. stayed in it one year in the Catskills and it worked well. I am a big fan. of pushing rv OEMs to conduct a real energy audit using a blower door and an IR gun to assess their design issues like thermal breaks from framing etc. Great advice to the folks on your winter camping tips. I think only a few boutique rv manufacturers really address conditioned space challenges as it represents a manufacturing issue with conventional metal framed rvs. composite panels and high quality hvac systems and the ability to fully insulate windows with storm panels are some of the crazy things I think about for a true four season camper. be safe and have fun!
Thanks, Rich! We’ve still not completely solved the condensation issues in our EKKO, but we’re making progress!
are there any small dehumidifiers that could help with the condensation, or is that just a terrible thought all together?
Well, if it’s a terrible thought, I’ve had it too!
We’ve tried the small “peltier” dehumidifiers. They’re simply junk, and they should be prosecuted for selling such deliberate crap.
We also tried a regular compressor dehumidifier. It certainly filled its bucket, but it didn’t stop the condensation to the level we were hoping.
Still waiting for a silver bullet here.
I’m thinking of looking into “heat recovery ventilators” as a possible future mod.
What brand of foam tape did you use around the door frame and where did you get it? I’m not having much luck finding it. Thanks in advance.
It was this stuff: Armacell Insulation Tape
But there’s nothing magical about that brand. Other kinds would be fine, and there are even thicker ones available if you browse around. The 2” width is the important dimension.
That is a great, honest and practical article, thank you!
Glad you found it useful!
I wonder how many people have bought EKKOs and Travatos because of you two! I’ve now bought both and you’re to blame. Thank you for all your posts! There’s no YouTuber out there I trust more for getting my RV tips & education. This was such a helpful read.
James, thank you for all that you do. Finally picking up our Ekko in a few weeks and have been shopping. Can you share where you bought the foam tape for your entry door. I’m able to find neoprene tape but not at the width and depth you may have. The usual locations like Amazon, Home Depot and Grainger come up. But did you double up to get such a wide and thick build out?
Thanks
Honestly, I just bought that foam tape at either Home Depot or Lowes. There wasn’t any special effort required to find it. Maybe I just got lucky?
I am so happy I found this article/post. I am slidding into retirement soon and considering rig options. As of late I have been intrigued by truck campers but I keep coming back to the Ekko. My dream is a rig I can chase the snow nd ski peacefully during thevweekdays and leave the weekends for the crowds.
Three cheers for mid-week skiing! The EKKO will definitely get it done for you.
I wish there were more ski areas that allowed camping right at the resorts. There are a few, but not nearly as many as I want!
Do you leave the Truma heater on while you’re driving?
Best practice is to keep the propane off while driving. (You don’t want to have anything try to light while you’re getting gas, for example.)
If the back needs heat, the dash heat is an option – use the fan to circulate the air.
If that’s not enough, we installed an electric heater, and could use that and the inverter safely while driving.
Hi James, Have you ever had a problem with the battery temperature being too low to accept a charge from the second alternator? or from the solar panels? I’m asking because I’m not getting a recharge on the Lithionics when the Ford engine is idling, nor when I’m driving. The solar panels seem to be recharging the battery slowly but surely when parked. According to the app, the battery temperature is 39defF and the BMS temp is 32degF. The BMS temp drops to 29degF at night. We have an extended winter ski trip planned to British Columbia in March and need to have the coach battery working at its max! Thank you for your help.
No. We’ve never had an occasion where our battery temperature was too low to accept a charge, and I don’t expect that situation would ever occur on an EKKO unless the battery was discharged to cut-off levels.
The EKKO batteries have internal heaters that are automatically operated. As long as there is sufficient charge in the batteries, the heaters will keep them within operating limits.
If the solar panels are recharging the batteries, then the problem is 100% not with the batteries, but with the second alternator and Balmar charge controller. I suggest you contact Balmar or your Winnebago dealer to fix the problem with the Balmar. There have been many similar incidents discussed on the EKKO Owners and Wannabes group on Facebook, if you’re looking for self-diagnosis steps.
I noticed your thermal curtain has two snaps in the center flap. Ours does not, nor does our cab have corresponding male snaps. Did you add them?
I added them.
I had to make several modifications to the curtain when I built the L-shaped dinette so that the curtain would close around the dinette. I added those two snaps while I was at it.
Have you ever tried a small dehumidifier to address condensation in winter when adequate power is available? I may give it a shot.
We’re testing one out this winter.
The small ones (the piezo ones) basically don’t work at all.
We’re trying out a compressor model, and while it works somewhat, it’s not a complete solution.
Was thinking that winter time RVs need a heat exchanger vent like many houses have to swap in fresh air during the winter, to improve air quality as well as move moist air out, while at least exchanging some of the heat back into the incoming air. Home heat exchangers can be 75% or more efficient. I have searched and not found any source of such a beast for RVs. In the meantime, we have been using the 0% efficient solution of a small opening in one of the cab windows, with rear vent (we have poptop so our vent is over rear bed) at 10% fan to maintain some fresh airflow. This does help with moving moisture out as well as air quality, particularly in our newer van that is still heavily outgassing nasty chemicals we would rather not be breathing.
Finding one that would work in an RV setting – that was powered by 12v, that would work with a wall that’s only 3 inches thick, that doesn’t need studs to mount it to, AND that had decent energy recovery, etc… was challenging. I didn’t find anything suitable that would fit in the spaces I have available.
Advanced-RV puts them into some of their B-Box builds. Perhaps you could ask them what model they’re using.
Thanks James, I’ll inquire with Advanced RV. Love to find a workable heat exchanger for the EKKO. Happy Holidays and thanks for all your great Mods and info on the EKKO.
It’ll be interesting to see what you come up with and if it helps reduce the windshield condensation in your EKKO.
On your latest videos I see new zip up window covers. What benefits are the bringing?
Thanks
They’re a prototype we’re working with a company to get produced. If it ever happens, we’ll make a video explaining all about them.
Hi James, I really appreciate all your tech info and the videos are also helpful and fun. The awning one is my favorite! I have had some awning trauma and that video made me feel much better about not using ours, ever!
Mark and I recently got a Thor Synergy and it’s really not insulated at all. We don’t plan on doing any winter RVing, we’re just going to empty all the tanks and let our rig sit in our driveway until Spring. If all the tanks are empty and the pipes are run dry, is it necessary to put the RV antifreeze into any of the systems?
Thanks for your input,
Debbi
PS Please tell Stef that I did the exercises she posted for the passengers on long trips and it was great! She is an awesome fitness instructor!
Glad you liked the awning video! That one never really took off, but it’s my favorite.
As far as antifreeze – we don’t use it, and never have. At least not in the fresh water pipes.
I blow out the water lines using compressed air. If there’s no water in the lines, there’s nothing that can freeze.
But the challenge is making sure that the water lines are truly empty, and there’s not water stuck in low spots in your plumbing. I don’t know if I would be confident enough about that if all I did was just drain the water. (Hence, the compressed air.)
So short answer – RV antifreeze is not always absolutely necessary. But like most things in life, it depends…
We like the Ekko, have a Wonder FTB. We don’t know if we can handle the cassette toilet, when it is full. How often do you empty? We our not young, but we are so use of the normal dumping. Wait to hear your comment .
When we’re both using the cassette full-time, we have to empty it about every other day.
Hi James. Thank you so much for writing this piece!! We’re scheduled to pick up our new EKKO on Friday and you and Stephanie have been 100% instrumental in getting us to “yes”. We’re all so very lucky that you’re not only extremely technically minded, but you can actually communicate in a way that we can understand. So, thank you thank you and I hope we see you guys on the road someday. And, if you’re ever in Bend, OR, we’d love to buy you dinner.
So glad you found it helpful!
And we’ve been meaning to make a trip to Bend!
Early in the article James talks about shore power and electric heat and what to do about heater thermostat and electric heat causing propane thermostat to shut down and thus not getting heat to holding tanks.
I am still an EKKO wannabee but I have for 3 decades used a winter capable 5th wheel as a ski chalet. I have shore power and heat the RV interior with electric space heaters. A duct from the propane furnace goes into the belly pan that houses the holding tanks, so I mounted a thermostat in the belly pan, spliced the new thermostat wires onto the wires of the factory thermostat and then turned off the factory interior thermostat. So now the propane furnace keeps the holding tanks from freezing and dry electric heat warms the interior.
Creative!
In the EKKO, the interior heat is from the VarioHeat, which wouldn’t work with a spliced in thermostat – though you might be able to relocate the temperature probe, which would give you the same result. The VarioHeat also heats the coach interior with vents that can’t be closed – so you couldn’t isolate that heat to just the storage bays. Once the storage bay heating kicked in, it would raise the temperature inside the rig as well, which would stop the electric heater… From there, it’s a question of whether the RV interior or the storage bays lose heat faster to know what would happen.
But more importantly: If you’ve got an electrical hookup in a ski area parking lot… We’re super jealous!!!!
Since you are loaded with batteries, have you considered a 12v dehumidifier? I’ve used them in enclosed spaces (camera closets) but not sure how it would perform in an RV (where people are coming and going). Yet another thing to carry, but maybe a small one in the cab might help.
If you’re got a lead on a good 12v dehumidifier, I’d be curious.
And by dehumidifier, I mean a compressor-based unit that actually works.
Not one of those Peltier joke devices.
“The EKKO will charge just fine while driving (we still have the stock 170 amp second alternator).”
So you do (?) charge the house batteries off the generator? It seemed from your last post (on solar charging the starter batteries), you didn’t bother with that any more. Or are we talking here about something different, maybe just charging your starter battery?
We have no generator, so we can’t use that to charge our batteries.
We have three charging sources: The second alternator, shore power, and solar. Whichever one is running – that’s what is charging the batteries.
Honestly, we don’t much think about “charging the batteries” as a separate task. Between solar, the second alternator, and plugging in if that’s available, our batteries are constantly charging.
With the Amp-L-Start, the starter battery is charging whenever the house battery is charging.
I get my EKKO next week. Will try to replace the windshield mirror with Vision Works rear camera and display. Hope to find a way to add the side cameras (lights can be removed) too and display all 3. https://www.technorv.com
Question: Your battery maintainer post indicated you keep the chassis and Li coach batteries fully charged. Good for lead acid but I understand Li batteries are most stressed when fully charged and should be stored at 30-50% charge. Do you have different info from the Li battery manufacturer?
Hi Bob.
To clarify, I leave the rig “on” all the time, and plugged into solar.
So the batteries sort of “micro-cycle” as they discharge a little each night and charge to float during the day. There’s some evidence that this may even be beneficial.
But even if it isn’t, if my batteries last for 15,734 cycles instead of 16,000… I’m OK with that.
The effort and PITA factor of discharging batteries every time I park, just to chase some theoretical “best” storage scenario simply isn’t worth it.
Greetings from Canada!
I too travel with my cat and was wondering if I can cut a hole from the bedroom into the garage for accessibility to the litter box?
Not easily.
On all except the very stop step, you would have to plow through water tanks to get from the floor to the garage. The very top step could go right through, but it is only about 5 inches tall, and edged top and bottom with metal. You’d also have to make some kind of step or shelf in the garage, as that would make the opening about 40 inches off the floor. (Either make a shelf, or it would be a one-way trip for the cat I suppose.)
The much better solution is to go into the storage compartment as we did.
Also, why do you have a rear view mirror?
Yeah, that one is on the list. I want to replace it with a rear view camera in the same location, but I haven’t found the perfect one yet.
I am surprised you have one; my van, with no windows in the back, didn’t come with one. I guess you could use it to check where Mel or Stef is hanging out while you are driving…
James,
On our ER, we have the Brandmotion 7.3″ LCD Display Mirror FLTW-7692V2. Works great and installs in place of the rearview mirror and looks OEM also.
That’s more along the lines of what I’m looking for. Versus the “bungee-on” mirror overlays that are common.
Hi Guys–
We just returned from a week long trip to the UP of Michigan and some 4 ft of snow in the Keweenaw Peninsula and -15C temps. No freezing van problems, but some close calls. Our water plumbing comes out of and then goes forward under the water tank in one of the coldest areas of the garage in the very back of the van, where it was hitting -1C in -15C night time temps outside. We were keeping the van at +10C at night (much cooler than you sunny world folks, tsk tsk) so I increased that to +12C and also added some strategic insulation above the piping so the water tank itself could do a little of the heating work (Note: always carry strategic insulation.) and that seemed to cure the problem. Turns out we just learned our thermostat is about 2C cold so now 12C is the new 10C.
Our batteries also got a little chilly in the bike bay of the garage, at about -3C in the morning, but I believe that is within their charging range. At least the Battle Born hardware was letting us charge them, although by peak solar* they were above freezing.
We did bring a snow shovel and used it. Usually for clearing snow away from the doors to keep the snow out of the van. Once for clearing away little track in a foot of new snow so we could get up to speed in an unplowed DMV parking area.
Cheers,
*peak solar in the UP is really months away. That said, we were pulling more than 500 Wh some days.
Brrr.
Sounds more difficult than what we did with our EKKO, but glad you had success!
What sort of van are we talking about here?
Self built Green Ford Transit, many similarities to the FarOutRV build, but in a mid-height mid-length Transit. I don’t know if you can see this, but a post at Xmas: https://www.facebook.com/photo/?fbid=10227165452226343&set=pcb.10227165433225868
Hey James and Stef: I have been waiting SO LONG to have you guys post this article on winter traveling in the EKKO as this has been what I wanted to know before I placed an order for my own Ekko. The big question for me has been, Does the EKKO live up to the hype of being a true four season RV? Or not. Your truly excellent and complete review was outstanding to answer every question I have about it. It’s shocking to me that the RV industry has taken this long to figure out that they have been leaving 25% of the camping season on the table. And it you want to camp in the mountains in spring and fall (is that not everyone?) who wants to worry about what you are going to do if the temps for a day or two drop into the 20’s? I have been in an RV when the pipes froze and it was ugly :< That fear keeps people from enjoying their RV for a good portion of the year. The EKKO seems to solve that issue and made the worry, effort and frustration of RV use in colder temps a non-issue. The only issue left is for some rocket scientist to figure out a way to deal with moisture build up that you speak about. I wonder if Winnebago were to include a heat pump on the A/C system, would running that help with moisture buildup or would the subfreezing temps outside obviate the ability of a heat pump to work purely for moisture extraction? I will be ordering an EKKO soon. Thank you again!
I’ve asked a couple air conditioner makers about that very thing, and at the temperatures we were seeing, heat pumps wouldn’t work.
Still thinking about it though.
In the meantime, bring some towels and enjoy the colder temperatures!
Hey James – been in contact a few times, but, question about the electric heater: I also have one installed (it’s white though – so exciting), and used it while on shore power. I used it when it got quite cold (low single digits) but the rig was not winterized, so I’m not entirely convinced on how well it would have worked otherwise.
Specifically, I had the Truma ‘vent’ mode (I believe I had the fan set around 5?), hopefully circulating air, while having the electric heater on. When it got that cold it kept the insides in the low 50s. Great if the heat was evenly distributed but I can’t be confident in it. Wondering what your thoughts here are?
Without temperature probes in the exterior compartments, it’s tough to say what happened in any particular scenario.
We did something similar on shore power – it got below freezing outside and we had the electric heater set to 74 (it doesn’t get that hot in the back though).
Fan on about 3. Everything made it through OK.
We were in the rig though, and if it had gotten down to 50, we would have done something to supplement.
James, thanks for the article and tips for winter camping. One thing you were a little cryptic about was your feelings toward awnings. And I never knew the Ekko had a built in “bed chiller”! Lol, I got a good chuckle with that one.
I’m more than a bit worried that if you park with the driver’s side in the sun during the summer, you’ll have a “summertime bed heater!”
Went back and looked at the awning video. Epic!
It’s one of my all-time favorites that I’ve ever done.
It doesn’t get enough traction for some reason though.
YouTube. Go figure.
That description added even more to why I love love love our EKKO. I knew most of the facts, but you created a picture of the reality and value of it. Not that we’d ever sell it, but resale will skyrocket until there’s a competitor. Thanks again for the information and the how tos to make it work!
Glad you enjoyed the post!
That snowplow dude could have hurt your EKKO or even worse, you. Great info otherwise.
I know, right? We were more than a little displeased.
How about the insulating cover for the Max Air fan?
Yes, we’re using the fan cover from Vanmade Shades that goes up with magnets.
Been using that style for years.
We use it year round actually, so it’s not strictly a wintertime thing for us.
How do the VanMade shades compare to WeatherTech shades?
We don’t have any experience with the WeatherTech shades. Sorry!