This post may contain affiliate links.
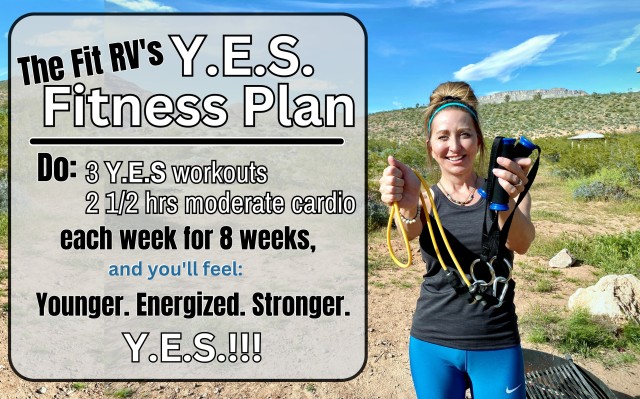
Welcome to the first of three strength-building workouts in my Y.E.S. Fitness Plan!
What is the Y.E.S. Fitness Plan?
The Y.E.S. Fitness plan is an 8-week get-your-groove back plan! If you’re feeling like you’re not at the top of your game at the moment but you WANT to be, this is just what the trainer (me!) ordered.
Each week, complete three strength workouts– and the workout routine below is one of your 3 options. Also, complete 2 and a half hours of moderate-intensity cardio busted up however you wish (though make sure cardio sessions are at least 20 consecutive minutes). And by moderate intensity, I’m not talking about your window-shopping toodling pace. You need to be going hard enough that you can still speak, but talking takes some effort. Going by heart rate, you want your HR 50-60% higher than when it’s at rest.
What equipment do I need?
All 3 strength workouts are built around resistance bands exercises (and some bodyweight, too), so you’re going to need a set of resistance bands in various strengths. I recommend the Bodylastics brand*; I have no affiliation with them, it’s just the brand I’ve been personally using for almost 10 years now. And since many exercises we’ll be doing require a way to mount your bands to something; like a pole, door, or railing, you’ll need either a door mount or an anchor wrap (this is what I used in the video below) to attach them.
*The kit in this link I’ve provided does have a small anchor wrap (and a door anchor too!), however just note it’s designed to be wrapped around something thinner, like a railing. If you’re planning to use a thick post like I’m doing in the video, you’ll need to also purchase the large anchor wrap, which isn’t included in the kit.
Who is the Y.E.S. Fitness Plan geared for?
a) Beginners
b) People just getting back into fitness after an injury or illness
c) Active older adults
d) Seniors without any serious balance concerns
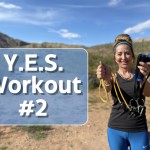
Ready to workout with me?! Here’s the Workout #1 video!
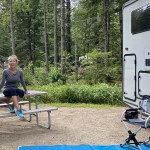
The 7 exercises in this workout plan are all-standing, so they’re great if you’re an RVer like me and will be working out at your campsite, or really anyone who wants to do this outdoors!
How Many Sets & Reps Should I Do?
In the follow-along portion of the video, you will do 2 sets and 10 reps of all 7 exercises. But! That doesn’t mean that’s all you get to do all 8 weeks. You’ll start with 2 sets and 10 reps your first few weeks, but then you’ll want to build on that. How to build on that?
1.) Add a 3rd set. Once you’ve gone a few weeks and if all is feeling okay, this is your ultimate goal, getting to 3 sets of every exercise. But don’t rush to this right away! Take a few weeks and see how your body responds. It’s important to go slow, and allow your body time to adjust. Perhaps you add the 3rd set to the exercises that feel easier to you, and wait a little longer for the harder exercises.
2.) Increase to harder bands. To create a ‘training response’, you need to be working hard enough to stress your muscles. If the band you’re using isn’t challenging your current strength levels, then you’re not going to get any training response, meaning you’re not breaking down your muscle tissue—so your body won’t be building you back a little stronger. So! When an exercise is feeling a little too easy, make it harder. Stress your muscles–though do so safely, and without overdoing it!
3) Increase the number of repetitions. Since we’re doing a few bodyweight exercises in this plan, increasing repetitions once they get easier makes sense. For the resistance bands moves, I’d prefer you increase the intensity rather than the repetitions, but! There are times when it makes sense to do more reps rather than up the bands. If that’s the case for any exercise you’ve been doing for a few weeks, then take up your reps, but no more than 15.
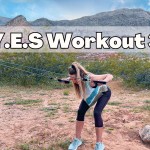
The 7 Exercises in Workout #1
1: Wide Squat with Alternating Side Stretches (See at 3:08 in video)
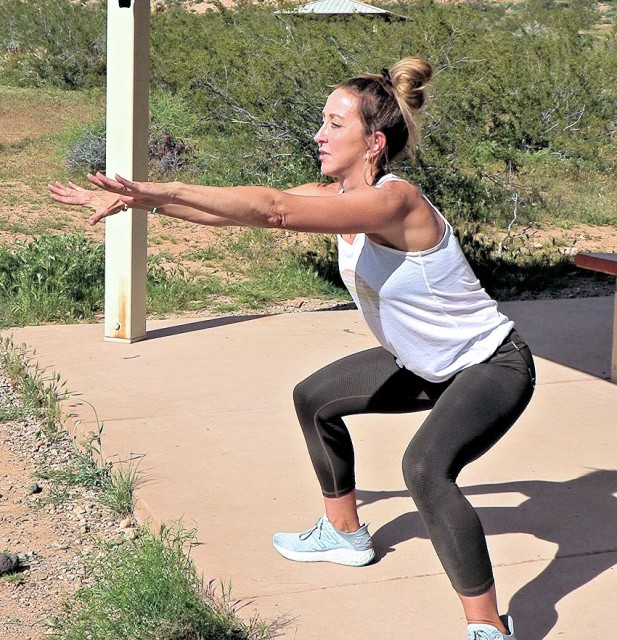
Stand with your feet wide and toes turned out. Slowly squat by driving your hips backwards, keeping a natural arch in your spine–no rounding. Keep your weight on your heels. Exhale and come back up, and then reach your left arm up and lean & stretch to the right. Next, reach your right arm up, and lean & stretch to the left. All of that completes one repetition.
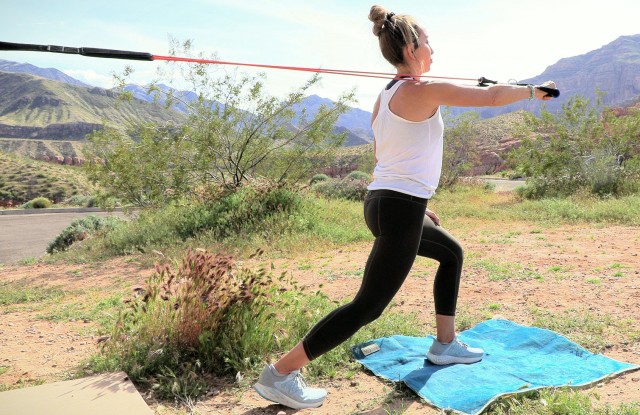
2: Single Row with Lungeback (See at 4:33 in video)
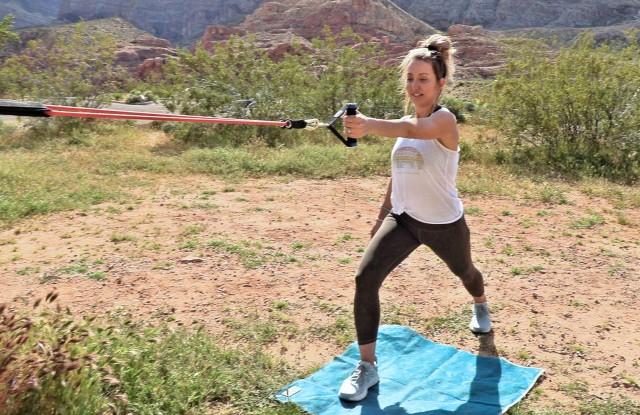
Anchor the band somewhere between chest and shoulder height if you can. If you’re using a railing as your mount, which would be lower than that range–that’s fine, too. The picture shows your start phase, legs in a lunge stance with the same side leg lunged back as the arm that’s working. Exhale as you pull the handle towards you, driving your elbow back behind you and squeezing your shoulder blade into your spine to ensure you’re hitting your rhomboids (which are a pair of muscles that play a big role in your posture). At the same time as you’re pulling the handle, return your lunged leg so both feet are square. This move takes some balance, so if you have any issues with your balance, do these near something you can hold on to.
3: Reverse Fly and Skier Squat Combo (See in vid at 9:17)
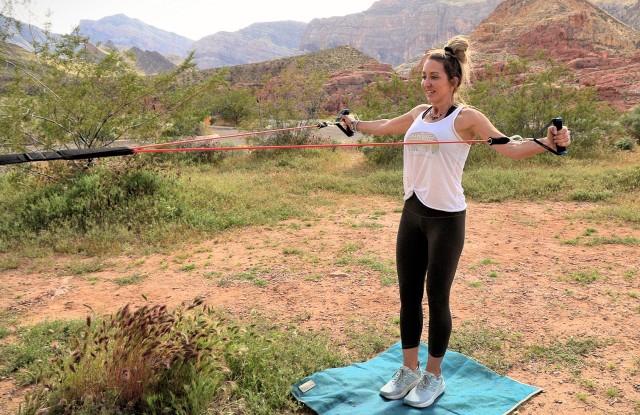
This is really two separate moves combined in one, and it take 4 steps to complete. STEP 1: Start with your arms straight forward, your feet fairly close together in a narrow stance, holding the handles in a neutral grip (so both palms are facing each other). Be backed away enough that there’s plenty of tension on the band. STEP 2: See pic. Open your arms, with elbows soft, so that your body forms a “T”. STEP 3: Close your arms again, so you’re in same position as start. STEP 4: Drive your hips back in a squat as you simultaneously bring your arms straight down to your sides, rotating the handles so that your palms face behind you.
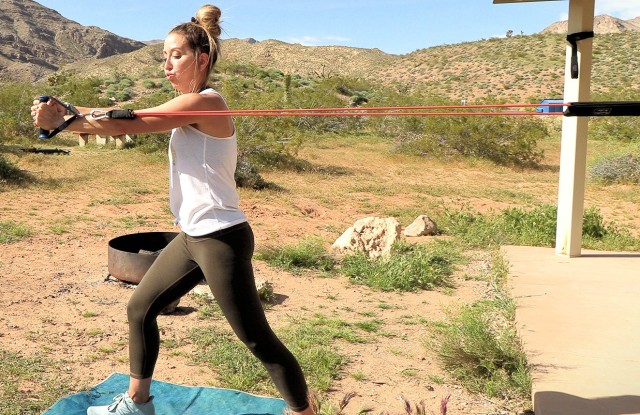
4: Single Arm Chest Press in a Split Squat (See in vid at 10:27):
Attach a single handle and face away from your anchor lowered in a split stance as in pic. The lower you go into your split squat, the more muscles you’re working, so do challenge yourself with that! Hold the split squat throughout the entire set as you slowly press your arm forward, and then return it to start, which is your hand near your shoulder and your elbow behind you. Keep your chest up and your core tight, and make sure you’re not leaning forward with the press; stay upright. It helps to look forward.
5: Robot Walks (See at 15:02 in vid)
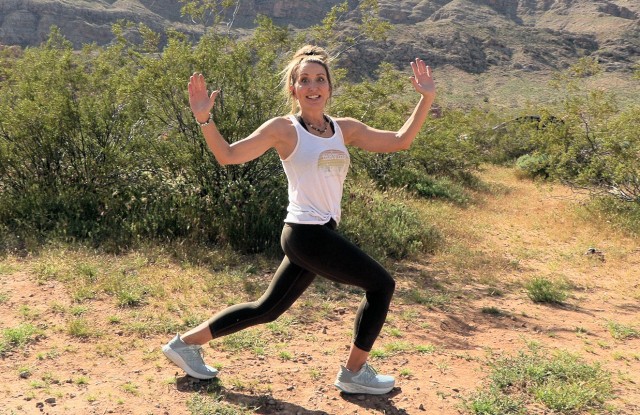
This is a bodyweight exercise where you lunge-step forward taking alternating steps. As you lunge-step on your left leg, you rotate your trunk to the left, ensuring your spine remains upright and your core is tight. After that, return your feet together and then take a lunge step on your right leg, while simultaneously rotating your trunk to the right. All of that completes one repetition. See pic for arm placement–arms are up in ‘goal post’, which helps keep your posture upright. This can be challenging for your balance, so do these along a wall if you have any balance issues. Make sure you go slow, and as deep as you safely can into your lunge. Slow is actually more challenging!
6: Standing Core Twists (See in vid at 16:08)
Set your band up with one handle, and stand sideways from your anchor with your feet wide apart, and your arms extended straight out in front of you, with both hands wrapped around the same handle. Pivot your toes so that they’re pointed away from your anchor at a diagonal, even though you’re standing sideways. Make sure the knee that’s farthest from the anchor remains bent; that allows your hips to rotate freely. All of that is your start phase. Now that you’re set up, slowly rotate the band (horizontally) away from the anchor, until the band touches your upper arm. That’s your cue you’ve rotated far enough and you can slowly return to start. Make sure to do both sides.
Calf Raises in a Heel/Toe Balance (See at 20:15 in vid)
Stand with your feet aligned heel to toe, as if you’re standing on a line. Be upright with good posture and a tight core. Slowly raise to your tippy toes and then lower back down. You can reach your arms up with each calf raise if you wish. Do 5 with your right foot in front, and then do 5 with your left foot in front to complete your 10 calf raises. Anyone with compromised balance, do these near a wall for safety.
And there you go! Do let me know if I forgot to share anything down below in the comments; or feel free to ask questions, leave feedback, or anything else, too! Good luck; you can totally do this! Let me know how it goes!
Rooting for ya;
❤️ Trainer Stef


Sorry, forgot to ask. I saw that some of your fitness videos also have written directions. Where can I find those. Thank you!
Hi Stephanie! I love you and James! Saturday I purchased the band kit you recommended. Of course it’s not arriving until the end of April. I’m really excited about starting to use the bands and get a routine going. Hope to get my husband involved too. Just wanted to know how much you and James are helping with our new adventures. (Just bought a new 24K in January and have only gotten to take one trip so far. Colorado snows!) Your videos are so full of information and sometimes just make me laugh! (The musical review from Pirates of Penzance! Loved it!) Thanks for the new joy you’re bringing to us and all the great information!
Hey congrats on your 24K that’s awesome! Hope you’ll have incredible adventures with it! Glad you liked James’ crazy musical review, too — he had so much fun with that!
Good for you for investing in some resistance bands; they’re so great for RV life! I do have printable instructions with some of my workout plans here, but I didn’t do any for the YES workouts — sorry! Hopefully once you go through these workouts once or twice with your bands, you’ll have the form down, and then can just use the pictures above to remind you during future workouts.
Best of luck on your fitness AND RV adventures ahead! Perhaps we’ll see you out there someday! ❤️
Thank you Stefany!
Looking forward to receiving the bands. Just watched the latest video about the Camco Water filter. It was really helpful – sent it to both my husband (just filled our RV for the first time yesterday) and to our daughter who is a full time rv person!
Thank you for the answer. Hope to meet the three of you sometime!
Stephanie, bodylastics sells various kits, I am not sure which set to buy. when you have time at the tampa ekko rally could you help me pick one out? I want to get in shape for my daughter’s wedding. thanks, karen lebrun
Happy to help! We will be back at the rally shortly and I’ll look for you! ❤️