This post may contain affiliate links.
I need to start with this confession: In our 14 years as RVers, Stef and I have never owned an RV with a slide. Since the vast majority of RVs today are made with slides, this puts us in the minority.
There are a few reasons for that, but one of the main one has to do with maintenance. I perceived RV slide-out rooms as another lengthy maintenance chore that would likely require several new tools, a few new products, tedious adjustments, and – mostly – time.
Perhaps I’ve mellowed with age (I’d bet Stef disagrees), but recently I began wondering if I had been hasty in my judgement of slides. While there is certainly some effort involved, with so many people having them, slide-out maintenance couldn’t be that difficult? Or could it? I honestly didn’t know, since I had never owned one.
Curiosity got the better of me, and I eventually went down to Gander RV of St. George, Utah to have a chat with Brad Green, RVIA Certified Master Technician, about slide-outs.
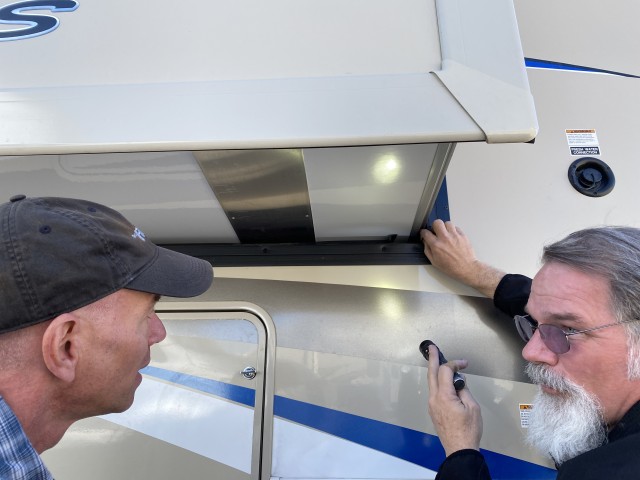
Brad’s been in the RV industry since working at his father’s RV dealership in his teens. For over 30 years, he’s done everything from manage a service department to run his own mobile tech business; so he’s seen his share of slides. He agreed to show me the basic slide-out maintenance tasks: Slide-out 101, as it were.
Types of Slides
As a non-slide owner, I hadn’t realized that there were different kinds of slide-out rooms. Brad stressed that knowing what type of slide you have on your RV is important, because the maintenance procedures are slightly different for each of them. Here are the more common types of slides:
Cable Slides: These use a system of cables and pulleys, in combination with an electric motor, to drive the slide room in and out. These systems are light weight, and they’re capable of handling longer and heavier slides.
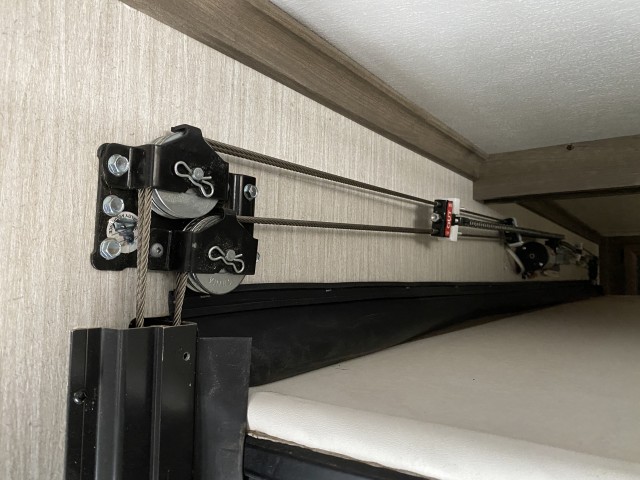
An interior look at a cable slide.
Rack and Pinion Slides: These are exactly as I pictured them – round gears (pinions) that rotate with electric motors to move a linear track (the rack) in and out. These systems are common and affordable. As a tech, Brad appreciates the easy adjustability of these kinds of slides.
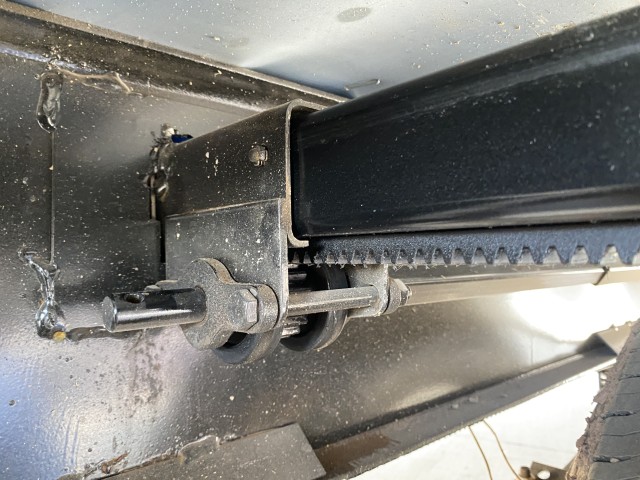
The rack and pinion mechanism.
“Schwintek” Slides: This type of slide is easily identified by the aluminum guides with the “worm tracks” in them on the outsides of the slide rooms. These electrically driven slides are typically used on lighter-weight slide rooms.
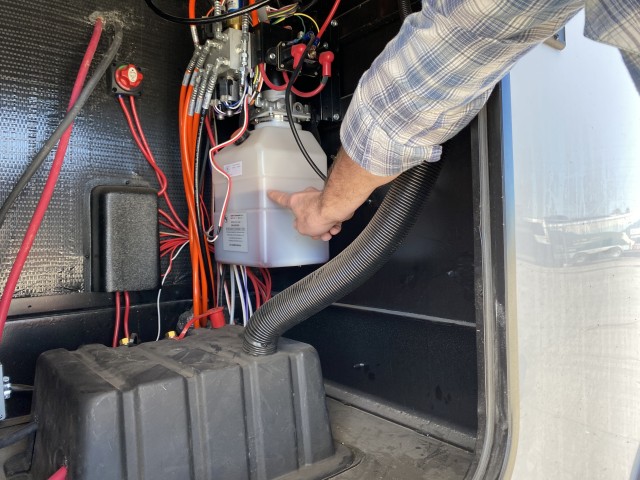
Hydraulic Slides: This type uses a hydraulic pump and fluid to provide the driving force to extend and retract the slides, but they will still rely on mechanical components to keep them aligned and on track. There will be a reservoir for hydraulic fluid and hoses leading to the slide(s).
The Elephants in the Slide-out Rooms
Regardless of the type of slide, there are two main things that cause problems when they’re used.
Potential Problem #1: Voltage
Slides are big, heavy components. Moving them takes a fair amount of force. And an electric motor won’t be able to generate the necessary force if it doesn’t have adequate voltage available. So the first step in slide-out maintenance is to practice good battery maintenance!
I won’t cover battery maintenance here because that could be a whole book by itself. Generally speaking, a good state of charge and clean and solid connections are going to be your friends. Your battery voltage should be the first thing you check if your slide won’t move and you’re stumped.
Potential Problem #2: Obstructions
Obstructions can be a lot of different things — anything from hitting a tree on the way out to catching a flip-flop on the way in. Over the years, Brad has seen pine cones, critters, cabinet doors – you name it – get stuck in slide-out mechanisms. When this happens, typically one side of the slide gets stopped, but the other keeps moving. Even if nothing breaks, a slide that encounters an obstruction will likely need to be adjusted to get it back into proper alignment and working order.
The way to combat obstructions with your slide is basically to pay attention. Check for trees or bushes before extending slides. Check the outside of your slide – particularly the roof – for debris or obstructions before bringing it in. And be sure to check inside your RV for anything that might get caught in the slide before moving it in either direction.
Slide Maintenance Best Practices
Beyond having proper voltage and paying attention, slide maintenance seems simple. Today’s slide mechanisms don’t require a lot of periodic maintenance. Once a year is a suggested minimum for preventative maintenance, twice a year for you over-achievers. There are three main steps to a periodic maintenance routine: Clean, Inspect, and Lubricate/Condition.
Step #1: Cleaning
Cleaning your slides seems like a natural step to me, but according to Brad, a lot of people don’t put in the effort here that they should. You can wash the slide exterior with the same soap and water you wash the rest of the RV with. The more important step is cleaning the actual mechanisms that make the slides work.
Your slide mechanisms are exposed to the elements when they’re extended, so they pick up their fair share of dirt and grime. At the same time, you count on these parts to move some heavy loads. Moving parts don’t play nice with grit and grime, so you need to periodically clean your slides.
Fortunately, cleaning slide mechanisms isn’t difficult. This is not something you go after with a pressure washer. Simply wipe away the worst of the dirt with a clean, dry to damp, microfiber rag. You can use a soft bristle brush if necessary, but don’t use anything aggressive like a wire brush. If you happen to have compressed air available, that can be an easy way to blast away the crud.
Step #2: Inspection
The next step in the slide maintenance routine is to thoroughly inspect your slide mechanisms. The particulars are different depending on what type of slides you have, but there are some steps that are common to all of them.
Seals should be the first thing you inspect. Your RV relies on these seals to keep the outside out, so they need to be in good shape. There are actually two sets of seals for each slide, an inner and an outer, so you’ll want to inspect both. And the seals go all the way around the slide, so you’ll need to inspect all four sides, and pay particular attention to the corners.
At each seal, look for trapped debris or tears in the seal. Remove any debris you find. Tears in your slide seals might require professional evaluation. You should also check each seal for dryness and cracking. The seals should be soft and pliable, not stiff. Watch as your slide extends and retracts to make sure that the seals flip over properly. Finally, make sure that all the seals are attached tightly to your RV.
If your slides have slide toppers, you’ll want to inspect those to make sure they’re operating properly. Check to see if any debris has gotten jammed into their covers. If it has, you may be able to remove the covers and clean out the debris. You’ll also want to inspect for tears or sagging.
And regardless of the type of slide, you’ll want to check to make sure that there aren’t any bolts or screws that have worked loose. One place problems seem to show up is on the underside of your slide room – if something is loose and dragging across the underside of the floor, you’ll want to get that fixed. You can also look underneath the slide room to see if the rollers and supports on the bottom of the room are operating properly, or if they’re stuck or dragging.
Beyond that, the specifics of your inspection will vary according to the type of slide you have. If you have cable slides, be on the lookout for frayed or damaged cables, particularly at points where the cables pass through other components. More common problems with cable slides are what Brad called “tension issues”. An easy tension check on cable slides is to listen for a bass guitar kind of note as you pluck a cable. (I play bass, so this caught my attention.)
If your slides are hydraulic, you’ll want to check the level of fluid in the reservoir, and make sure there are no obvious leaks in the system. Rack and pinion slides should have gears and teeth that are aligned and in good repair. Further inspections specific to your RV can be found in your owner’s manual.
And here’s quite possibly the best piece of advice Brad shared. Learn what your slides look and sound like when they’re operating normally. That way, when something makes a strange sound, you know straight away if it’s normal or not.
Remember, the name of the game here is preventative maintenance, so it’s unlikely you’ll uncover anything in your inspection that you’re going to want to fix yourself. I know I certainly don’t have the equipment or the know-how to realign a heavy slide room or repair a hydraulic pump. Instead of that, the goal here is for you to identify emerging problems while things are still working.
Step #3: Lubricate / Condition
The last step is to lubricate and condition the parts that keep your slides working as they should. Chief among these parts are the seals. Brad was careful to warn me here that most seals do well with the common seal conditioners, but a few do not. The only way to know the difference for sure is to consult your owner’s manual, so that’s step one.
If your seals require it, conditioning them is an easy “spray and wipe” affair. There are several products marketed for this task, but Camco Slide-Out Rubber Seal Conditioner is a popular choice, and it’s readily available. The application instructions couldn’t be easier: “Spray it on, spread it evenly with a cloth, and allow to dry.” Don’t forget that there are two sets of seals – inside and outside.
Once your seals have been taken care of, you can turn your attention to the mechanisms that move the slide in and out. This is another area where the steps will be different depending on the type of slide you have. Put yourself in a minimalistic mindset when lubricating your slides. Modern slides take advantage of sealed bearings and maintenance-free motors, so there’s typically nothing to do on the motors themselves.
The final word on exactly what and how to lubricate should come from your owner’s manual. But in general, you should be using a light, dry lubricant – like a silicone based lube. Lubricants that stay wet, like oil and grease, tend to attract dirt and should be avoided.
The main thing you’re going to want to lubricate are the drive gears and tracks – the parts that move your slide in and out. Since you’ve already cleaned them in the first step, lubricating them is easy. Simply spray on a light coating of lubricant, and wipe off any excess.
Schwintek “worm” rails don’t require any lubrication themselves, but the rollers and gibs inside the wall call for a specific lubricant applied in a certain way – although these days, they seem to be recommending no lubricant at all there. If you’re not comfortable performing that task, it’s better to take it in for servicing. Similarly, a cable driven system should be largely left alone, but a squeaky pulley might be cured with a quick hit of a dry lube. And if you have hydraulic slides, while you won’t service the hydraulic system specifically, you will want to lubricate any gears or tracks that keep the slide-out moving on the correct path.
Conclusion
Altogether, my conversation with Brad was pretty enlightening. I think I could run through those three maintenance steps – Clean, Inspect, and Lubricate & Condition – in very little time. Am I a convert? Will our next RV include slides? For the right RV, I think I’d be more open to it now. After all, it really is hard to argue against more space!


I have a 1999 Mini Winnie motor home with a hydraulic slide. I get leaking fluid from the top of the slide. There is a bar that passes through the wall of the coach that either guides the slide or is hydraulic. Not sure which. The leak seems to occur when closing the slide.
I would have thought requiring “several new tools” and “a few new products” would be a positive for you!!!
The thing that bothers me with slides in general is the KISS principle… the more complex you make it, the more it is likely to break down, and break down at the most inopportune moments. I think I’d rather have less space and the fewer headaches that come with that!
Be seeing you!
And that’s why, to this day, we still haven’t owned an RV with slides. 🙂