This post may contain affiliate links.
The Dodge Ram ProMaster is a front wheel drive vehicle. As such, there is no drive shaft running from the engine to the rear wheels. This makes the floor of the ProMaster closer to the ground – and that makes for some terrific handling in every situation I’ve driven ours in. Crosswinds, passing semi-trucks, you name it; our Travato remains firmly planted on the road.
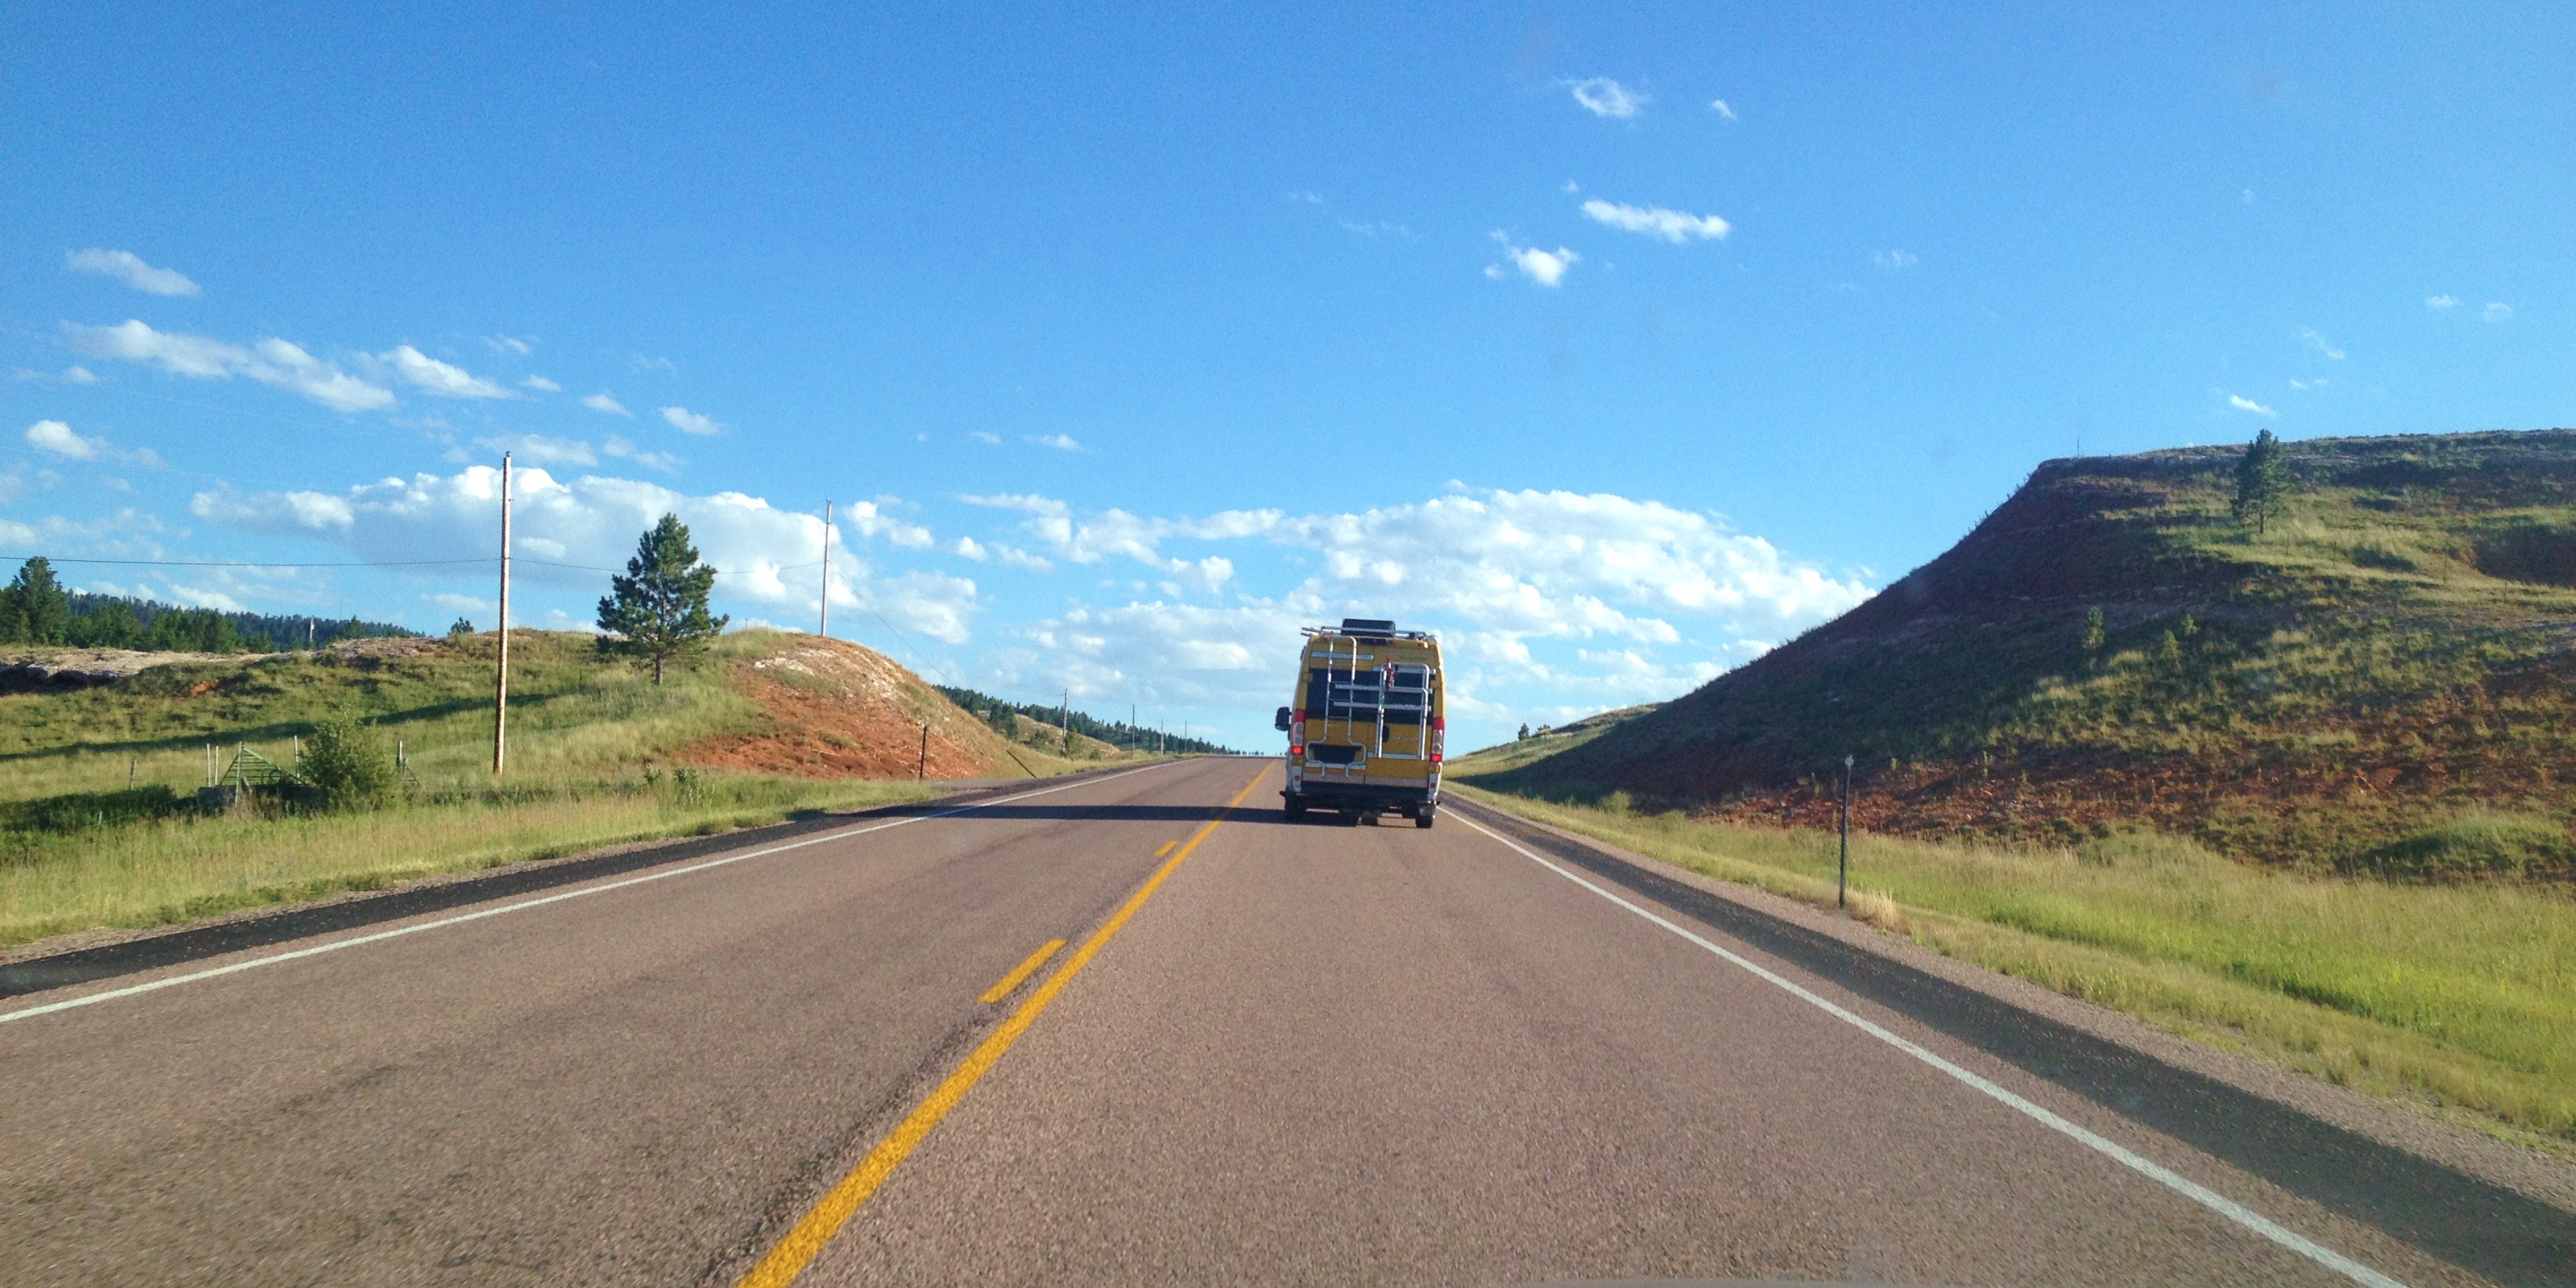
But while that low floor height makes for great handling on the road, it also means that everything underneath the RV is closer to the ground. One area where I’ve heard concerns has to do with the generator. Most of these concerns come not from owners, but from potential owners. The “look” of the generator underneath concerns people. And even though I hadn’t had any problems with it myself, I thought I’d see if there was an easy and effective way to raise the generator a bit.
I found a product called “Sumo Springs”, which is made for the ProMaster. I could describe in detail the closed cell polyurethane, blah, blah, blah; but basically, they’re upgraded bump stops that are screw-in replacements for the factory ones in the rear of the Travato. I had used a similar product on our last RV, and I like the idea of a non-permanent, easily reversible solution that I could try out. If I didn’t like them, removing them is just as easy as installing them.
I discussed adding the Sumo Springs with Winnebago. They told me they are working with Chrysler to devise a way to increase the ride height of a fully loaded Travato. But as far as the Sumo Springs, they cannot install them at Winnebago or recommend that end users install them. So, if you plan on trying out the Sumo Springs, know that you’re doing so at your own risk.
I ordered the “heavy duty” set, and made arrangements to have them installed at a local garage. I recommend you have someone install them unless you’re a qualified mechanic. The Travato is a heavy vehicle, and to complete this safely, you’d need a heavy duty jack, chocks, and jack stands. Don’t undertake this yourself unless you know what you’re doing.
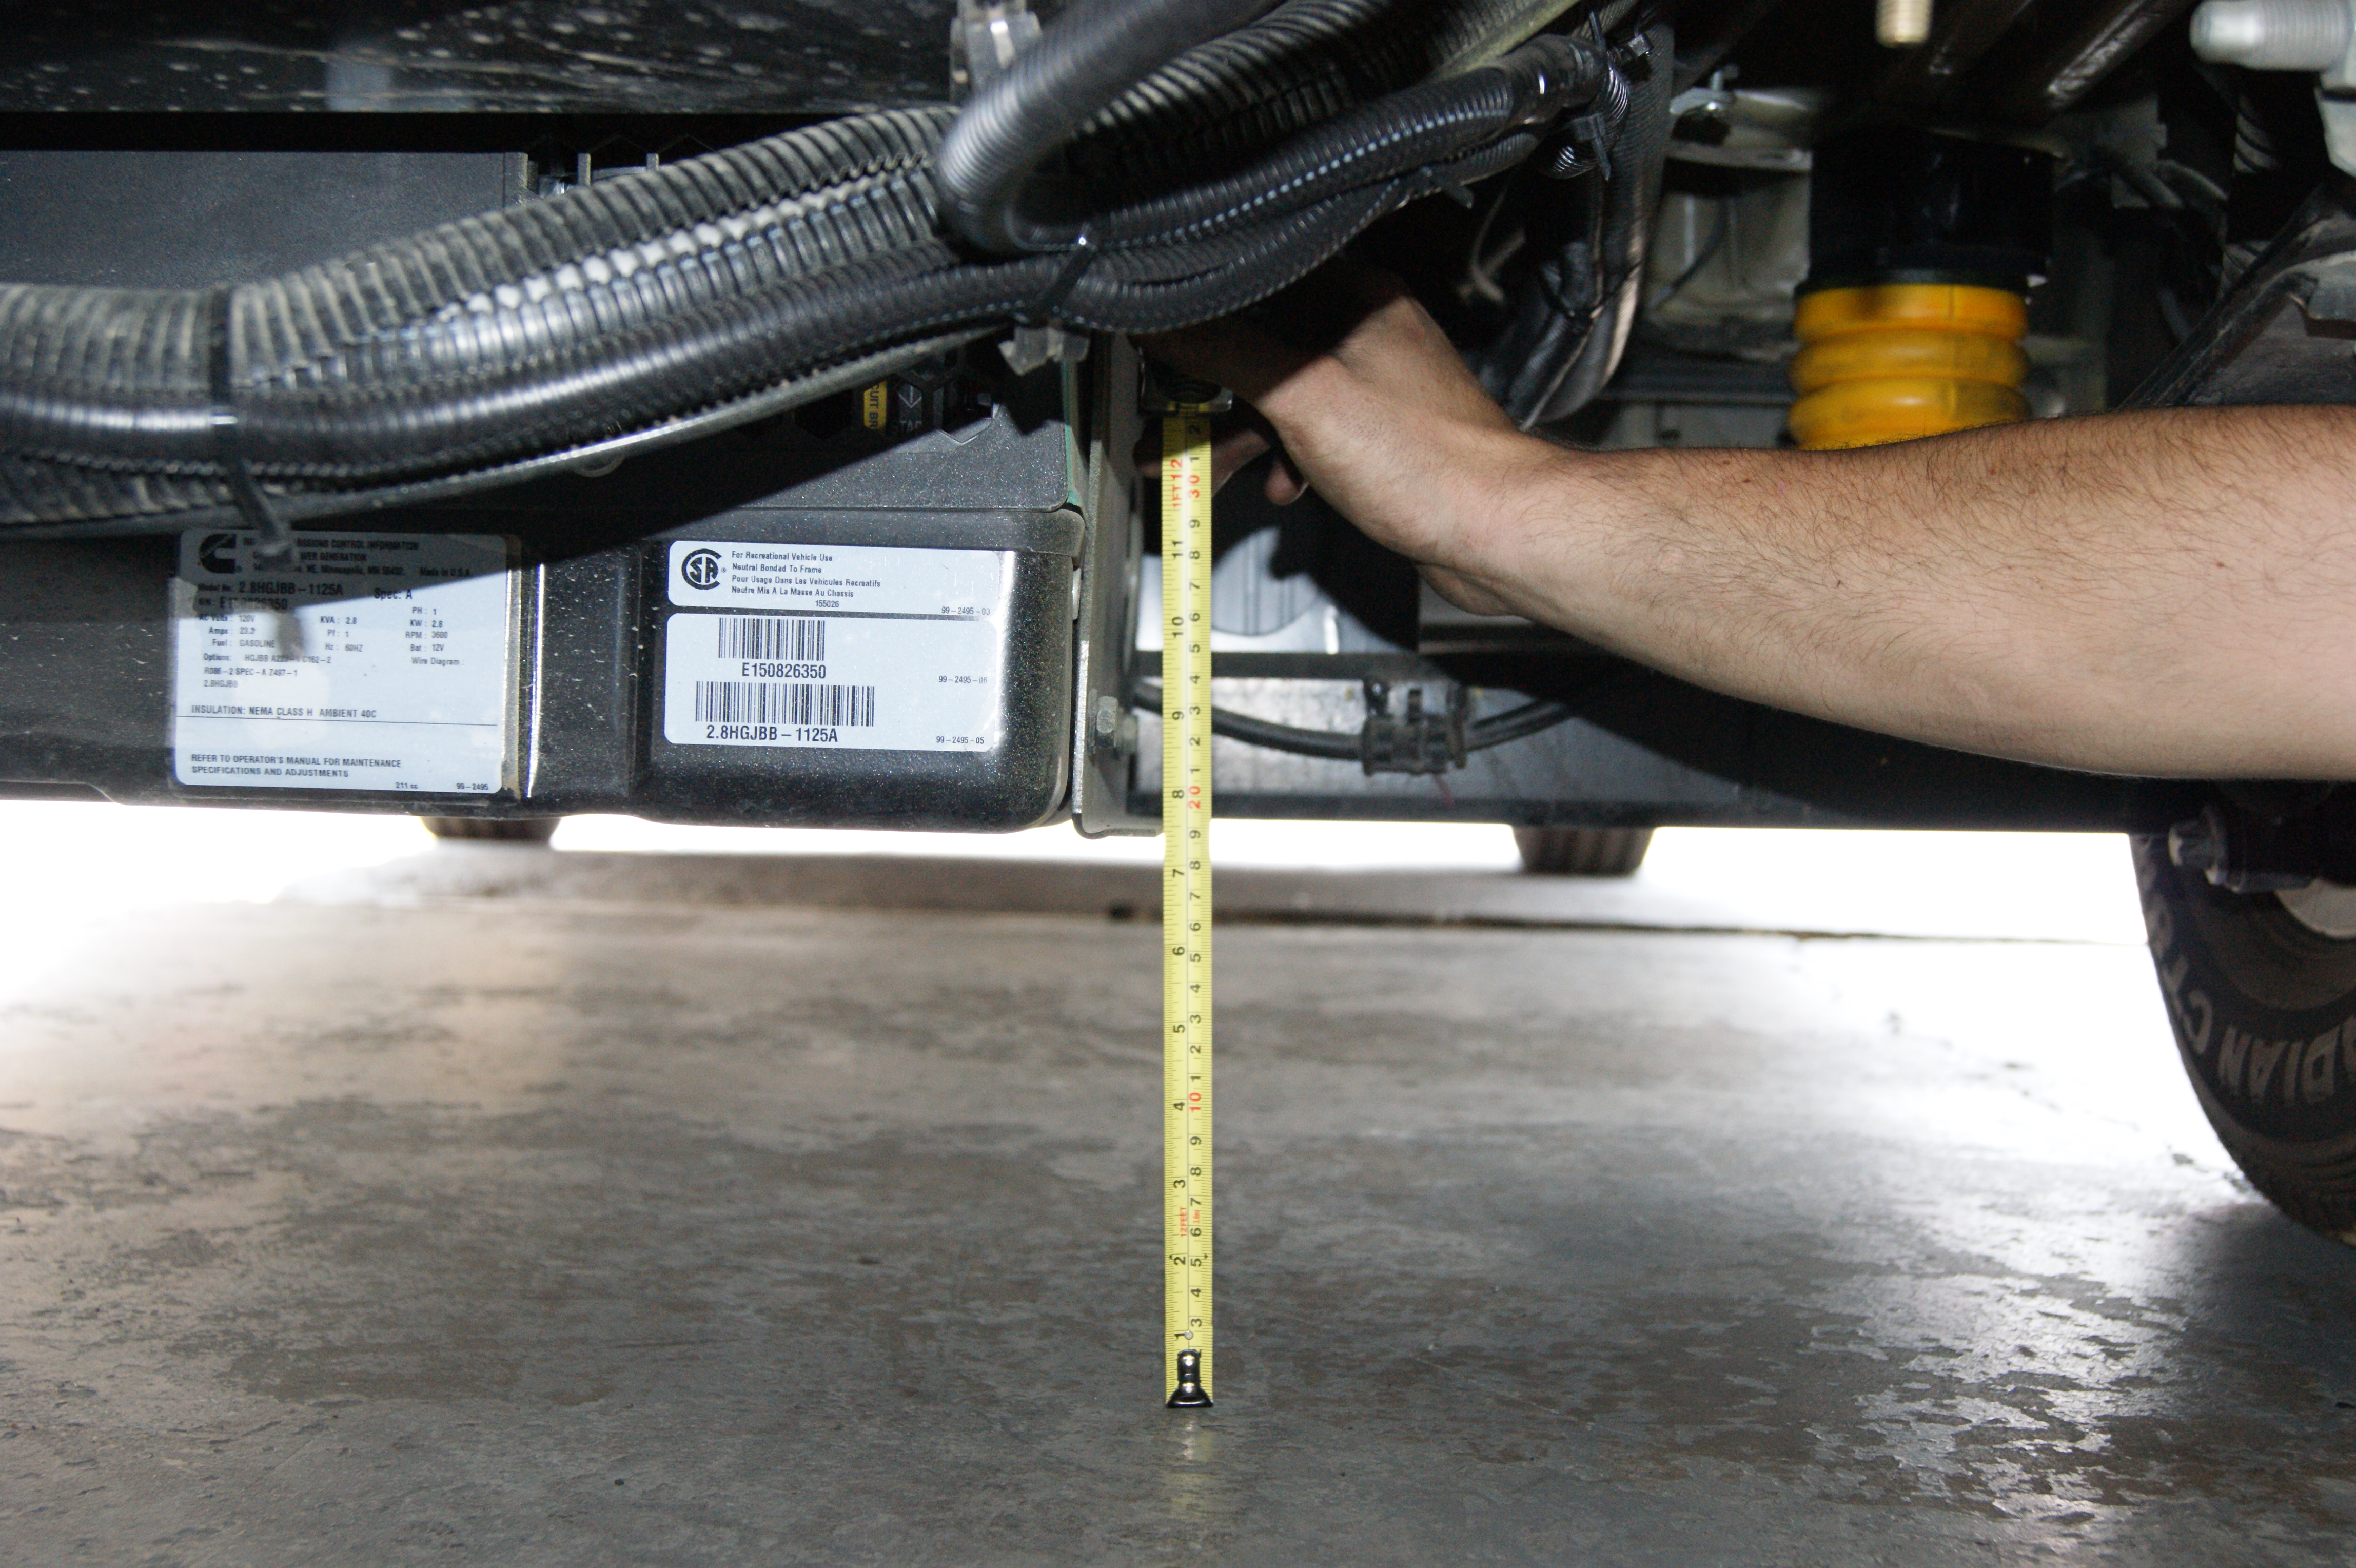
The install procedure was simple. Before we did anything, we measured the height of the generator. In this picture, you can see that the generator sits 6 3/8 inches off the ground.
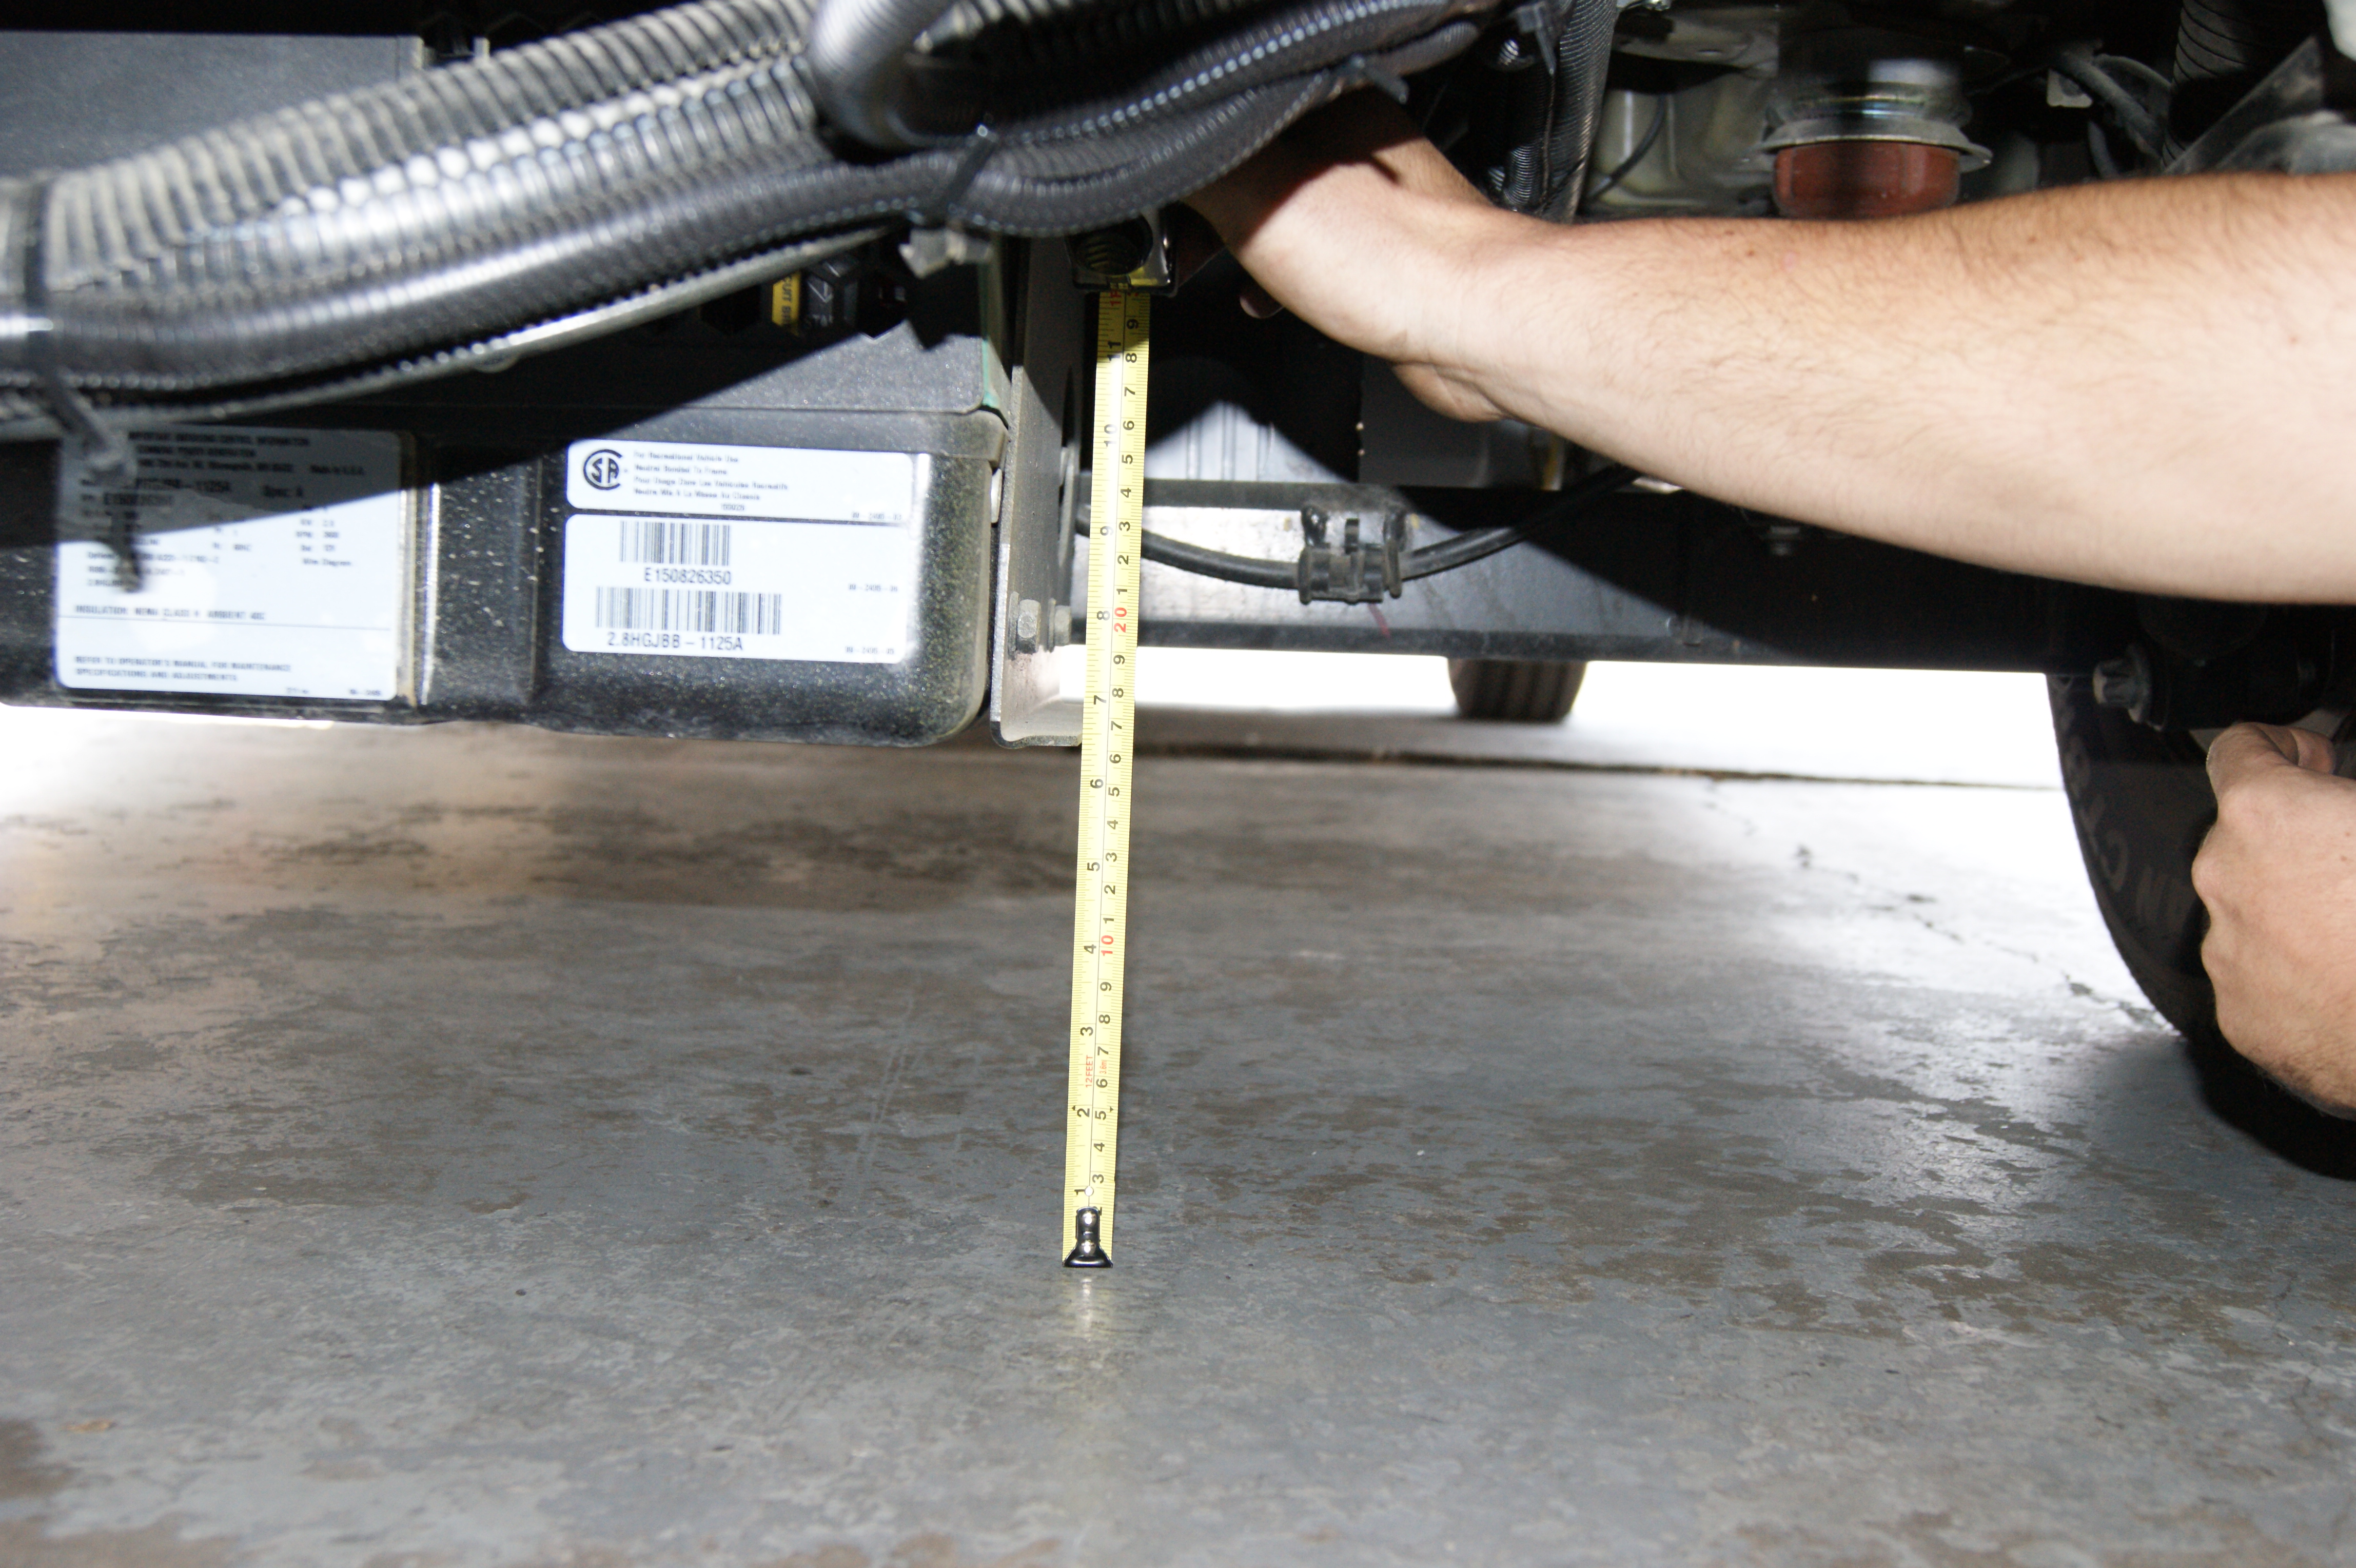
In that same picture, the rear axle is 192mm off the ground. We’ll come back to that in the “after” picture. Once the vehicle was raised, it was simple to locate the factory bump stop (the orange thing) and simply unscrew it (though they did use an oil filter wrench for leverage).

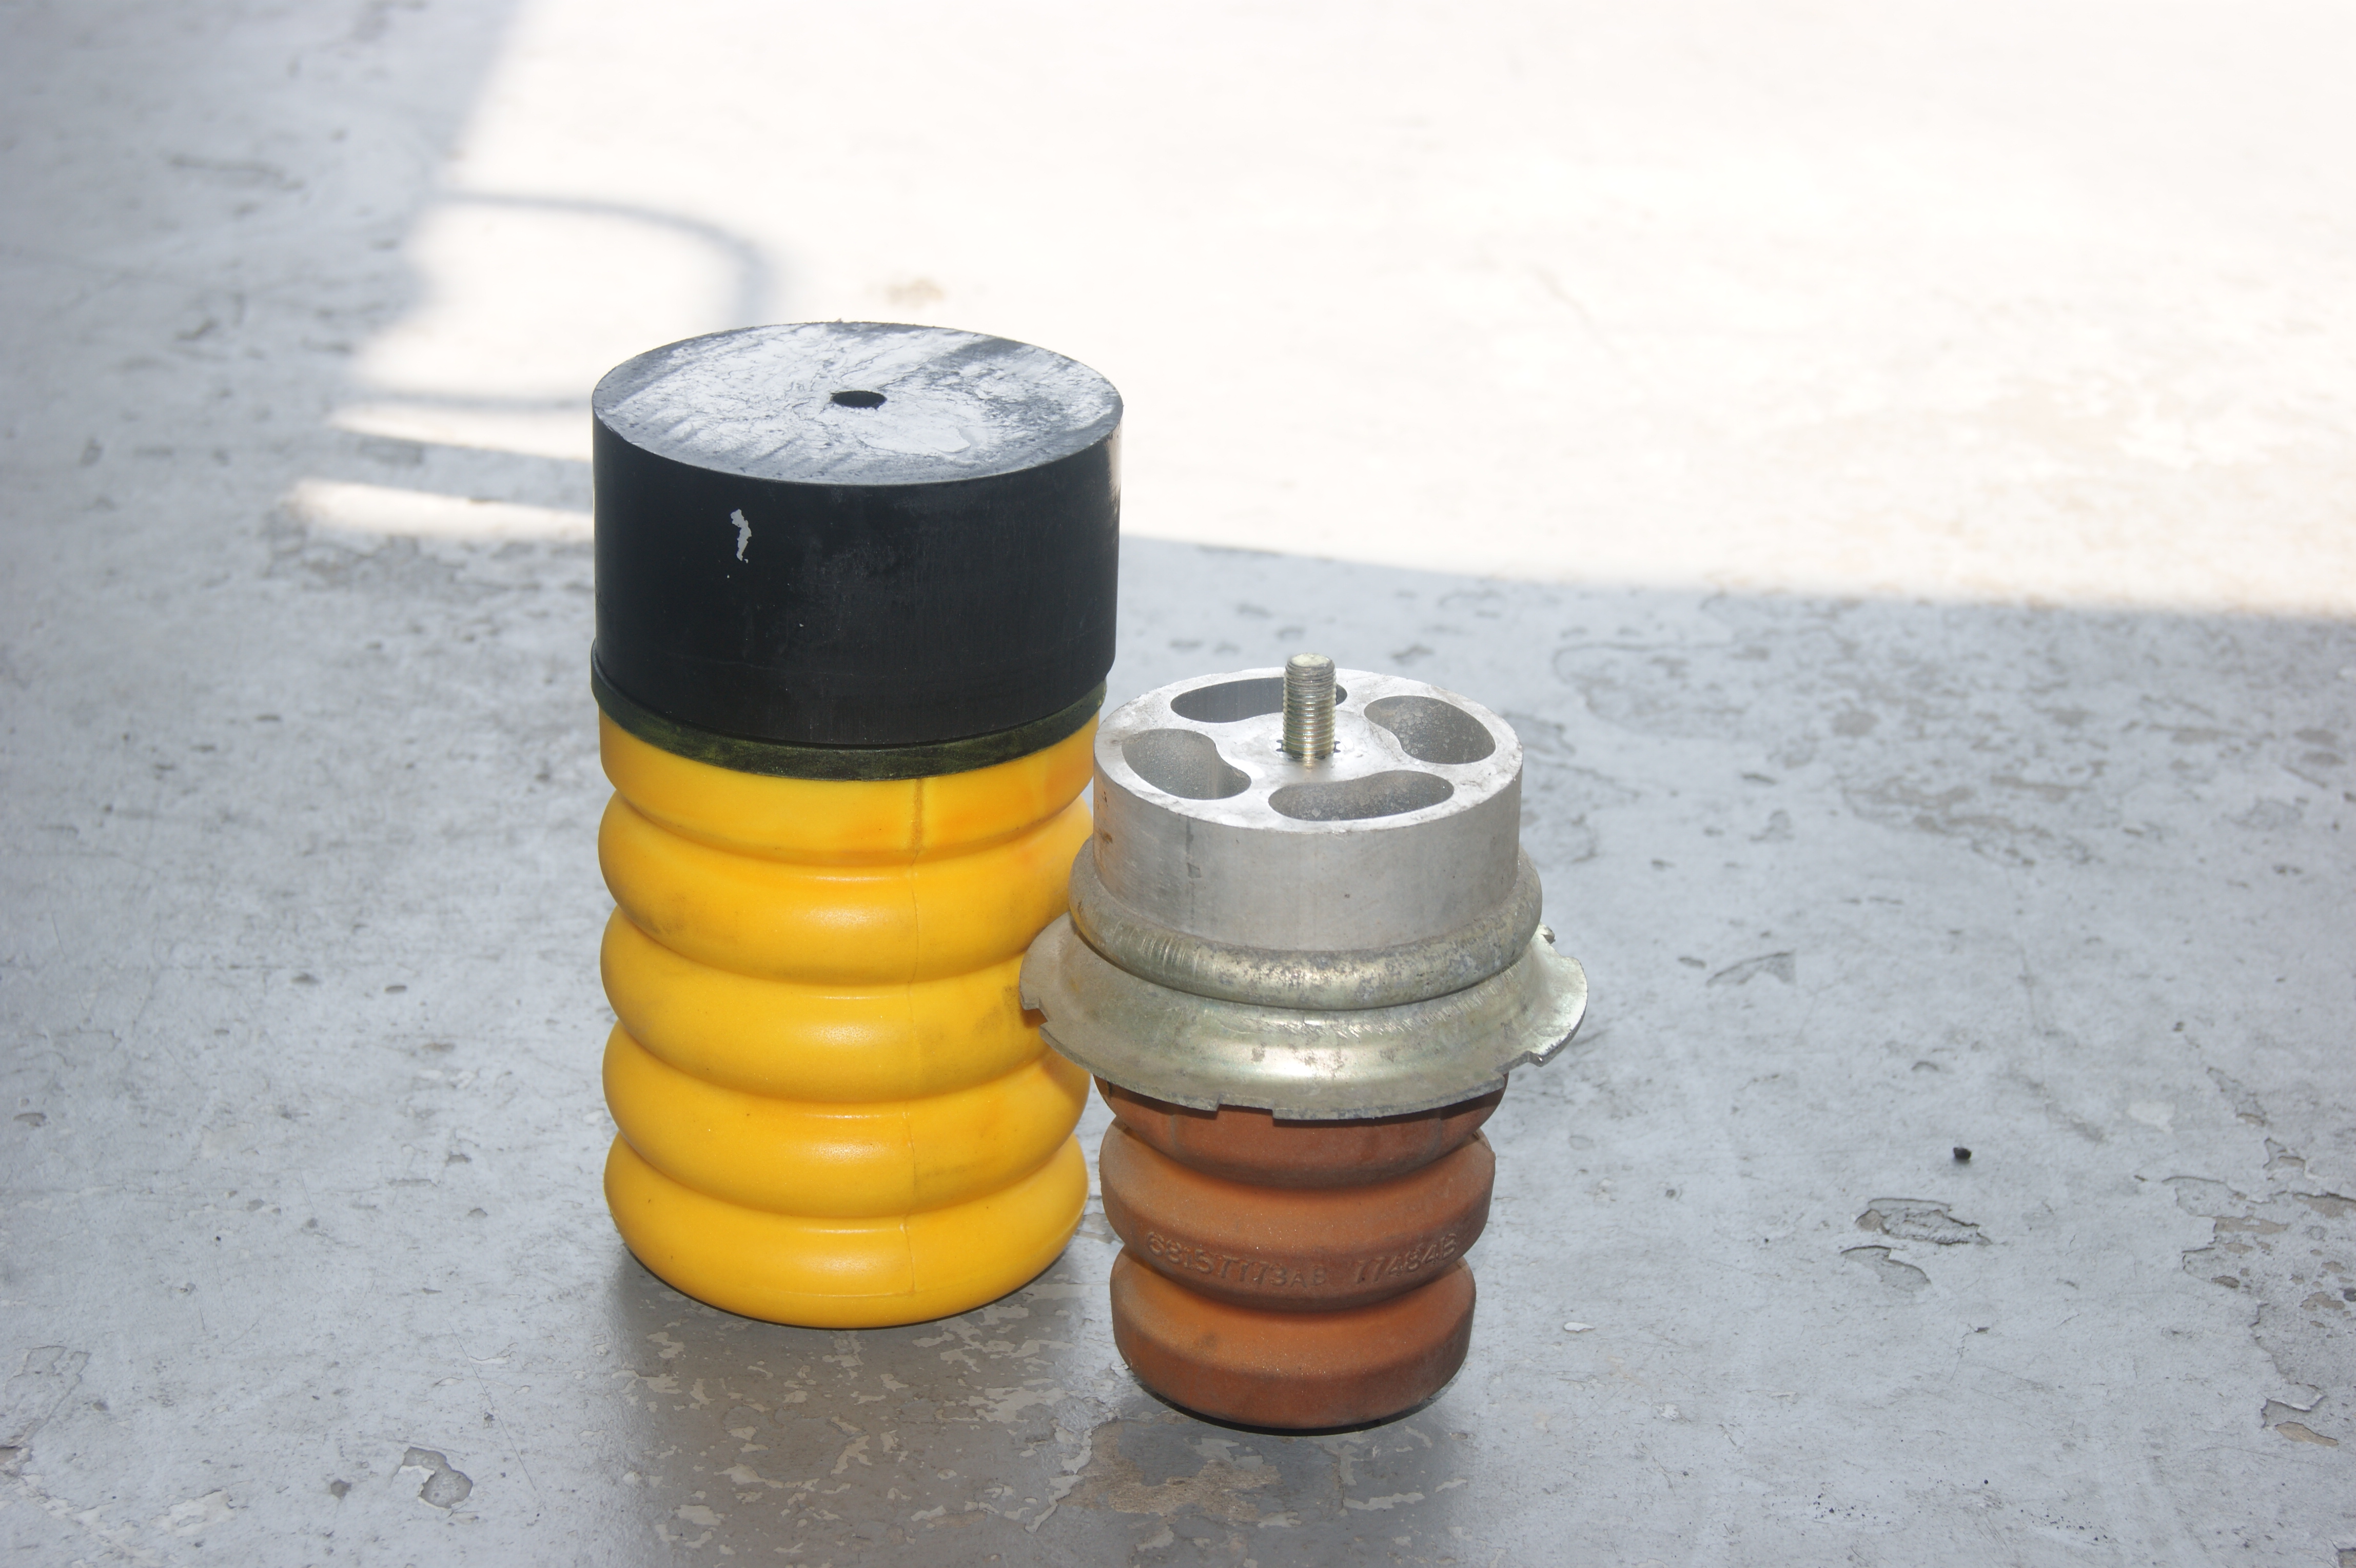
The difference in uncompressed height between the factory bump stop and the Sumo Spring stop was rather obvious. There’s a 2 inch urethane spacer that comes with the Sumo Springs which practically guarantees that we’ll pick up some height in the back.
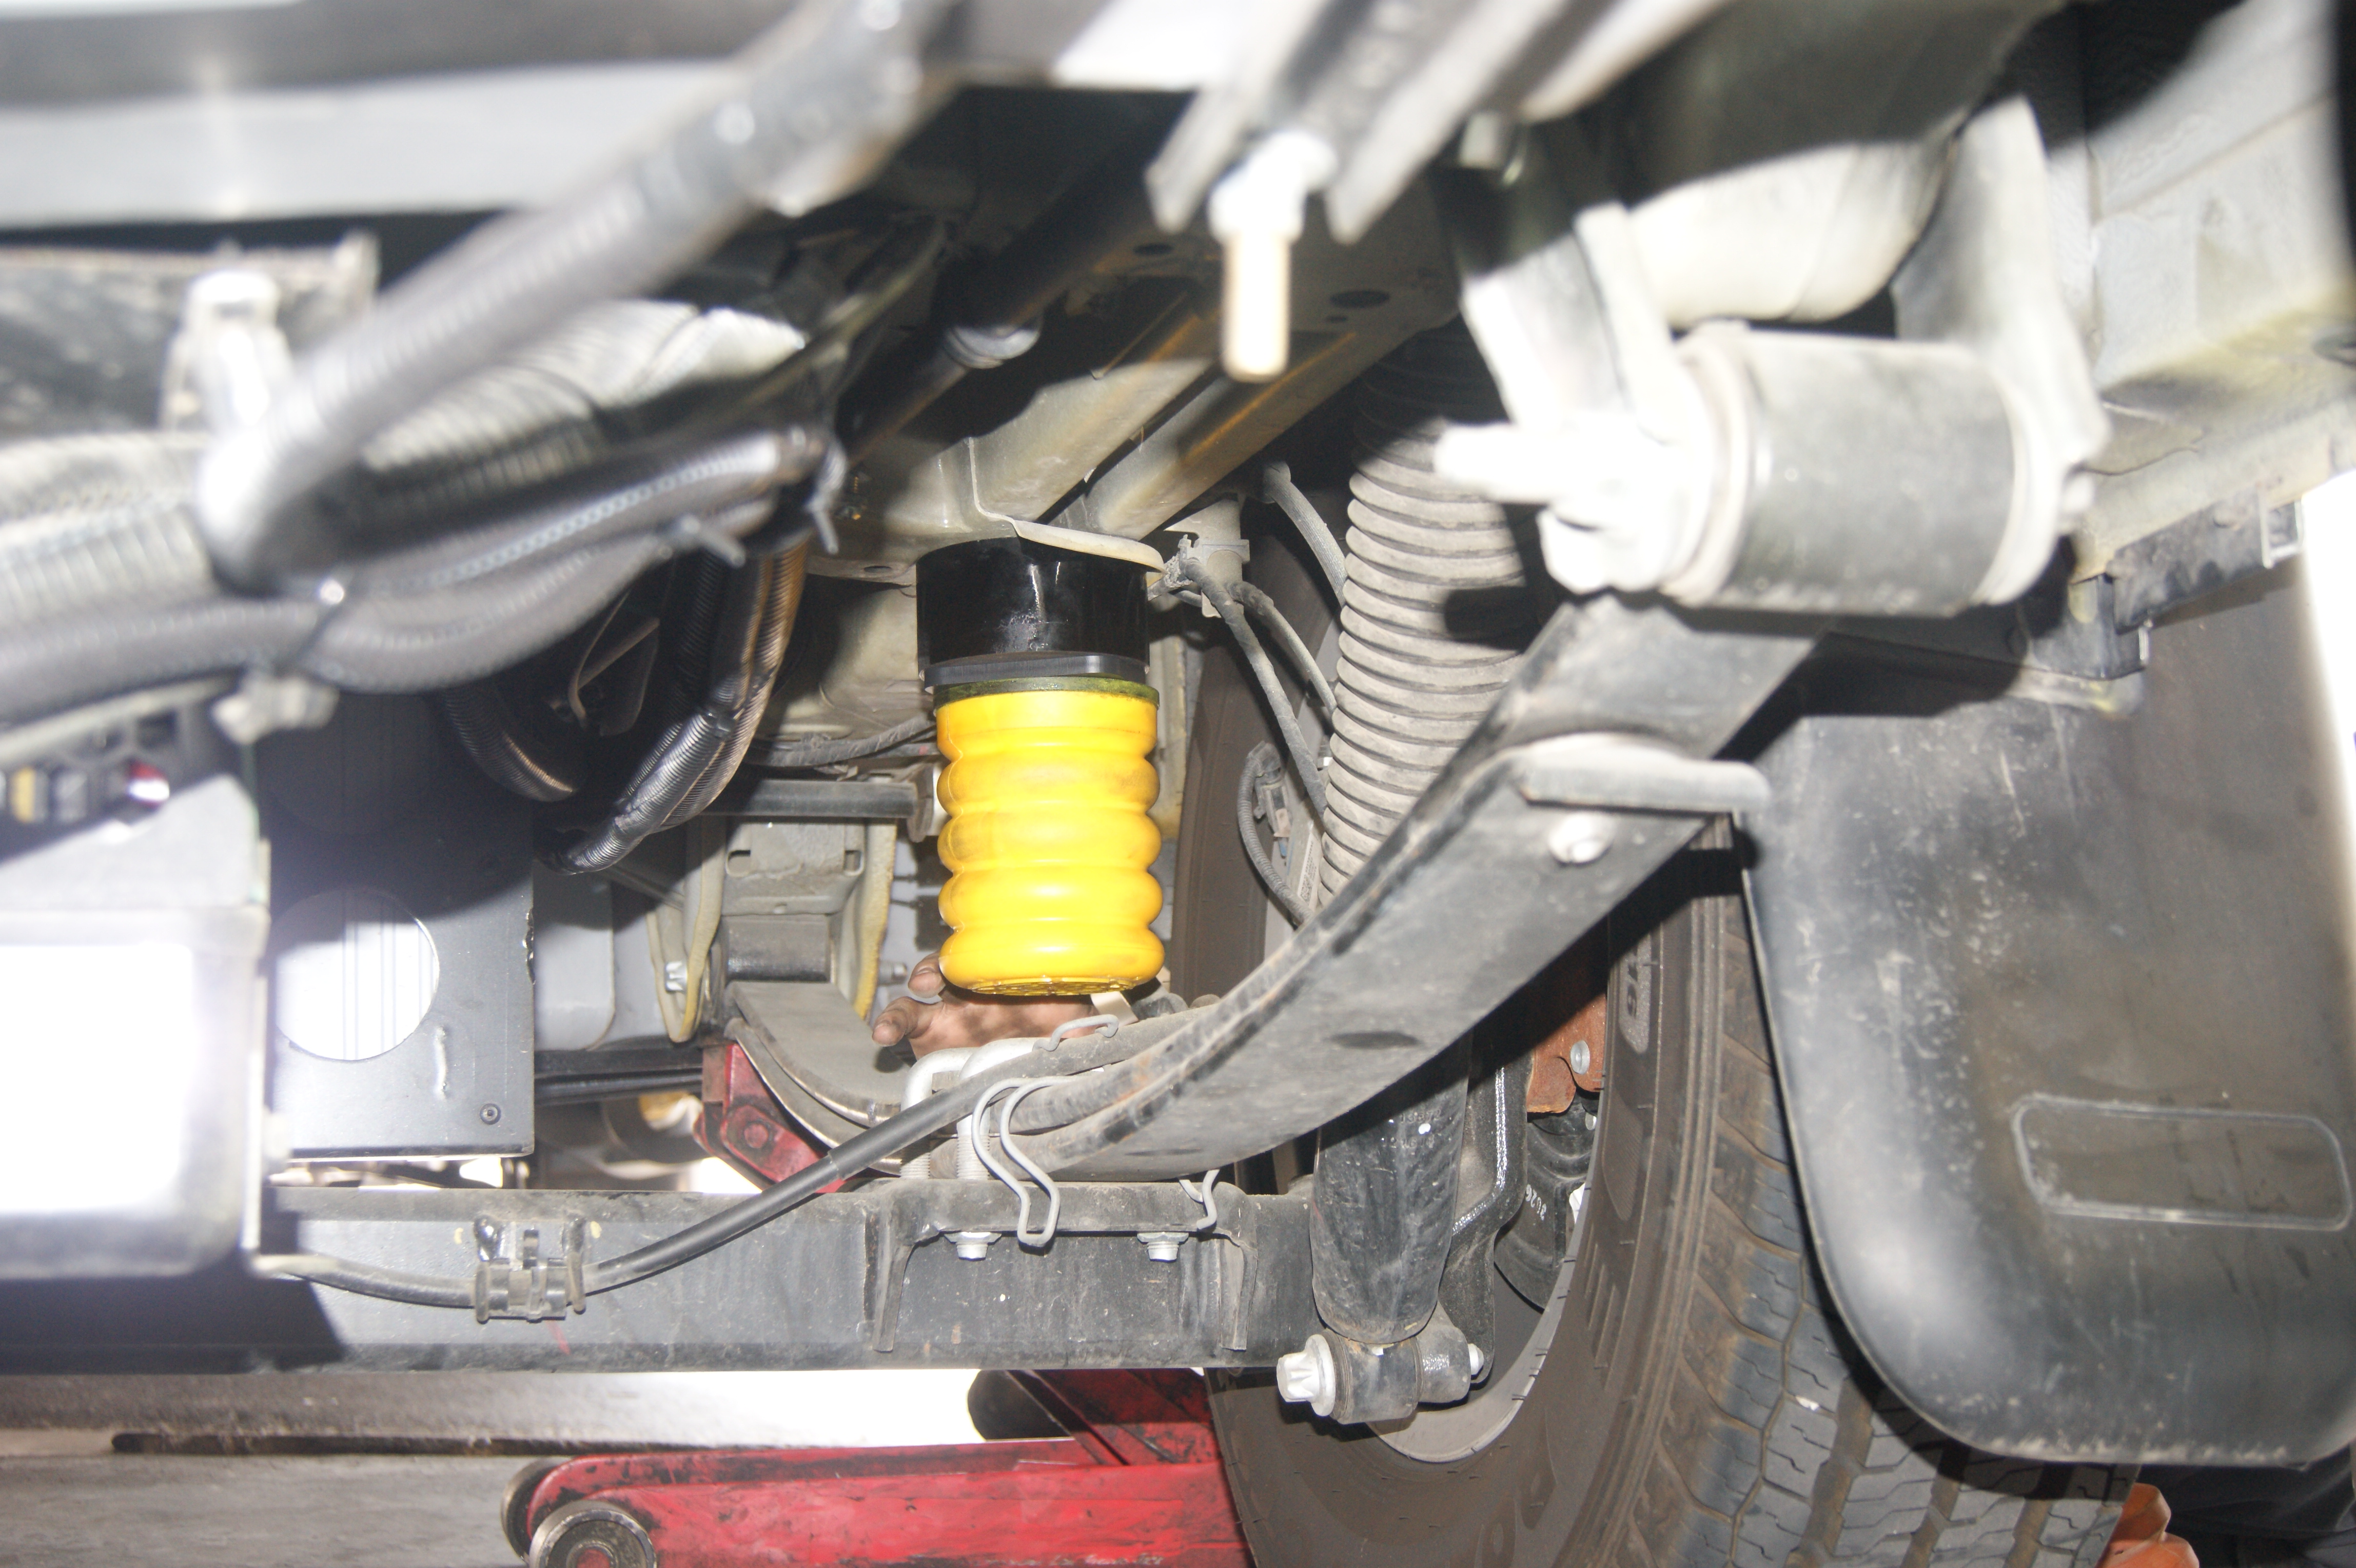
The Sumo Spring stop simply screws in place, in two pieces, in place of the factory one. Here it is installed, but the vehicle is still raised, leaving the spring uncompressed.
And that’s it. It was then just a matter of repeating the process on the other side of the Travato. Total time elapsed: about 30 minutes.
But did it work?
Absolutely! Here we are measuring to the bottom of the generator after the Sumo Springs are installed. The new height? 7 and 7/16 inches. That’s an increase of over one inch.
And remember the 192mm to the bottom of the axle? That axle sits further forward. You can see in this second photo that it shows 193mm. I tried to keep the camera angle the same between the before and after shots. Though I was squatting down and leaning under the Travato, I kept parallax to within a millimeter. So no trick photography here.
And how does it drive?
I’m happy to report that the experience from the driver’s seat is as excellent as it always was. While I’ve not driven through any hurricanes, I don’t notice any additional sway or push-pull with passing rigs. And when I took the Travato down a steep twisty mountain canyon road, control over the rear end seemed sure and unaffected. Stef has even driven the Travato post Sumo-Springs – extensively, as she supported me on a 300 mile bicycle race over mountains and through terrible crosswinds. She doesn’t mind driving the Travato at all! (She would never have driven our old Sprinter.)
I’ve saved the factory bump stops, but I don’t think I’ll be reinstalling them. The Sumo Springs have increased the ground clearance on our Travato by just over an inch with no adverse consequences. If you’re concerned about the height of the generator on your Travato, adding the Sumo Springs might be something to consider.


Is it possible to go the opposite direction and shrink 3”? Although I like the Promaster much better because of its width, FWD, & space efficiency, my building’s garage is 7’2” and that seems to leave me stuck with the 7’ Ford Transit or 7’ Nissan NV.
Well, I won’t tell you anything is IMpossible…
But given the way the ProMaster is built, I don’t know how you would remove 3 inches of ground clearance.
There are only 3 ways to increase the “axle clearance” on a Promaster:
1) Increase tire diameter
2) Off Highway Van lift kit (proper way). Actually drops the hubs down from the axle.
3) Cut and re-fabricate the rear axle welding a new beam over the old axle. Risky but works well.
Hi James, Why did you not do Sumo on the rear of Lance?
Did you do anything to the front?
Uh… not sure I understand the question?
I DID install Sumo Springs on the back of Lance. That’s what this very post is about.
I later replaced it with VB Air Suspension.
I did not install Sumo Springs on the front.
I did later install new front springs from VB as well.
Duh! I Meant Back, Haha
Why did you change them, I didn’t see a post on the VB’s Did they raise them higher? Let me know..
Thanks
B
Opps again, I searched your posts & found them…..
Duh! again
ha
B
No worries! lol!
For anyone else following this thread, the post he’s referring to about VB air suspension installation can be found here:
https://www.thefitrv.com/rv-tips/a-smoother-ride-installing-vb-air-suspension-in-our-rv/
How did you get the correct “Color” of sumo springs. I notice there are 3 colors, Yellow (Heaviest Duty) Blue (medium duty) & Blue (lightest duty)
Did you specify or did someone else. Did you put Yellow on Front & Rear or ??
Let me know
Thanks
We just went with yellow on the rear.
I had actually weighed our rig, fully loaded. It was pretty heavy – so I went with the heavy duty ones.
If I drove around with an empty van most of the time, I might have considered the lighter duty ones.
James, did the sumo springs increase ride comfort on the rear? Our 2015 has harsh bumps on broken pavement and highway joints.
Thanks,
Jeff
Honestly, we don’t know. We don’t normally ride back there! lol.
I do know what you mean though about feeling the harshness on bumps and freeway joints though.
First suggestion is weigh your rig and see if you can get by with less than the max pressure in the rears. We run at 75 (cold) now.
That helps a bit.
But I’m working on something that should REALLY help the ride in the rear. Stay tuned…
Hi, love you and Stef and all your fantastic/helpful info! Quick questions: How does Lance handle rough, backcountry, forest service roads? I live near oodles of national (US) forests and intend to wild camp in those areas. Have you run into (not literally, haha) any ground clearance issues on your backcountry travels?
None. Ever. We don’t go on Jeep roads or anything, but we’ve been fine on any forest service road we’ve ever tried.
We are taking delivery of a 2018 59k in June. I think I will have Sumo Springs installed. Did you do anything to change the front suspension?
Nope! We left the front suspension as-is.
Honestly, we just don’t feel like there’s a need to do anything with it. We love the way Lance handles.
Thanks for the info James. I’ve just bought a 2017 K and immediately ran into problems getting into my uphill driveway without scraping the black/grey water drain. I’ve ordered the Sumo but also am going to have a local suspension specialist increase rear clearance by placing a wedge between the spring leaves. The technician estimates that the clearance may be increased 1.5 – 2.0 inches this way. I figured I’d do this first before having the Sumo installed. Not sure about the interaction between the 2 procedures or necessity for Sumo if the spring wedge works well enough. I’ll update next week.
Interesting. Do come back and update us. I’ve never tried the “wedge in the springs” approach. (Though I did once add an extra leaf.)
James thanks – was looking at Timbren’s also, but I think you ended up with better clearance with the Sumo’s. Any chance you could post the source and/or part #’s I have looked at a couple of sources and the picture does not match your set. Just want to order the right set the first time 🙂 Thanks! Mike D.
Glad you liked the write-up.
I ordered from AutoAnything.com.
(I’m neither endorsing nor warning against them as a retailer. What I can say is I got what I ordered in a reasonable time and at a fair price.)
My order with them stated the following:
SumoSprings Solo Kit – Rear
2015 Dodge ProMaster
(All ProMaster models)
Part #: SSR-304-54
Very much enjoyed the write-up! Thanks for the additional info, ordered them today. Appreciate the good work you and Steph are doing for us B’ers. – Mike D.
Happy to help!
I just found them on Amazon
They weren’t there when I wrote the article a while back, but it looks like these are available on Amazon now!
SuperSprings SSR-304-54 SumoSprings Solo Rear Bump Stop Upgrade Kit
I looked around online under “SUMO SPRING STOP” and found lots of sites seeing Sumo Springs. .but not the stop or spacer you pictured. I will be purchasing a TRAVATO 59K later this year, and adding some clearance is something I wish to have done. Someone provide a link to the stop?
The big spacer in the pictures came with the Sumo Springs for the Dodge Ram ProMaster.
It was part of the heavy duty Sumo Springs kit – nothing else to buy.
Good infor, Jim.
James, what is the difference between Sumo and Timbren’s? Or, do they do basically the same thing?
I’m sure the manufacturers of Sumo Springs and Timbrens would tell you different, but yeah, basically, they are two products that work in the same way.
The Sumo Springs seemed to be a little taller, plus they had that large spacer block, so my thought was they would give a little more height than the Timbrens.
Plus, I had used Timbrens on our last RV, so I thought I would try the Sumo Springs on this one.
The Sumo Springs seem to be made out of some closed cell poly, which I’m thinking should hold up well. Timbrens are made of rubber, I believe.
I am really close to purchasing a travato and the ground clearance is one of the hang ups I have. If the ride quality of the stock suspension is adequate and doesn’t seem overweighted I would think a 1-2″ block under the leaf springs and longer U-bolts would give you a better result without changing the ride. I plan to do this mod and also add coil Spring spacers to front to level it along with a slightly more aggressive tire. The travato will be my mt bike race vechicle and some of the venues are located back on rough logging roads. I have been research euro fiat Ducato forums and there seems to be a lot of owners also looking to level or add ride height to their vans. There is a German company that offers kits. Please keep us updated on your bump stop mod, I am interested to see if it settles.
And as many have said before your site is great.
Before settling on the Sumo Springs, I had talked to Upscale Automotive in Oregon (Sprinter Store). They have a kit available for the ProMaster with extra leaf springs under the axle. That seemed strange to me, even though I really liked their spring kit for the Sprinter. But, as you suggest, the ride on the stock Travato is fine, and I didn’t really want to change it much by adding springs. Upscale Automotive was willing to experiment with something like you suggest with longer U-bolts and spacers. If I were local to them, I may have tried several things like that.
So far, so good on the Sumo Springs. I’ll update this post if they settle and flatten.
I don’t think there’s anything easy that can be done about the rear axle, however. And I suspect ultimately, that will be the limiting factor.
Yeah, the only way to add clearance to the axle would be a redesign or larger tires. If I’m able to increase tire clearance with blocks and coil spacers I might go with a taller tire. This of course will effect gas mileage. The travato is the closest class b to what I’m looking for other then a custom 4×4 sprinter. Bike storage is key for me too, so the era 4×4 floor plan doesn’t work.
Which bike race? I assume it was ‘leapfrog’ type support on the road? How was it finding adequate pull-off areas for the PM?
I’m thinking of using our PM as a follow/support vehicle for some ultracycling races. (or at least those that will allow it, its too wide per the rules of some) I’ve been concerned about its size as my experience has been there’s often spots barely big enough for a minivan.
(I might be in UT next year, want to look at being a race official for Hoodoo 500).
Oh, and definitely curious what your aero mod will be.
Indeed it was the Hoodoo 500 I was in this past weekend! Stef has put a bunch of pictures up on our Facebook page. (Though I was only doing a 300 mile stage race.)
To answer your questions – yes, it was leapfrog support. From a rider’s perspective, Stef didn’t seem to have any trouble finding pullout spots. She was there when I needed her. Stef said that she had to be a bit more selective with pullouts than some of the little Subarus, but not enough to really be problematic. No real complaints from either of us on that account.
Technically, the ProMaster was 2.7 inches wider than the rules would allow. But a quick email with race officials cleared that up for us, and we were fine. I suspect width rules like that are really meant to disallow big old class C and A RVs. I don’t really think they intend to say “You can drive a Mercedes or a Ford, but not a Dodge.” Any race director that wouldn’t allow a van as a support vehicle, or would brand discriminate between vans, wouldn’t be getting my entry fee.
Stef should be writing a blog post about her perspective on the race this week, but generally, we thought the Travato made the ultimate support vehicle.
If that’s your intended use, then I say go for it!
Sounds great! I watched the live tracking on Hoodoo, feel like I should have noticed your name. A good friend was in a 4 person team; George Thomas, Team Race Across America.
Since I have the diesel and its oddball transmission, I do wonder about slow climbs. It will idle in first at just under 4mph. I figure if the rider is going slower than that, probably going to be walking.
I’m thinking long-term of doing a full brevet/randonneur series next year, and then coming down to do the Hoodoo 500 stage race in 2017.
Regarding vehicle restrictions, there are some that have explicitly disallowed Sprinter-type vans (*cough*the FC508). I’m checking with RAAM to see how serious they are about the 80″ width rule.
I can barely stay upright at 4mph!
Nice folks at the Hoodoo. You’d have fun.
Appreciate your write up. This looks like a simple mod as almost a no brainier for a bit more peace of mind. It looks like it may be possible to jack up one side at a time to access the bump stops. With the backend now higher than the front, you may get improved aerodynamics! Cool! All you need now are off-road tires!
This mod was dead simple. I haven’t tested the aerodynamics yet – but I have another mod in mind that should really help there!