This post may contain affiliate links.
Our RV, a former Forest River MB Cruiser, is based on a 2003 2500 Sprinter chassis – with the single rear wheels. From the day we got it, I’ve enjoyed driving it. It actually handles fairly well, considering that it’s a big, heavy, “moving wall” of a vehicle. It’s not car-like, but certainly much better than I would have expected from just looking at it.
But I’ve always wondered if I could make it “better” somehow. Most of the time, I have no complaints at all, but three areas have always bugged me. They are:
- Side-to-Side roll when entering parking lots at an angle, or going over a speed bump.
- The “pushed away then sucked in” when being passed by an 18 wheeler
- General stability in crosswinds.
None of these bad behaviors are at a level I would consider to be “dangerous”. But still, I would be grateful if I could improve them. Our Sprinter RV runs pretty heavy, but not quite fully loaded. I’m under the GVWR and GAWR. The first step I took was to take stock of what I already had. As I acquired it, my Sprinter had the following key suspension components.
- Koni red shocks on all four corners
- 7/8” rear sway bar
- Apparently factory front bump stops.
- Single leaf rear springs
And I’ll add the tires to this mix. Currently, I’m riding on new Firestone Transforce HT tires (E load rated). I intend to make a separate video showing the process I use for this, but I’ve weighed the vehicle, and consulted the manufacturers load tables, and I’ve arrived at what I consider to be the correct tire pressure for my RV (50 front, 70 rear, cold). Just getting the tire pressure right has improved things. But I wanted more.
Enter the Timbren SES kit. Basically, these are upgraded bump stops/springs to replace the factory ones. Doing some research online, the *font* Timbren SES kit got uniformly good reviews for the Sprinter, but there were some mixed opinions on the back kit. So I’ve opted for just the fronts. I purchased the below kit from Amazon.com and it arrived quickly with two day shipping.
Timbren MBFSP35 Front Suspension Enhancement System for Dodge Sprinter 02-09
When the kit arrived, I was a little amused at exactly how little was in it. There are two metal mounting plates, two globs of rubber, and a couple bolts and nuts. That’s all you get for your money. But I suppose if it improves front handling, then maybe there’s some magic in those globs of rubber.
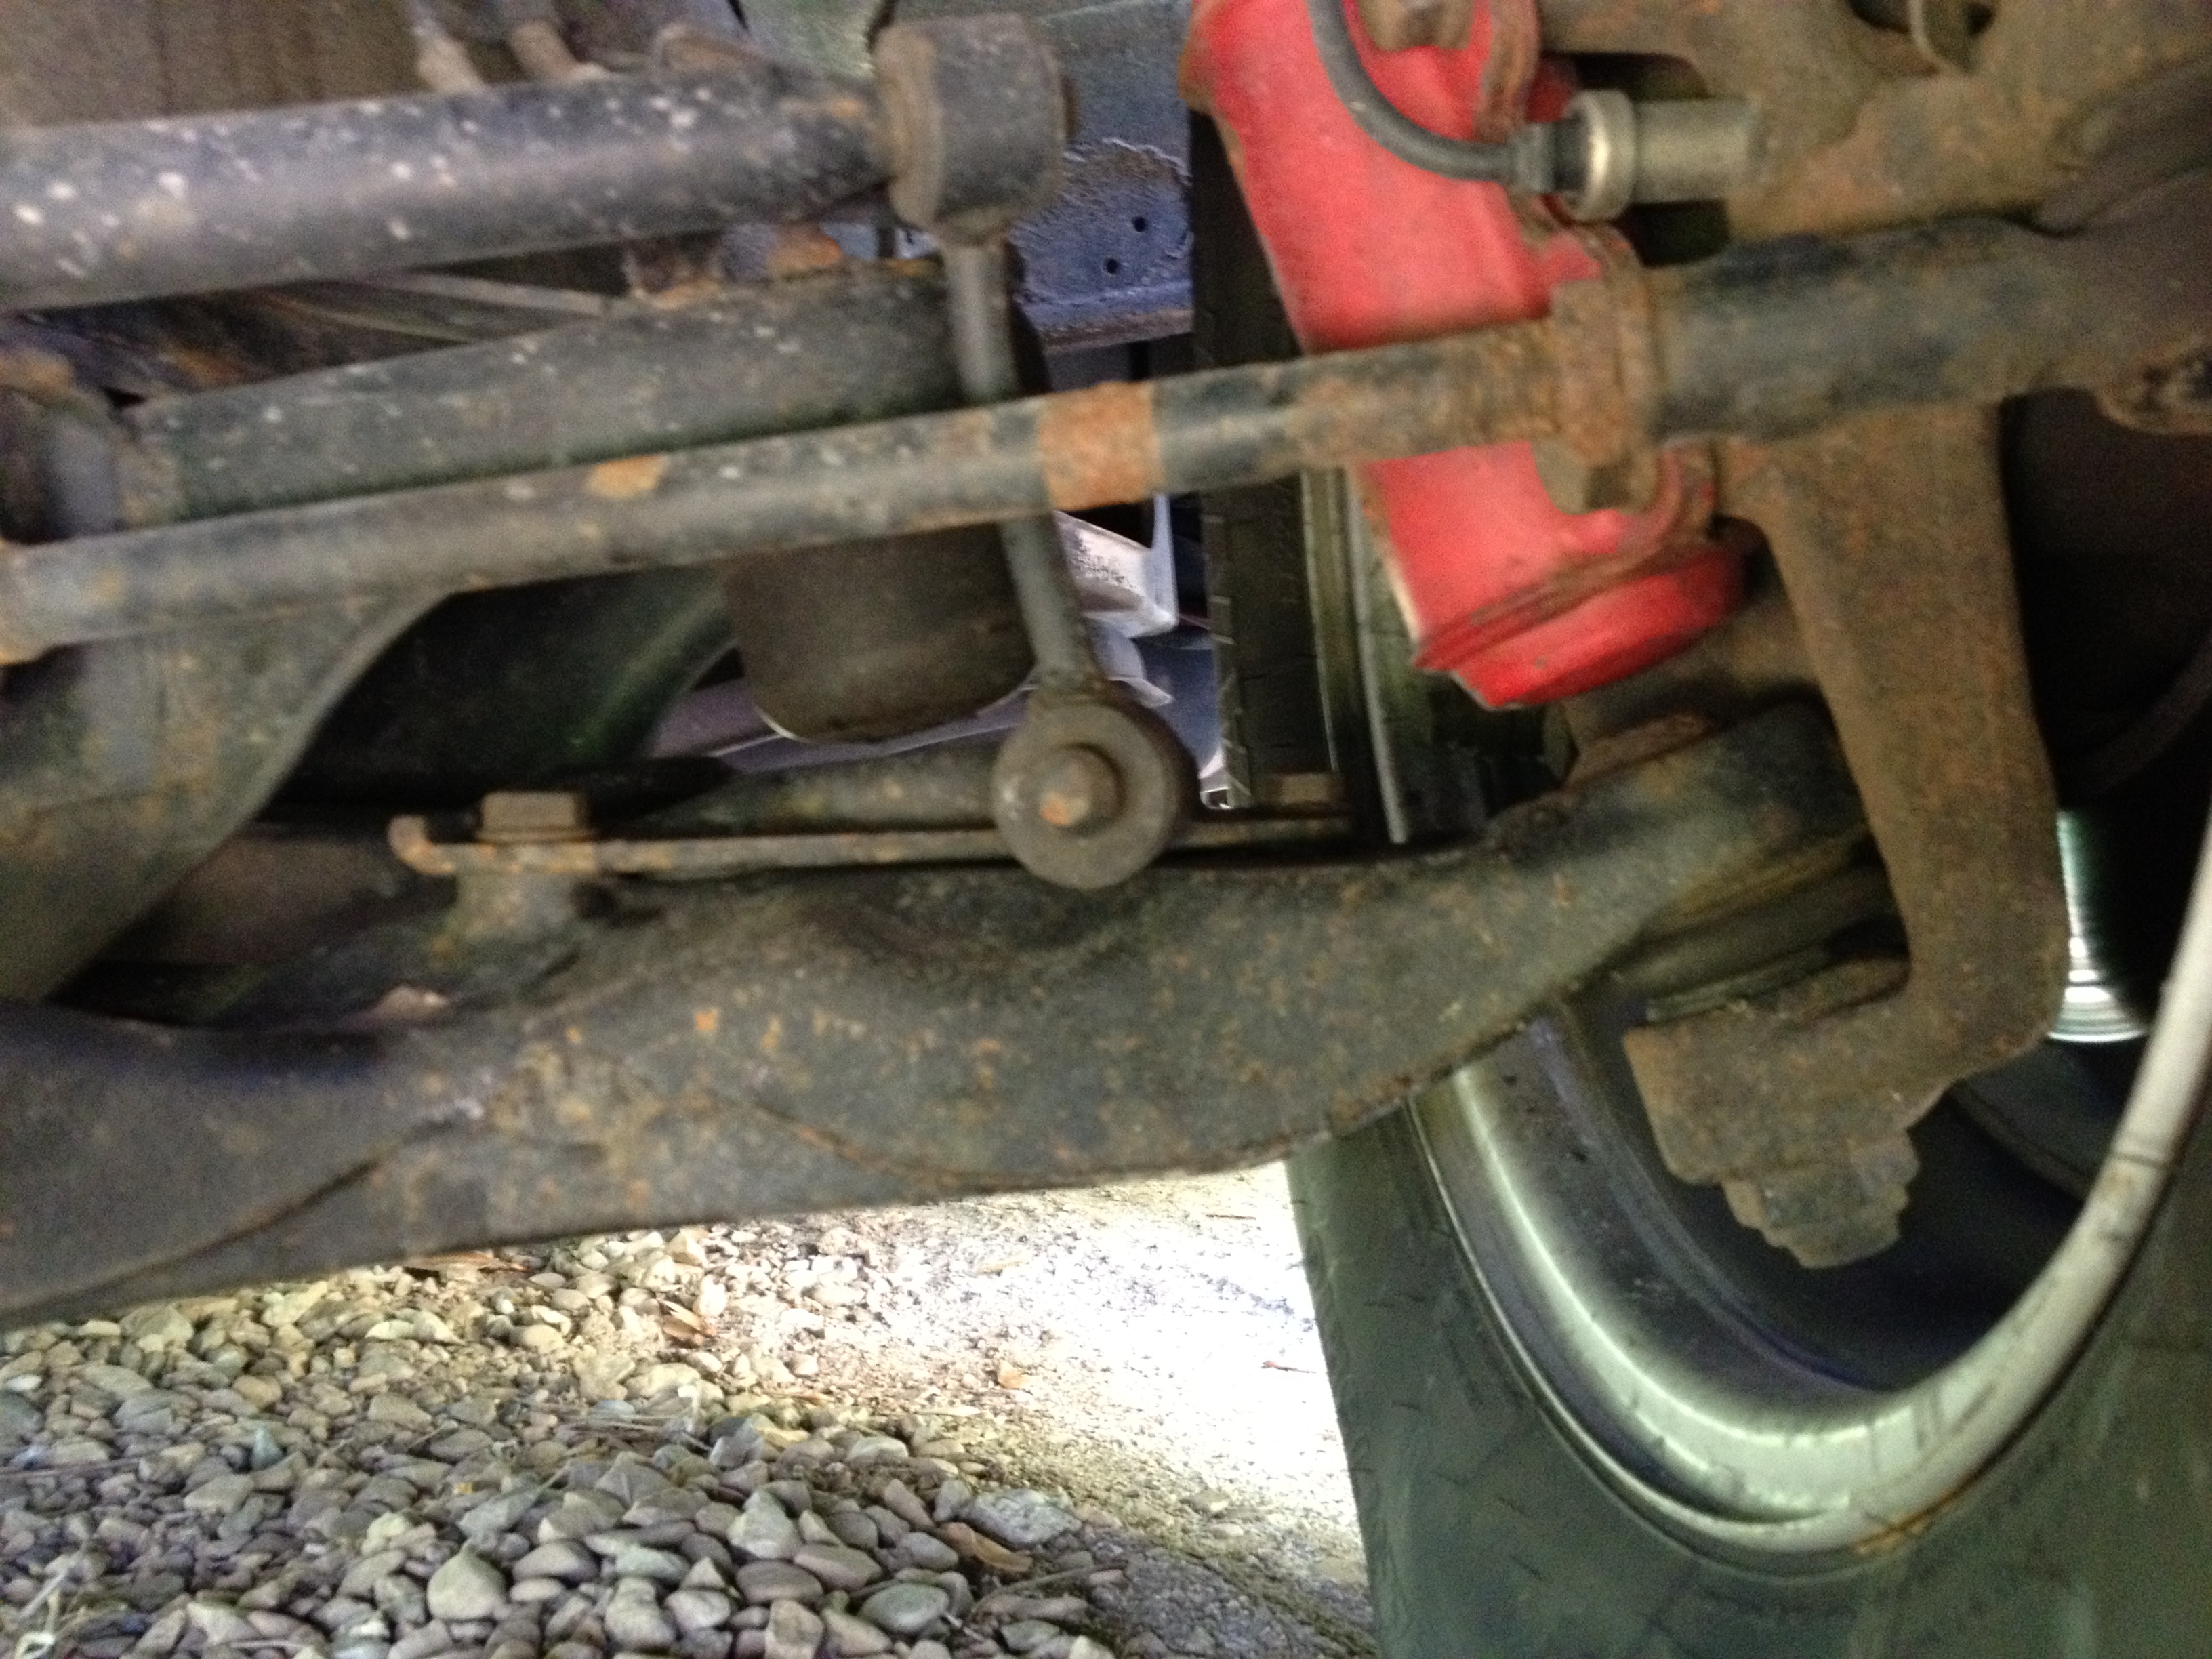
The first step in the install instructions was “raise the vehicle allowing the axle to hang freely,” so right away I knew I was going to need help getting these installed. I contacted AAA Spring of Salt Lake City, and made an appointment to get them installed later in the week. I went in first thing on Friday, and was able to take a few pictures of the install before they chased me out of the shop. Most of the pictures didn’t turn out very well, but this one did:
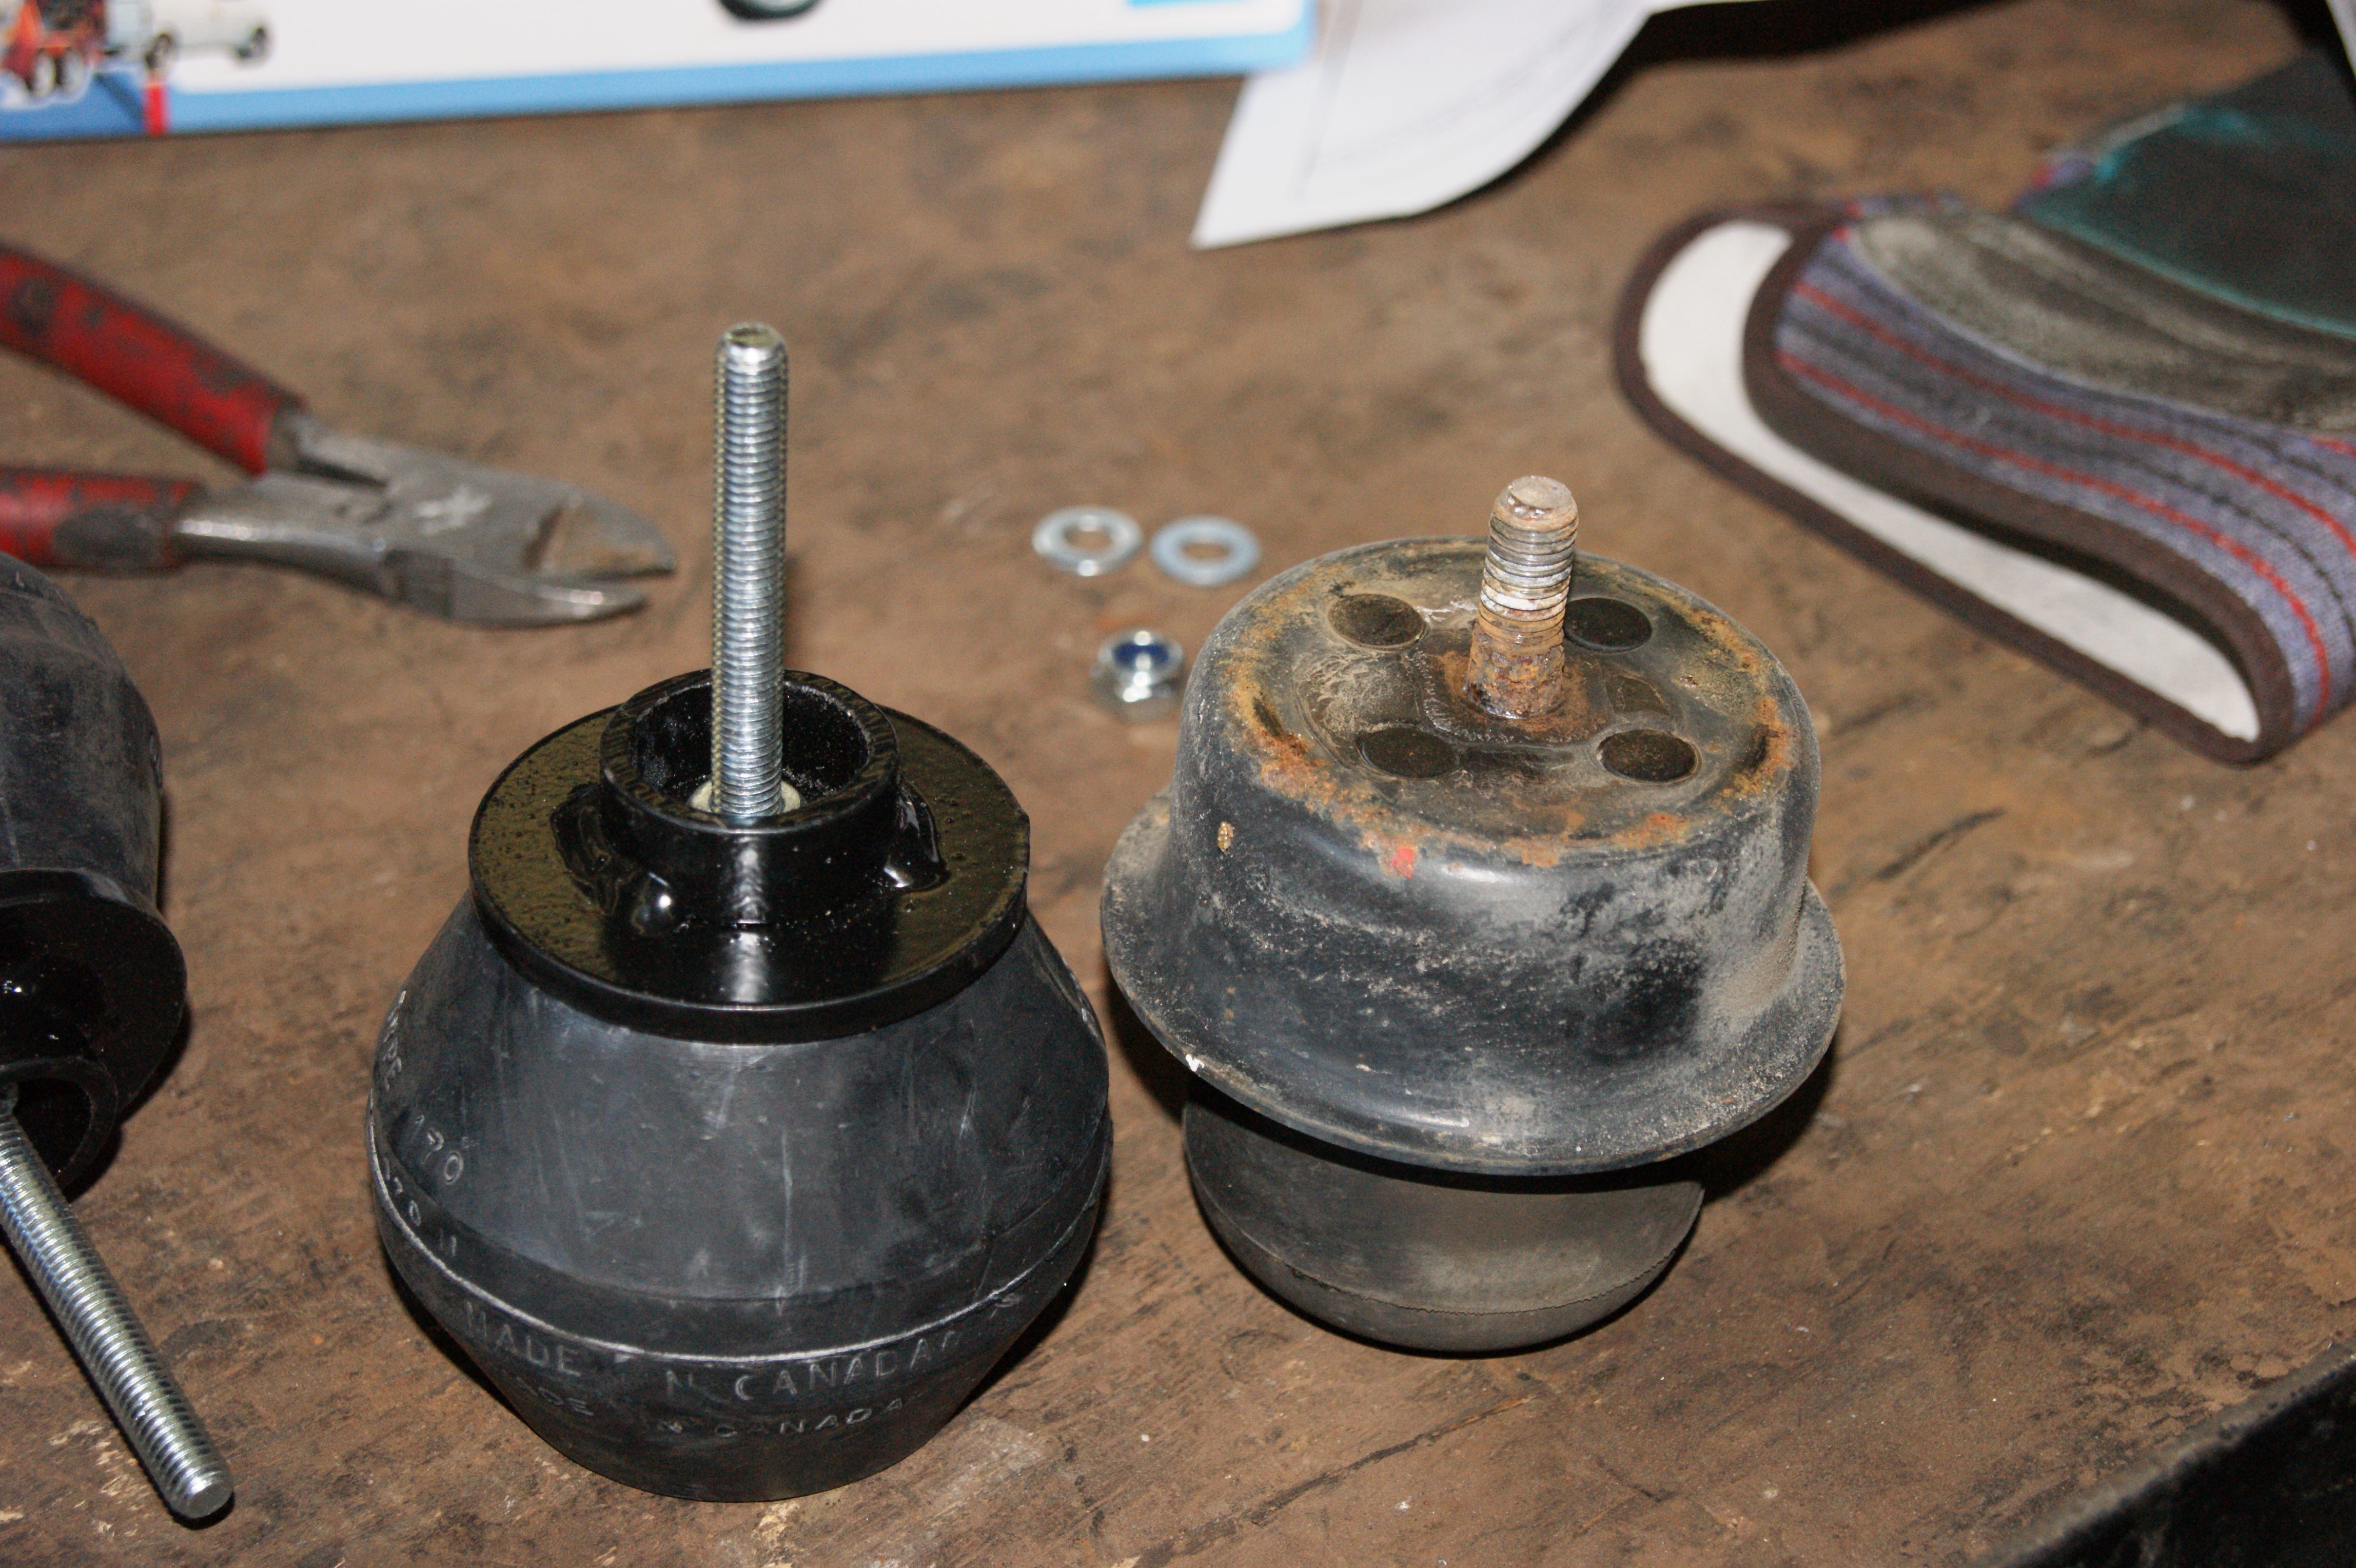
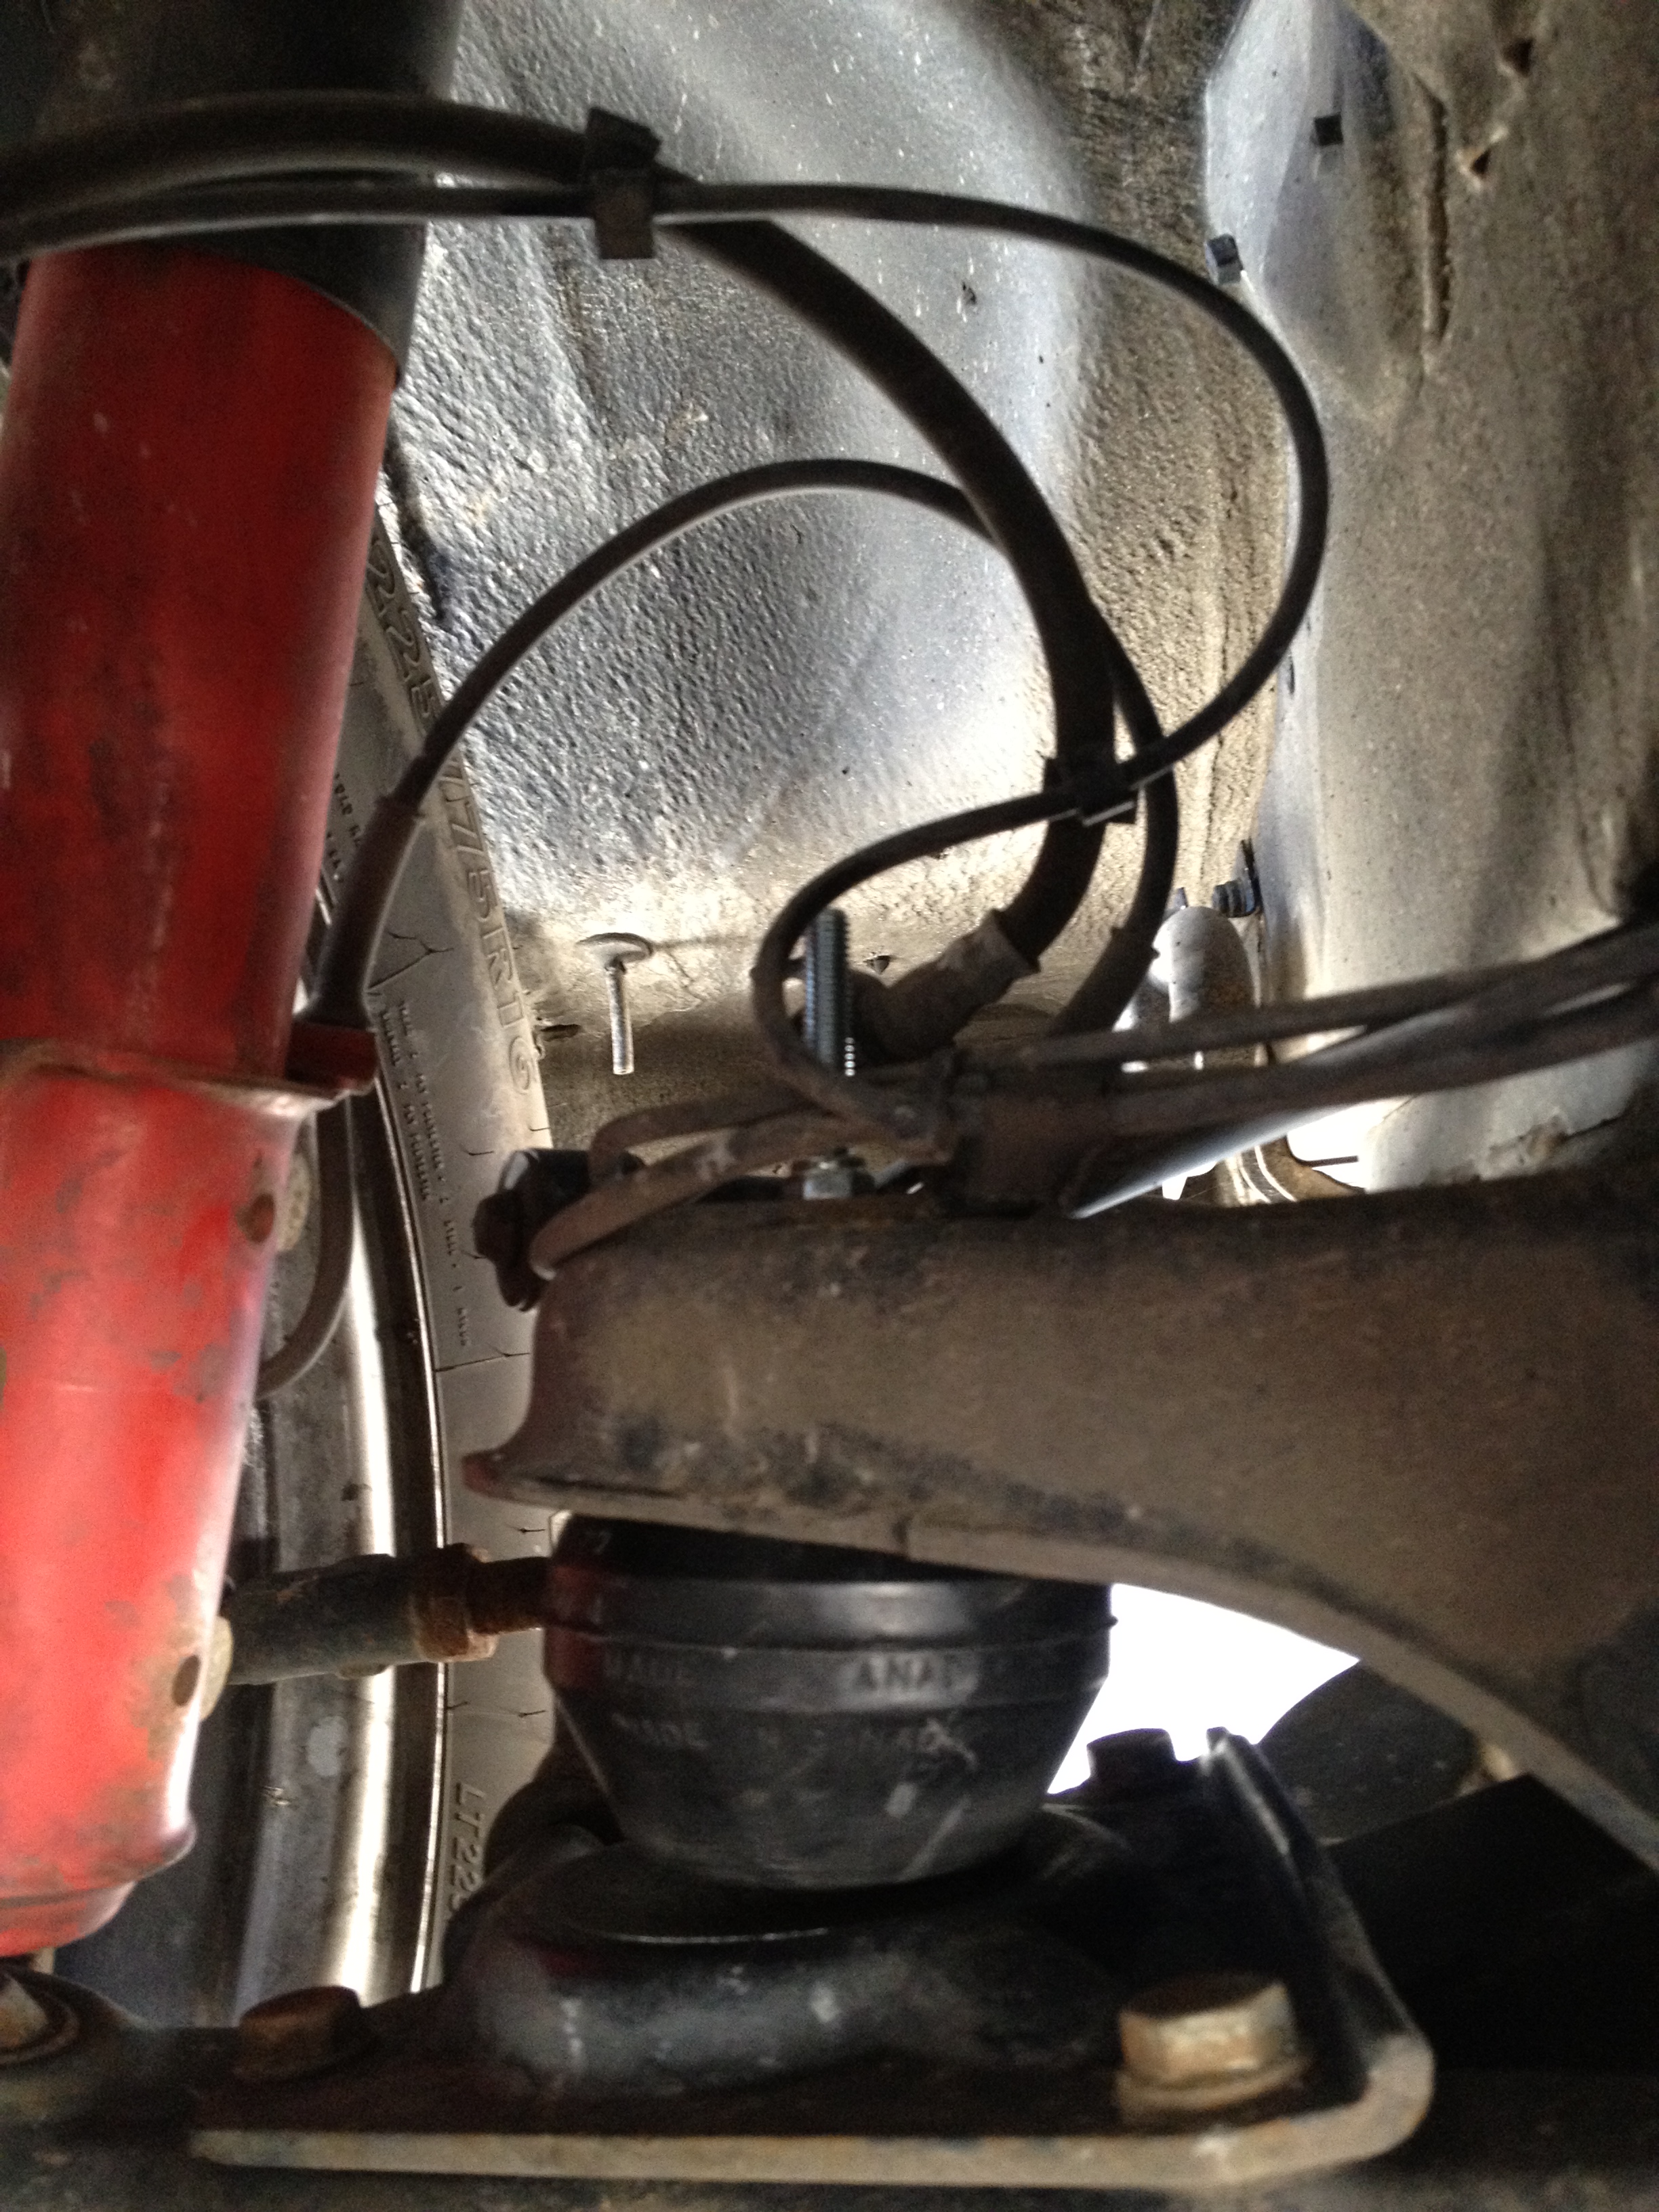
What you can see here is the old factory bump stop on the right, and the new Timbren on the left. One thing that jumped out at us was the unusually long bolt supplied with the Timbren kit. When installed, this projects several inches further above the mounting point than the factory bolt did. This caused us some alarm, but it did not look like it would contact any of the lines above, so we proceeded. Altogether, the install took under an hour. When we finished, here’s what we had. See what I mean about that bolt?
Driving impressions
After driving with them for a while, the biggest thing I noticed wasn’t a change going in and out of parking lots or driveways. And it wasn’t a change in performance in crosswinds. Where I really notice a change is when driving at speed and cornering – on a cloverleaf freeway ramp, for example. The Sprinter seems to roll less and generally be a bit truer in the turns. Also, it seems to just be generally “calmer”. Tough to describe, but let’s just say that changing the radio station will require a bit less forethought. It’s a subtle difference, but I definitely notice, and I definitely like it. Some of this subtlety may be because I already had Koni red shocks helping out on the front. Those without upgraded shocks may notice more of a difference. At any rate, I’m keeping the Timbrens on.
I did call Timbren to discuss the overly long bolts. The gentleman I spoke with didn’t have an explanation for the excessive bolt length. He recommended that I source some replacement bolts. But again – since I can’t raise the front of my Sprinter, that would require the assistance of a shop. He also indicated that I should not cause any problems by cutting down the bolts. They really are kind of scaring me sticking up like that, so I may spend part of my weekend on my back, underneath the Sprinter, looking for a way to take some length off the bolts.
Just another weekend in paradise…


Why not cut them b4 installing?
I agree that would have been ideal. But I don’t have a lift or a suitable jack myself, and the place where I had them installed was a bit… brusque. I wanted to have them put them in, mark the bolt length, take them out, cut the bolt, and then have them reinstall. But I got the feeling I shouldn’t ask.
But if you can pull that off yourself, yes, that’s the way to go.
Looking at fitting these on the front of my 1993 Class A that has some spring sag. I appreciate your notes and photos. Kind regards Rob Wallace. New Zealand
Thanks, Rob! I hope you get your suspension issues worked out. Cheers!
I go to see every day some blogs and websites to
read posts, however this blog gives quality based
content.
Feel free to visit my blog wireless (etesian-tech.com) (mod: link removed)
Update –
As to the super-long bolts. I must have spent a good hour under that thing this weekend. I tried several things, and couldn’t come up with a way to cut the bolts down that I was satisfied wouldn’t cut something else. I tried hacksaws, bolt cutters, Dremmel, but they all either wouldn’t fit, or made me way too nervous that I was going to cut something important.
In the end, what I did was to cut some lengths of rubber tubing, and slide this down over the exposed bolts. Now, instead of sharp bolt threads, anything that comes in contact will hit rubber. I checked the wheels at full-left, full-right, and center, and nothing seemed to make contact at any of those positions, so I guess it is OK.
But if I read this post before ordering my own, I would source some shorter bolts before heading off to have them installed. And don’t get cheap bolts from Home Depot for that – get good ones.