This post may contain affiliate links.
If you’re a human, and you live on Earth where we have this thing called “gravity”, you’ve probably noticed that as time passes, things tend to… sag. This age-induced-sagging is not, as it turns out, unique to humans – something I realized recently when I looked at Lance’s back doors. Lance – our ProMaster Class B RV – will see his fifth birthday this year, and let’s just say that his rear end was showing the effects of time and gravity. The rear doors seemed to work just fine, but on closer inspection, they were letting in a good bit of dirt, dust, draft, and sand. Check out the video to see how I went about fixing it.
So let’s have a look at where we started out. I put this picture up in another post, and it shows the problem pretty well.

An actual photo of Lance’s crack.
The timing for dealing with this was pretty good. I had actually just built a set of double doors for the closet in my shop. So I had recently done some research on door construction, hinge placement, and how to keep doors from sagging. What seemed to be happening to Lance’s doors is sort of the same thing that happens to just about all doors. They droop over time towards the center. On Lance, I didn’t have the option to alter the hinge placement or mounting hardware, but there seemed to be plenty of adjustments on the doors to enable me to tighten things back up.

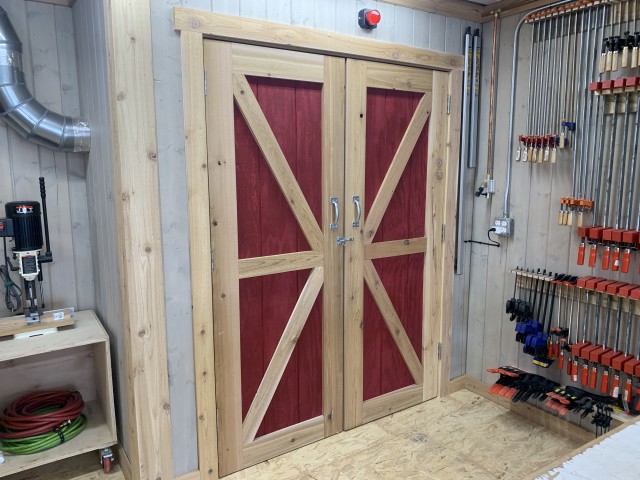
My shop doors. Mounted with 3 inch screws into studs. Top hinges closer to the top of the doors.
I’ve come across complaints from others – RV owners and freight drivers alike – who have gaps in their rear doors. The typical knee-jerk response to that is to start slapping up additional home-center weatherstripping wherever you see a gap. That might work, but it’s kind of a hack approach. I wanted to avoid that, and I mostly did (but not entirely). Hopefully, the video helps others tackle this problem with a minimum of extra parts. And though this video was made with a ProMaster, the rear doors on Sprinters and Transits probably have similar adjustments.
Stuff I Used
Here’s the stuff I used that you might not have readily available:
- Torx Drivers – The adjustments that I made all required a T-40 Torx bit. But if you have a ProMaster, it’s not a bad idea to get yourself a set of Torx drivers or bits. You’ll find you use them more than once. This set that I found on Amazon is inexpensive, doesn’t require a power tool to use, and should be able to get you plenty of leverage when you need it.
- Rubber Bump Stop – I honestly can’t say where the rubber bump stop I installed came from. I just found it in a drawer with a bunch of other random feet, glides, and bumpers. But if you’re missing the bump stop like I was, and you don’t want to wait and order a new one from Fiat-Chrysler, these that I found are pretty much what I installed.
- EPDM Self-Stick Weatherseal – This is not the typical “foam tape”. This stuff is rubber, and should last a lot longer than that tape would. You can find it (hit or miss) at home centers, but it’s also available on Amazon if you just want to have it show up somewhere along your travels.
- Denatured Alcohol – OK. Weird that I’d mention this, but you’d be amazed at how often it comes in handy. Need to clean up any random smutz in your rig? Denatured alcohol. Adding a Command tape accessory? Denatured alcohol. Removing magic marker from the dust collection piping you’re installing in your shop? (True story) Denatured alcohol. It’s fairly safe for paints and it evaporates in minutes. I love this stuff. You can buy it from Amazon, but honestly, just go pick it up at any hardware store.
Tips for Success
- I don’t know what the particular situation on your door might be, so take a careful survey of exactly what needs to be adjusted, and where, before you start. On Lance, we had a bike rack and a storage box on the passenger’s side door, and a ladder on the driver’s side door. These things add weight to the door, and certainly contributed to the sagging. If your doors are loaded differently, you may have a different situation back there. Understand what needs to move where before you start.
- If you have any missing or broken parts – fix those first! In my case, the missing bump stop was a huge help in correcting the rattle from the rear doors. If you have pieces that are bent, damaged, broken, etc – it’s probably a good idea to restore things to working order first, before making lots of adjustments.
- Understand that every adjustment you make back there will likely affect every other adjustment. For example, I didn’t do anything directly to correct the droop and the widening triangle gap at the bottom of the doors. But by adjusting the latch inward, I pulled the door inward. By pulling the door inward, I pulled it further up the ramps on the striker plates. By pulling the door further up those ramps, I raised the inside edges of the doors… and that seems to be what closed up the gap.
- Don’t go leaping right for the big stuff. It would have been tempting to loosen up the big hinges and try jacking the doors up in the center. But that would have been totally unnecessary and probably caused bigger problems. Think scalpel first – dynamite later.
And finally – as Stef was making her holiday rounds when I shot this – a thank you shout out to Fit RV friend Steve, who was my assistant and cameraman for this one.
So there you go – hopefully this is helpful to you, even if you don’t have the exact same problem or van that I did. Sound off in the comments below. Cheers!


I want to get a Winnebago bike rack (for a Travato), but I have one question. On your site and others, I have seen pictures of the Travato’s rear door open when the bike rack is loaded with two bikes. The hinges look quite beefy, but are they (and the door structure) strong enough to do this without problems? I cannot seem to find a good source of information on this. With all your bike experience, you are certain to know.
While I don’t have any special knowledge about the hinges on the ProMaster, I can tell you that we used our RV for years with the bike rack, storage box, and often bikes, all on the back door. We never had any trouble with our door.
I don’t know what sort of bikes you’re planning on, but if it’s two 70 pound behemoth e-bikes, that might be cause for caution. Our 15 lb road bikes were never any issue.
Very helpful. Thanks. We have steel touring bikes (Salsa Vaya), about 25 pounds each. Sounds like there should be no problems.
This is such a helpful video. Showing exactly what I need to see, no drama, no chatter, well lit and clear. THANK YOU. It’s a treat to come across such well-presented advice in a sea of terrible van videos. I’ve got a door rattle that no one seems to be able to solve but I’m almost certain these simple adjustments will take care of it. You’re a hero! Thank you for this.
Glad you liked it!
Can you tell me about the box mounted on passenger side read door? Is it mounted to your bike rack? Thanks very much!
https://www.thefitrv.com/rv-tips/a-custom-exterior-storage-box-for-our-travato/
You have a rare quality being able to use tools as most design engineers are … well not very adept at manual tasks in my experience.
One tip I would add would be to mark the adjustable latches before moving anything so you can go back to the start point if things aren’t working out. On aircraft we would mark right around the latch and then mark the latch and the frame a couple of spots. I have seen maintenance engineers spend hours adjusting doors to no avail because they lost track of the adjustments they made.
That’s actually a really good tip!
James ,
Thanks for all your tips on fixing my crack ! I followed all of your advice and so far it worked out great . I’m in New York State so it’s sitting idle in the driveway for now . Keep up the good work !
Glad it helped!
Now, if we could all just go somewhere…
James, your succinct details and videos never cease to come to our aid! Curiously our 2019 Travato GL rear doors close adequately at the top and bottom, but not in the middle. We will try the adjusting the middle latch area when we return to McFly. Thanks, buddy!
Good luck!
Just the video I was waiting for! Thanks. My 2016 Promaster had light (and dust) leaking through the rear doors from day 1 of ownership. Looking forward to the follow up to see how this went for you.
Well, we’ve been out this weekend, and nothing has come in the doors.
(Although, if it had, it would have been snow…)
We may need to wait for warmer weather for the “dust test”.
great video, As usual
I had a Citreon Relay Van [2005 model] which has the same body shell as the promaster and various other branded Vans here in the UK. The Old Vauxhall[originally GMC] factory here in the UK makes the vans[left hand drive models] for most of the Brand Names in Europe, except Mercedes and Volkswagen, and they share the same body with different front ends and engines. The basic van part of the van has not changed much over the years but has been refined a lot. My van had the same closing mechanism as your promaster but without the rubber bump stop and the striker plates were of a earlier less effective design. I found it essential to get the Left hand door adjusted the best I could first doing pretty much exactly what you did to your promaster and then look at the Centre latch to get the Right Hand locking door closing properly. Essentially The doors only hang roughly right when manufactured and the striker plates and latches achieve the final fit even when new so what you have done is pretty much a “re-jig” of what would have been done in final assembly when new. I am thinking that probably the only time the main hinges would need to be be adjusted would only be after damage to the doors?
I agree. I think the main hinges are solid, and unless you’ve been in an accident, there’s no reason to tinker with them.
Nice! Like that you approached the problem methodically. Now I will have to check out our 2017 Travato’s rear doors for light infiltration. Way to go James. Thanks for sharing.