This post may contain affiliate links.
If you’ve seen my first, or second experiment with the clear RV black tank, you’re probably guessing that I’m not one to just accept the conventional wisdom on RV maintenance topics. You’d be right.
Today, I’m tackling the RV water heater. Most sources will tell you that you need to rinse out the water heater at least once a year. It seems like reasonable advice, and a way to flush out any sediment, or other organic matter that may find its way in there. But I’ll be honest – I’ve not done that for well over two years now! So when I finally got around to rinsing out the tank, I took a probe camera to it so I could see just how bad things had gotten in there…
I’ll be honest, I was pleasantly surprised. We live in Utah, and have fairly hard water, so I was expecting to see a lot of scale and buildup inside the water heater tank. But actually, it wasn’t that bad at all. Sure, I saw a little pitting:
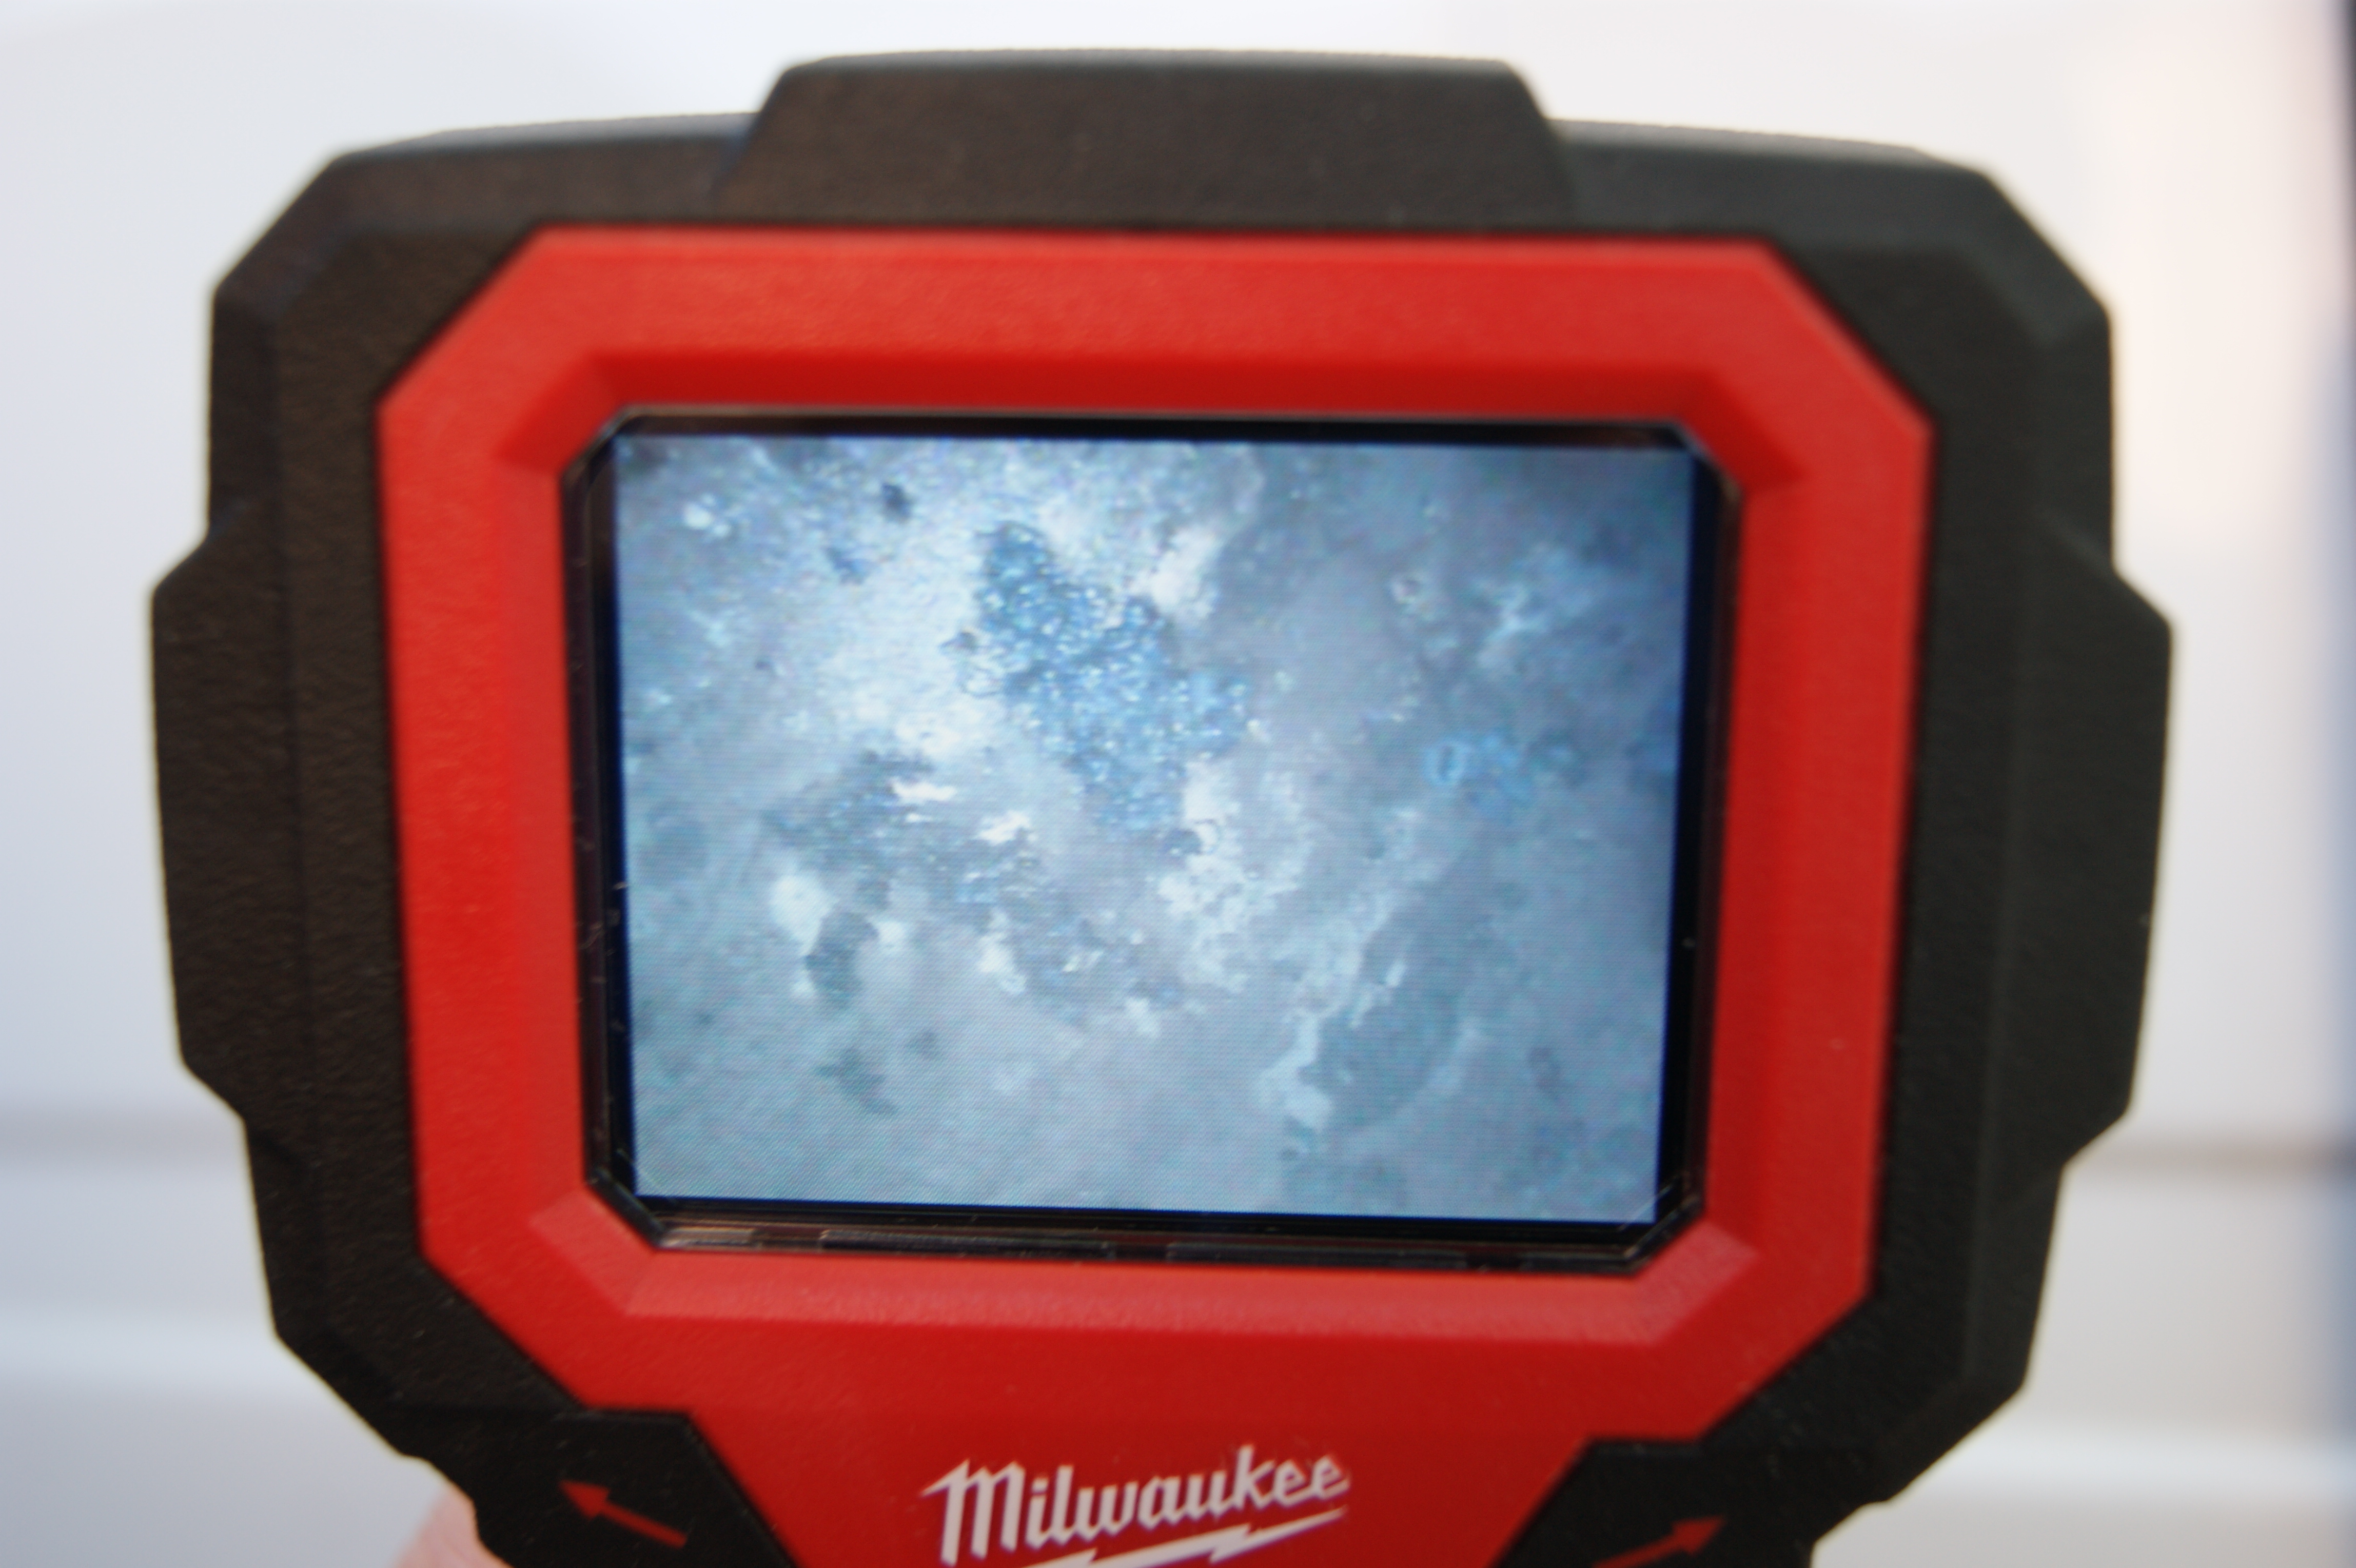
And I could see something that looked like rust (but the tank is aluminum, so I know it’s not rust).

But overall, nothing that had me worried at all. Certainly no mold, slime, sludge, or anything like that. Though I did see several pipes inside and I was able to view the electric heating elements as well.
Now – our water heater is an Atwood, which has an aluminum tank. So there’s no anode that I need to replace. If you have a Suburban, things may look differently for you, and you’ll certainly want to at least replace the anode rod every year. Also, it’s pretty arid in Utah – we don’t generally have to worry about mildew, for example. AND, I generally only fill up with treated culinary water. If you have well water, things may look differently inside that tank. But overall, for my usage patterns, and my tank, rinsing for 15 minutes every year would probably be overkill.
Rinsing out your water heater every year is still probably solid advice. But in my case, it was good to find out that I wasn’t in as dire of a situation as the conventional wisdom would have led me to believe.
UPDATE!
I just re-read this article, and if it sounds like I’m recommending that you never flush out your water heater tank, then you’ve got the wrong impression. I went outside the next day to the spot where I rinsed the tank out, and I found what you see below:

That’s a sand-like sediment that I did flush out of the water heater. So obviously, rinsing it out did some good, and did remove that bit of sediment after at least two years of use. So – to be clear – my advice is … DO rinse out your water heater tank. Once a year, or when you sanitize the water system is a good frequency. But if you forget one year – the world probably isn’t going to end. Cheers!


Most sources will tell you that you need to rinse out the water heater at least once a year.
Uh. Yeah?… I said as much in the article.
Several times.
I’ve had my RV now for about six years and every time I clean out and drain the water out of my water heater I get clear gelatin beads coming out of my water heater and also all of my hot water faucets get clogged up by these pieces of gelatin beach what are they
OK. That’s weird.
Never heard of gelatin beads in a water heater.
Did somehow one of those “Do Not Eat” packets get dumped in there?
James,
Thanks for the video. We are new to RVing, the videos are great. Quick question, where did you find the plastic fitting that goes into the water heater drain plug? After struggling to remove the plug last week I sure would like to find an easier way to do it. Thanks again!
No problem. I actually just found the parts at the local home center!
But you can find them on Amazon as well. I just found this one: http://amzn.to/2wdSSor
(Don’t just blindly order that one though… check the sizes)
The big thing is to use a plastic one, since I don’t know what your tank is made of, and you don’t want to have a metal fitting corrode itself permanently onto your tank.
I have developed a sulfur odor from my Suburban water heater. After talking to many other RV’rs it was mentioned to mix 50/50 water & white vinegar. My plan is to remove the PR valve and use the hole to fill the tank with the water/vinegar solution & let it sit for a day then flush out. Any thoughts on this?
Well, if I had to do it, I would try to do it in a way that I didn’t have to mess with a safety feature like the temperature-pressure release valve.
I think I would rig up a hose from the drain outlet, open the TP valve, and hold the end of the hose higher than the valve. I’d use a funnel or something and fill it that way. That’s just how I’d approach it.
Hi Folks,
I just finished viewing your hot hater flush clip. I felt your pain using the old standard box wrench to take your fitting off so you could flush the tank. Did you ever try using a quick connect water fitting ? An example would be the brass fitting that has a push on pull off connection. If it works it might save you some pain…ha! Just a thought!
Never tried a quick-connect. That might have worked, but you have to be careful about what you leave screwed in there. The tank is aluminum, and you don’t want to put any metal in there permanently that will react with the aluminum and fuse to it through galvanic corrosion. That’s why the drain plugs that come with them are plastic.
Once I came up with my ball valve solution, I never looked back…
You should be able to raise the drain hose above the level of the heater tank, add vinyl tubing if necessary, and pour a vinegar mix to fill the heater tank and remove oxidation. Not sure how high the water column needs to be to fill the tank but that’d be what I try.
I’m embarrassed to say I’d never thought of that. It’s a fantastic idea! And another benefit of having the drain hose modification.
Thanks for the tip!!
Regarding the drain plug removal. Perhaps a crow’s foot wrench would work for you. It’s like an open end wrench cut off and attached to a ratchet/extension.
Jerry – I bet you’re right, and a crow’s foot would help. If I clean out that tank more frequently, I’ll look into one.
But the drain valve makes it infrequent enough that I’ll probably stick with what I have… and keep complaining about it! lol.
Thanks for reading!
We are looking to put a little house on our privare lot in a gated rv community. We must put this up on our old trailer,30′.
I have ben learning more and more about rvs.
Why did you leave out the grey tank on the black tank cleanout test? It seemed to me that you wash the black tank with the grey tank. Maybe if you used something like plaster of Paris or old paint, the testing would be more accurate.
I do understand that the deposits in The tank are for final cleanout.
Thanks for the great video!
Glad you liked the videos! I didn’t make a grey tank too, because, well, that would have cost twice as much! lol.
Hi James, thanks for the tips! I think The RV Geeks are great too, here’s their version of water heater tank cleaning:
https://www.youtube.com/watch?v=IKg0R9oiMP0&list=PL741CBA6040D79E45&index=4