This post may contain affiliate links.
A few months ago, I wrote a post outlining some mods I wanted to do to Lance, our Winnebago Travato. We turned Parky back in to Winnebago at the end of last year, so I was excited to be able to mod again. I’ve been plugging away at my list ever since, so I thought it might be a good time for an update. But first, the Parky update.
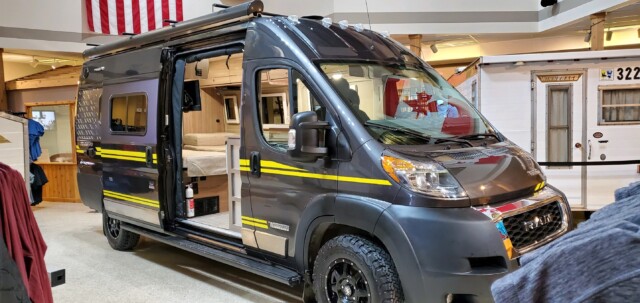
They washed him! Honestly, I don’t think he was that clean the whole time we had him!
Parky made it back to Forest City, Iowa, and is now in residence at the Winnebago Visitor’s Center! If you ever wanted to check out the inside of Parky, but didn’t want to have to look past our dirty laundry to do it – here’s your chance. No word on how long he will be at the Visitor’s Center, but he looks to be enjoying his well-deserved rest.
OK. On to the Lance mods.
At this point, I’ve crossed everything off my list except insulating the pizza oven. (And if you want to my complete list of Lance mods – like, from the beginning – let me know and I’ll make a post of it. There’s a spreadsheet. Though it’s a little, uh… long.) Some of the recent mods, I’ve addressed in other posts or videos, like these:
- Adjusting and Sealing ProMaster Rear Doors
- Changing your Cabin Air Filter
- And we talk about window coverings in our video on winter RVing
Which leaves just three mods worth talking about.
1. Maximizing Storage in the Back Wall
This is actually the third time I’ve dealt with storage on the back wall. It wasn’t on my radar to redo, but I’ll blame Mel our cat for this one. I got so sick of all the cat hair sweeping, I finally bought a handheld vacuum to preserve my sanity. It’s a Dyson. If you want to know the exact model I settled on, it’s this one. (As a bonus, it also picks up sand.) Anyway, when I couldn’t find a convenient place to store the new vacuum, I decided I needed more space. So here we are. Take 3.
The first time I modded the back wall, I installed some simple products from Organized Obie to get us going. The second time, I made a small but not super-functional shelf unit in a somewhat-entertaining video. But THIS time, I wanted to really squeeze all I could out of that back wall. I think I’ve done that now.
In the new storage area, we’ll store our camp chairs, table, tool kit, gallon of engine coolant, bike helmets and cycling shoes. That made room for the new vacuum INSIDE!
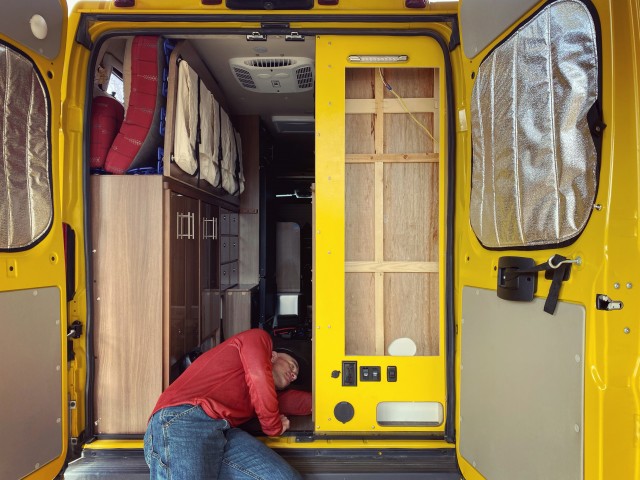
There were really three main steps to getting this done. The first, was to remove the back wall completely. You pretty much have to do this if you want to maximize the storage, because there’s a vent pipe in that wall that runs at a weird diagonal. The diagonal pipe gets in the way of any attempt at a really large storage area, so you just have to relocate it. And you can’t relocate it without removing that back wall.
Shout-out to Marcus Stokes (from the Travato Owners & Wannabes FB group) for a quick video he did on how to remove that back wall. Marcus, you saved me a couple hours figuring things out.
Once you’ve removed the back wall, I can guarantee you won’t put it back the same way – just in case you ever want to remove it again.
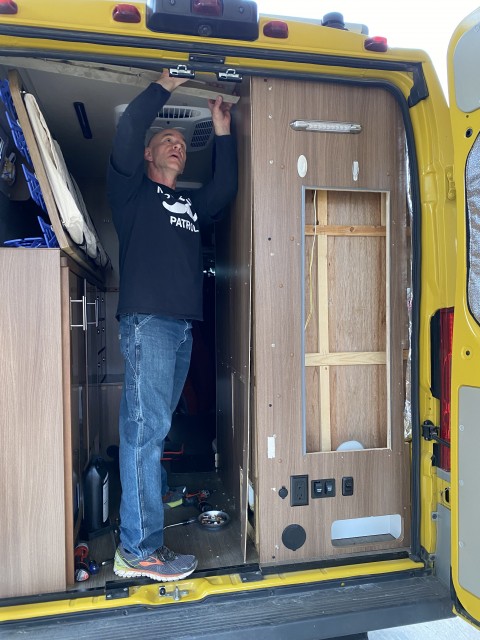
I had to remove some of the trim to remove the wall, so I used the opportunity to add more insulation…
With the wall removed, it’s pretty easy to cut the pipe, and straighten up the pipe run with some flexible elbows. You can see the pipe on the left side of the opening in the picture below. That was about as far over as I could get it.
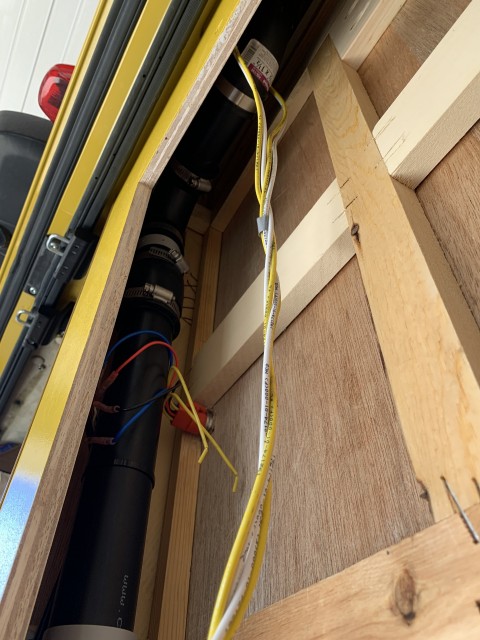
The vent pipe is on the left. You can also see the back side of a new switch. We’re getting to that…
Another benefit of completely removing the back wall is that it makes it really easy to get super-straight cuts on the wall. It also makes it really easy to refinish the wall, which is what I did. You can see the raw wall drying here.
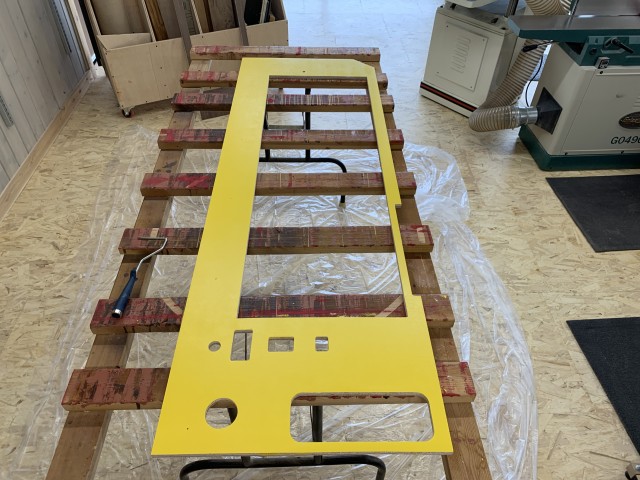
I can’t tell you how gratifying it is to sand down a “picture of wood” to reveal… WOOD! There’s actually wood underneath the picture!
That wrapped up the first step. The second step was to build a box to go inside the opening I had just made. I went round and round about what to make it out of, but in the end, I just went with wood that I painted with an enamel. In some ways, it’s just a box, but there are a couple highlights worth mentioning. The first thing is: notice the profile! It’s curved to match the curvature of the rear doors so that I could get the most room possible inside the box.
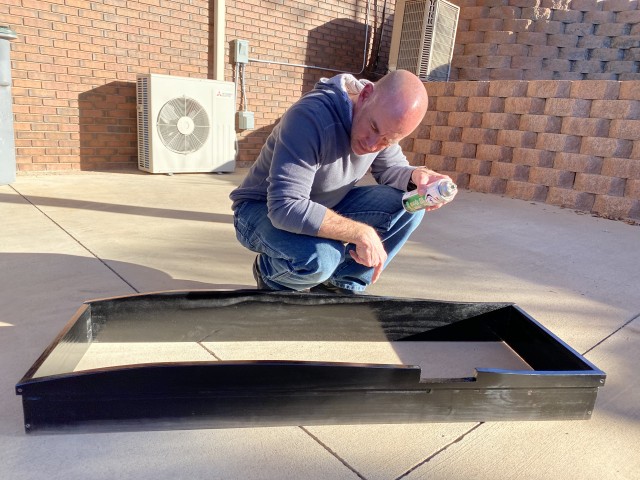
Yeah. Spray paint. I wasn’t feeling that creative. But I didn’t actually spray paint it there in the driveway, because once, when I was fourteen, I spray painted something in the driveway and mom yelled at me and made me clean it up, which took forever.
It was easy to match that curve once I realized I had a template. There’s a narrow piece of trim on the passenger side in the back. You have to remove it to remove the back wall. It’s curved to match the rear of the van, so all I did was trace it out on the new box sides. Perfect fit. In that same picture, you can also see the notch I had to cut in the side to allow for the rear door handle to open. The other thing to notice about the sides of that box are that there’s a giant-wide rabbet along the back 4 inches of it. What I mean there is that the back of the box is smaller than the front of the box… if that makes sense. This picture shows it better:
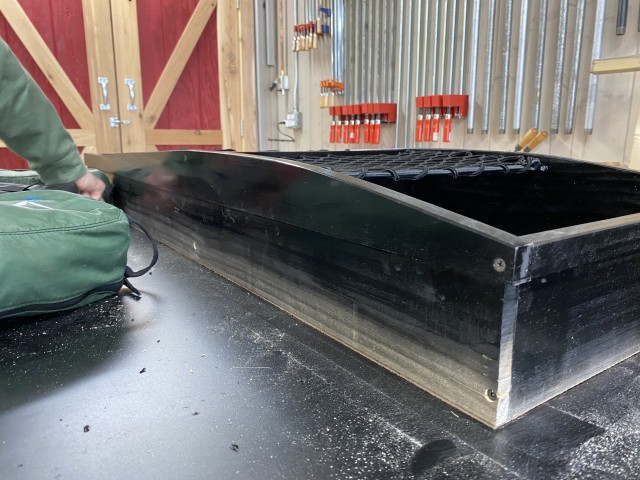
I got two benefits from doing it this way. The first was that I didn’t lose as much of my storage width with thick sides on my box. Instead of 1 1/2 inches, I only lost 3/4″ with the sides. The second benefit was that the larger, visible front parts overhang the rectangular cutout in the back wall and camouflage any irregularities in that cut. Maybe I’m not describing it right, but it makes sense when you see it.
With the main part of the box built, I just needed to add a couple shelves. I used the exact things I wanted to store to set the shelf spacing. I recycled some Organized Obie netting I had on hand to make the mesh retainers for the shelves.
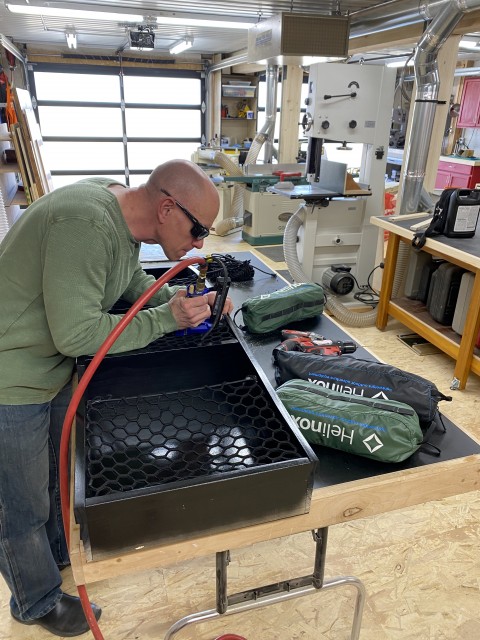
I once ordered a really large Obie net. I didn’t use it for long, and now I’ve recycled that one net into about six other things in and around the RV.
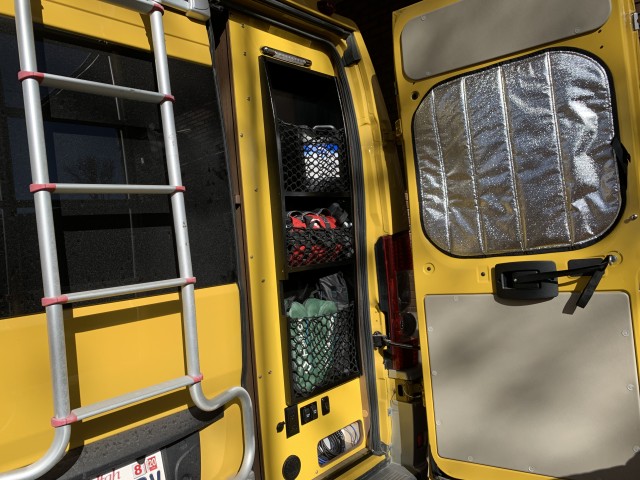
That wrapped up the box. Then, the third and final step was to get it all installed (or re-installed). That part went really smoothly.
It’s amazing to me how well I matched the yellow.
This next picture shows the difference in storage area size from before to now. (And this doesn’t even account for the increased depth.)
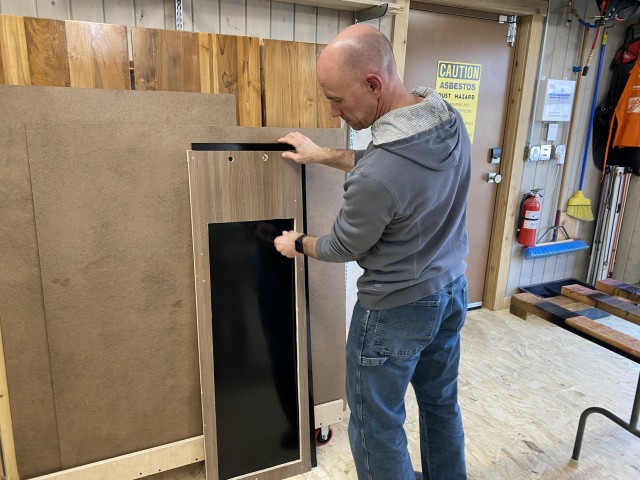
The black part is the size of the new cabinet. I knew I saved that cutout for something!
2. Installing a New Pump Switch in the bathroom
While I had that back wall out, it was really easy to wire in a new pump switch in the bathroom. I installed this lighted switch:
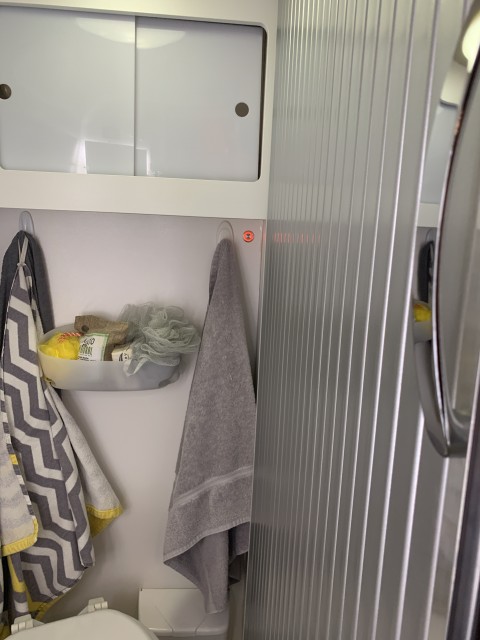
It’s the red light. Finally! No more, “Honey, can you turn on the pump?” awkwardness.
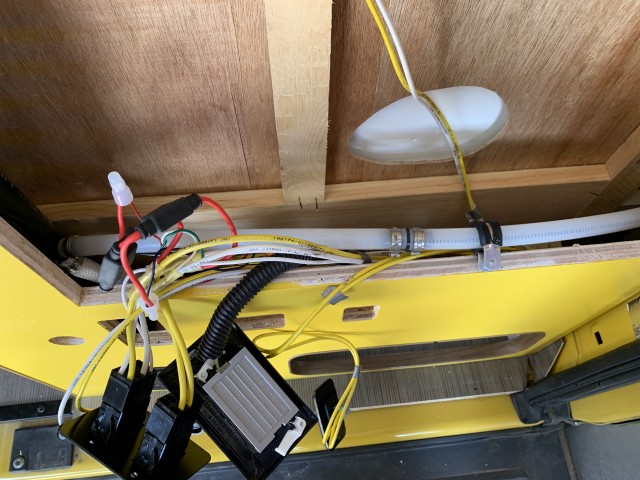
This is the switch I used. I just got it off Amazon: Waterproof Stainless Steel Lighted Momentary Switch. The main thing I had to be careful to do was to mount it someplace where it wouldn’t interfere with the large cabinet I was about to install. You can see the back side of the switch in one of the pictures above (the 4th photo down). As far as wiring the switch, I was able to just piggyback on the existing pump switch in the back wall – though the wiring does look somewhat of a mess in the below picture. I threw a couple inline fuses in there, which contributes to the mess.
Inline fuses… Senie approved!
3. Upgrading the mirror with back-lighting
From day one, I’ve had trouble shaving with the mirror in Lance’s bathroom. The problem wasn’t the bathroom, or the mirror. The problem was the lighting. The bathroom was lit with one lone bulb, three feet BEHIND my head and on the ceiling. No matter what, my face and neck were in the shadows. I always managed to get a shave, but often times I would resort to using the light on my cell phone so I could see what I was doing. Finally, I decided I’d had enough. This is what I came up with:
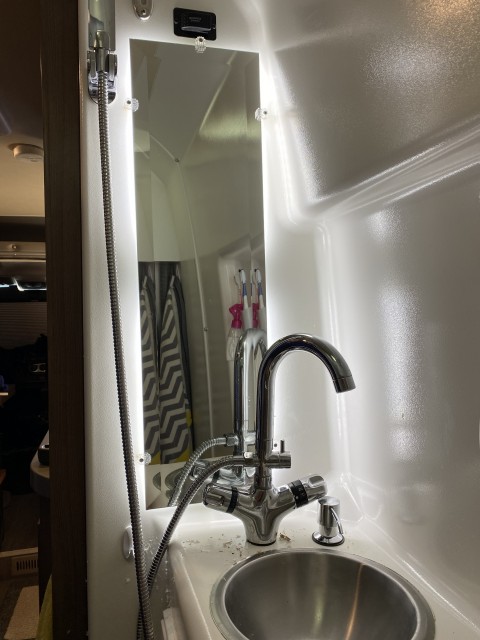
This is as trendy as I get…
That’s not exactly what I set out to make, but it turned out pretty cool. I had originally bought some waterproof LED light strips thinking I could just put them around the outsides of the mirror. But they were INSANELY BRIGHT! I showed Stef and we were both seeing spots for an hour afterwards. So that easy solution was off the table. Then I had the bright idea (ha!) to put the light strips on the back of the mirror and bounce the light off the reflect-y white walls. So that’s exactly what I did.
Removing the mirror was more complicated than I thought. Besides the six mirror clips you can see, there’s about five linear feet of glue holding the mirror to the wall. That took me an hour with a hair dryer to remove. Once the mirror was off, I stuck the LED strip lights to the back, and also epoxied on some nylon bushings to force the mirror to sit a half inch away from the wall. You can see all that here:
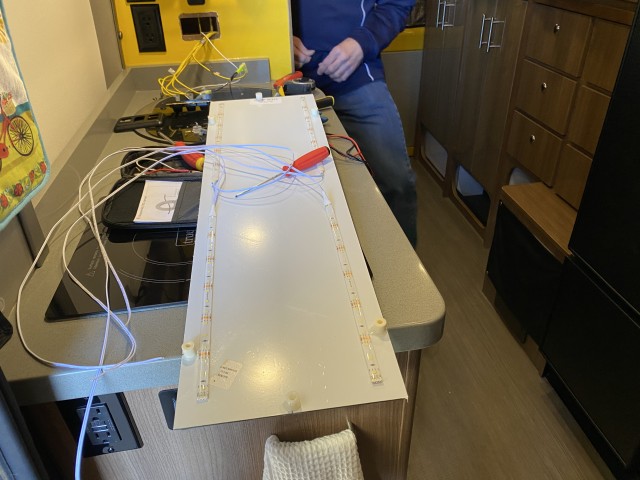
I used another set of nylon bushings underneath the mirror clips so they all mounted up correctly and hold the mirror one half inch from the wall. The wiring was messy (because I used four light strips), but not too complicated. I just wired them in to the switch that was already there for the bathroom lights.
Stef says my tools are ‘pretty’ … ???
And that was pretty much it. I think it turned out better than expected – which isn’t saying much, since I was expecting to stare at stick-on light strips…
Looking Ahead
There’s only one more project I really want to get done on Lance before it gets hot, and that’s to insulate the pizza oven. I’m both looking forward to that one, and dreading it as well. I had a second van lined up to be my guinea pig, but he’s since chickened out, so I’ll be working that one without a net – which is how it usually goes.
Once that’s done, it’s a full summer of cycling and RVing. See you on the road!


The backlit floating mirror is a great idea, James. It looks like it solves the basic problem with putting proper makeup lighting in our rigs – they’re not wide enough to put the lights at the right angle. I tried adding strip LEDs on a dimmer to our KL medicine cabinet – they light the face, but shine right into your eyeballs. Eyeglasses make for really fun reflections. Bouncing the light off the rear and side walls solves that.
Stef LOVES the new lighting.
It hasn’t helped with *my* makeup though…
James – you might want to tackle the pizza oven when Stef is on a trip for a week. The disassembly of the cab trim you have to do is near total, unless you want to risk putting some serious creases in the ceiling. Oh, wait, you already changed that out…
The images on the web about this are the stuff of late night horror videos…
The link for the LED strips actually links to the switch on Amazon. Please fix it. Thanks very much.
Done!
Thanks for letting me know.
JAMES,
Regarding your bathroom mirror mod. Great job. You mentioned you used a heat gun to remove the existing mirror. Was it attached with “mirror-o- mastic”? Were you able to reuse the mirror or have to replace it? Did you hardwire your led light tape or use a plug in? I like the Mod and I’m going to do the same. Any suggestions would be much appreciated.
Thanks Rob Farrell
Not as completely hard-core as a heat gun. I just used a hair dryer.
I don’t know what brand the glue was. It was kind of like dried caramel. It wasn’t stuck to tightly to the mirror – that just popped off. But it was stuck like crazy to the wall, and that’s where I needed the hair dryer.
Yes, the LED light strips are hard wired into the existing switch that was already operating the bathroom light.
Stef is wondering if an “Intervention” is needed…….. Mmm.. not unless she hears “meowing” from inside the latest project.
https://static.boredpanda.com/blog/wp-content/uploads/2020/02/5e37fcba534db_zgX9HCt__700.jpg
okay this impressive wall redo is well beyond our capabilities…but where did you get that cool backpack carrier for Mel? Our daughter just adopted a cat and that looks like a very good solution instead of schlepping around an awkward carrier!!
You must be a newsletter subscriber!
The backpack is this one: Lollimeow Pet Carrier Backpack
I like the idea of low power drawn background or nite lighting. Using LED strips and your principles, I crafted a bezel that fits around my overhead vent van and put it on a rheostat so the light level can be adjusted to conditions.
Cool idea!