This post may contain affiliate links.
If you’re new to solar power, or you’re thinking about adding a solar power system to your RV, there’s a bit of a learning curve to get over. Let’s try to demystify some of that with this rundown of everything you need to know.
Why Solar?
It’s tough not to like the idea of free power. The sun doesn’t send you a bill every month, and it offers an all-you-can-use source of energy. So, once you make the initial fixed investment in a solar power system, the energy that you get from there on out is essentially free. Perhaps more importantly than being free, solar power is a way for RVers to boondock far from the reach of shore power cords. Even if you only occasionally dry camp, solar can certainly make a difference in how long you can keep the lights on when you aren’t able to plug in.
First Step: Understanding How Solar Works
I’ll be concentrating here on permanently installed solar power systems: those that are wired right into your RV’s house batteries and electrical system. There are plenty of portable and all-in-one systems on the market, and those are fine too— but they can’t match the ease and efficiency of an installed system.
Solar is an Elaborate Battery Charger
It’s best to think of a solar power system’s main job as keeping your house batteries charged, or replacing the energy you use day-to-day. This concept is something those new to solar really need to wrap their minds around. I’ll try to explain:
Solar power systems produce power for the 12 volt DC side of your RV’s electrical system. They don’t produce 120 volt AC power directly. So, viewing solar as a battery charger is a good way to think of it. It’s also best not to think of running anything directly from solar power. If you can’t run something today from your batteries, it’s unlikely solar will let you run it. But if you can run something from your battery bank, solar will help you run it for longer.
Solar Produced – Power Being Used = Amount Charging Batteries
During the day, take the amount of solar power you’re producing, subtract the power you’re using right at that moment, and the remainder is what’s used to charge your batteries. And that’s a good thing, because most of us like to use electricity at night as well as during the day. Solar panels don’t work so well at night, but your battery does.
Second Step: Understanding the Components
There are three main components required for a functional RV solar power system: The solar panels, the charge controller, and your batteries. Let’s look at each of them.
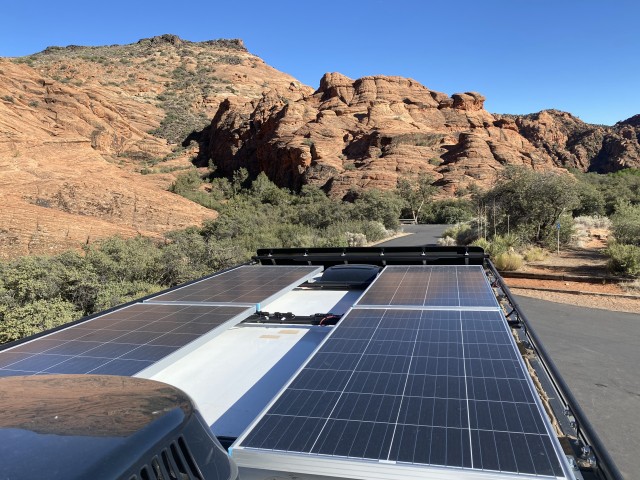
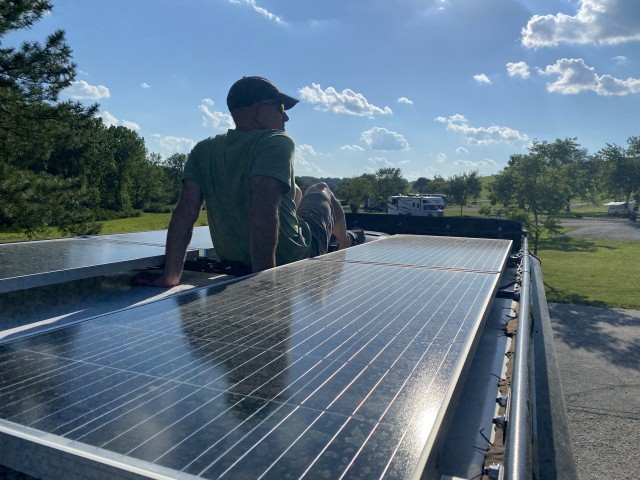
Solar Panels
These are the most visible components of the system, and they’re a place where you can spend a lot of time looking at a dizzying array of choices. Solar panels for RVs are sold in a variety of wattages from 20 watts to 200, and physical dimensions that range from notebook sized to a square yard. Typically, most of us want to get the most wattage we can in the space that we have available – usually our RV’s roof. So picking the right solar panels can feel a bit like a puzzle. And on top of the different wattages and sizes, there are also different technologies.
For example, you may hear about monocrystalline panels, and polycrystalline panels. And while it’s true that monocrystalline panels are slightly more efficient, both kinds of panels are ultimately rated in watts. And 100 watts from a solar panel is 100 watts, regardless of the panel that produced it.
Since both types of panels work, rather than get too wrapped up in the chemistry, I recommend letting your decisions be guided by capacity and available roof space. (We are talking about RVs, after all… roof space is limited!) You’ll find that monocrystalline panels will tend to be physically smaller for the same output, so that may play into your decision.
You’ll also see rigid and flexible panels. Flexible panels claim to be lighter (they are), more aerodynamic (they can be), and easier to mount to your rig since you don’t have to drill holes (also true). Traditional flat panels are less expensive, generally more durable, and have typically longer warranties. But here again, they both work, and the output power of both is rated in watts. So I recommend letting the flat vs. flexible decision be driven by other factors. Teardrop trailers, for example, tend to look better with flexible panels on their curved roofs.
The Solar Charge Controller
You don’t just plug solar panels directly into your batteries… life’s not that easy. Solar panels generally produce voltages and amperages that vary a lot and aren’t well suited for charging your house battery bank. The voltage produced by a typical RV solar panel can be as much as 24 volts, and it fluctuates with passing clouds. To account for this, we have solar charge controllers.
Solar charge controllers are installed between your solar panels and your batteries. They take the output from the solar panels, and convert that into a charging profile that is suitable for your batteries. Most solar charge controllers sold today have charging profiles for lead acid and lithium batteries available for you to select from.
The devices themselves have simple connections, with typically only + and – connections for your solar panels, and your batteries, and maybe a data cable connection for a monitor panel.
PWM vs MPPT Controllers:
There are two main types of solar charge controllers available for RV installations today. PWM and MPPT. They both work, but there are some differences you need to be aware of.
PWM stands for “Pulse Width Modulation”. These controllers are less expensive, and they work well, but they’re the less efficient of the two. They tend to work best when the voltages output by your panels are close to what your batteries need for proper charging. Since most RV solar panels typically put out 16-20 volts, and most RV batteries need to be charged at around 14 volts, that’s a reasonable match if your panels are connected in parallel.
The other type of controller is MPPT, which stands for “Maximum Power Point Tracking”. These controllers are more efficient, but also considerably more expensive. MPPT controllers work better for panels with higher voltages, panels wired in series, long wire runs, cold weather situations, and larger solar arrays. If those things sound like you, then investigate MPPT controllers. (This MPPT controller from Victron is the one currently installed in our RV.)
If your rig came with a solar power system pre-installed, you can be sure that the charge controller is appropriate and matched to the system. Upgrades are always possible, so one could switch from a PWM controller to an MPPT, for example, or maybe add more panels. But before you start thinking about those types of additions, let’s turn some attention to the third, and arguably most important, component of a solar power setup.
Your Batteries
The biggest difference between a grid-tied home solar system and RV solar is that, in an RV, you’re not going to sell your excess power back onto the grid. So if your RVs solar panels produce power, but you can’t use it or store it… it’s just wasted. This means your batteries – your means of storing that energy – are a critical component of any solar power system.
And once your batteries are full… they’re full. Upgrading your solar power installation beyond that won’t get you anything more – it would make more sense to upgrade your batteries instead. For example, if you start the night with fully charged batteries, and you can’t make it through the night without them going dead, all the solar in the world isn’t going to help you. You need to investigate battery upgrades.
The other essential function your batteries perform is that they “buffer” the output from your solar power system to keep the voltages consistent. I’ve run solar power in my RV with the batteries disconnected. The lights throb with the passing clouds… It’s very disconcerting… you don’t want that.
Solar power doesn’t care what kind of batteries you have, it will charge any of them with the right charge controller. But solar does care that you have enough capacity to store the power it produces. So don’t neglect to plan your battery capacity when thinking of a solar power installation.
The End User Experience
Once you have the three main components of a solar power system installed – and there are lots of discussions about wire sizes, fuses, and connector types that need to occur to make that happen – what is the experience like for an end user? The good news is that it’s pretty much a “set it and forget it” proposition.
You’ll need to set up the solar charge controller initially, telling it what kind of batteries you have and so forth. But once that is done, generally no interaction at all is required to reap the benefits. The systems charge when the sun is out. They turn off at night. And, they’ll track how much power they’ve produced. In fact, that’s the main function of their control panels… just letting you know what’s going on – if you care to look.
So! Whether your RV came with a solar power system or you’re considering adding one, it’s a smart choice. There’s nothing extra you have to do once it’s all installed, except kick back and enjoy the free battery charge… all thanks to the incredible power of the sun.


James, I must have missed it, what panels did you use when you upgraded to victron?.. I did see you used the 150/70 victron which makes sense.. It looks like maybe 4×200 watt panels for 800w? I am going to try to make Tampa in my Ekko, so if so, looking forward to meeting you both. I was considering this or just adding two more 170s to see if I can stuff 4 in there, something I thought you may have considered as well? I like the install with the tunnel in the middle tho..thanks for all you do..Dave
We never did a video on this, but the panels we have on top now are 4x Renogy 175 watt panels, for a total of 700W. You can add two more of the WGO-provided square panels, but you have to extent them over the tops of the side rails a bit to get them to fit. I had four of them up there for a while, and did not like not being able to walk to the front of the roof.
I like that walkway, and would have to think long and hard about giving it up!
Thank for the article James. It helped clarify the interplay of the systems.
It appears there is no downside to having more battery than solar due
to roof size?
The only negatives to a large battery bank I can think of are just the weight and size of the batteries.
Other than that, battery capacity is all positive (pun intended) in my book.
If I recall, you decided not to get the optional generator for your rig, so what happens when it’s cloudy(or raining) all day? Do you run out of stored battery power or does the running of your rig charge the lithium batteries?
We’re not completely reliant on solar power.
Running the engine of our EKKO engages a second alternator, which charges our batteries (at a much greater rate than our solar).
Also – we have enough battery that, apart from air conditioning, our rig could run on stored battery power for a couple weeks, even without running the engine.
(So I guess if we head to the arctic circle in winter, we’d be fine for a while?)
James, slightly off topic of solar, but extending on your second alternator comment: Since the Ekko has the second alternator to charge the batteries, I’m not sure why they even offer the option of the secondary generator. To me it doesn’t make sense why anyone would pick the generator over the second battery. My understanding is that if the batteries hit a certain depth of discharge, then engine will turn on to run the second alternator to charge the batteries. What real purpose would the secondary generator serve then? Am I missing something?
Hope to swing by the Chantilly RV show today to catch one of your seminars!
Well, we agree, and we didn’t get the generator.
The generator appeals to those who like to take the RV and just park it somewhere and not run it for a few days.
It’s a different style of RVing.
Without running the engine, the generator is the fastest way to charge the batteries in remote locations like that.
Well done explaining Solar Power for RV’s. Thanks
Glad you liked it!