This post may contain affiliate links.
Years ago, when I was a brand new homeowner, I got a rude awakening to an aspect of home maintenance that I had never thought of before: my roof! Water from snow melt was leaking through the attic, making a soggy blob of insulation, and seeping through the ceiling into the hallway where it made a puddle on the carpet. Fixing that turned out to be a very expensive proposition, but there was one silver lining. It put roof maintenance permanently on my radar.
That carried over to our RVs, and to this day, I still keep a close eye on Number One’s roof. And while I’m fairly certain nobody starts their search for the perfect RV by investigating RV roofs, it is a vital component to the long-term enjoyment of any RV.
Just ask anyone whose RV roof started leaking during a trip; sleeping on a wet RV bed has a way of thwarting your trip fun. To avoid any surprises like that, it’s important to have a basic understanding of your roof and what maintenance it requires. Let’s jump in.
The 3 Main Types of RV Roofs
RV roofs are not all the same, so the first step on your roof maintenance journey is figuring out exactly which type of roof is over your head. Fortunately, there are only a few types, and none of the choices are “bad”. You’ll need to know what type of roof you have so that you can select the right products and procedures to maintain it.
1) Membrane Roofs
It’s a safe bet that the lion’s share of RV roofs are membrane roofs, and since new RVers may be less familiar with them, we’ll spend a bit more time here. You might also hear them referred to as a “rubber roof.” These roofs consist of a synthetic rubber membrane that is stretched over the roof substrate, which is likely plywood. There are two main types of membranes used today for RV roofs: EPDM and TPO. (Spoiler alert: one isn’t better than the other.)
EPDM stands for ethylene propylene diene monomer, and it’s been used on RV roofs since the 1980s. EPDM roofing is manufactured in a black color, and then a coating is applied to create the white RV roof you’ll see. This tidbit of info becomes important later.
TPO stands for Thermoplastic Polyolefin. It’s a newer product than EPDM, but it’s been around for a long time as well. TPO is manufactured the same color throughout the membrane.
In an RV installation, the choice is a wash. But RV manufacturers have to choose between the two types, so how do they make that decision? Is it just based on price?
I spoke with Adam Christoffersen, Senior Product Manager for Winnebago Towables to ask how they make the choice. “It’s not entirely cost-driven,” he told me. He then listed a bunch of factors that go into the decision. These included ease of installation, feedback from warranty data, the level of familiarity with the material, and (especially lately) supply chain considerations. In other words, it’s a business decision. Nothing in our conversation led me to believe that one of these materials was “better” than the other.
But even though one isn’t “better”, it’s still important for you to know what kind of membrane your roof is. You’ll need to know so that you can select compatible cleaners and sealants to use with it. So how do you know which type of membrane roof you have?
While you can find lots of tips online, there are a few reliable ways to know for sure. The gold standard is to simply ask the manufacturer or look it up in your owner’s manual. The other reliable way has to do with the information I gave you earlier about the material’s color. Find a place in the RV where you’ll be able to see both sides of the material. One place you could check is inside the roof opening of a fan or vent, though you may have to remove a trim ring to see it. If the material is the same color all the way through, it’s TPO. If it’s black on one side and white on the other, it’s EPDM.
2) Fiberglass Roofs
Besides being used in boats and bathtubs, fiberglass is also used for RV roofs. A fiberglass roof on your RV will be hard to the touch, and very resistant to damage from rust, rot, or even fire. Fiberglass roofs are lightweight, and generally require less maintenance than rubber roofs. But even fiberglass roofs require periodic cleaning and maintenance to keep them working their best.
3) Metal Roofs
Though less common, your RV may have a metal roof. Many times, this will be an aluminum roof (Hello, Airstream!). In the case of Class B RVs, it will be an automotive-type steel roof. Metal roofing is obviously extremely durable, and you’re not likely to pierce it with an errant tree branch. But even with the durability of metal overhead, you’re still not immune to roof maintenance, as these roofs will have penetrations that need to be sealed and maintained, just like their membrane and fiberglass counterparts.
Can You Walk On It Safely?
Any roof maintenance is going to require you to access your roof. The most obvious way to do this is to just climb up there and get to it. But you need to know two things before getting on your RV’s roof: First, is it safe for the roof? And more importantly, is it safe for you?
A walkable RV roof is one that you can safely walk on without damaging it, and not all RVs have them. What makes a roof walkable is a combination of the surface itself (which you can see), and the supporting structure underneath (which you can’t). The only 100% way to know if your roof is walkable is to consult with your manufacturer or owner’s manual. But if you can’t do that, and you don’t like the thought of creating unintentional skylights in your rig, there are a couple rules of thumb that may help you.
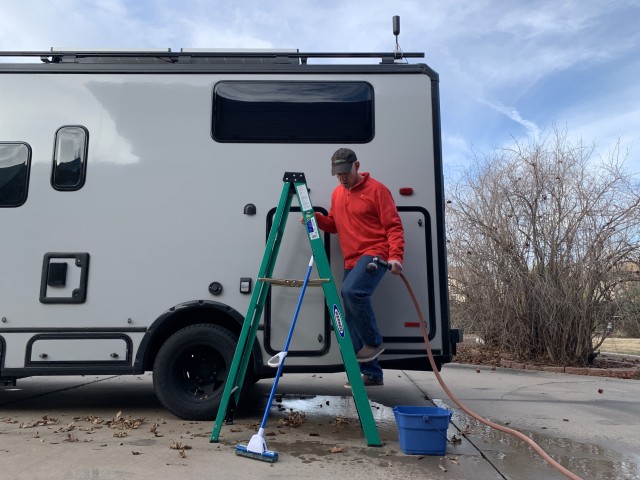
The most obvious is the presence of a ladder. If an RV manufacturer included a ladder on your RV, it’s a reasonable bet that the roof is walkable. Fiberglass roofs, due to their rigidity, are generally walkable, though there are exceptions. Automotive-style metal roofs on Class B vans might hold your weight, but you’d probably dent them if you tried to walk around up there. If I had doubts about the walkability of my RV’s roof, I’d perform any roof maintenance from a sturdy ladder.
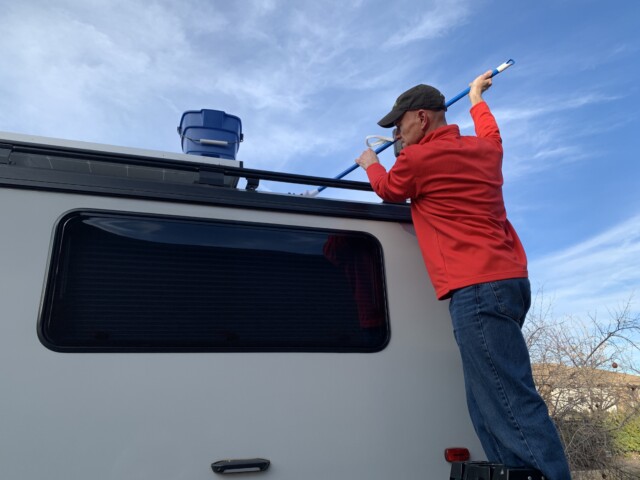
But the bigger concern about walking on the roof has to do with your safety. RV roofs can be quite a distance from the ground, and they don’t have guardrails. When they’re wet, they can be EXTREMELY SLIPPERY. A fall from your RV’s roof can lead to serious injury. If you do decide to climb up on your RV’s roof, make sure you can do it safely, wear appropriate (grippy) footwear, have an assistant to be your spotter and hand you up supplies, and observe any warnings or safety labels on the roof or in your owner’s manual. If any of that is difficult or impossible, it’s best to perform your cleaning, inspection, and maintenance from the side of your RV, using a ground-based ladder, otherwise take it to your RV service center.
Maintaining Your RV Roof
Winnebago’s Christoffersen told me “The more care you give something the longer you can prolong its life.” Besides offering me a metaphor for life in general, it was clear he was a big proponent of roof maintenance. “Most failures are due to neglect,” he concluded.
As it’s mostly cleaning and inspection, RV roof maintenance isn’t difficult, but it’s easy to put it off. Don’t. It’s best to wash and inspect your RV’s roof every few months. But at a bare minimum, I’d recommend twice a year. If you live or RV in areas with high humidity that can contribute to mold growth, or if you park your RV under trees that can drop leaves and sap, you’ll want to wash and inspect the roof more frequently.
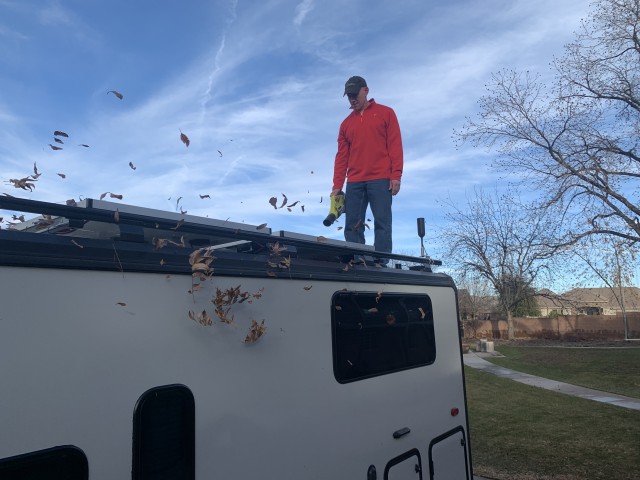
Step One: Clearing Your Roof for Initial Inspection
The first step in your maintenance routine is to clear your roof of accumulated debris, dirt, and leaves. You can use a broom for this, but I like to use a lightweight battery powered leaf blower. (If you don’t have one, this is your excuse to go buy a battery powered leaf blower!) Once the roof is clear of debris, perform a quick inspection of your caulks and sealants, and look for any obvious flaws in the roof. You’ll look at this more closely when you wash it, but since washing involves putting water on your roof, you don’t want to make any obvious problems worse.
Step Two: Washing Your Roof for Secondary Inspection
Assuming your initial clearing and inspection goes well, proceed to washing your roof. There are many products available for this job. Just make sure to choose one that is compatible with the type of roof that you have. Washing your roof doesn’t require any special cleaners though; you can always use a mild detergent like Murphy’s Oil Soap and water.
Wash a small section of the roof at a time, perhaps a square yard, using a long handled sponge-mop. Don’t forget your slide-outs (if you have them). You’ll want to pay better attention this time to the sealants, looking for any cracks or separation. Be sure to check around all your roof penetrations (vent pipes, antennae, etc.). Also look for rips and tears (membrane roofs), hairline cracks or oxidation (fiberglass roofs), or dents or chipped paint (metal roofs). As you rinse each section off, mind the runoff. It can be quite dirty, and you don’t want it drying on the side of your RV and streaking it. Make sure to rinse it all the way off.
If All Looks Good… Done OR Apply Protectant (for Fiberglass)
If your washing and inspection has traveled down the “happy path”, and you haven’t found any issues, you may be done at this point. Rubber roofs don’t technically require anything further, but many RVers will apply a protectant, which makes future washing easier. I do recommend applying a protectant to a fiberglass roof to guard against oxidation, which over time can make the gelcoat lose its shine and turn hazy. Metal roofs in good repair don’t require anything else at this point, but you can always wax them to make future washing easier.
Making Repairs
But let’s say you do find something during your inspection. What then? You’ve always got the option to take your RV to a qualified service center, but some of the repairs you should be able to handle yourself.
Patching up your sealants isn’t terribly difficult. The most important thing here is to use a sealant that’s chemically compatible with your roofing material and the existing sealants. Basically, you just clean up the old sealant, and apply new, compatible sealant over the old – completely covering any problem areas. Since you’re working on the roof, you’ll want a self-leveling lap sealant.
Errant tree branches can cause small tears in membrane roofing materials. If you find one of these, probably the easiest way to repair it is with specialized roofing repair tape. Dicor makes such a product, that you should be able to find at most RV centers. I’ve also used Eternabond tape in the past with excellent results.
These tapes are the closest thing I’ve found to a miracle cure for RV roofs. They go on easily and quickly. They’re waterproof immediately. They don’t crack or harden. And they stick to all RV roofing materials. I’ve used these tapes on gouges, seams, and cracks, and on metal and fiberglass roofs to boot. I keep some of this tape in my RV toolkit.
Fiberglass oxidation – a dull, chalky appearance to your fiberglass roof – is something you might run into. Fortunately, due to its long history in the marine world, fiberglass repair materials and oxidation restorers are well-known. Any fiberglass repair product or oxidation remover, when used according to directions, should be safe to use on your RV’s fiberglass roof.
So there you go! Hopefully this helped give you better understanding of your RVs roof and what you need to do to maintain it. Caring for your roof isn’t the most exciting aspect of RVing. But since one of the main benefits of RVing is having a roof over your head wherever you travel, it’s something that shouldn’t be neglected. Keep your RV roof in top shape, and it should remain problem-free for many years to come.


