This post may contain affiliate links.
With the weather finally warming, many of you are starting to think about waking your RV up from its long winter nap. And while it’s exciting to think about getting back on the road, there are several tasks, checks, and maintenance items you should complete first. To make it easy for you, I’ve compiled them here in a handy checklist.
And really this isn’t limited to just seasonal RVers. Even if you’ve been RVing all winter or fulltiming, it’s a smart idea to run through this list, too. Think of it as an annual checkup! Just like the yearly checkup you should be getting to make sure you’re in good shape, your RV needs one, too.
The purpose is to check that everything in your RV is functioning safely and as it should, and to avoid any surprises that could have been prevented once you’re on the road. What I’m not covering in this list is de-winterizing the water system. That’s too RV-specific and can get overly detailed, so I’ll save that for a future post. You can find the procedure for getting your RV’s water system ready to go in your owner’s manual.
And with that, let’s jump in and give your RV a checkup!
The RV Checkup Checklist
Give your RV an annual check-up to keep it healthy & your upcoming trips problem-free.
✅ 1: Inspect
Check around, above, and beneath the RV for leaks, loose objects, or anything out of the ordinary. Look for things like oil leaks, critter nests, mystery goo, or anything that might have gotten broken or damaged. If you find anything, that’s first on your fix-it list.
✅ 2: Fluids
For motorhomes, run through all your vehicle’s fluid checks. Check the engine oil, engine coolant, transmission fluid, brake fluid, power steering fluid, and even windshield washer fluid. Consult your owner’s manual for the proper types and levels if any of them need topping off.
✅ 3: Tires and Wheels
Tire and wheel checks are some of the most important safety checks you’ll do. At every tire, check for unusual tire wear or sidewall cracking. You’ll also want to check the DOT code and verify that your tires haven’t “aged out” and need to be replaced. Check the torque on each lug nut and make sure it’s set to the specifications for your motorhome or trailer. Once all those checks have passed, inflate the tires to the proper pressure.
✅ 4: Engine Battery
On a motorhome, check your engine starting battery. Clean the connections if they need it, and verify you’ve got a proper state of charge. If your RV is a towable, you get a pass on this step!
✅ 5: Lights
Make sure all turn signals, running lights, and hazard lights are working. It’s easiest to do this with a partner – but running around your rig works, too. If you’re towing, verify the lights and signals on both vehicles.
✅ 6: House Batteries
If you removed the house batteries for storage, reinstall them. Lead-acid batteries in storage can lose up to 10% of their charge each month, so verify the state of charge and, if necessary, charge the batteries. If your batteries require water, wait until the batteries are fully charged before adding it, unless the water level is below the plates (which should always be covered). While you’re working with the batteries, check for loose cables and corrosion, and clean and tighten as necessary.
✅ 7: 12 Volt Check
Now that the batteries are online, check the 12 volt fuse panel for missing or blown fuses. This is also a good time to check all the 12 volt light fixtures in your RV and replace bulbs as necessary. Check that all your 12 volt and USB outlets work (if your RV is equipped with them).
✅ 8: Charging Systems
Make sure that all your battery charging systems are working properly. If you have solar panels, which charge the batteries through a charge controller, verify that system is working. Your RV likely has a converter or an inverter/charger for charging from shore power or a generator. Verify that’s working as well. Finally, for motorhomes, verify that the house batteries charge while the engine is running.
✅ 9: Generator
Quick, when’s the last time your generator was serviced? If your answer started with, “Ummm….” then it’s probably time. The start of a new RVing season is a great time to inspect your generator, and have it professionally serviced if necessary. At a minimum, you should check the oil level, and make sure you’re changing the oil according to the maintenance schedule. Also check and change the air and fuel filters as appropriate. It’s a good idea to run your generator for an hour or so at 50% load to make sure it won’t let you down on that first trip.
✅ 10: 120 Volt System Check
A running generator means you’ve got 120 volt AC power, so it’s a good time to check out that system as well. Make sure your breakers are on and investigate any that trip. You’ll want to verify that all your sources of AC power are working. Besides a generator, you’ll want to check shore power, and your inverter (if equipped).
✅ 11: Safety
Time for some basic RV safety checks. Verify that your fire extinguishers are present and fully charged. Replace them if they’re outdated or have lost their charge. (You’re worth it.) While you’re at it, test the smoke, carbon monoxide, and propane leak detectors, and replace all the batteries. Also check the dates on your detectors themselves! Did you know that most of them will expire in 5 to 7 years?
✅ 12: Vents & Fans
Make sure that your kitchen and roof vents open and function properly. If your vents are powered, check that the fans work as they’re supposed to. If they have filters, clean them.
✅ 13: Propane
First, check the condition of the propane cylinders themselves, as well as any mounting brackets, regulators, and covers. This is an area where you don’t want to compromise safety at all. If anything looks suspicious, it’s best to take it to a professional for servicing or replacement. Fill your propane tank(s) and connect them to the coach (if applicable). It’s a good idea to spray a solution of soapy water on your valves and regulator to check for leaks (bubbles). If you find any leaks, close the tank valves and have your propane system serviced.
✅ 14: Propane Appliances
Check that your propane appliances are working properly. The stove tops are the easiest to verify, since you can see the flame. You’ll also want to check your heater and water heater. Before firing them up, inspect their vents for any obstructions, critters, or spiders. Also – don’t run your water heater without water in it. If your water heater also runs on electricity, you’ll want to verify that’s working as well.
✅ 15: Fridge
Check your refrigerator and make sure it gets cold. Depending on your fridge, you may have to check one, two, or three sources of power (propane, 12 volt, 120 volt). You want to make sure that all of them are working. If your fridge has vents and burns propane, check the vents for debris and check the condition of your burner before lighting it up.
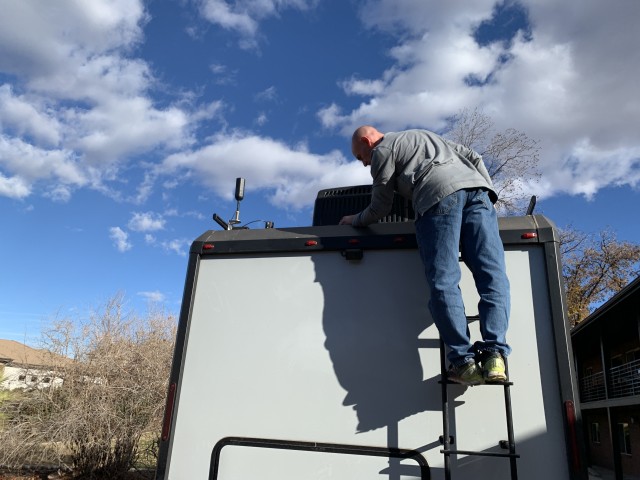
✅ 16: Air Conditioner
Verify that A/C delivers cold air as it should. Remove your intake filters and clean or replace them as necessary. This is especially important for those of us who travel with our pets! If you can get onto your roof safely, make sure any leaves and debris are well clear of the roof unit.
✅ 17: Other Appliances
If there are any other appliances in your RV that we haven’t covered (microwave, washing machine, sound system, cell booster, etc.), take the opportunity to check them out as well.
✅ 18: Anode Rod
While we’re looking at the water heater: if you haven’t already done so, check the anode rod in your hot water tank (if you have one). Replace that if necessary.
✅ 19: Sanitizing
Once you’ve followed the proper de-winterizing procedures for your water system, sanitize it and fill your fresh water holding tanks. I highly recommend taking the time to sanitize, and I mention some options to do so HERE. When you’re done sanitizing, your RV should be full of clean, safe water.
✅ 20: Water Pump, Faucets & Toilets
Check your water pump and verify that you can get fresh water from your holding tank to each of your fixtures, including showers, toilets, and exterior faucets. While you’re at each of these fixtures, verify that they drain without issue. Check that your toilets operate properly, and the seals are all in good condition. (You really don’t want to skip that one…) With your water pump on (not hooked up to city water), close all faucets and wait a few minutes and see if you hear your water pump cycling. A cycling water pump can indicate a leak, so if your pump runs a few pulses every few minutes, you’ll want to check your water lines – particularly at the connections – for leaks. If you find a leak, obviously, that’s your next target for a fix.
✅ 21: Water Filters
If your RV has water filters – and these could be separate drinking water filters, permanently installed whole-house filters, or even portable filters you use at the campsite – spring is a good time to replace the cartridges in those filters.
✅ 22: Awnings
Check your awnings (all of them, if you have more than one). Make sure that they deploy properly. Perhaps more importantly, make sure they stow away properly! If your awning calls for any annual maintenance like lubrication (check your manuals), this is the time to get that taken care of.
✅ 25: Doors, Locks, Latches
Check all your doors, locks and latches. This includes baggage doors, entry doors, screen doors and access hatches. Make sure they open, close, and lock properly. You should also check your entry steps for smooth operation. Now is the time to lubricate any hinge points. I prefer dry lubricants that are silicone or graphite based, as they’ll accumulate less dirt and grit over time.
✅ 26: Levelers or Stabilizers
If your rig is equipped with leveling jacks or stabilizers, check that they operate as they should. Use this time to perform any seasonal maintenance like lubrication.
✅ 27: Tank Level Monitors
Check the operation of your tank level indicators and make sure you can rely on them to let you know when to dump and fill your tanks.
✅ 28: Dump Valves
Head to an appropriate dump facility and check the operation of your dump valves. This is one you REALLY don’t want to skip because the consequences are rather unpleasant. Make sure the dump valves don’t leak, and that they operate smoothly and close securely. Once you’ve verified that they’re good, add any needed chemicals (and some water) to your holding tanks.
✅ 29: Accessories Check
If there are other accessories you normally use on your RV trips – things like tire pressure monitors, walkie talkies, headlamps, etc. – make sure that their batteries are charged up and ready to go. If your grill or griddle (my new favorite) are big parts of your camping trips, make sure they are working properly before you head out. They’re a lot easier to fix in your driveway than at the campsite!
✅ 30: Cleaning and Final Inspection
Finally, it’s time to thoroughly clean your RV, top to bottom, inside and out. I save this step for last, because a thorough cleaning will get you up-close with parts of your RV you might otherwise neglect. It’s a good last step to make sure nothing falls through the cracks. Here are just some of the things you should be looking out for during your cleaning:
- Condition of all sealants
- Operation of any slideouts
- The integrity of an attached ladder
- Evidence of water leakage or mildew
- Smooth operation of windows and emergency exits
And that’s it! As you can see, it’s an extensive list, so allow yourself plenty of time to complete it. When I run through this myself, I take most of a day to get through it. For me, it’s actually fun to go through these steps; and hopefully you’ll see it that way, too. My RV is something I enjoy taking care of, modifying, and just spending time in–so going through the checklist isn’t a chore at all.
And don’t leave this until the last minute! Starting this process early enough will give you time to fix any issues before your trip. That means more worry-free time enjoying your first RV trip of the season.
Feel free to leave comments, suggestions, or ask questions below. Happy RVing, all!


