This post may contain affiliate links.
With the New Year, and holidays, and weekends galore lately, I’ve made quite a bit of progress, and I’m happy to report that the entertainment center is now starting to look like something. There will be a lot of pictures this week, because I did a lot of work.
What does it say about me & Stef that our New Year’s Eve was spent between the woodshop & the gym?
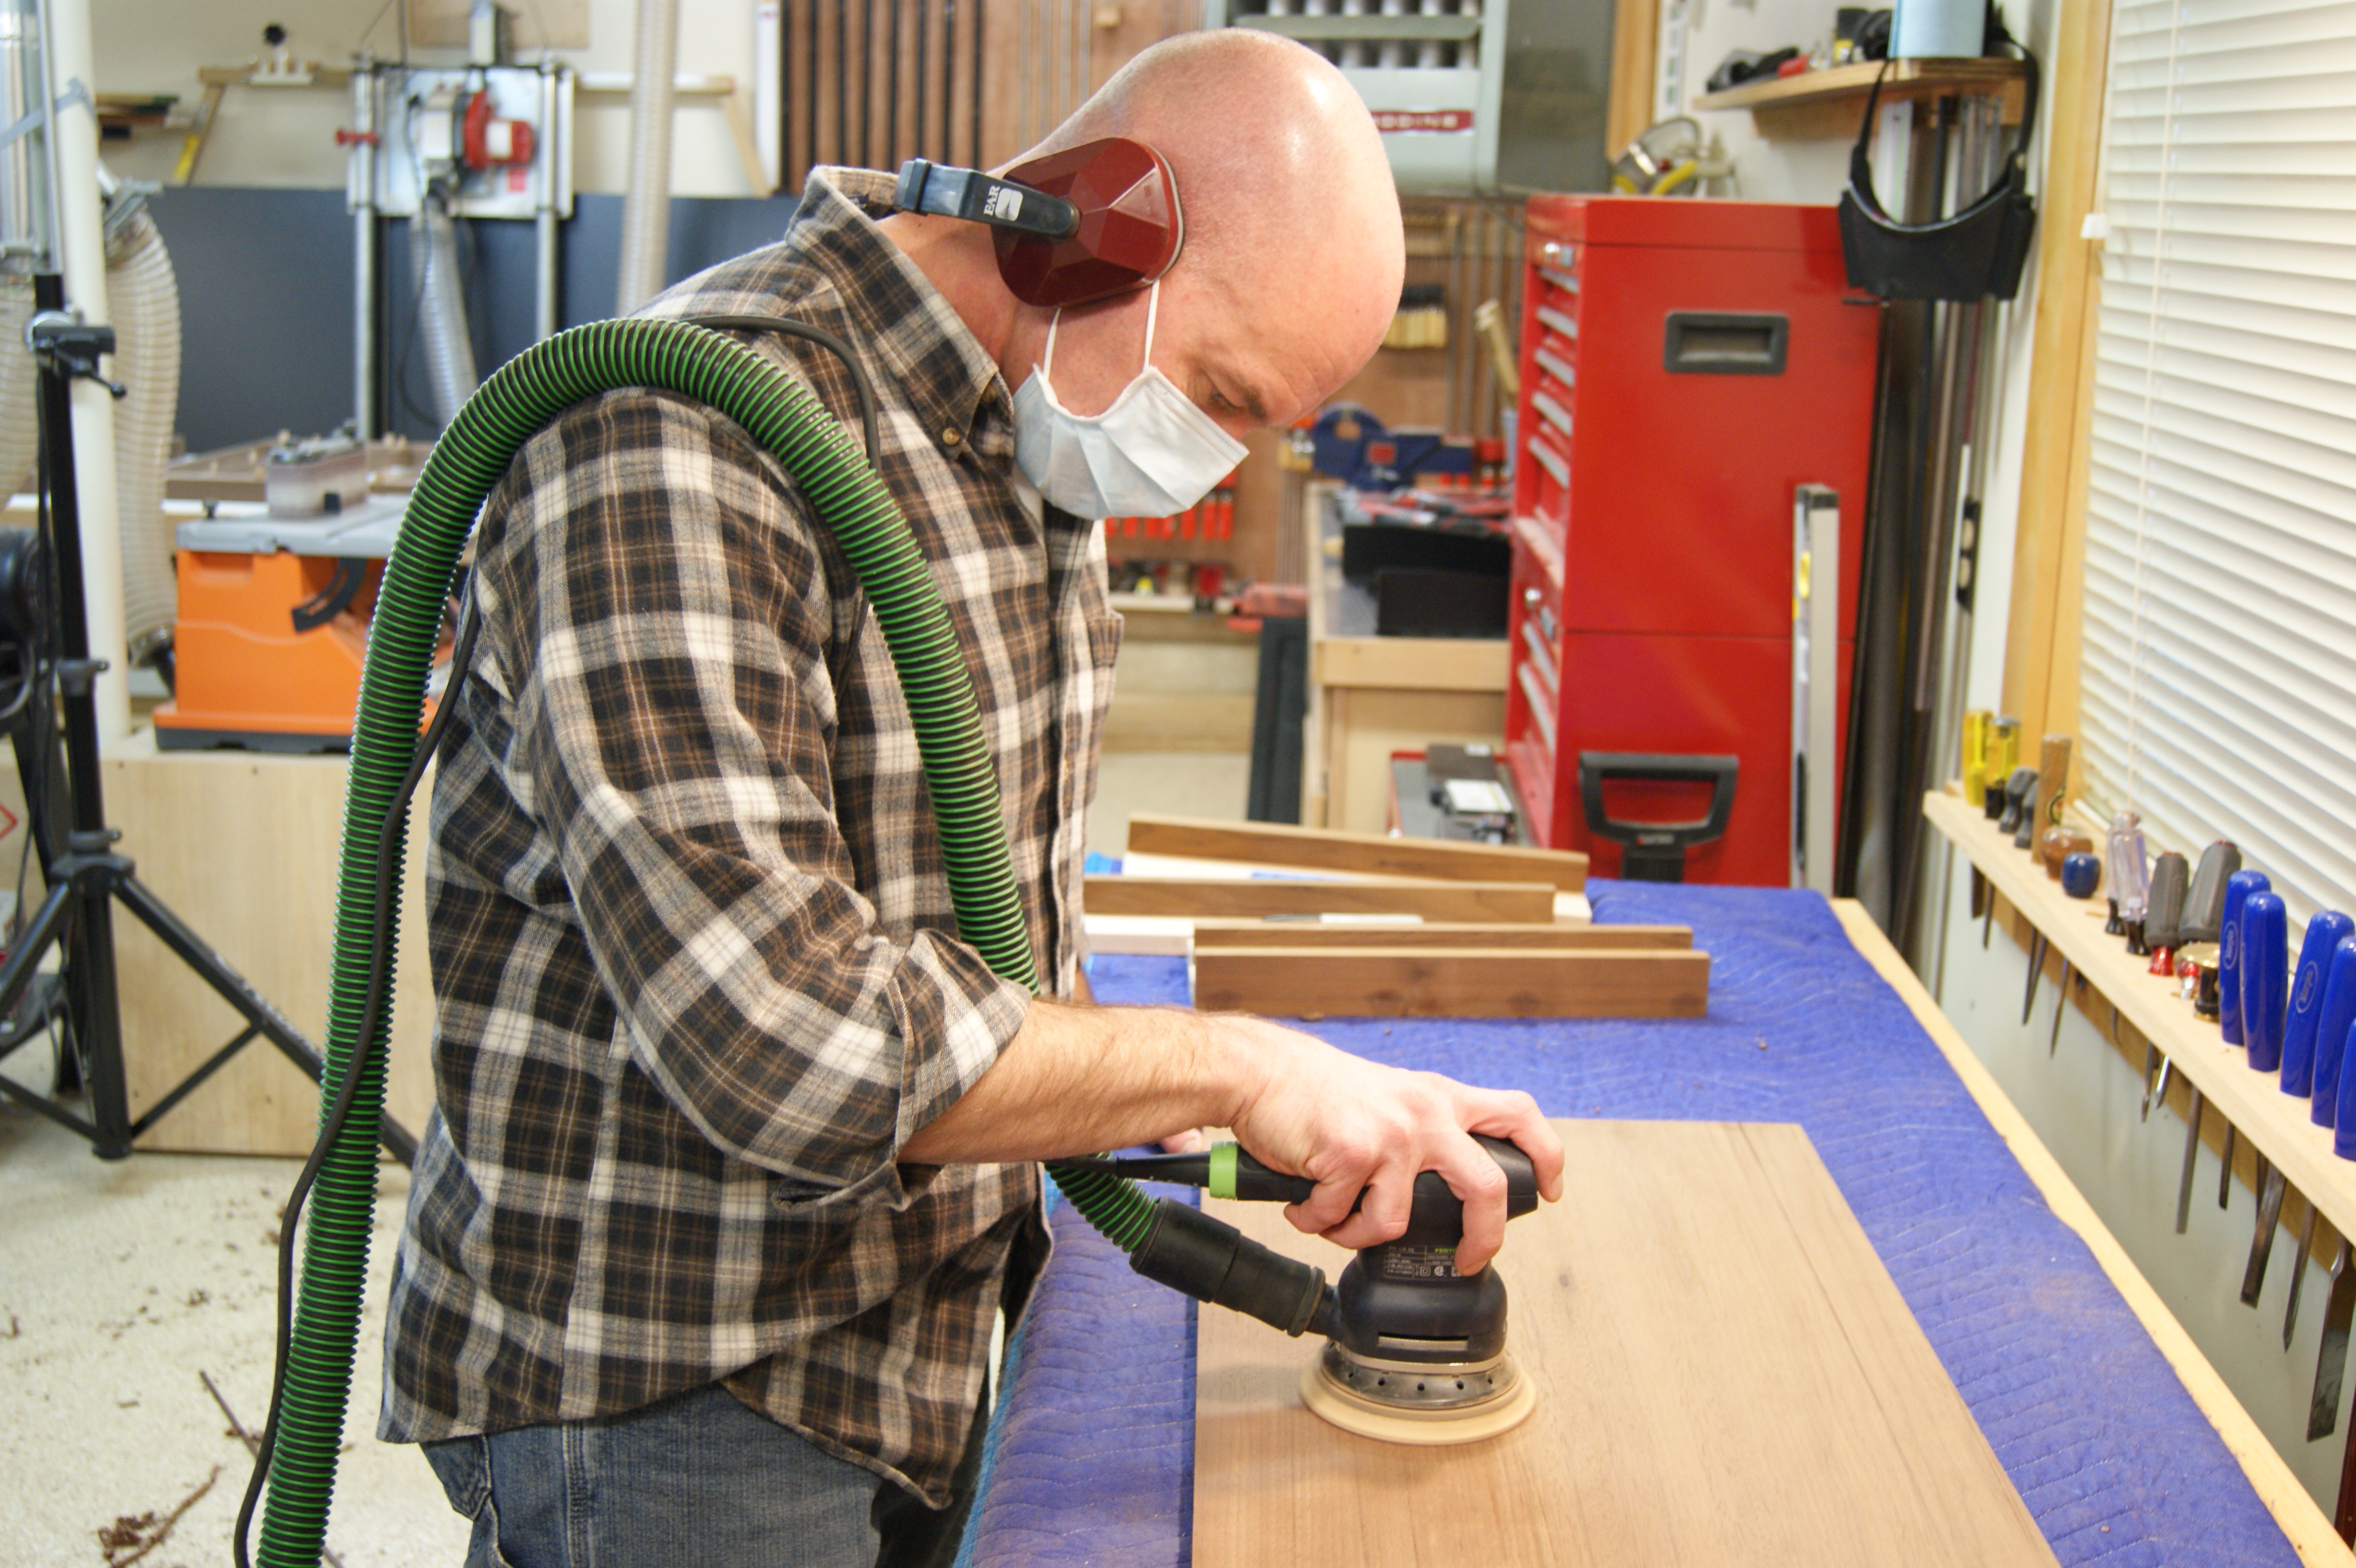
This was one exciting New Year’s Eve. There were actually many hours of me standing around sanding this week, so be thankful that you’re just getting this one sanding picture. And yes, the sander is another Festool product. I’m sanding now because I’ve learned (the hard way) that it’s often easier to sand parts while they sit flat on the bench before assembly, rather than trying to sand into inside corners afterward. The downside to this approach is that you have to be more careful with the glue to avoid mucking up your sanding. So here’s hoping the rest of the assembly goes smoothly.
(Sadly, I’ll only have to do more sanding later. The Peruvian Walnut I’m using is an open-grained wood, and I will want to fill the grain by wet-sanding with something like Danish Oil. But that’s another topic for another week…)
Anyway, with the dozens of pieces to go together, I tackled the glue up in stages. I knew I wanted to avoid gluing and clamping in two orthogonal directions at once, so I started with the front and rear rail assemblies. Here’s the first of them in the clamps.
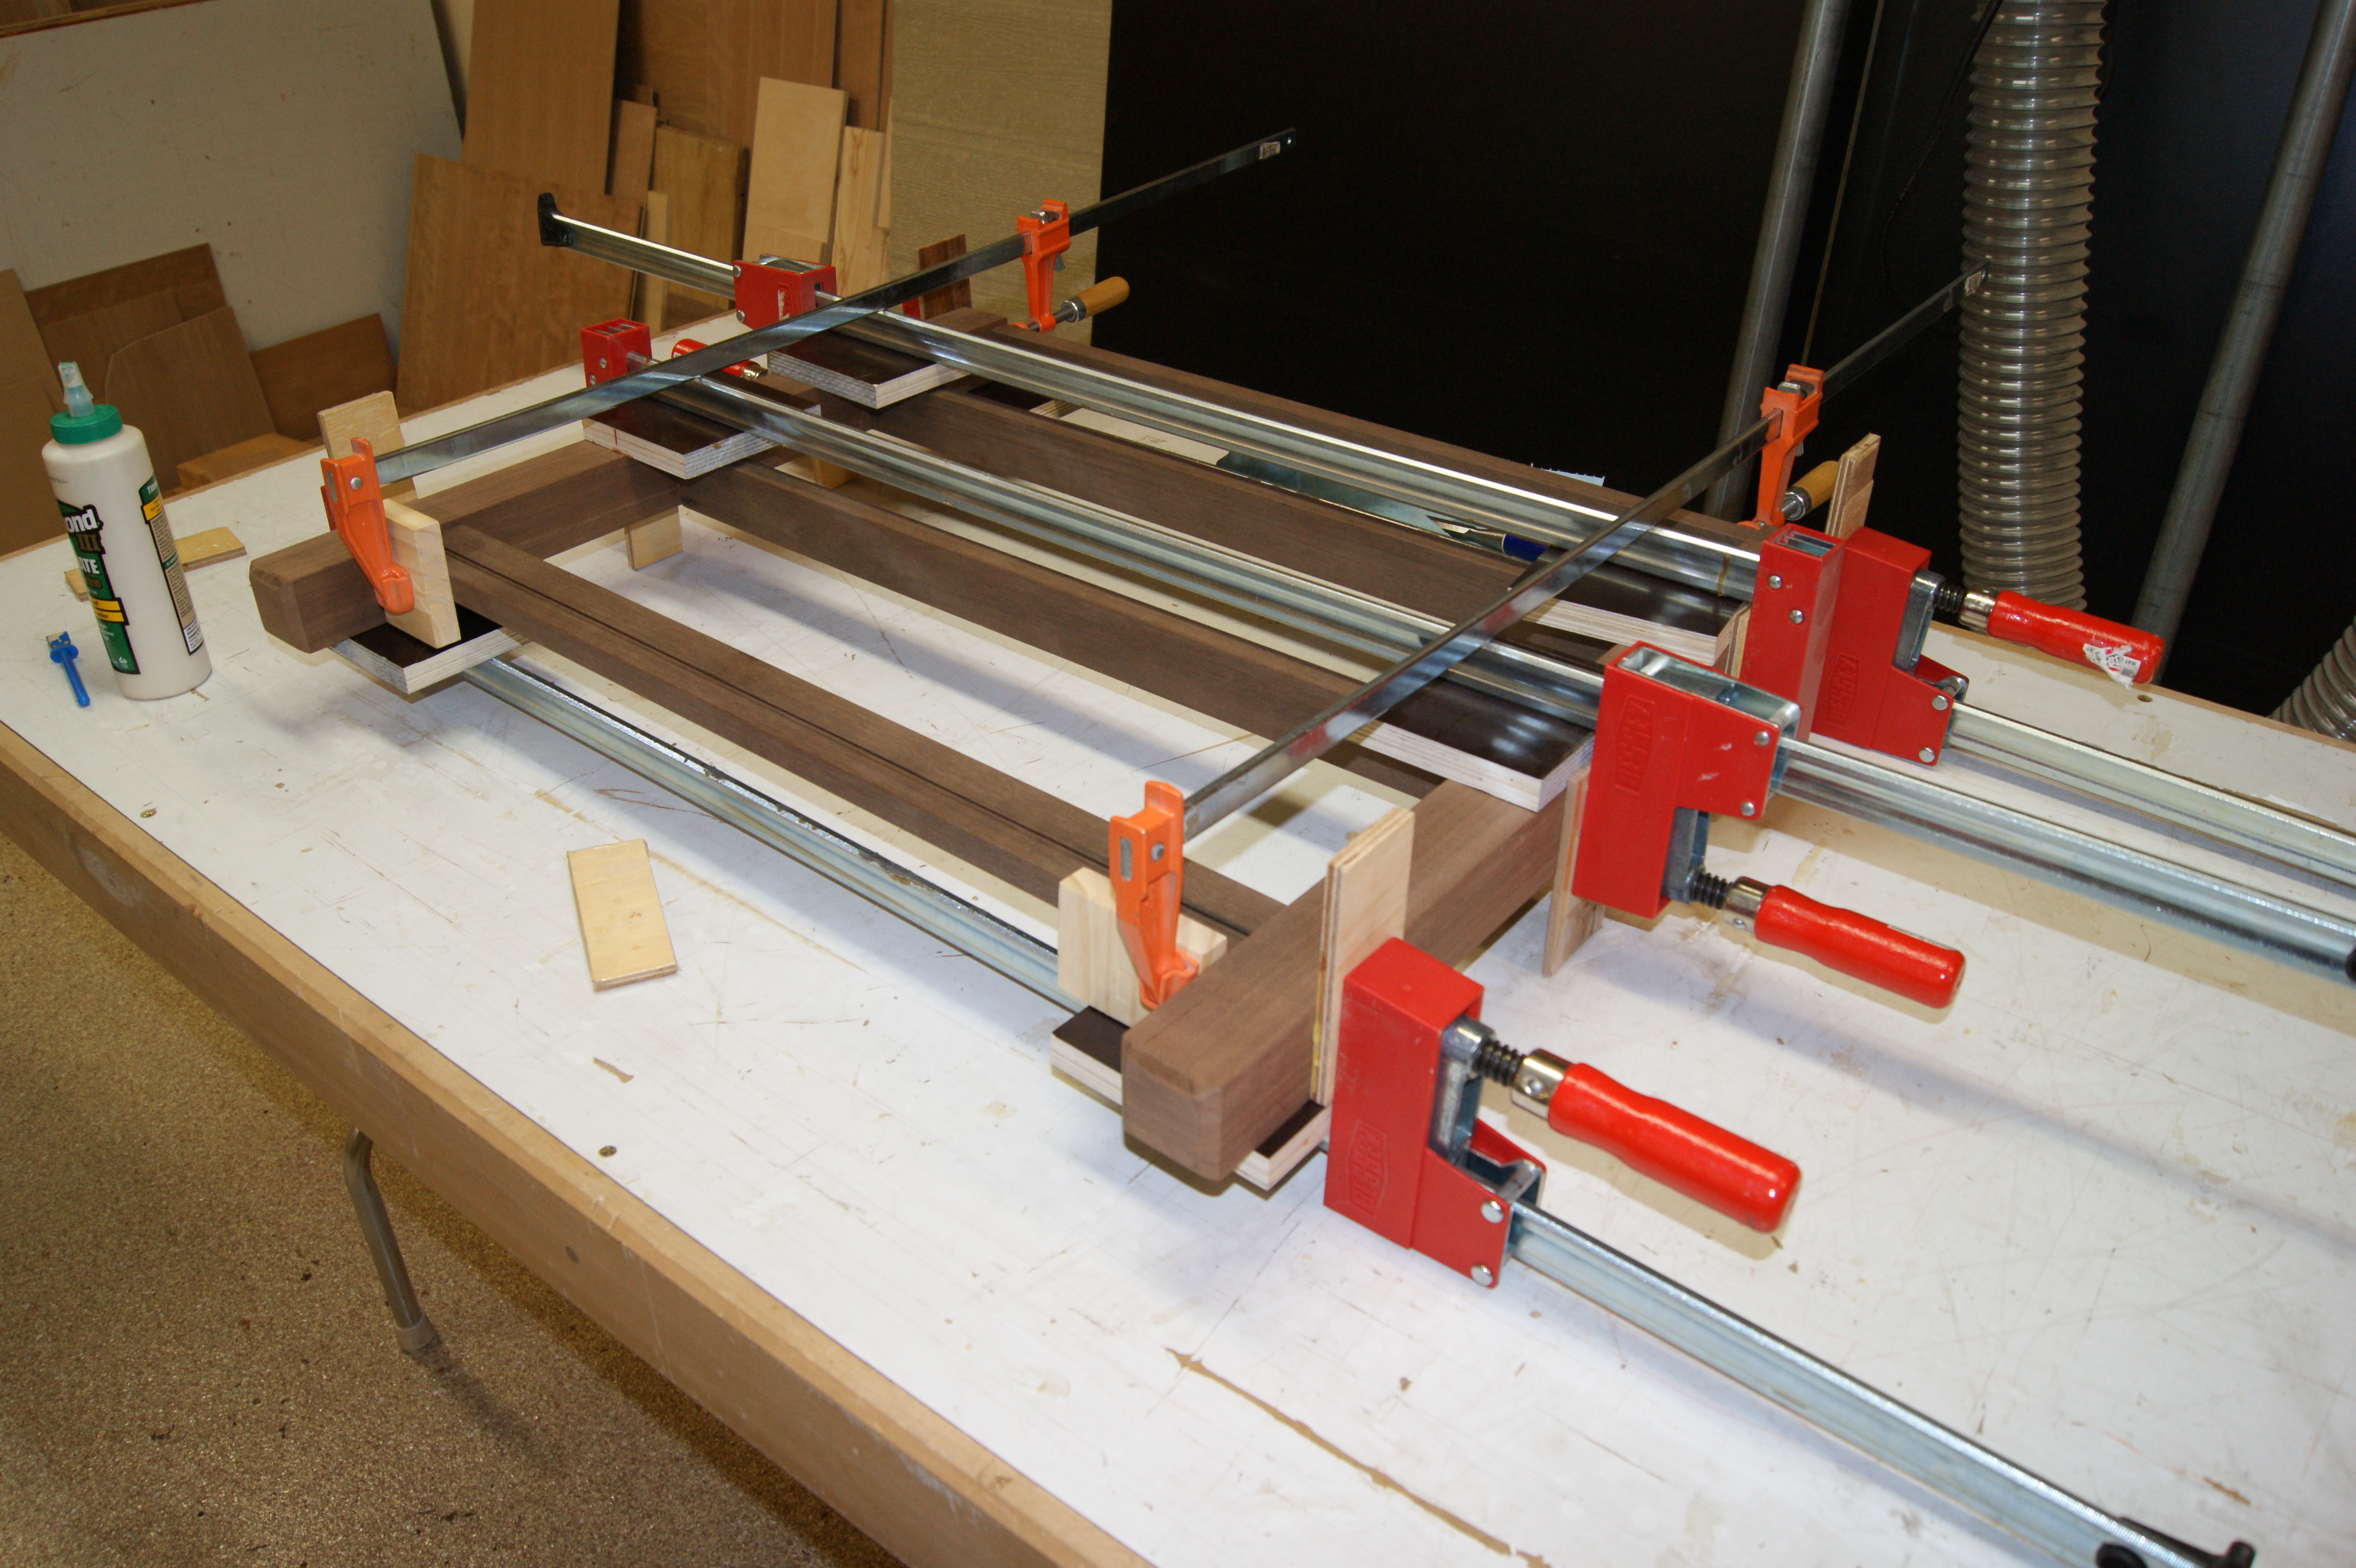
Using plenty of blocks to avoid crushing the actual workpiece.
There were four of those sections to glue up. When I was done with those, it was time to join them in pairs with the front-to-back pieces (the cabinet walls and drawer runners). But at this point, there were a lot of very tight fitting dominoes (slip tenons) to push home. So I tried this trick to make things easier. (I can’t remember if I saw this trick somewhere else or not – so for now, let’s just say I invented it.)
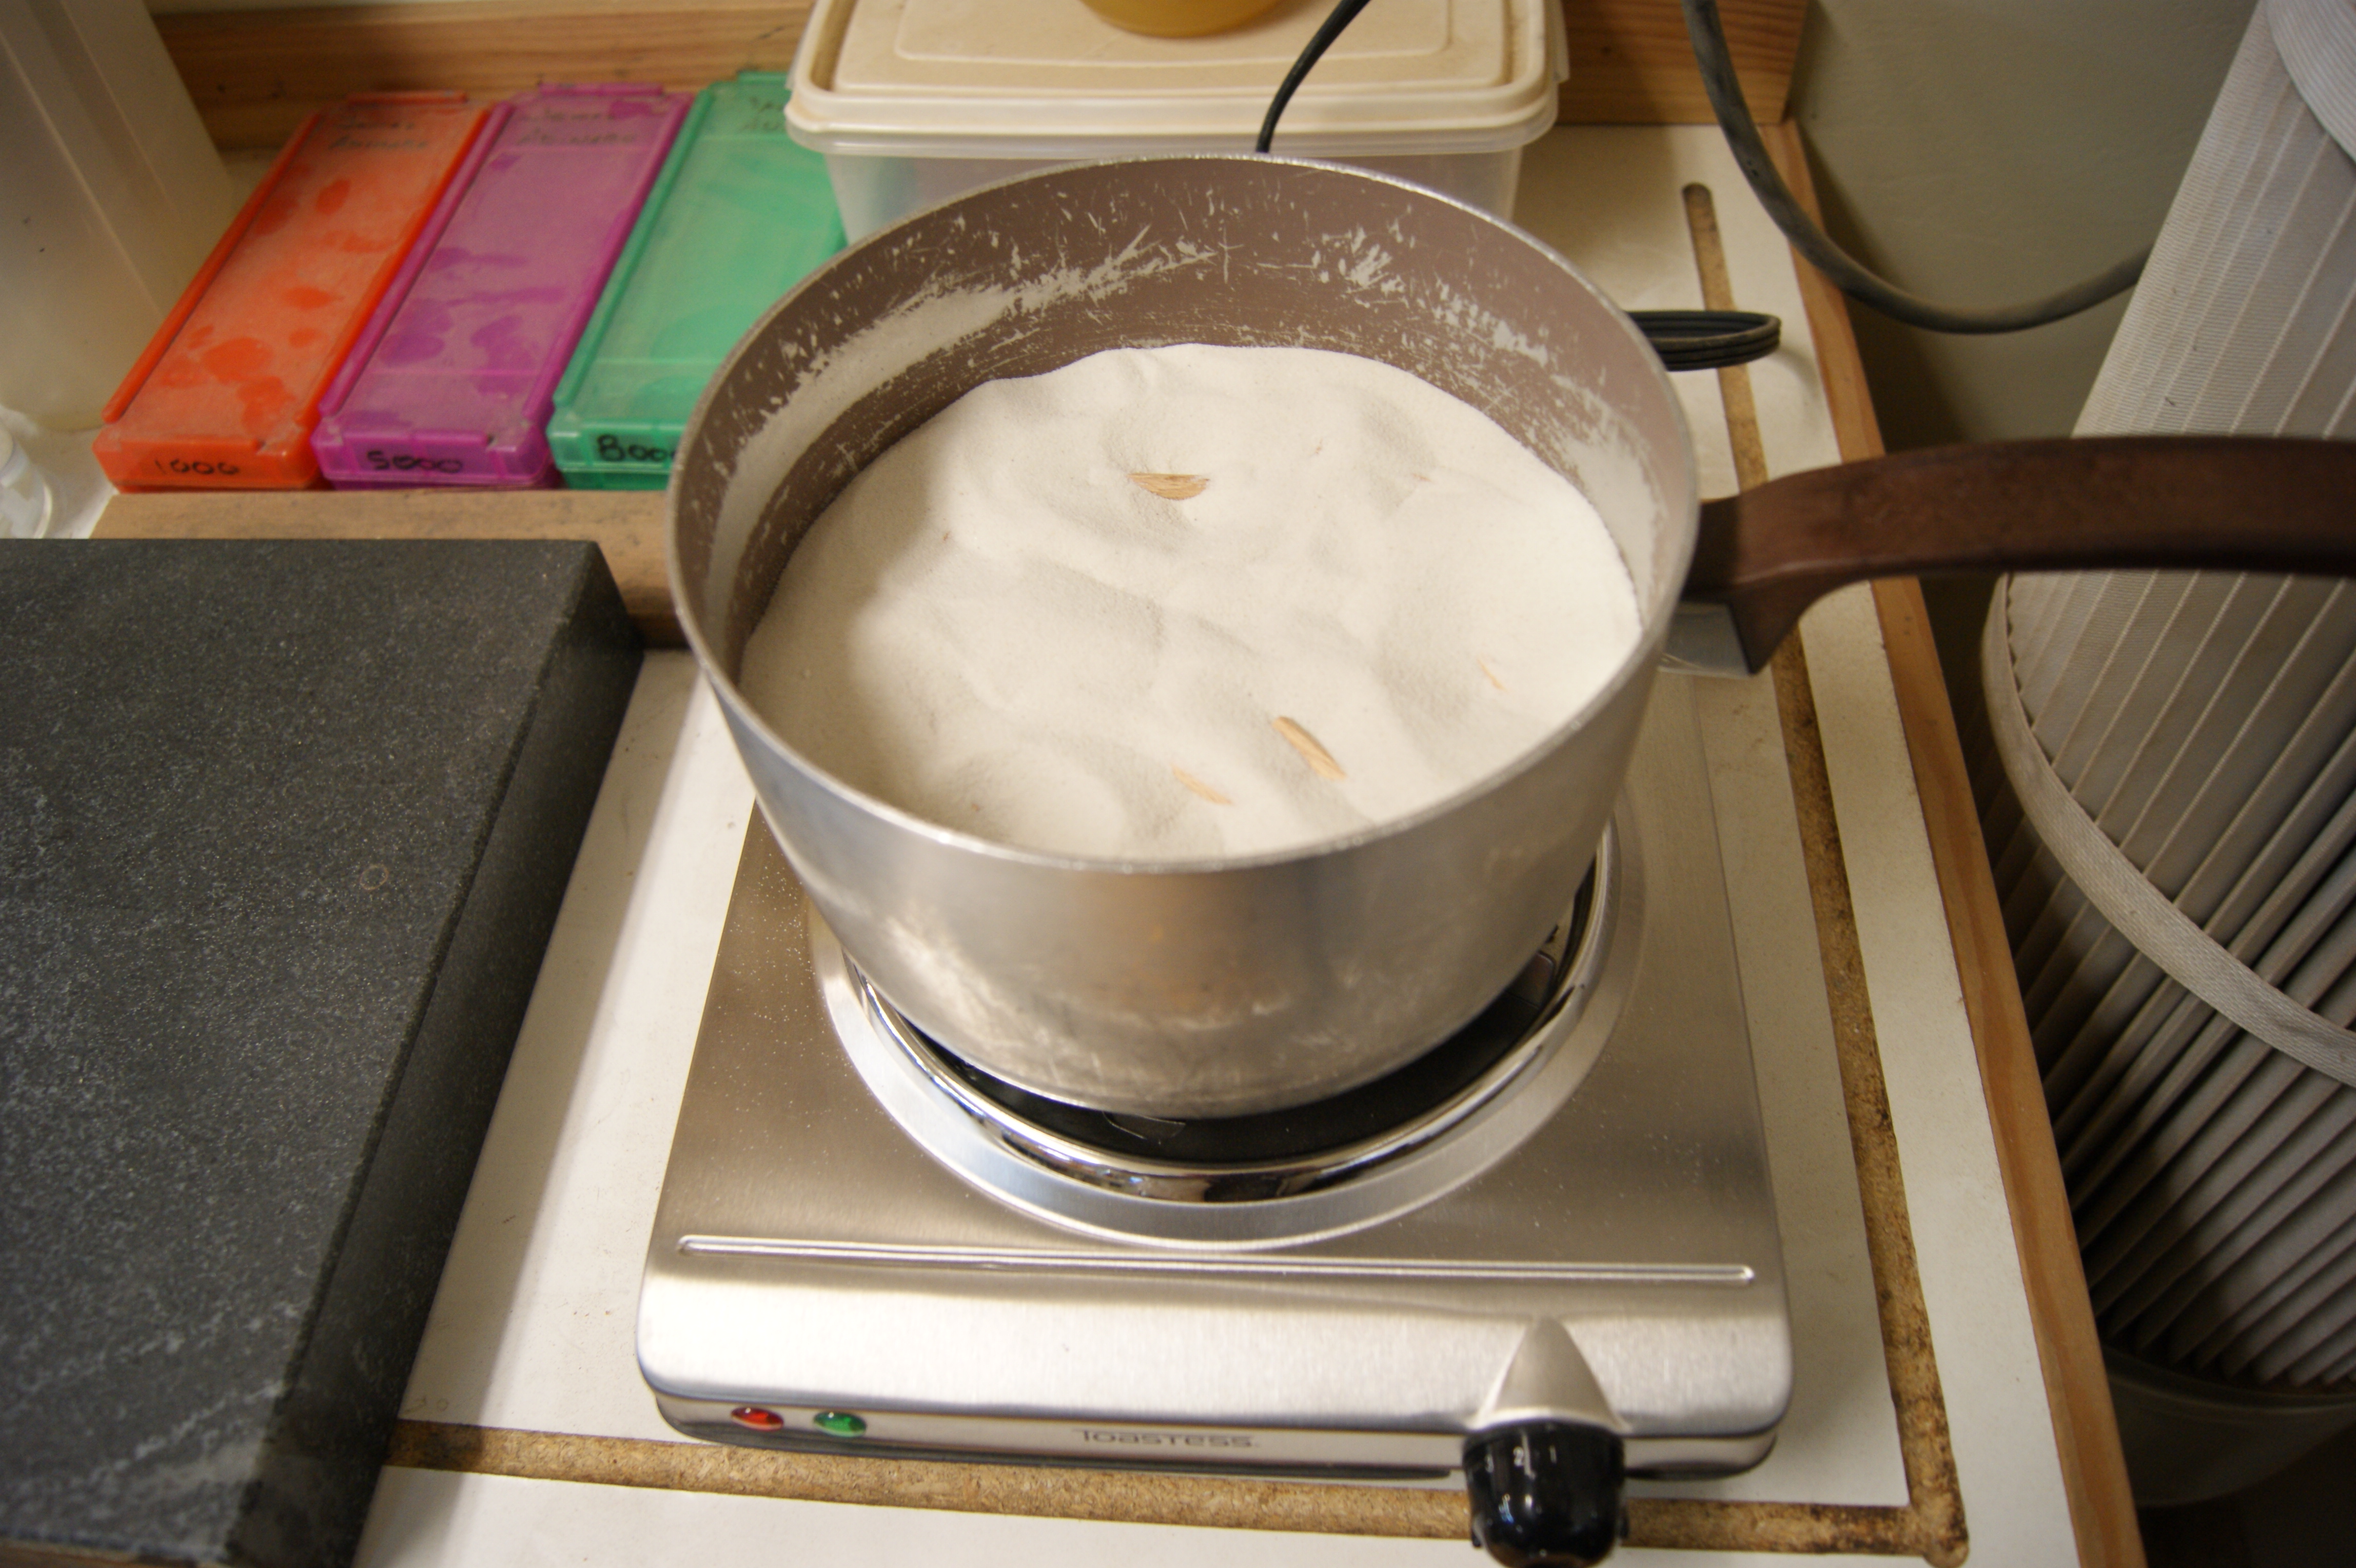
This was my old mac & cheese pot from college!
No, that’s not my lunch. It’s a hot plate, set on a very low setting, heating a pot full of sand. I put the dominoes into the warm, dry sand, and leave them there for ten minutes or so. This draws any remaining moisture out of the dominoes, and shrinks them just a bit. That little bit of shrinkage makes a big difference in how easy it is to use the dominoes to assemble the piece. Here I am doing just that putting one of the side sub-assemblies together.

Can you tell I’m totally stressed out in this picture?
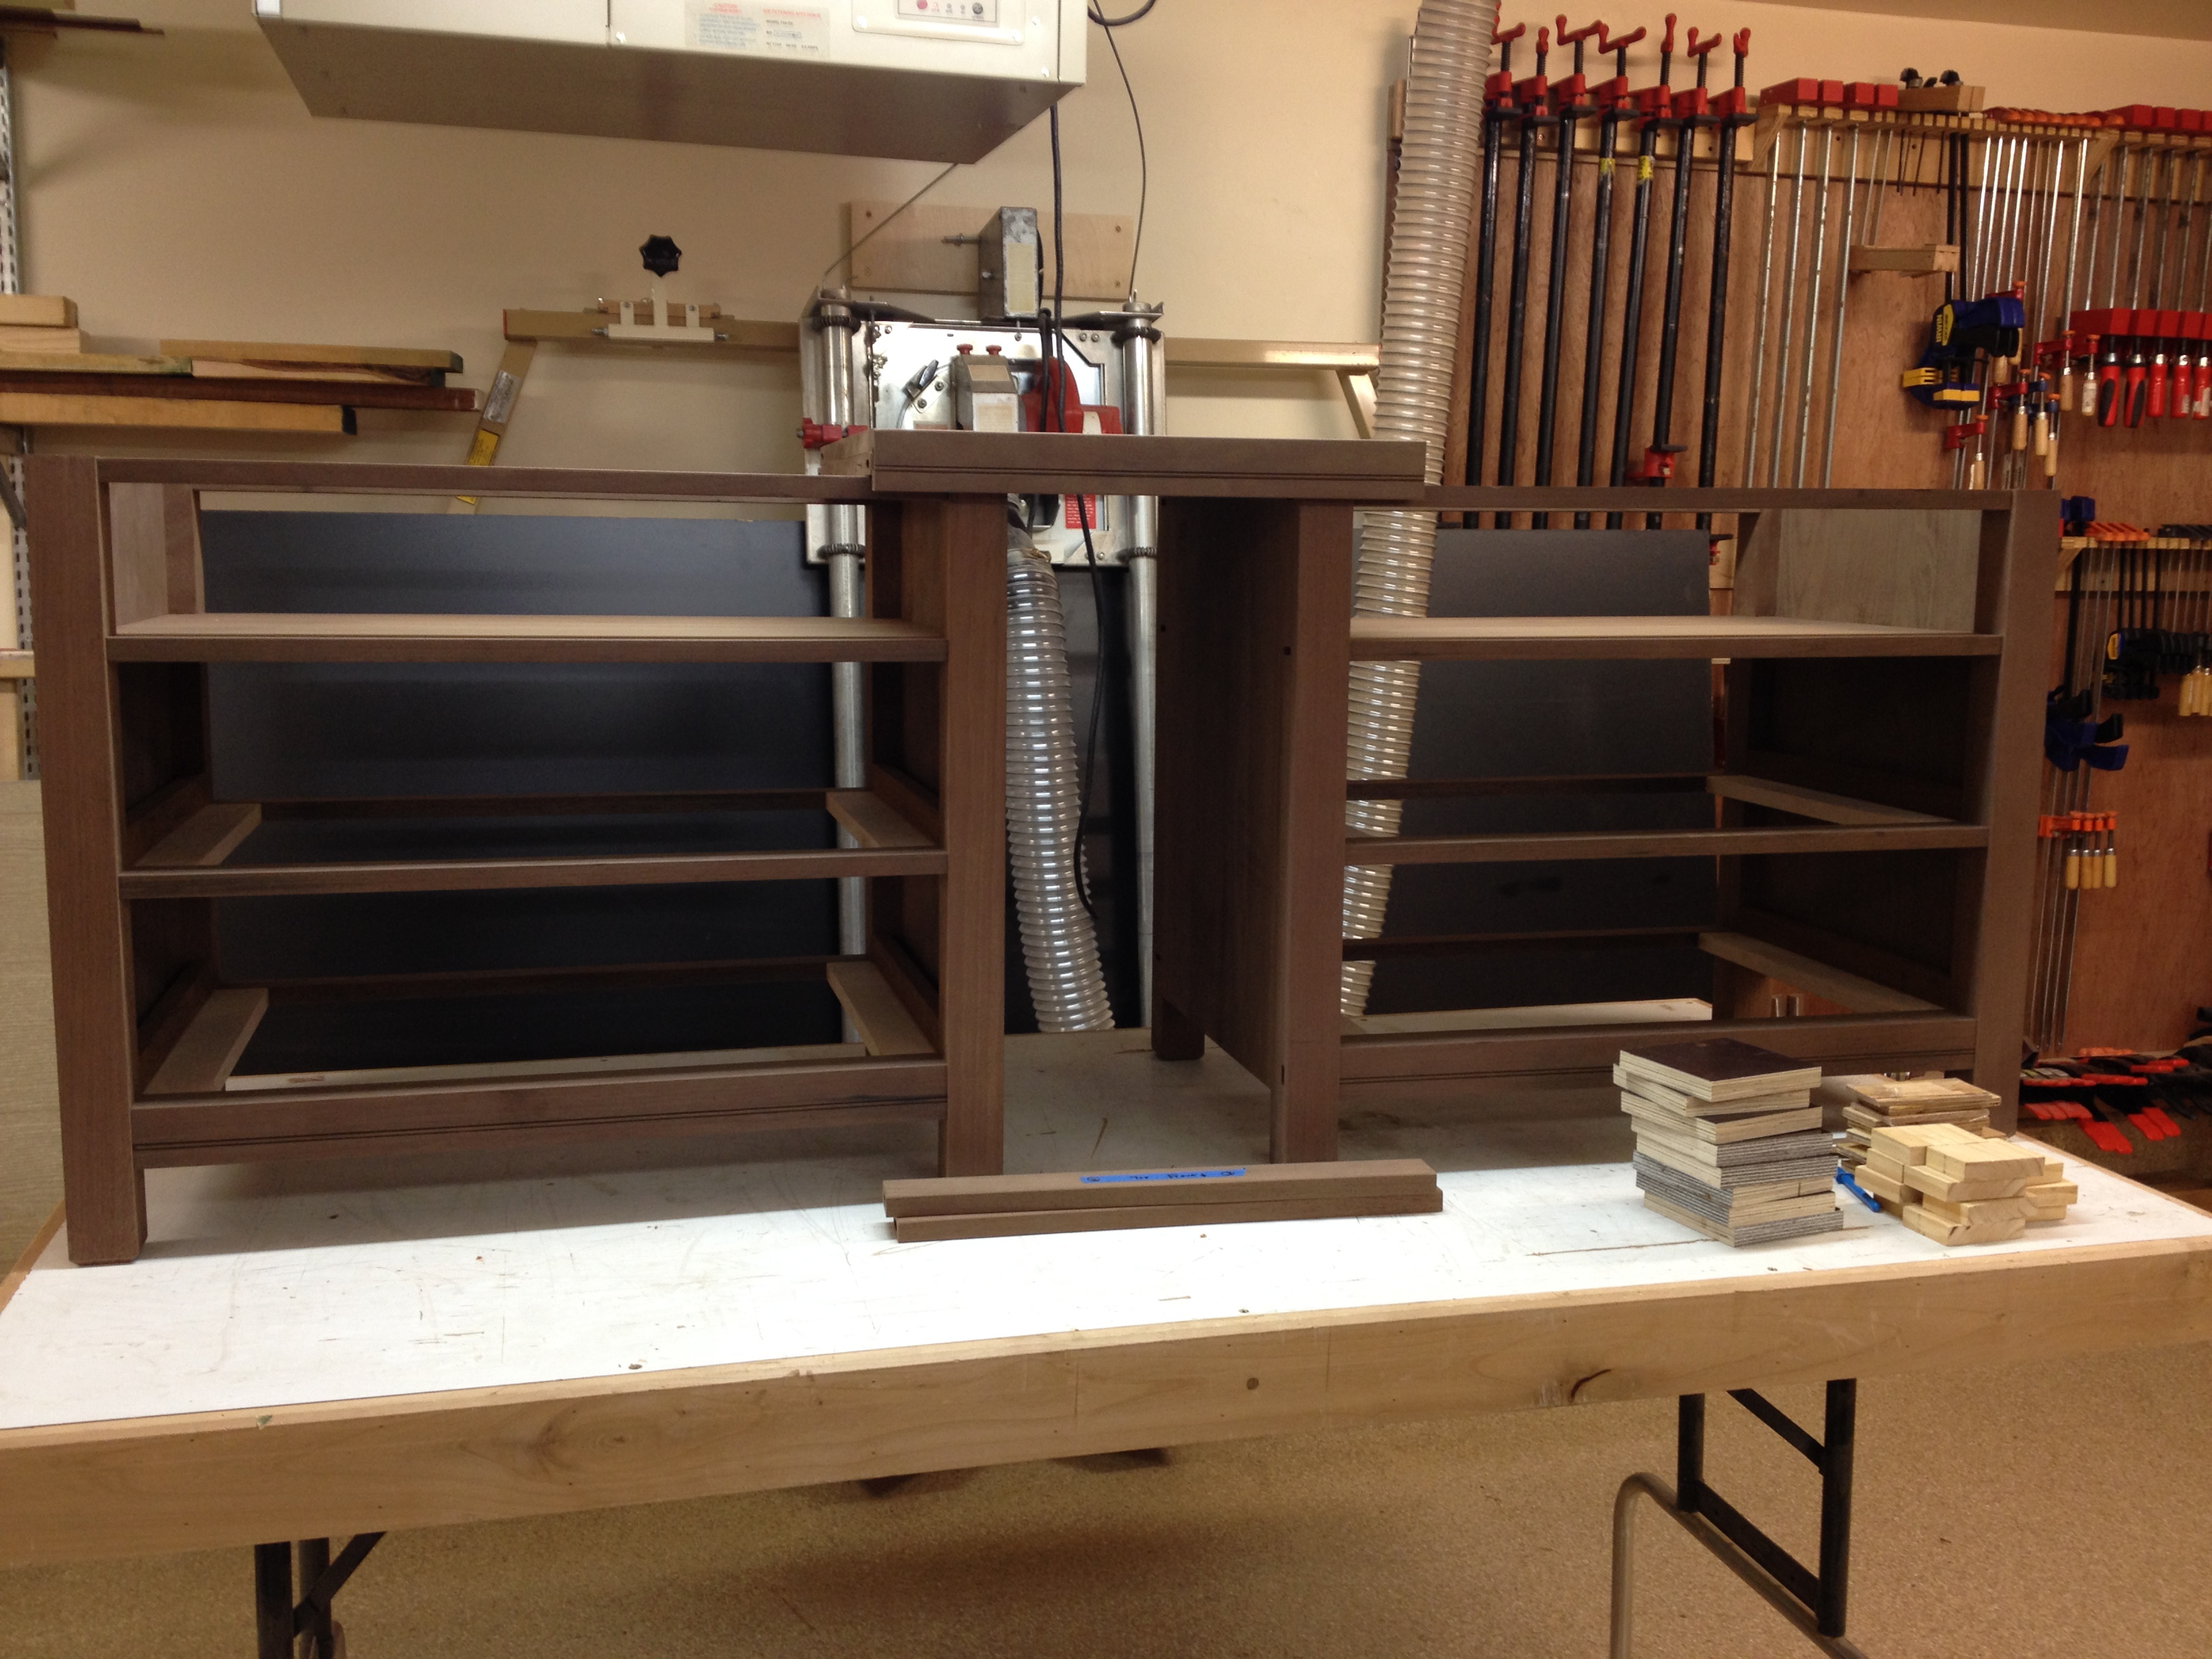
So it’s 20 minutes of stress and swearing, and then let the thing sit overnight. When I took it out of the clamps the next day, it was rock solid. This is one of the outer sections completed.

If a TV weighs less than I do, we should be good.
I should add that somewhere along the way I found the time to “sign” the piece with a branding iron and some metal stamps. I like to do this in an out-of-the-way place where it won’t necessarily be seen unless you’re looking for it. In this case, it will be in the dark back corner of an inside space. Here is what that looks like.

This may be foolishly optimistic, but I hope to finish this year…
After I got the second sub-assembly together, I had to quit for two reasons. The first reason was, I was out of glue. But the second reason had to do with my assembly table. Have a look at the pieces on my assembly table and you’ll see why I had problems.
Uh… The table is too short.
My assembly table is usually awesome. It’s got a “torsion box” construction, which keeps it dead-flat. That’s important when you want something to stand up straight in the end. It’s also got a completely flat bottom, which makes it handy for clamping things to. And though I need to replace the melamine surface, dried glue still pretty much pops right off. BUT… it’s only 6 feet long. And this cabinet is 7 feet long. Time to improvise.
I have this other folding-leg table that I use for painting. I also use it as a sacrificial table when cutting with a circular saw, as an impromptu banquet table, and sometimes as the thing that holds up the black tank simulator over in the side yard. I’ve had it for years, and frankly, I’m surprised it’s still together. But it’s over 7 feet long, which is just what I needed today.
![]()
I didn’t make the table to be completely flat, and so it isn’t. But with a thin sheet of melamine and a whole bunch of shims, I got it pretty darn close. Another 20 minutes of nervous gluing, and some manhandling the clamps to close up all the gaps, and we have this.

It’s a thing!!
So now that the casework is basically complete, it’s time to turn my attention to the 4 drawers. The sides and backs of the drawer boxes will be half inch thick maple. I decided to try to save a little money, and bought 6/4 inch thick boards to resaw to get the drawer stock. This move will either be a genius cost-saving measure, or a laughably warped failure.
Resawing, for those of you who don’t know what it is, is cutting a board in half along the most difficult dimension imaginable. Here’s a picture so you’ll get an idea of what I mean.

There, I’m driving a blade through a 7 inch deep slab of maple. Even though my band saw has plenty of power, I’ve never had much luck resawing. The blade would always wander and bow and leave me with 1 concave and 1 convex board. But then, some time ago, I read an article about bandsaw setup from Michael Fortune, who is a very talented craftsman. I adopted the tips in his article, and I haven’t had any trouble with my bandsaw since. I quit buying gadgets to help with resawing. I gave up on the special resaw blades. I gave up on the silly curved and tilting fences. I quit futzing with the blade tension. For these cuts, I just went at it with my regular bandsaw setup (well, I did add that tall fence). Guess what? It turned out fine.
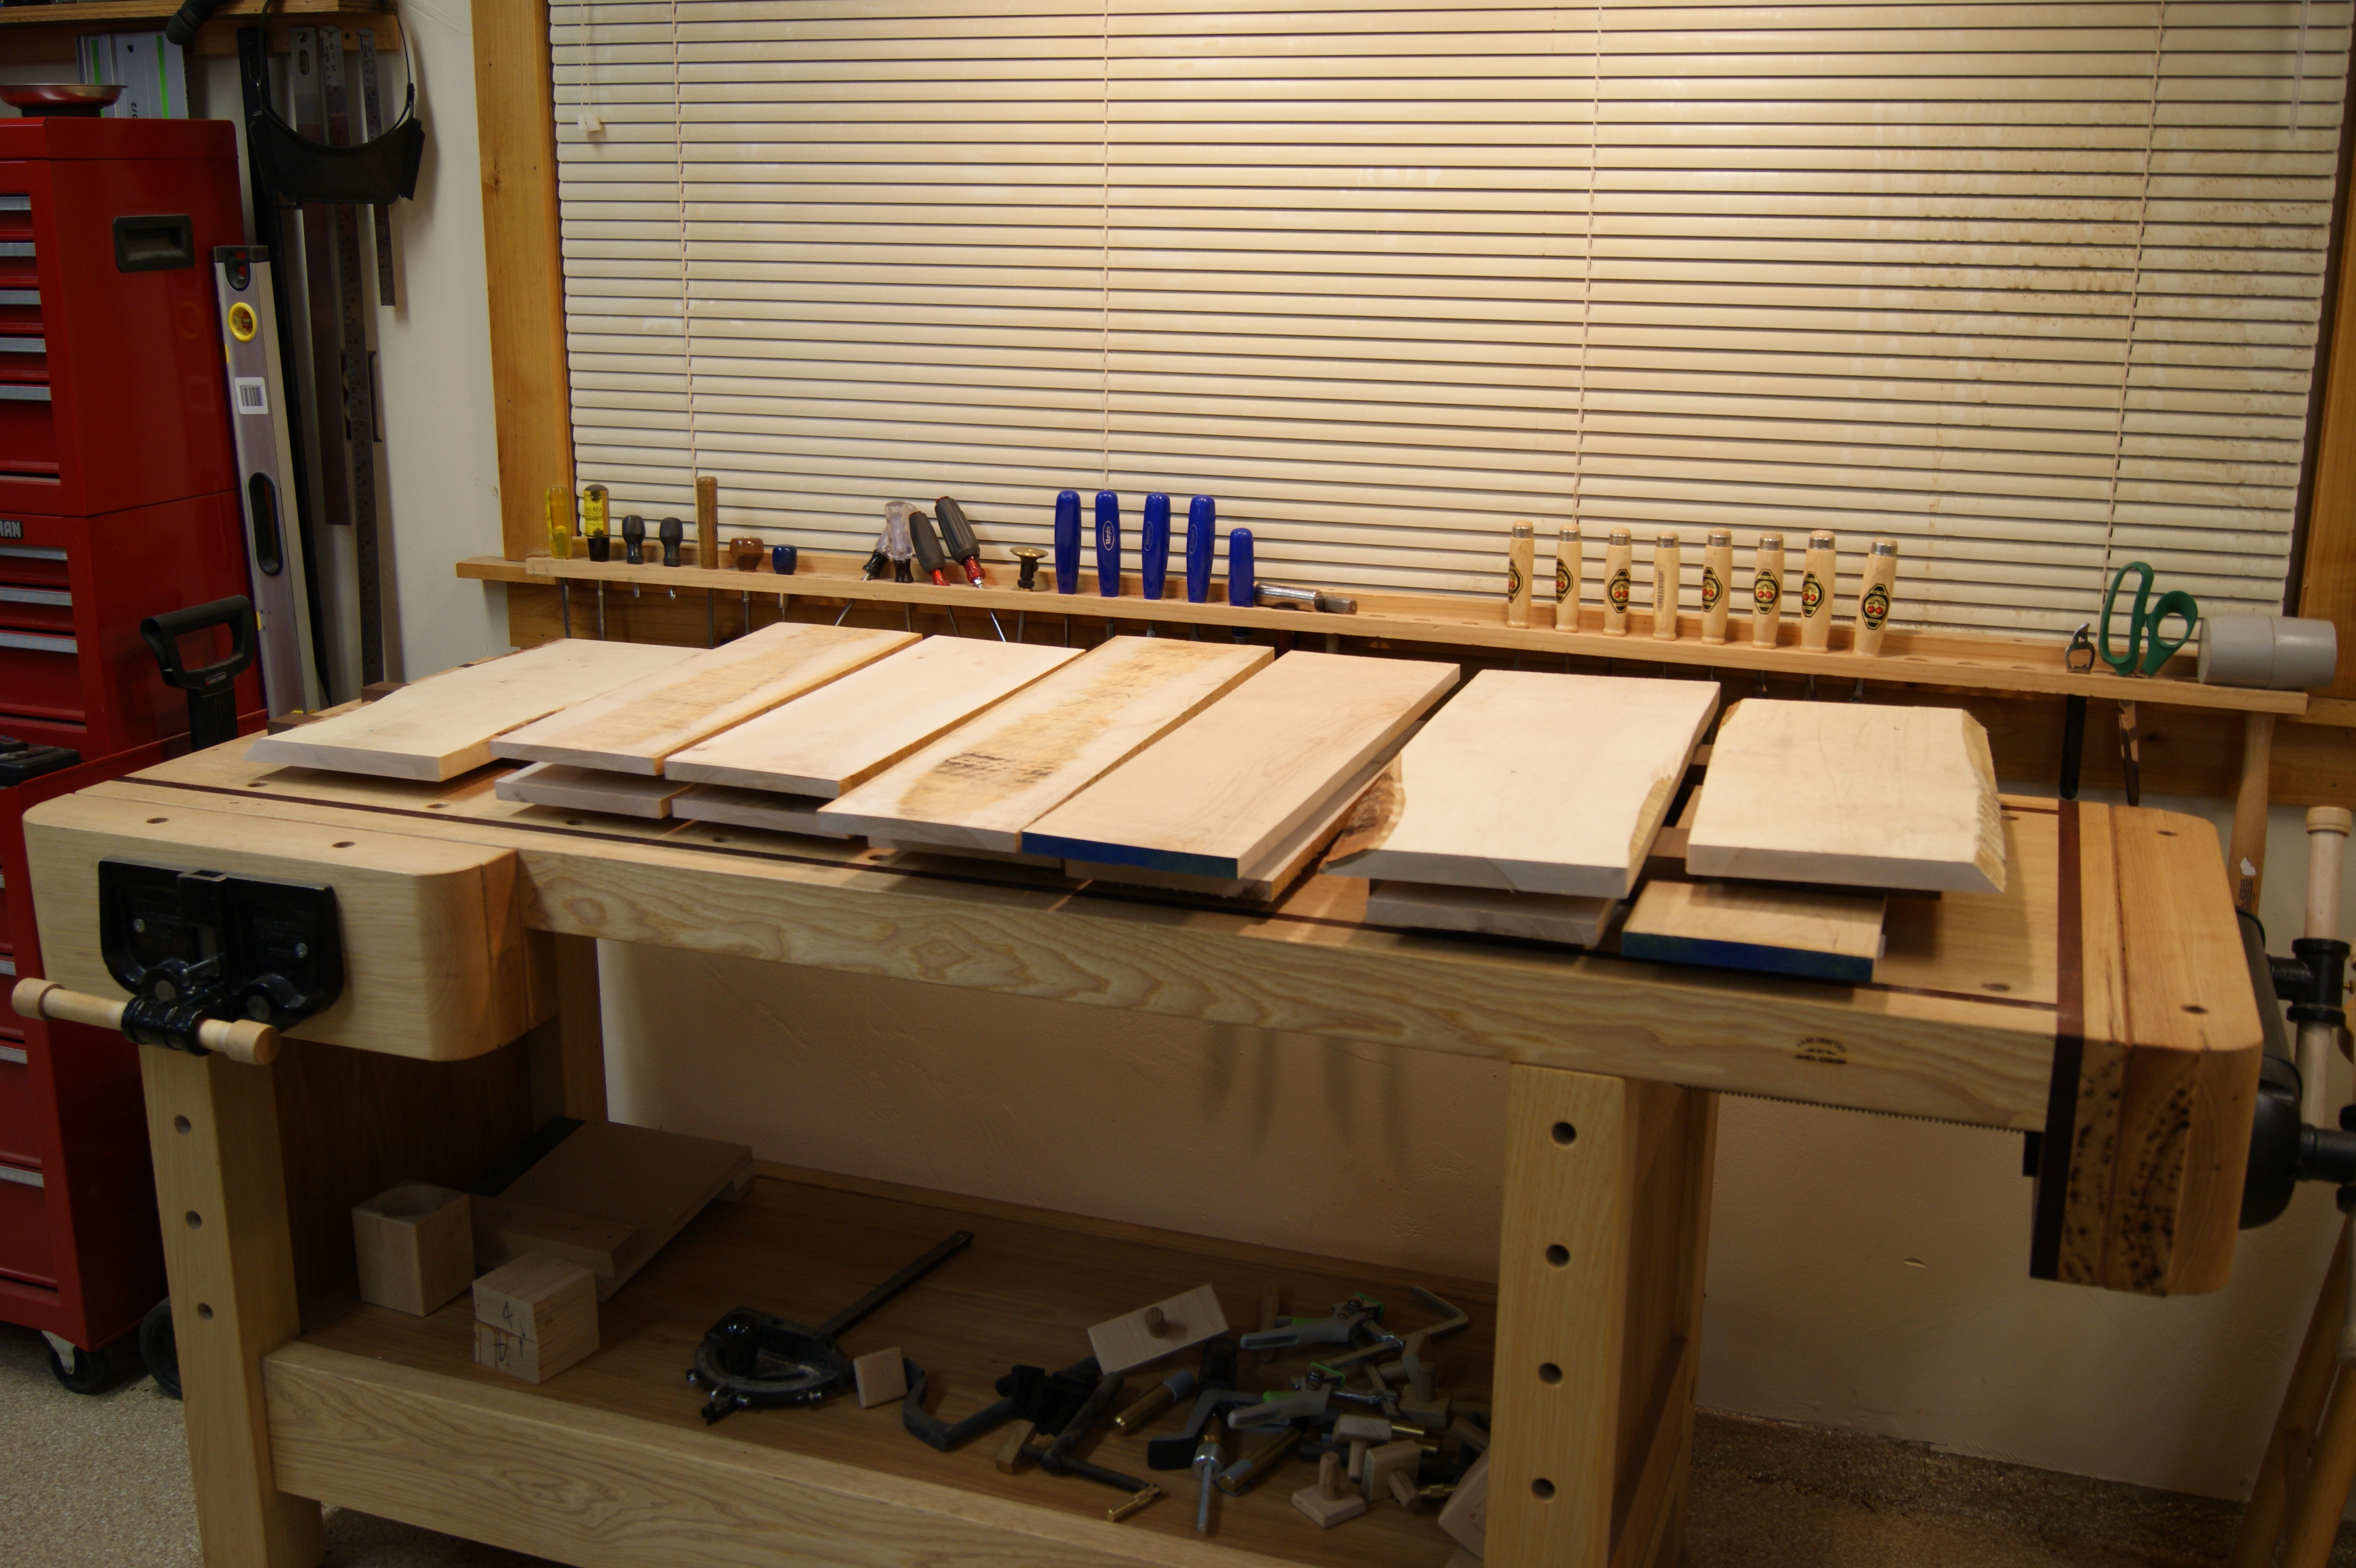
Ready. Set. Warp!
Now, the only thing I have to worry about is how much those boards are going to warp now that they’ve been resawn. I’ve got them stickered on my bench, and in a few days time I’ll check on them and see if they can be used for the drawer sides, or if I need to head back to the lumber yard. Fingers crossed!


James, dear James, you have no idea what all this woodworking is doing to ruin my own self-esteem….. I am absolutely a non-starter when it comes to anything do-it-yourself, let alone crafting fine furniture. My wife has seen some of these blogs of yours and is making me feel totally inadequate.
I cannot wait for the weather to improve and you two get back on your travels in Das Bus. That is something I can relate to!
Best wishes for the new season,
Peter (English guy from Sedona, AZ)
Peter!
LOL. You’re cracking me up!
If it makes you feel any better, I’m sure Stef would tell you that I have some inadequate days as well. 🙂
Funny thing, we had planned to go out in Das Bus over the holidays… twice! But both times, we were turned back – either by massive snowfall or temperatures that wouldn’t climb into double digits. We don’t mind RVing in the snow or cold, but we like to be able to occasionally EXIT the RV when we do. We may try again later this month.
Best wishes to you as well, Peter. I’m sure Sedona is as beautiful as we remember it.