This post may contain affiliate links.
Hey everyone. I usually try to get something on the web site every week. But this time around, it’s been a few weeks since I’ve posted. There are reasons for that. I’ll share a few details here, with full posts or videos to come. But trust me, I haven’t been being lazy!
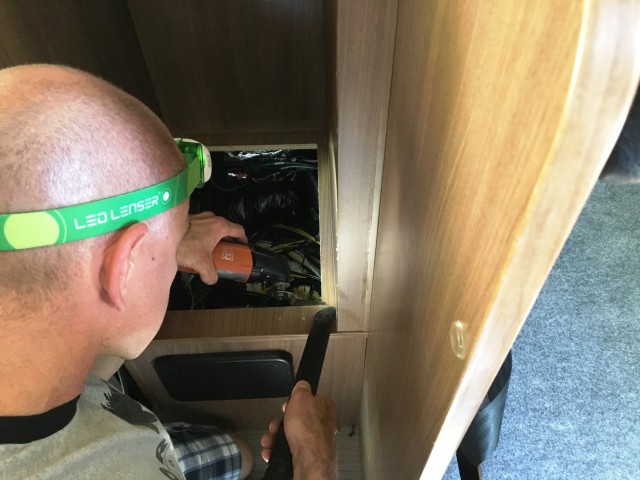
There have been three projects I’ve been trying to get completed before we leave for the Winnebago Grand National Rally. One large project, one medium, and one small. I’m happy to report, I’ve got them all wrapped up (for now), and we’re ready to hit the road. I’ll give you teasers on the large and medium projects, and all the details on the small one. Here we go:
The HUGE Project – The Electric Travato
Lance already had a whole-house inverter, and we were able to run 120 volt electrical loads without turning on the generator. But this project takes it to an entirely different level. Over the past several weeks, we’ve been converting Lance into a super-electric RV, with no need for the Onan generator. I say “we”, because I’ve been working with people from the following suppliers:
The folks at Xantrex have taken the lead on putting this system together, and I think they’ve done a good job as a systems integrator. The end result is something similar to what other RV manufacturers are offering in their vehicles, but with some key differences and improvements. The technical details are too much to go into in an overview post, but I can tell you that the system consists of the following key components:
Nations Dual Alternator for the ProMaster
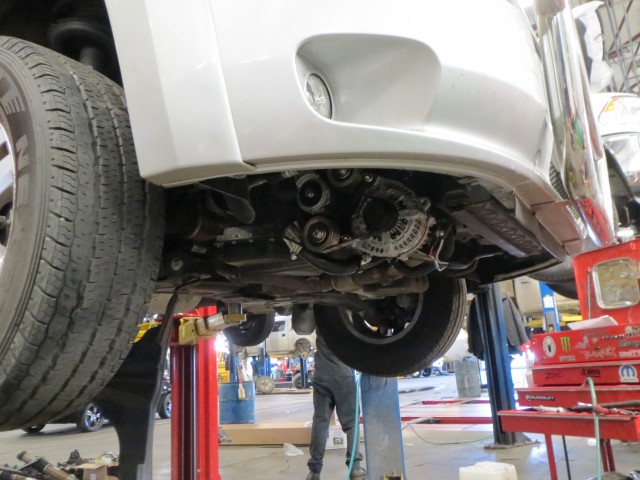
I will not refer to this as an “underhood generator” or any other silly term invented by a marketing department. It’s an alternator, and a big one. This alternator puts out a reported 280 amps at idle. (That’s awesome, but I haven’t tested it yet!) Using a second alternator is key, because the alternator came with a voltage regulator by Balmar that’s programmed for lithium batteries, and contains a control circuit that works with the Battery Management System (BMS) on the lithium battery. In other words, this alternator “talks to” the battery to regulate charge output.
Lithionics 420 Amp-Hour Battery with NeverDie BMS
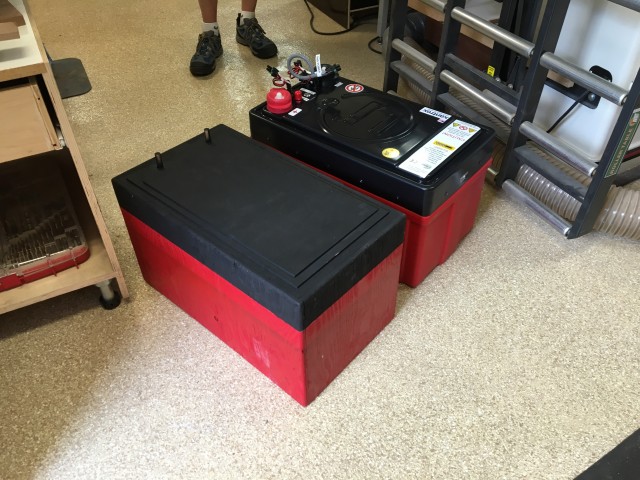
The real battery is on the right. That’s a mock-up I had made on the left…
This beast of a battery provides about four times the usable capacity of the stock system our Travato came with. Considering I never saw our AGM batteries fall below 90% full (thanks to all our solar panels), this may initially seem like overkill. BUT – this battery should allow us to run the air conditioner for about 3 hours on battery alone. Since 3 hours is about the longest bike race I typically compete in, Stef is OK with that. The battery management system is really the star here, and apparently prevents me from flat-lining the battery, over-charging the battery, or asking too much of the battery without taking it out to dinner and a movie first. I’ll be putting this battery through its paces in the coming weeks. Oh, and due to our love of winter RVing, this battery is mounted INSIDE the heated and cooled space of our RV!
Xantrex Freedom SW 3012 Inverter/Charger
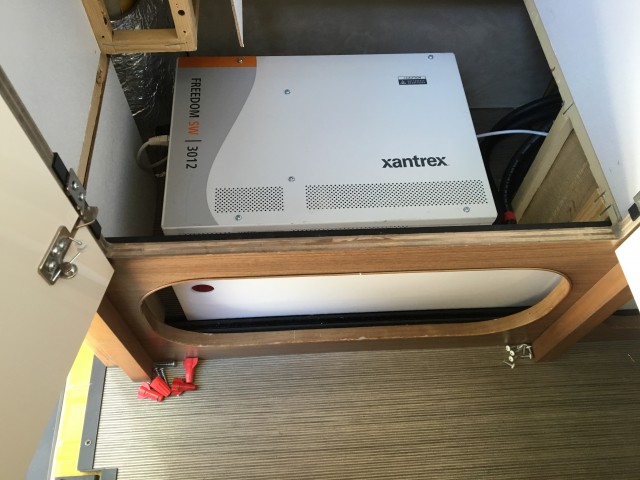
We already had a Magnum 2000 watt inverter. That was replaced with this 3000 watt unit. The main reason for that was the air conditioner. The Xantrex has tremendous surge capacity, and should be able to start and run the AC with no problem. (I mean, yes, we have already. I just haven’t done it like a million times yet.) Other loads in our coach should be well within its capabilities. I’ve already tested its ability to switch power sources from battery to alternator while running the AC. (The air conditioner doesn’t notice).
Fit RV Yard Sale?
A side-benefit of all this is that we were able to remove A LOT of stuff from our factory setup. I have enough RV components sitting around now that I’m considering some sort of yard sale!
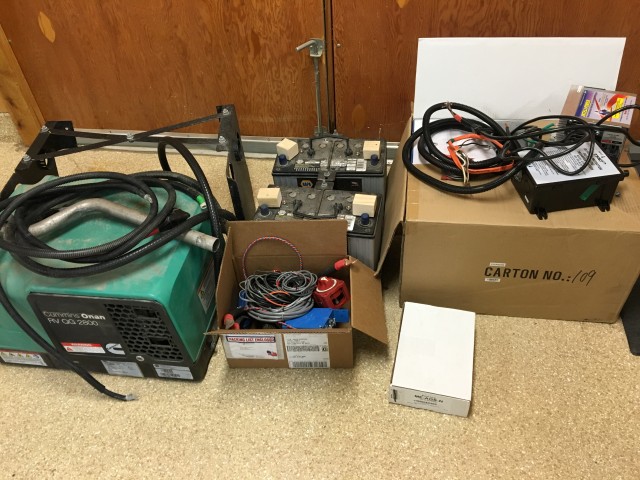
There are other parts to the system as well – including some that we have yet to install. Those will all be added shortly, and for now the system is fully functional. That’s good, because we need to get on the road to Iowa! Those of you who will be at the Winnebago GNR, you’ll have a chance to see the system in action, watch us test it, watch me try to kill it, whatever. Maybe we’ll even shoot a video about this system while we’re there. Anyway, it will all be fun.
The Medium Project –Curtains
If you’ve seen our Facebook page, you’ve seen Stef’s amused reactions to my latest undertaking. I had previously designed a curtain for the window in the sliding door of our RV. But I couldn’t implement it because I didn’t know how to sew.
Well, I eventually found someone to sew me that curtain (Thank you, Jenn!), but not being able to do it myself really bugged me. It bothered me so much, I signed up for sewing classes. I took the beginning course from Sew What, here in Salt Lake City, and hoped that was enough knowledge to sew curtains.
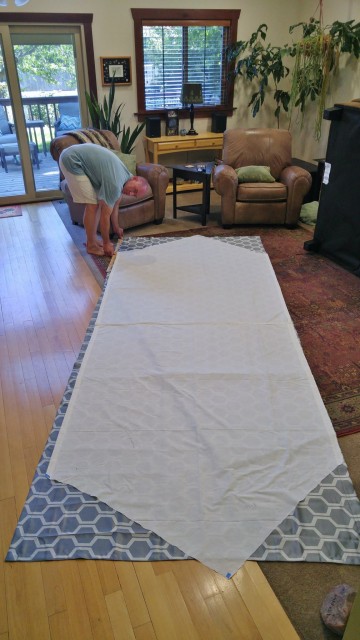
In practice, sewing a thick curtain of over 60 square feet is considerably more challenging than sewing the little napkins and pillow cases we worked on in class. But I got it done. I even had time to make a tie-back.
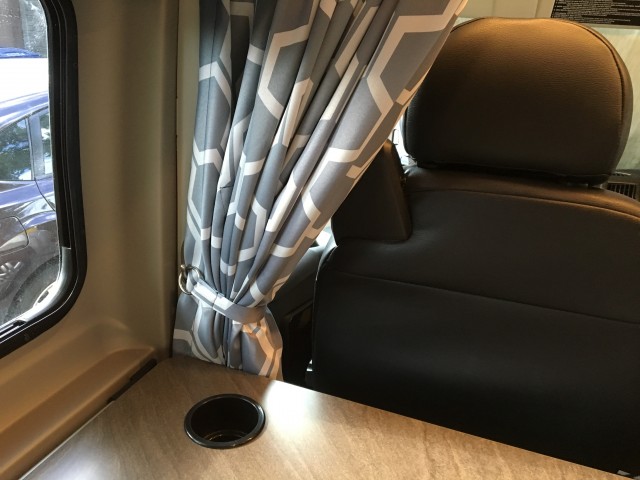
I don’t know about the fabric, but those rings are good to 225 lbs!
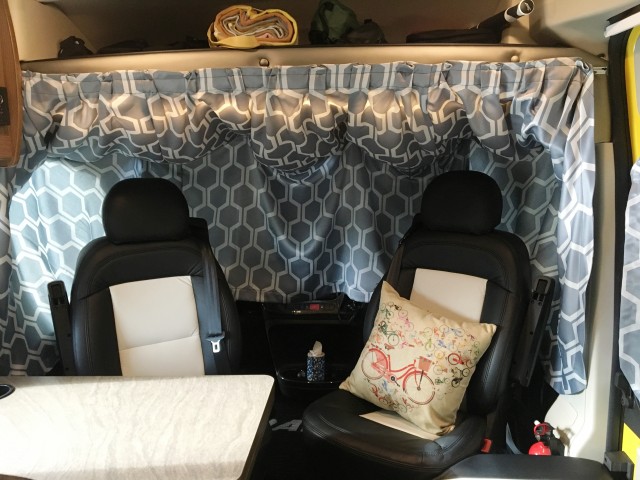
So now, we have a cab curtain that will either seal off the cab, or can be configured to include the cab in the living area. Both with complete privacy. I’ll share the details of how I did this, what track I used, and all that good stuff in an upcoming post.
The Small Project – More Storage!
This one started with a post by Daniel Senie over in the Travato Owner’s Group on Facebook. He posted pictures of a removable panel under the toilet in his Travato 59G. Since Lance is a G (more or less), I was interested. And since Lance has a composting toilet, I was especially interested. And when I removed the panel, I was thrilled.
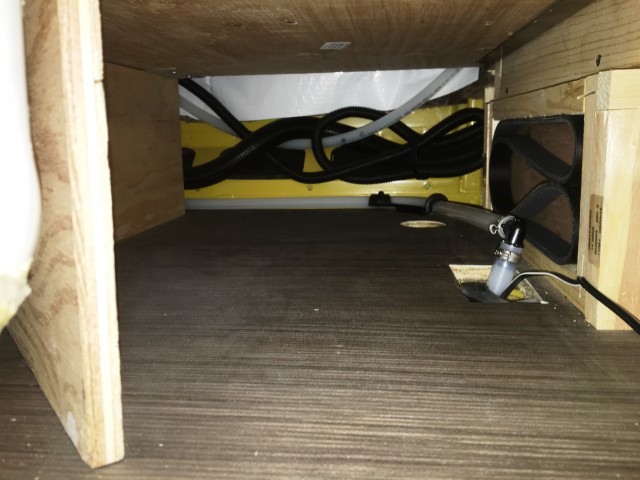
You see, with a composting toilet, we don’t have a large-diameter pipe running down through that space to the black tank. On Lance, that space was pretty empty. Hello, additional storage! This space is brought to you courtesy of Winnebago. They go the extra mile in the design stage, and they ensure that you can get to all the parts of the RV you might need to for service without tearing the RV apart. That’s why this panel was removable. There are a couple plumbing connections back there.
Besides being mindful of what I store there (to keep from damaging the aforementioned connections), all I had to do to make use of the space was cut in an opening. Well, that was easy enough. Then I needed a door of some sort. I could have tried to make something of wood, stained it to match (or tried to), and figured out some hinges or latches. But since Stefany had recently made me purchase a separate band saw specifically to cut metal (I’ll let her tell you about that one…), I thought I’d just go the simple route, and make a metal door.
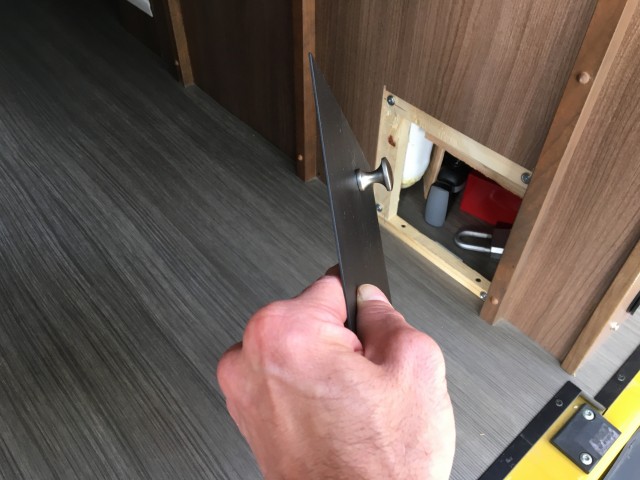
It’s just a square of metal with a hole drilled into it for a handle. I then just spray painted it a hopefully unobtrusive black.
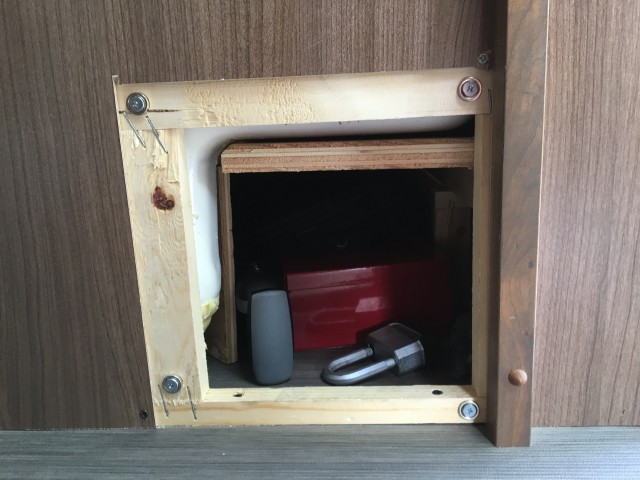
To mount the door, I simply used magnets. Strong ones, but still, just magnets. These were dead simple to mount, and since the door is steel, they work like a champ. No rattles. No popping open. And with the exception of the handle, it takes up very little space. (We store bikes in that area, so the door had to be slim.)
And finally, FINALLY, I have a place to store my bike pump that’s out of the way!
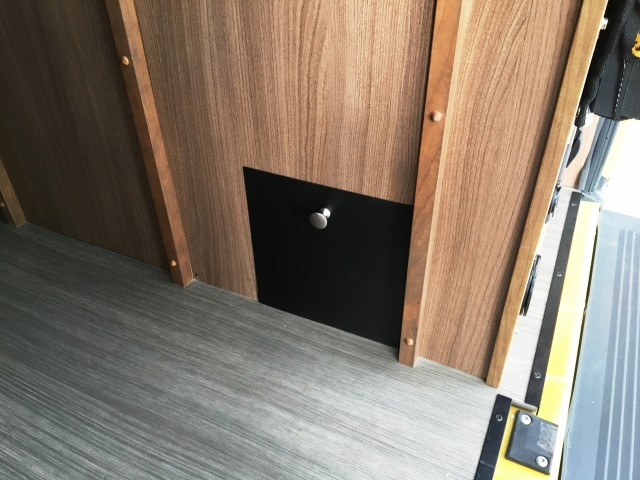
So there you have it. That’s why I haven’t had much time to write in the past few weeks. I should get the rest of the details on the curtain project up soon, and the electrical system will be a continuing effort in the coming weeks.
But that’s all the time I have for now. We have to hit the road!!





I just returned from the Detroit Auto Show. I walked through a Dodge ProMaster van. Just think if it were a hybrid model and you could use the batteries to provide house power and the hybrid motor/alternator to charge the batteries from time to time.
This would eliminate the generator and some of the gear you provided. Just think of the amp hours that would be available for the house electric.
It’s an interesting idea. I don’t know of any heavy-capacity vehicles (vans and/or trucks) that have been built as a Hybrid yet.
If anyone knows of one, I’d be interested to hear about it.
Not Hybrid…but here is an ALL ELECTRIC RAM Promaster!!! http://www.zenith-motors.com/ I doubt the range is great and it seems to be mostly used as a short range shuttle for companies and campuses.
Nice!
(Good luck selling “55mph – Electronically limited” to “Lead Foot Stef” though!)
Nice job!
So is Lance so named because of the of the colour and the *ahem “performance enhancements?”
James and Steph,
Thanks for all you very informative, very entertaining blogs. I’m a regular visitor. Plan to try to come meet you Pamona. So James, here’s my question. In going all electric, what are you getting right that Roadtrek did not get right the E-Trek? There seems to be a lot of unhappy chatter in the forums from E Trek owners who say Roadtrek over promised and under delivered in terms of how well the E Trek option preforms. Be interested to hear you “geek out “ a little on how you’re solving engineering issues that RT apparently have not been able to solve.
I’ve wondered that myself. I mean, yes, it’s technical. But it’s not rocket science. I suspect where one might go wrong would be in trying to over-engineer things. In other words, by trying to create something totally foolproof, and that can work for any contingency, you could actually create a system that’s a little too complex. I’ve not familiarized myself with the reported Roadtrek problems enough to comment in too much more detail than that. But really, what we’ve done doesn’t seem THAT complicated…
Hi James & Stefany –
I am going to start on our front cab (59K) curtain project this coming weekend & was wondering if you could share a link to whatever curtain rod you used, along with a link to the curtain hooks you used. And of course any super important tips & tricks I should know!
Thank you!
Ashley
Oh, I do owe everyone a write up on the curtain, don’t I.
I’ll add it to the list. It’s coming.
Did this affect the warranty on your vehicle?
The second alternator was installed by a Ram dealer. They were clear that any of the modifications would NOT be covered under warranty, but that the basic engine and powertrain warranty was still intact.
Very excited to see that you decided to upgrade Lance’s power plant! Looking forward to hear from your live tests. Do you know why the 420 Amp battery you installed has been discontinued? Replaced by the 400 or the 480.
Waiting for my AGM to die to replace them with Lithium (they will probably die of old age because I’m a bit energy obsessive) Glad to have riders like you “en tête de peloton” to test the road ahead of the “water carriers”!
This is Stephen Tartaglia, Engineering Manager at Lithionics Battery. We were able to increase the windings (laminations count) of the original 420, and boosted it to 480 amp hours inside the same 8D case. For an extra 15% capacity, the price only went up about 5%….a good deal for our customers. The weight stayed the same because all we did was control the consistency of the .001 inch lithium sheet stock to gain more windings or “turns” inside the cell (more capacity) by turning metal thickness variations into usable capacity.
Thanks Steve! We always appreciate having authoritative sources.
Come back any time!
Very excited to see that you decided to upgrade Lance’s power plant! Looking forward to hear from your live tests. Do you know why the 420 Amp battery you installed from Lithionics has been discontinued? Replaced by the 400 or the 480.
Waiting for my AGM to die to replace them with Lithium (they will probably die of old age because I’m a bit energy obsessive) Glad to have riders like you “en tête de peloton” to test the road ahead of the “water carriers”!
I wasn’t actually the one to order the battery, the folks at Xantrex did that. I don’t know why that size is not offered any longer.
My goal on this battery/inverter/alternator thing is to get it to a point where I don’t think about it anymore. It all just works. So far, I’m off to a good start!
James, can’t wait to see your post of the details of the large project. You Da Electron Man! 🙂
So far, it’s been going well!
Great post! Really cool updates. I’ll definitely need to work on my curtain making. HAHA!
Big project – too out of my league to even comment. Medium one – well BRAVO FOR YOU! Yes curtains are seriously more involved but I do feel your pain and joy in getting that done. Small project – another BRAVO on extra storage (I’m currently reworking some of my trailer in that department but not as involved). Steph gets the kudos though for MAKING you get a new band saw and putting up that challenge (via her amusement) on the curtains. Wise woman that one! 🙂
Did the Nations Alternator’s “control circuit that works with the Battery Management System (BMS) on the lithium battery” push you to go with this specific inverter/charger/lithium combo?
We’re not in the market for a second alternator right now, but our Trend will be at AM Solar next week and we might want to add one in the future.
It was actually the folks from Xantrex that put the whole system together. They’ve been working with Lithionics and Nations for a while, so I imagine they had a hand in designing the system and it’s charging protocols.
The second alternator however, is NOT a trivial addition.
Great job sewing the curtains, James!
Just don’t look at them too closely! 😉
Just made curtains for my travato before I found this post. They work great.Going to make one for side door to help keep out cold when opening side door. Water tank should be place next to counter so you don’t have to open door all way in cold westher.
interesting idea. Never thought of that one.
James,
Very exciting additions to Lance. I was looking at getting the second alternator kit just so I could charge my batteries faster without having to run the generator and when the 100 watt solar panel was in cloudy weather.
Is having the second alternator a good fit with just having the rest of the van electronics and batteries stock or is it just meant for if you are upgrading to lithium batteries.
(2017 Travato 59K)
“just so I could charge my batteries faster without having to run the generator”
If that’s all you’re after, then a second alternator is way too much overkill and too much risk. There’s nothing magic about a second alternator – the standard alternator will charge your existing batteries just fine and just as fast. The limiting factor there is how fast the AGM batteries will accept charge. The second alternator only becomes important if you switch to lithium batteries – which have a different charging protocol, and can accept a charge at a much greater rate. Also, if you intend to run the house AC from the engine – that will require more charge than the stock alternator can provide.
But if those use-cases aren’t in your future, then the stock alternator is a good fit.
I don’t think anybody could ever accuse you of being lazy. And I just can’t visualize you needing Stef to urge you to purchase a new tool.
Does the battery need to remain above freezing even in storage? Or just in use? If I remember correctly, the generator was the low point on the Travato, so you will gain some ground clearance by getting rid of it.
With the reduced pantry space, are you guys condemned to eat rice for the rest of your travels…LOL
PS: We still don’t know why Lance was being towed in the previous post.
LOL, Alain! I had James buy me a band saw so I could work on my own very exciting DIY project: a metal magnet board for Lance’s galley wall! As for the tow, that was thanks to the 2nd alternator…it wasn’t installed properly and cut through the coolant hose. Will let James explain!
The problem with Lithium batteries and freezing temperatures is only *charging*. They can be stored and used below freezing, just not charged. The problem would happen if you started the engine in a sub-freezing climate. By keeping the battery inside, we won’t have that issue. I’ll just have to pay attention when bringing Lance out of storage in freezing temps. And we only lost one drawer in the pantry bringing the battery inside, so not too bad.
Was this the reason Lance was on the flat bed tow truck in the previous post? Love the curtains! Good job! Looking forward to the info about the patterns. Safe travels.
Howdy Annie and Dave! Yeah I’m loving the curtains and so proud of James for pulling it off! He’s unstoppable. The tow truck was thanks to the 2nd alternator being improperly installed. We used our local Ram service shop to install it and it was their first time. They tried! But ended up getting a part of it too close to the coolant hose, so it eventually cut through it. All is well now but a good learning experience for us all.
Yeah…. ummmmm…. pattern…. 😉
Yay the second alternator install! Can’t wait for the detailed post. I am interested in how hard (and costly if you were willing to share) it was to install. We haven’t purchased an RV yet but I really like not having to deal with a generator but would like to be able to run an AC for my wife while I a, fishing or hiking for a couple hours. Really looking forward to the details and what a kit would entail.
You’re definitely going to want to check back when I’ve got some data and such!
Maybe it’s an optical illusion, but those batteries look huge compared to the shoes in the background)! I can’t for the life of me imagine where you put those. Looking forward to your real life test results and video.
Andy & Kim
Oh, will your 2 be at Pomona this year?
We’ll be there IF it’s under 100 degrees!
Hey, you two! 100 degrees?! Pshaw, that’s nothing! Last Pomona was closer to 105! Yep, we’ll be at Pomona so we’ll be looking for you…AND yes! That battery is HUGE! It’s in the bottom of the food pantry cabinet to the right of the fridge. We’re on the road to Iowa at the moment…hope you’re off having adventures too! xo Stef