This post may contain affiliate links.

If you own an RV based on the Ram ProMaster, you’ve probably noticed that you’re missing something most other RVs have. I’m talking about leather (or UltraLeather) seats. You see, since the GVWR of the ProMaster comes in at under 10,000 lbs, a lot of passenger car safety regulations apply. We get some benefits from this (side impact air bags, for example), but the downside is that RV manufacturers can’t recover the seats unless they’re willing to undergo the required government crash testing. Since crashing multiple RVs can get expensive quickly, manufacturers decide to leave the seats alone.
BUT! As a consumer, I have no such restrictions, and I wanted leather seats. This is the story of how I got them.
Before I go any further, a few words of caution. While I share most of my RV projects with the intention that others can follow along and complete them on their own, this one is an exception. I actually DON’T recommend that most people try this. This turned out to be one of the most difficult things I’ve ever done to an RV. The seats themselves are heavy – I’d guess about 70 pounds. That’s not a huge amount of weight, but it doesn’t come in convenient barbell form. It comes in a large, awkward, easily damaged monstrosity with sharp bits of metal and delicate wires and plastic clips on it – that you have to wrestle with endlessly. And then, even though I have a fairly well-equipped shop, I hit some snags with the seat covers that I just didn’t have the tools to complete easily. I had to use pre-industrial-technology and sweat to get the job done.
So, bottom line: unless you really know what you’re doing, I’d probably source this one out to a professional. I know I would if I could do it again.
Getting the Leather Seats
There are a number of sources for aftermarket leather seats online. Ultimately the one I decided to go with was leatherseats.com. They had a good selection of material options, their prices were good, and their website worked properly for configuring the seats. (As an IT guy, it’s no surprise that a malfunctioning website turns me off from a purchase completely.) I configured the seats to match the Winnebago-supplied upholstery in the back, and placed my order.
That same afternoon, I got a call from LeatherSeats.com. They had some concerns about my order and wanted to make sure to get it right. “Now THAT’S customer service,” I thought! The first thing they wanted to do was send me some leather samples. I had ordered the seats in shades of black and white. Since they had several shades of each, they wanted to put actual samples in my hands to make sure the colors matched. I had the samples three days later, and while one of the colors I had chosen was spot on, I changed my mind on the shade of white. Nice!
The second thing they wanted was pictures of my existing seats. Apparently, they had a couple seat patterns for the ProMaster, and they wanted to make sure I got the correct one. No problem, I sent them some cell phone pictures and we were off to the races.
When the seats arrived a couple weeks later, it looked like the colors and the stitching were exact matches for what I wanted.
Now, to get them installed. My first instinct was to go to my friend Dale Hancock, who runs an upholstery business. He had done some of the recovers for Das Bus, so I knew it wouldn’t be a problem for him. Unfortunately, Dale was booked three weeks out before he could get to me… and I’m impatient. He did agree to have a look at them though, and offered me a little guidance on how to install them myself.
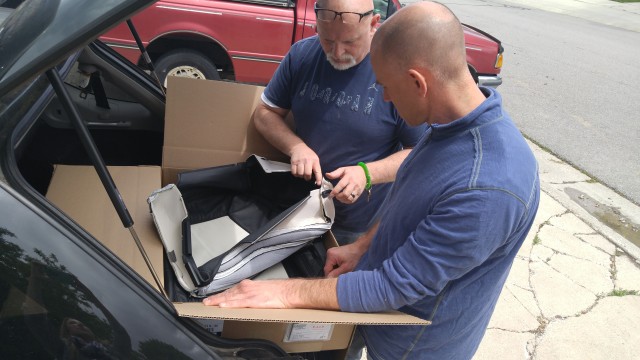
Dale, telling the captain of the Titanic, “Oh, hey by the way, there may be some ice floating around out there. Probably no big deal…”
So, armed with my usual over-confidence and a new set of hog ring pliers (we’ll get to hog rings…), I set out to install the seat covers.
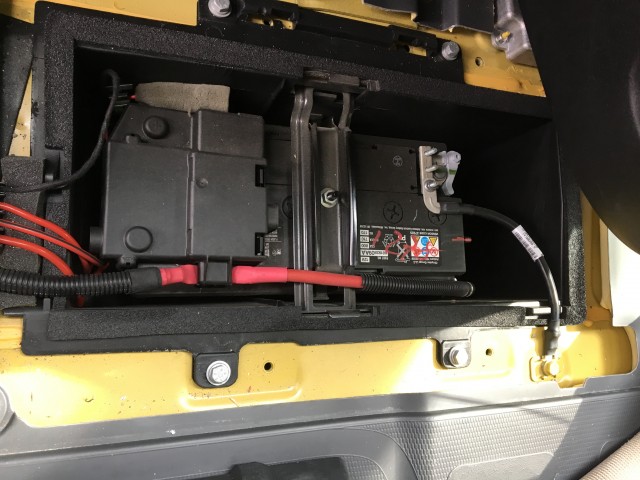
The first step when you’re doing anything with the seats is to disconnect the battery. There are electrical connections in the seats, and the last thing you want is a stray spark launching your airbag. If you’ve never disconnected the battery in your ProMaster, it’s under the floor on the driver’s side of the cab.
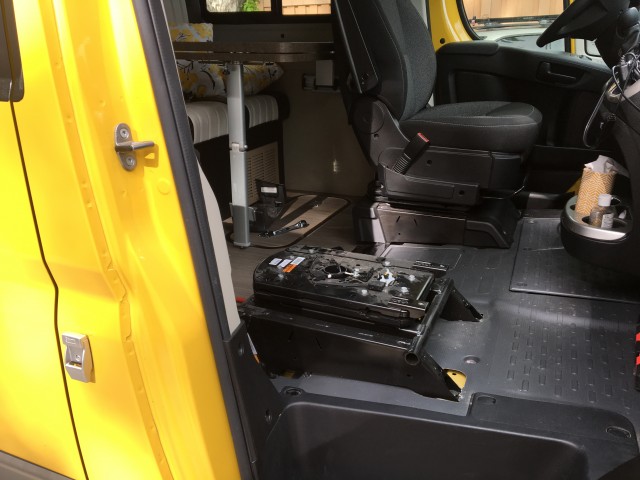
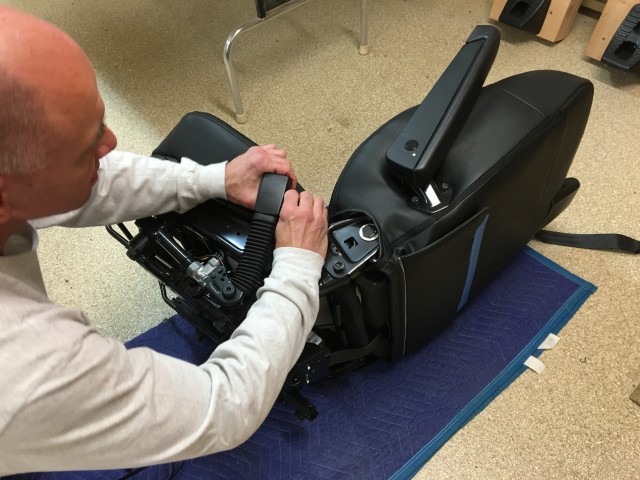
Removing the seats is pretty straight forward. There are 6 bolts holding each in. The two bolts in the front are a huge Torx bolt – like a T-45 or T-50, I don’t remember. The four bolts in the back are large hex-head bolts. Unbolt all of those. Then, there are electrical connections under each seat that you have to un-clip. There are two or three varieties of non-intuitive electrical clip-type connections under there to frustrate you. Two connections under the driver’s seat and three under the passenger’s. When everything is disconnected, you lift the awkward 70 pound seat while your wife struggles to free all the wires and you try not to let the seat slip and crush her hands. Then, you spend 5 minutes swearing at each other. When you come down from that, this is what it looks like with the seat removed
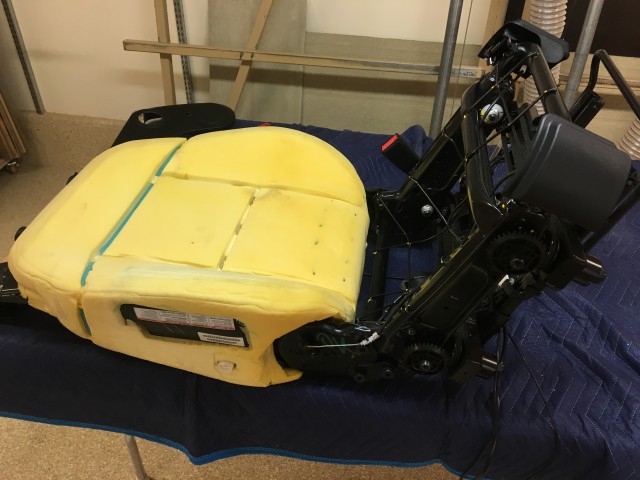
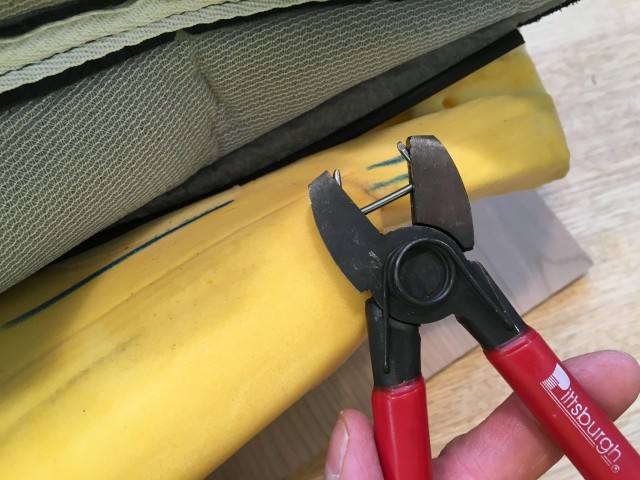
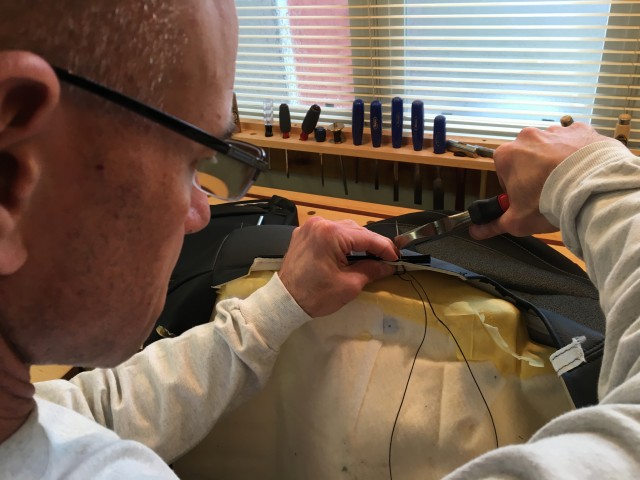
There are a few plastic trim pieces on the seats that you just screw off, and then you remove the existing seat covers. Start with the bottom, and remove the plastic clips from the frame of the seat (there are several). Once you’ve got that done, you’ll need to cut the hog rings that are holding the listings on the existing seat cover to the rods embedded in the foam. Kind of tough to explain, but it makes sense when you see it. There are about 14 hog rings in the bottom of the seat, and when you’re done, your hands hurt unless you’ve got something better than side-cutters to cut them with. I didn’t. Also, remember to fish all the pointy metal hog-ring-remnants out of the seat foam. When you’ve done that, it looks like this, and then the foam just lifts right off.
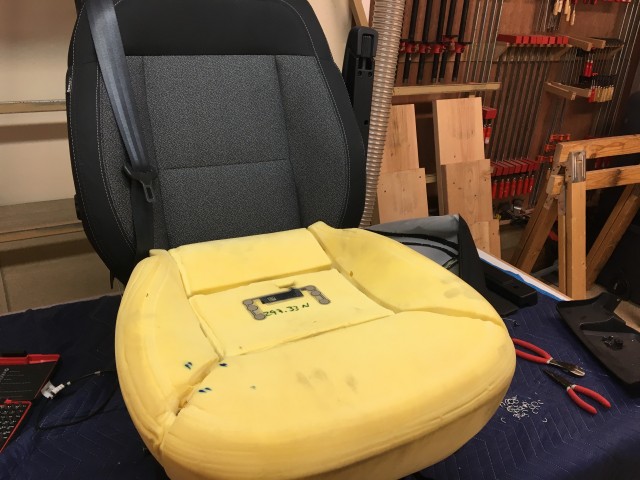
This is the passenger’s seat. that little sticker thing in the center of it is the weight sensor that lets it know if someone is sitting there and heavy enough to need the air bags.
You do sort of the same thing with the seat back cover. Remove the arm rest (more giant Torx bolts). There are a couple zippers to undo on the back. Then, just start peeling the seat cover off the back of the seat from the bottom toward the top, clipping hog rings (20 or so more) as you go. The very last listing on the seat back is attached with Velcro, which makes it a bit easier. When you get to the top, you just stretch the material off over the plastic studs for the head rest. When you’ve got it stripped, it looks like this. You can see the black plastic airbag cover there in the side of the seat. On the new seat covers (just like the old ones), there is a piece of Kevlar sewn over the airbag that ensures that the seams burst if the airbag deploys. The seat covers are tagged appropriately as side-airbag-compliant.
And then, in theory, you just reverse the process to install the new seat covers. But this is where I started to run into problems. I started by attaching the top Velcro listing and working my way down the seat, attaching hog rings as I went. Things were going well enough at first, but when I got to the bottom, there was about a four inch gap between the front and back surfaces of the cover where they were supposed to clip together. “No problem,” I thought, I just need to stretch it a bit. So I started stretching. And pulling. And putting the seats on the floor and using my legs for leverage. And using screw drivers to try to get the clips to connect. And failing. And swearing. And finally ripping the plastic clips from the seat cover.
Devastated.
Then it occurred to me to compare the new and the old seat covers more closely. When I did, sure enough, THE NEW SEAT COVERS WERE MISSING A FOUR INCH PIECE OF FABRIC WITH DIFFERENT CLIPS! What to do? I’m pretty confident leatherseats.com would have made everything right if I had called them. But it was after hours, and I needed to use the RV in four days to go to Durango for a bike race! I really didn’t feel like uninstalling the new cover, reinstalling the old ones, and repeating the whole process again at some later date. And I didn’t have the time or the patience to wait for them to make a new set of seat covers.
So, I learned to sew.
We’ve already established that I don’t actually know how to sew. And I don’t know if a proper seamstress would call what I did “sewing”. I was using a curved needle the diameter of a cocktail straw and waxy thread that was more like yarn. But it worked. I removed the missing critical piece (with the proper connectors) from the original seat covers, and sewed it to the new seat covers in place of the plastic clip that I had ripped off. It looked like emergency battlefield surgery that’s going to leave a nasty scar. But it worked.
And once I had done that, the back of the seat attached perfectly. The bright side of this experience – if you can say there was one – is that on the second seat, I knew the problem ahead of time and it was much easier to remedy on my workbench than half-attached to the seat.
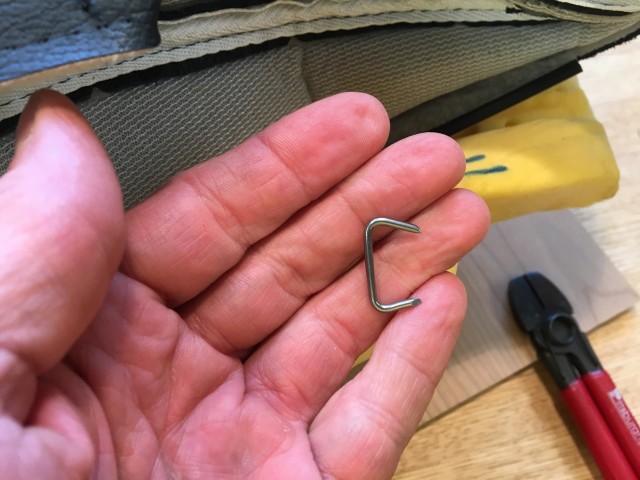
Once the back was sewn up (pun intended), it was time to work on the seat bottom. First, you attach the horizontal listings with hog rings. Since I’ve mentioned them several times now, hog rings if you don’t know, are little metal staple like things that look like this:
You use them with special pliers (they’re not very expensive), that have grooves in them to hold the staples like this:
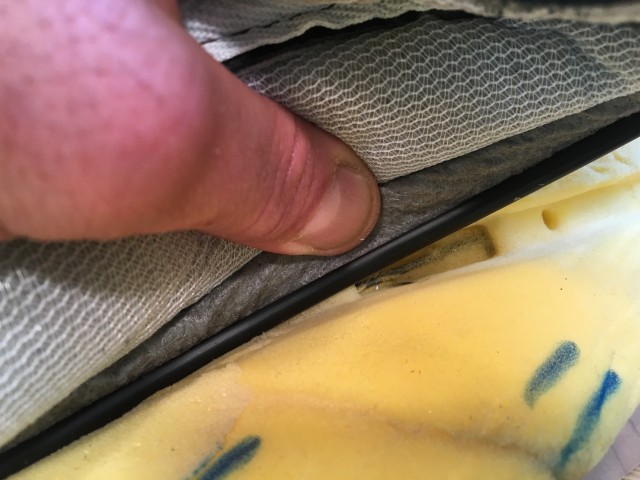
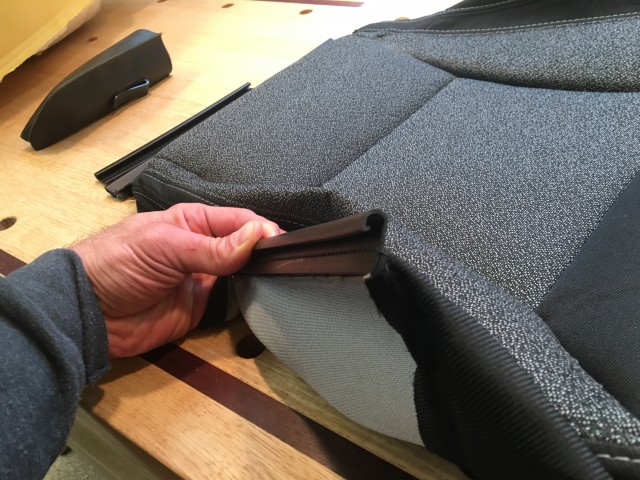
Then, what you do is put one end of the hog ring through the fabric holding the listing to the seat cover (the black plastic rod and grey fabric in the photo below). The other end of the hog ring goes around the metal rod embedded in the foam of the seat cushion. (You can see this below the listing in the gap in the foam.) Then you squeeze the pliers together and it cinches the staple into a ring and holds everything in place.
The only real difficulty with the hog rings is that with each one you fasten, you take up more and more of the slack you were working with. It’s sort of like painting yourself into a corner, on purpose. Because of this, the order in which you attach the hog rings matters. And though Dale had tried to give me some guidance here, knowing that order of operations is really something that comes with experience. Of which I had none. I was eventually able to get all the hog rings fastened, but not without more swearing.
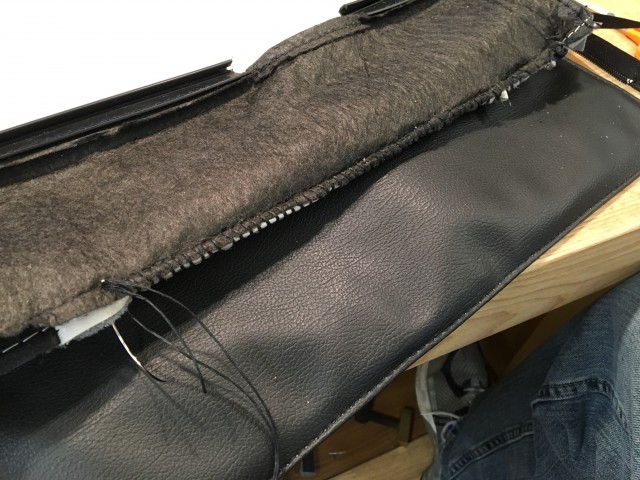
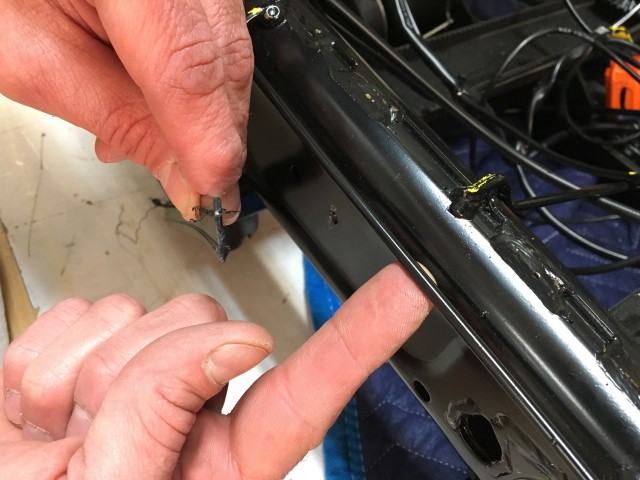
Then it was time to attach the plastic clips to the seat frame, and this is where I ran into my second big problem. THE NEW SEAT COVERS HAD THE WRONG KIND OF PLASTIC CLIPS ATTACHED! I really wish I was kidding, but I’m not. The new seat covers came with what I’ll call a “male” plastic clip attached, which you’ll see in my left hand below. The seat frame has a metal rod (right index finger) that the clip needed to attach to. Not gonna happen!
What SHOULD have been on the seat covers was a “female” clip, like this one that was on the original seat covers:
What to do? More sewing! Since I was feeling confident about my sewing abilities, and since we’ve already established that I’m impatient, I removed the plastic clips from the old seat covers and started sewing them onto the new seat covers in place of the incorrect ones.
But this time, it’s really a stretch to call it “sewing”. I was “sewing” plastic (think: credit card) to leather. I actually had to use a hammer and a pair of pliers to sew with. Seriously.
Again, the only real up-side to this is that for the second seat, I knew to do the “sewing” ahead of time instead of after it was already attached to the seat foam like you see there.
Once I had the correct clips attached, it only took a bit of wrestling to get the seat bottom attached.
And with that done, it was just a matter of reattaching the plastic trim pieces, carrying the seat out to the RV, and balancing on the running board holding the awkward 70 pound seat in the air and jamming some stupid metal tube into my left thigh while Stef threaded all the electrical connections through the seat base and I tried not to crush her hands. Then, just re-bolt the seats. Easy peasy!
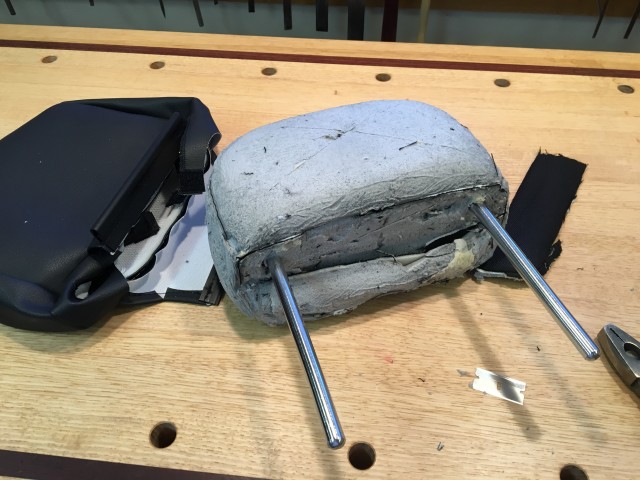
Oh, and it wouldn’t be complete without a word about the headrests. In the “how to” videos online, it showed them removing the headrest covers easily. But they also mentioned that if you didn’t need to re-use them, it might be easier to cut them off. At this point in the process, I was so far in, I went straight to cutting them off. Much to my dismay, the original head rest covers were glued – completely glued – to the foam below. And the “foam” was really more like someone had unloaded a grey can of that “Great Stuff” foam inside the headrest cover. It was an awful mess, and I wound up shaving them off with a razor blade. It looks like this with the cover off:
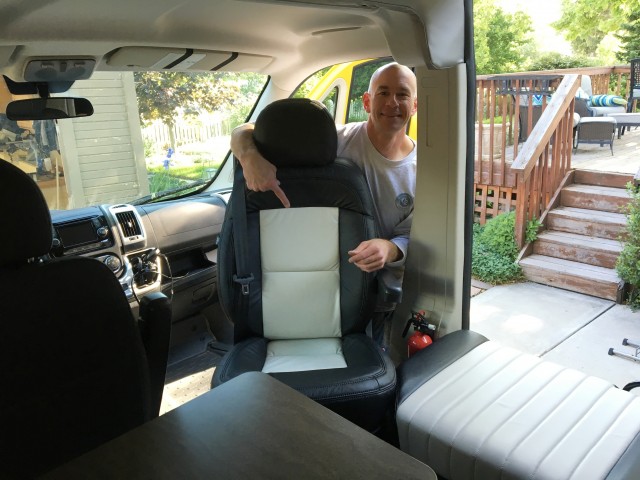
Stretching the new cover on was pretty easy (thankfully). But the removing of the old cover was so awful that on the second seat, I didn’t bother to remove it. I just put the new cover on over the old one. You can’t really tell which one is which when you see them in the RV.
And with that, I was basically done.
So, like I said, I don’t recommend that you try this yourself. I would much rather have dumped all this on some hapless upholstery installer. At least he or she might have had a proper industrial sewing machine.
Honestly, I don’t really blame leatherseats.com for the difficulties. Well, not all of them… They obviously knew there were some pattern differences among ProMaster models that year. They really tried to get it right. They called me. They asked for pictures. I’m sure if I had known what cues to tell them, they would have gotten it right. And based on their customer service pre-sale, I’m very confident they would have reworked the seat covers if I had called them and let them know. So I’m not throwing them under the bus. In the end, I was just too impatient to wait for all of that. So maybe I brought the problems on myself.
And, in the way of full disclosure – I paid retail for the seat covers from leatherseats.com. We have no affiliation to them.
Anyway, that’s the saga of our leather seats. Hope you found this useful – even if only as a cautionary tale…






James-even though i’m posting in 2019 on one of your old posts i assume you’ll see this.
I don’t necessarily want leather but i need MORE comfotable seats.
is yours more comfortable than the originals?
It’s been years, but we have two ProMasters in the driveway now.
I like the leather surface better. But I can’t say it’s any more or less comfortable. It’s just a new cover on the same seat.
“Comfort” is highly subjective. My bike seat, for example, has virtually no padding and I find it comfortable. Others may have different opinions.
Greetings,
We would like to get a Travato 59K with ProMaster chassis however we would need to move the driver and passenger seats back at least a couple inches. Do you think we could build some plate bracketry to accomplish this. We understand that the driver side cabinet will need some modifications. I understand as consumers we are responsible for safety. Thanks! Ricko J.
Well, anything is possible. Given enough time, money, and determination.
Would it be safe? I have no idea, and would not recommend it.
I would be very reluctant to put the driver and passenger in positions where the airbag system doesn’t think they are.
James,
Why did you want leather seats as opposed to the ultra-leather seats? Interested in buying a 2019 Travato and not sure if I should order the leather seat option.
My best and thank you – Heather
Believe it or not, Ultraleather is actually more expensive than real leather!
So cost was our main consideration.
Thanks for the response and a BIG THANKS to you and Stef for all you do in the RV World. Hopefully we will see you at one of the Winnebago Rallies with our bicycles in tow!
Hey! I’ve been looking to reupholster my Vinyl seats with fabric. Do you guys still have the old fabric from your seats? Maybe I could buy it off of you.
I’m so sorry! We discarded the fabric!
(I had to cut parts off of it to complete the leather install anyway.)
I was on the edge of my seat as you ripped out yours. You are a project animal James. Can’t wait for your next how to.
More like the next “how not to”! I think next, I’m going to install a dash trim kit. Should be much easier!
James, what a saga! Looks good in the end, though. In January, I saw a Roadtrek Zion with the leather(ette) option at a show in Atlanta. I was surprised to see it, because of the airbag issue, but it is still listed as an option on their website. The seats are more comfortable than the standard cloth, probably due to additional padding, and they looked great. Any idea how they did this? I seriously doubt they paid for crash testing.
Hmmmm. Never seen one in person, but I have seen pictures that I thought were leather on their website. I don’t know how they do it.
Could it have something to do with them being made in Canada? Nah. That doesn’t make sense.
I honestly don’t know. Maybe they cut a deal with RAM who crash tested some of their seats in their normal crash test runs?
I’m just guessing here. If anyone really knows the answer, please chime in!
You sir are a better man than I!!! If I were to attempt that my Scot / Irish temper would get the best of me and I would show the world how a seat could actually fly. With that sir I am sure that NORAD would catch the seat on the fly and also detect this old cranky Scot/ Irishman playing Amazing Grace to the passing on of my seat instal. Again sir you are a better man than I!!!! Oh that poor woman Stef…what must she take before SAINTHOOD!!!!
Good night all!
tis himself the Fish
Oh trust me… tempers were flaring at Fit RV HQ!
(We managed not to launch anything into orbit though.) 😉
Ha…I bet as we men know…Heaven knows NO fury like a woman scorned…ha! Take it easy on the lad Stef as he knows not what he did…ha!
Enjoy the new seats guys and maybe you can get to the bikes and do them as well so GET ER DONE!!
Fish
Wow really nice work James. That was a ton of work but you pulled it off!
James, you’re certainly ambitious. When I bought my SUV from Carmax recently, they gave me the option of getting the seats re-upholstered in leather before I picked it up. I checked out a few installation videos on YouTube and quickly realized that I would happily pay someone else to do the work for me. YOU (and Stef) ARE THE MAN!
Ambitious, or simply misguided. Sometimes I don’t know which!
James, I assume you will follow-up with leatherseats to inform them of the differences you encountered with your seats vs their covers?
Based on what you said about them, I’d think they’d want the feedback, to help improve their product.
Steve
I haven’t yet (because I basically finished the seats and we hit the road). But I will.
This is a Tale Of Tradgety and Triumph! You Are the Man! Still looking to buy a PleasureWay, looked at the ProMaster Travato but could not pull the trigger on what we had discussed before, my Big Three! Shower, Bed and Slider Door! Appreciate all you do and look forward to your Blog! You Guys Rock!
Thanks, Paul. I’m still recovering from the trauma…
James, they look AWESOME!!!!
And they have that “new RV smell”!!