This post may contain affiliate links.

Short Attention Span Version:
- Depending on your door, it may be possible to install a residential deadbolt in your RV. It works in the Winnebago EKKO.
- But this one won’t work in the EKKO if you still have the original screen door.
- Door thickness, backset, bore size, and door construction are all critical details. Be sure you know them before selecting a lock.
- RV doors will require reinforcement to prevent crushing the core with a residential deadbolt.
- You may have to source hardware to make the lock fit.
- It will try to thwart you. Be resourceful.
Keyed security in the North American RV industry isn’t so great, and that includes on our main coach entry door. The door is made by PTL engineering, and there are two Trimark brand “locks” built into the door. Besides the shockingly small number of different keys for these locks, I just wasn’t happy with the security of them in general. The “deadbolt” in the lock is a ¼” thick piece of pot-metal, and would probably break if you hit it the right way on a cold day. Not the greatest.
I’ve been slowly working towards improving our lock security in the RV. I recently installed deadbolt locks from HEO Solution on our RV’s exterior storage compartments. These have worked out great so far, and I thought I might like to have one for our RV’s main entry door. I even went as far as ordering a new matching lock from Europe for the task.
But it turned out there were several reasons why that didn’t work. The setback on the lock… the locations of the required screw holes… the locations of steel reinforcements in the door… They just weren’t all compatible with each other. So I had to abandon that idea.
A keypad lock was an interesting option, and something Stef had been asking for. But the RV keypad locks are just as crappy as the keyed locks. They’re thin and weak. And literally every one of them I’ve found specifically says it doesn’t work with our PTL doors. (It’s weird! Like they literally say “replaces every RV lock ever made except the Trimark locks in motorhome doors made by PTL Engineering.” I’m not making that up.)
Eventually, that led me to investigate regular residential deadbolt locks. Generally speaking, these aren’t a straightforward install into an RV door for a number of reasons.
- The doors on most RV’s usually aren’t made to standard residential door thicknesses.
- RV door construction is lightweight and hollow, and would crush as you tighten the two halves of the lock together
- The RV door jambs generally don’t have enough space or the strength to support the large hole required for a residential deadbolt.
There may be other reasons it doesn’t work so well, but those were top-of-mind for me.
But after I struck out with the HEO Solution lock, I kept coming back around to this idea. Why not? I kept thinking.
“Well, because if you try it and it doesn’t work, you’ve got lots of very large holes in your RV door!” was the answer I kept giving myself. But after lots of research, I concluded I might actually be able to pull it off. I wasn’t 100% sure it would work. But I got myself like 80% sure, and that seemed like good enough odds to try.
(Fun Fact: I’m usually only ever about 80% certain my mods will work. I just don’t tell Stef that when pitching them to her.)
If you want to try this, I offer you no guarantee it will work in your particular RV. You have to be handy. You have to be resourceful. You have to be confident. But here are some tips I picked up along the way that might help you build up the nerve to try this yourself.
Know your door.
I’ve mentioned that our door is made by PTL Engineering. That turned out to be a good thing, because they’ve got pretty good customer service. I emailed them and asked them for some construction details of their door. I needed to be able to locate the framework and reinforcements inside the door, so that I could be certain I wouldn’t be drilling a two inch hole through a critical piece. They sent me some diagrams that made sense.
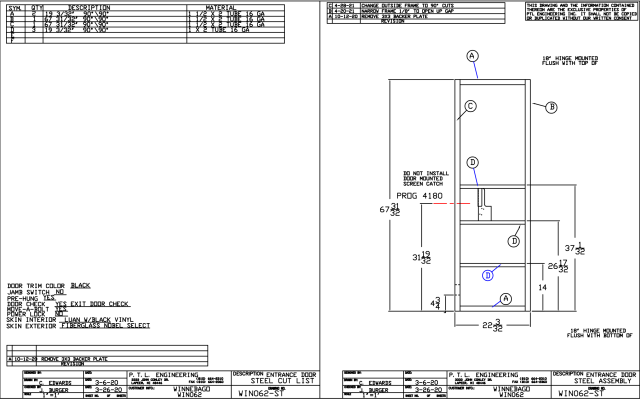
Drawing courtesy of PTL Engineering.
On top of that, the interior framework of the door is steel. This meant I could use a magnet and run it over the inside surface of the door to get a good visual idea on where the steel was. This was progress.
When selecting a lock, you need to know the “backset” of the lock, and whether or not that will work with your door. The backset is the distance from the edge of the door to the center of the big hole. There are two common backsets for residential door locks: 2-3/8″ and 2-3/4″. With the sizes of the steel tubing inside the door, and the sizes of holes required, I determined that I needed a lock with a 1-1/2” bore hole, and a 2-3/4” backset… and that would just clear the structures of the door.
The next thing I needed to figure out was the thickness of the door. Fortunately, since I had recently cut a hole in our door to install a window, I knew this exactly. (I even still had the cutout!) So I knew I needed a lock that would fit a 2-1/4” thick door. That actually narrows down the lock choices a great deal.
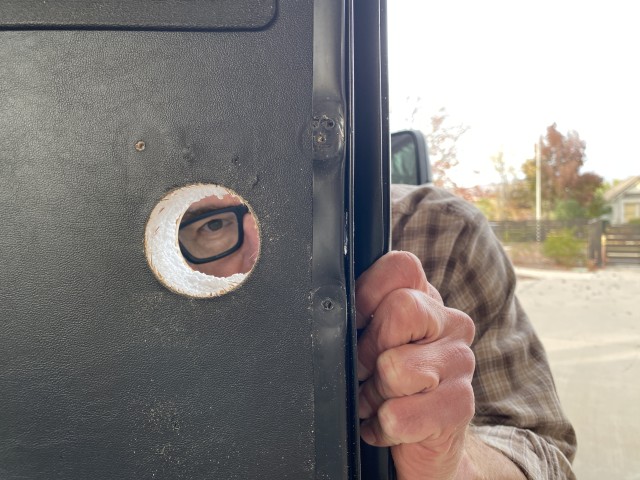
Finally, I needed to make sure I could drill a 1” hole in the door jamb capable of receiving the deadbolt. There were already a number of holes in the door jamb for the existing joke lock, and from what I could see peeking inside them, it looked like this wouldn’t be too much of a problem.
Here’s the lock I used.
This lock fits an EKKO (sort of). If you have something other than an EKKO, you’ll need to figure out all the measurements for your rig. From everything I could see online, this one looked like it would work.

The Yale Assure 2 Lock
But here’s the thing with this lock: it has a rather thick interior component. If I had not removed our EKKO screen door and replaced it with a fabric screen… this lock would not have fit. I’m going to repeat that again, because it’s a big deal:
If your RV has a screen door, make sure there is space between the door and the screen for the lock you select.
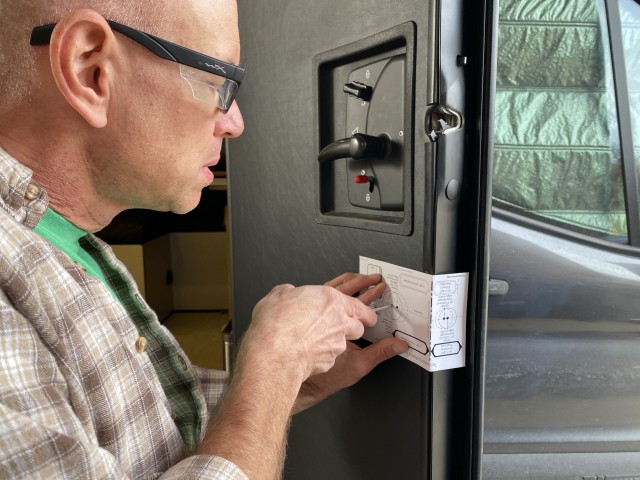
Installing the lock
You more or less follow the instructions for the lock to install it. The first step is tearing out the life-size template they give you and using it to mark the locations for the holes in your door. It’s very important to make sure you mark for the correct backset and the correct bore diameter. (And for the bore diameter, you really do want to pick 1-1/2, as I’ll explain in a bit.)
Once you get the hole locations marked… step away. Come back inside for a few minutes. Have a snack. And then head back outside and go through the steps to mark the holes again. You get exactly one shot at this. Once you’re confident of your hole locations, make an offering, and start drilling.
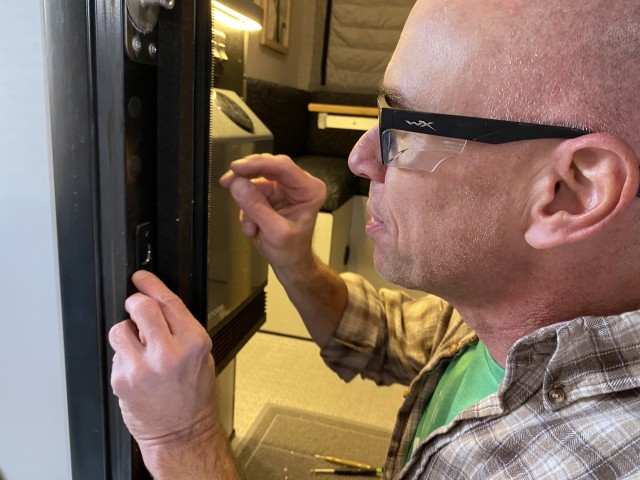
Drilling the edge hole
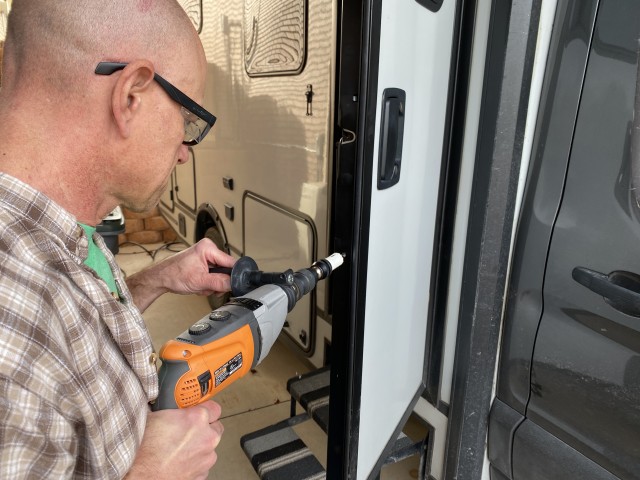
This stuff’ll make you nervous…
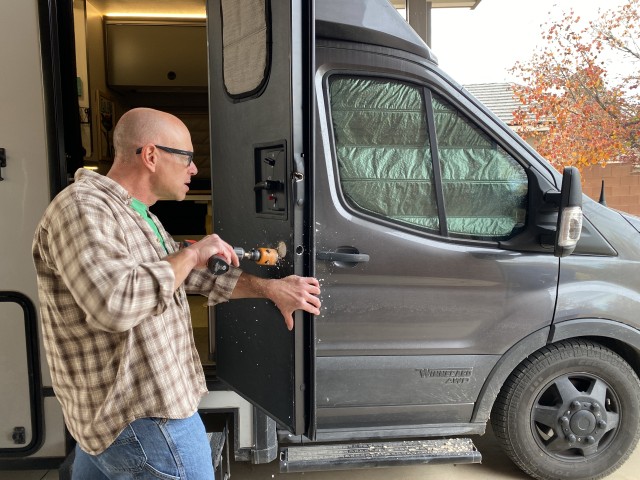
You’ll start with the 1 inch hole in the edge of the door. Two tips here. I was drilling through ¼” of aluminum, and then two sides of 16 gauge steel tubing. So if your door is anything like mine, tip #1 is to not use a battery powered or under-powered drill. You want to blow this out in one go, not frustrate yourself by having to change batteries twice during one hole.
The second tip is to make sure you’re drilling straight, level, plumb, square, etc. It’s challenging to do with a hand drill, but if your holes don’t line up, you’re going to have a really hard time forcing a deadbolt through steel.
I used a bimetal hole saw to drill this hole, and it worked out OK. It got a little sloppy on the entry into the aluminum, but nothing that would affect the security or function of the lock.
Drilling the bore hole
I said you’d want a lock that supports a 1-1/2” bore… and you want to mark your door for that. But you’re actually going to drill a 2 inch hole. Here’s why:
RV door construction (apart from any metal framing) is generally two really thin plywood or fiberglass layers sandwiching a squeaky Styrofoam core. It makes for easy drilling, but when you go to install the lock, as you tighten the screws down, you’ll just crush the door. So you need to reinforce the hole so as to not crush the door.
Just be ready for styrofoam beads everywhere.
I wish I could take credit for coming up with this solution, but I can’t. I found it in a YouTube video somewhere, but it works out great. What you’re going to do is find a piece of 1-1/2” inner diameter ABS pipe, and you’re going to cut that to the thickness of your RV’s door. The lock innards will fit into the inner diameter of the pipe, and the pipe will fit into your 2” hole. The pipe keeps the lock from crushing your door. It’s brilliant.
Marking the correct length of pipe to fit inside the door.
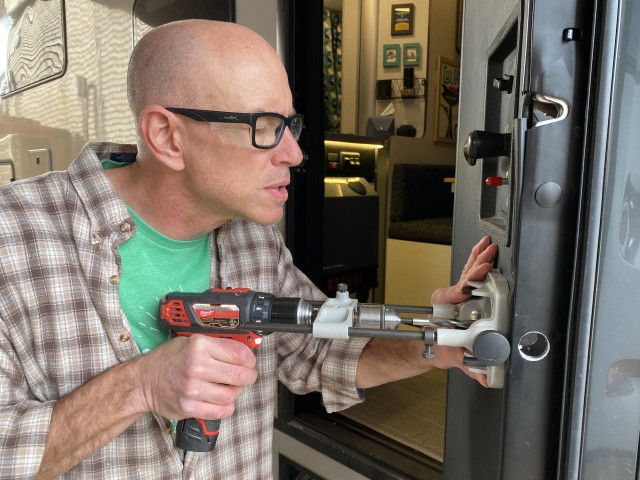
So as far as the bore hole, you need to drill it very straight and true. I used a portable right angle drill attachment. It also helps if you drill your pilot hole first through both sides, and then come back and attack the main bore afterwards. Due to the construction of the door, and the fact that I was able to miss all the internal steel, this was a pretty easy hole to drill.
Now for the supporting pipe. The deadbolt has to pass through the walls of the pipe – kind of on both sides. So once you’ve got the pipe cut to your short length, and your bore hole drilled, secure the piece of pipe in the door, and then go back and re-drill your door-edge hole to cut through the pipe. When I did this, I cut through the first side of the pipe that way, but then took it in the shop so I could see what I was doing a little better.
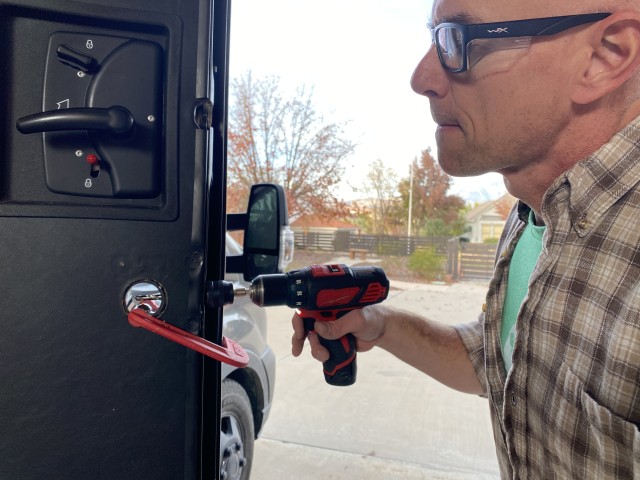
Drilling the door jamb
Marking this hole is actually harder than drilling it. Due to the way RV doors are constructed, it’s just not easy to mark where the mating hole is. What I wound up doing is getting a short pencil, putting it inside the the hole in the door, closing the door, and then scribbling all around the door edge hole from the inside to mark a spot on the door jamb. It worked well enough, and I was able to get pretty close to center of my scribbles to mark the jamb hole.

The step drill really is the way to go here.
This is just another 1” hole, but I found it easier to drill this with a step drill rather than a hole saw. The jamb of the PTL door is aluminum anyway, so it went pretty easy. Do be sure you have room to install the door jamb stiffener plate that comes with your lock. In a normal residential lock, you’d chisel out some wood to make room to recess the jamb plate. But that doesn’t work so well with a metal door jamb, so do make sure you’ve got room to install it. Fortunately, with the PTL door, I did.
Assembling the lock
With all the holes drilled, it should be kind of plug-and-play to install the lock itself. They’re not complicated to install – you just screw them together. But of course, with an RV install, there was a final wrinkle.
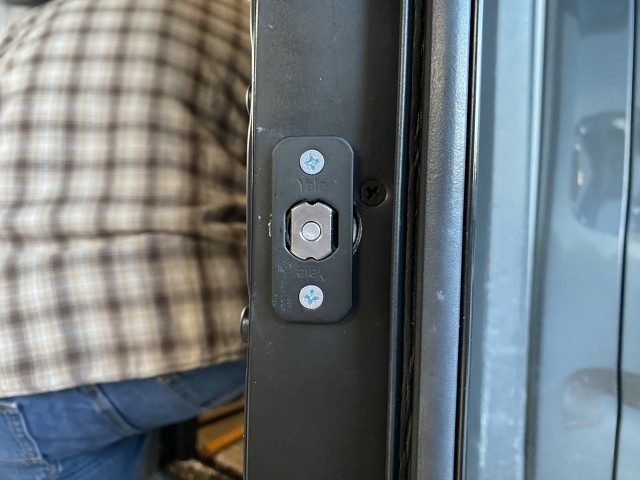
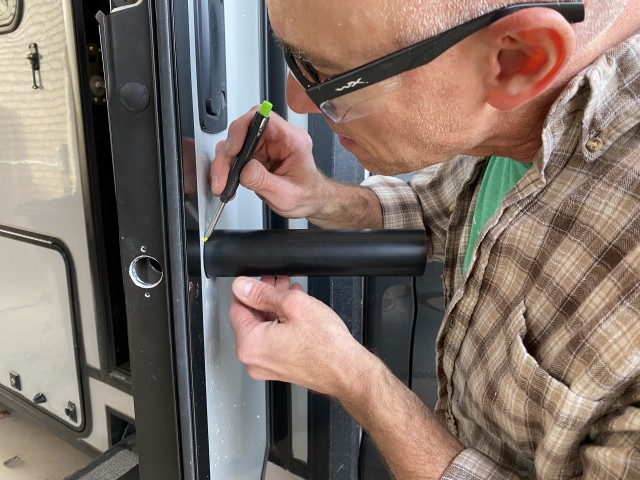
Not as clean as I would like, but it’s not often seen.
The deadbolt itself went in OK, and I was able to secure it to the door edge. It’s anchored into steel tubing, so I’m extremely confident in that part of the install. Unfortunately, it does reveal where my door-edge hole got a little oversized. So it doesn’t look fabulous. Fortunately, that doesn’t affect the function or (more importantly) the security.
But connecting the two halves of the lock together was a real pain. Though the lock was advertised as fitting a 2-1/4” door, and my door was 2-1/4” thick… the supplied screws simply wouldn’t grab to connect the two halves. I could get one of the two screws to engage one out of every 15 attempts, but the other screw would barely engage at all. This didn’t fill me with confidence.

The instructions said you had to use their bolts to install the lock… but I couldn’t really believe they developed their own proprietary threading standard just to make this one lock. And of course they hadn’t. I eventually figured out that the bolts for this Yale lock were M6-1.0. The length I really needed for this door was 60mm long, and I was able to find some bolts at the local blue Borg.
But of course, they didn’t initially fit. The threading fit just fine. And the length was fine. But the bolt heads were too big to fit into the recesses in the lock mounting plate. That’s a solvable problem though. I just ground away at the bolt heads until they fit.
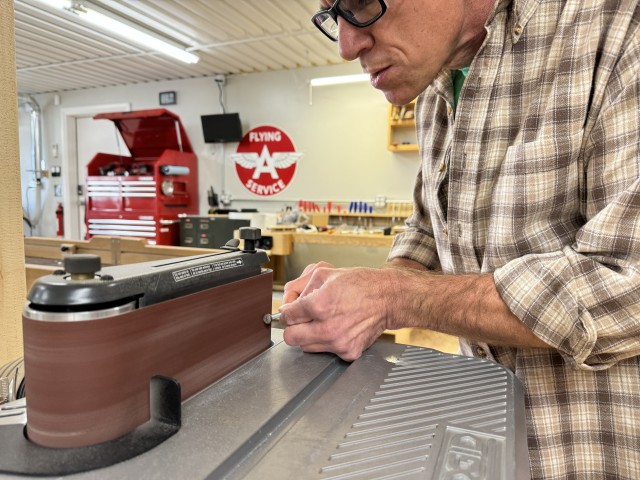
Fun bonus! This is also a great way to launch bolts across your shop space!!
A word of caution here – the bolts from a Kwikset lock don’t necessarily fit a Yale lock, or a Schlage lock, or any other lock. So depending on the lock you select, you may have to play your own game of “bolt-finder” if the supplied bolts don’t work. I feel like I got lucky finding the right bolts available locally.
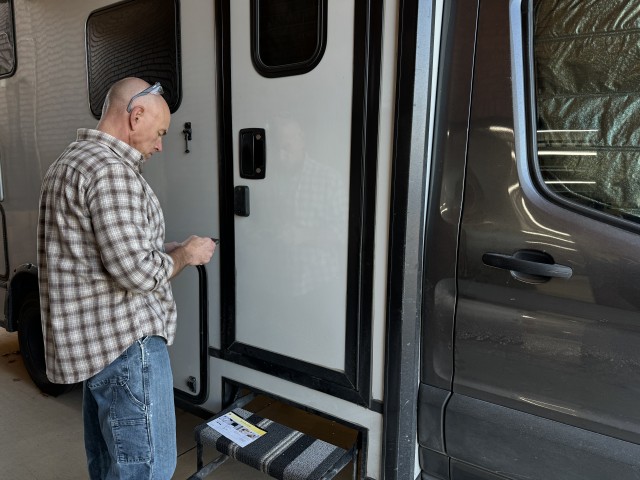
How do we like it?
Now that I’m done swearing in the driveway, I really do like the lock. Not only is it much more secure than the Trimark Joke lock the RV came with, but we also have keypad entry. This particular Yale lock also has Bluetooth, and app-based features… I’m sure they’re great and all – but to my mind, those are just bonuses.
With this lock, the app seems to be *the only* way to set a combination.
So, the moral of this story is that you *can* use a residential lock in your RV. You just need to make sure you pick a lock with the right dimensions and parameters, and you need to be prepared to think on your feet to get it installed. But it CAN be done!
See you out there.


