This post may contain affiliate links.
PHEW!!!
We’re back in Utah after attending Winnebago’s annual RV Rallypalooza (it’s really called GNR but my name’s cooler); what a whirlwind! I won’t bore you with what a crazy great time we had, but gadzunks gang, WE HAD A CRAZY GREAT TIME!
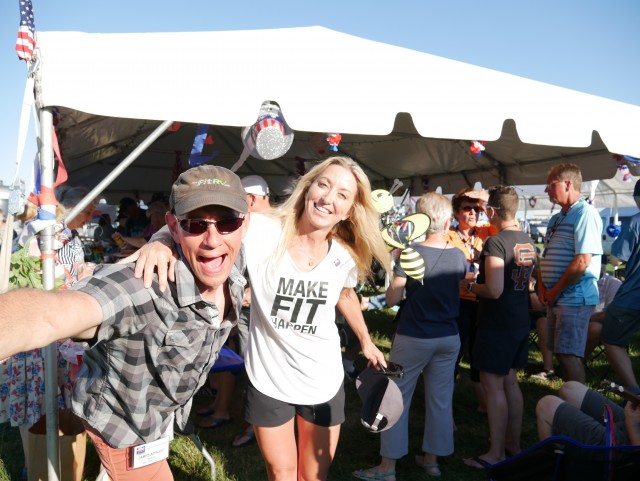
Photo credit: Kenny Phillips from Moving Forward Adventures (thx buddy!)
I WOULD give you all the rally details but hey, what happens in a field in Iowa, stays in a field in Iowa. Besides, I might just be writing about it for Winnebago’s “GoLife” blog and don’t want to spill the beans.
I will tell you this bit. While at GNR, between James and me, we led 9 fitness-related events. MIC DROP!
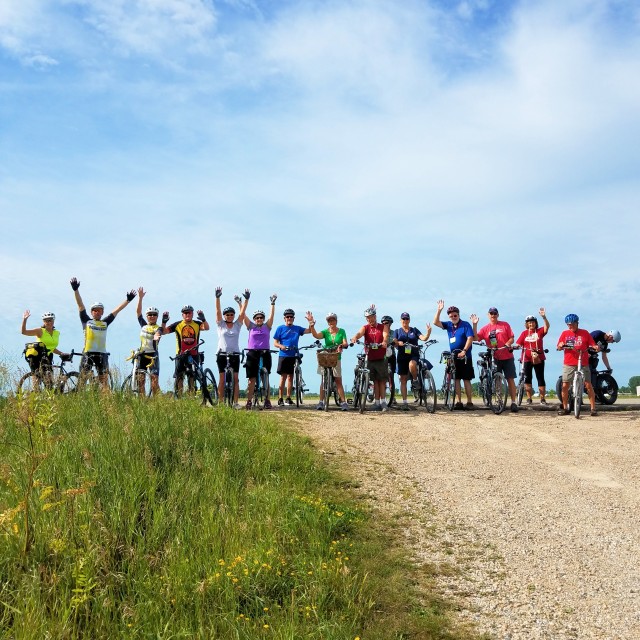
Photo Credit: Kenny again!
That’s just so awesome in many different ways; especially that it feels like our FitRV mission is having an impact. Proud and happy trainer here.
So now that the inevitable tangent is out of the way, let’s talk about this here workout plan you’ve clicked on.
This workout was actually inspired by a couple of the ladies who were at the rally with me. Both are fellow Travato owners (one from the Midwest and one from New England), both came to the rally armed with a brand new bag of Bodylastics resistance bands ready to workout with me. One of them had seen my other resistance bands printable workout and wanted a workout plan where she didn’t have to attach the bands to anything. I get it. She wasn’t ready for that extra complication just yet. The other requested something she could do around the RV. There’s not always a ton of space at campgrounds, and she wanted to able to use her rig as part of the workout. So, with these requests in mind, this one’s for you, Stacy and Linda! xoxo
PRINTABLE WORKOUT PLAN HERE (click the pic):
Now just because I designed it for newbies, don’t think this is a beginner’s-only workout. As it goes with resistance bands, this full-body workout can be as challenging as you wish to make it and is completely appropriate for more advanced fitness enthusiasts as well. And seniors, as long as you’re holding on when you need to, and keeping safety your first focus, this is just as beneficial for you. Now all you need is to get yourselves a resistance bands kit! We recommend the Bodylastics brand. We have no affiliation with the company (so buy through our affiliate link here on Amazon!), but they really do make a great product at a great price. Their bands have a safety cord that runs through them so if it were to snap on you, you’d be safe. By the way, we’ve had our pro kit for years now, use it all the time, and we’ve never had one snap.
Around the RV with Resistance Bands Workout!
DIRECTIONS:
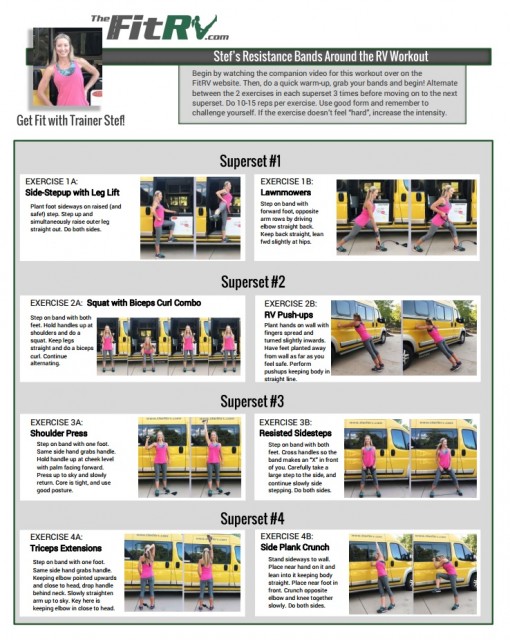
The workout is set up in supersets. So, there are two exercises you’ll alternate between for 3 sets. Once you’re done with all 3 sets, you move on to the next superset. As for reps, shoot for 10-15 depending on what feels right for you.
SUPERSET #1
1A: Sidestep-up Leg Lift:
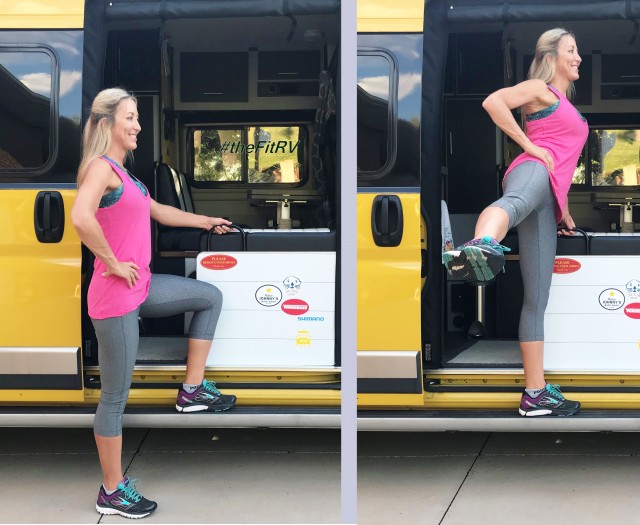
Stand on the ground, sideways to your step. Place your near foot on the step and keep it glued there throughout the movement. Place all your weight on the leg that’s on the step and straighten the leg. Simultaneously, lift your outer leg away from your body. Slowly return outer leg back to ground, shifting weight equally between feet. Continue to repeat reps and when completed, switch to other side.
1B: Lawnmowers:
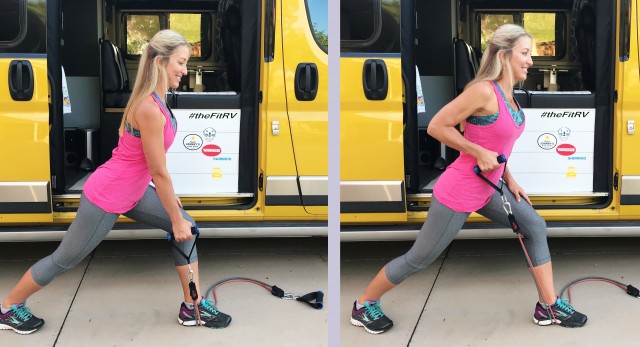
Stand with legs split with one foot in front of other (start with left forward). Now stand on the band(s) with your front foot, ensuring band is safely under your foot and can not snap out. Leave around 12 inches of elastic on the inside of the front foot and grab the band with the arm opposite of the front leg, making sure the band is short enough so there is ample tension on it even with your arm extended. Keep your back straight and head aligned with spine, and then bend forward at the hips. Now,keep body in that position as you pull the band back until your hand is near your hip. Slowly return the band forward so that arm is extended straight down towards foot. That’s one rep. Continue repeating and then switch to the other side.
SUPERSET #2
2A: Squat and Biceps Curls Combo:
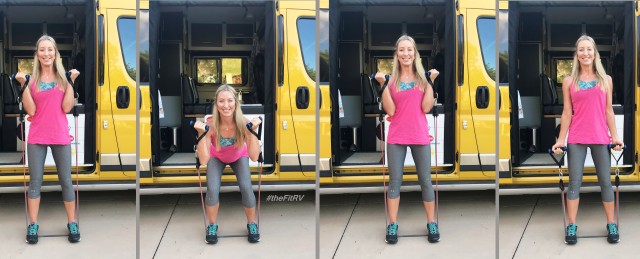
Stand on band(s) with feet slightly wider than hips and legs straight. Use good posture and tighten core. Pull the handles up to your shoulders (palms facing shoulders) with elbows pointing down and close to your body. This is start position. Keep your arms in this position with handles held at shoulders as you lower yourself into a squat using good squat form (hips drive back, heels stay firmly rooted). Return back up to start position, and now keep your legs still as you perform a biceps curl with the band. That whole series makes one rep. Continue to repeat, alternating between doing a squat and then doing a biceps curl.
2B: Personalized Push-ups:
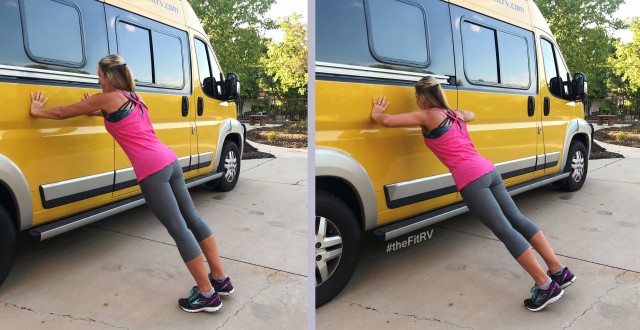
Many options here. Beginners or those with shoulder issues, do a wall pushup. To perform, stand facing a wall (or your RV) at least two feet away, more distance for a bigger challenge. Place your hands on the wall no higher than shoulder height. Spread your fingers and turn hands slightly inward. Drive elbows out to the sides as you bend them and bring your forehead closer to the wall. Allow your heels to raise with the movement and ensure your hips are in a straight line with the rest of your body. Intermediate, place your hands on a sturdy counter or seat and perform pushups. Advanced, perform traditional pushups (or knee pushups) on the ground.
SUPERSET #3
3A: Single Shoulder Press:
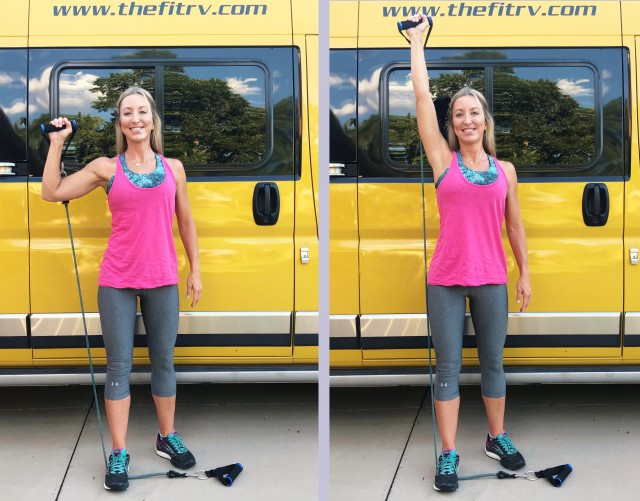
Stand on the middle of your band with one foot. Grab the handle on the same side as the foot holding the band. Leave the other handle loose on the ground. Lift the handle up to the outside of your shoulder and ensure your palm faces forward and your elbow is pointed down. This is the start position. From here, extend your arm straight up to the sky and slowly lower back to start. Continue repeating and then switch to the other side. Make sure you stand tall with good posture and core tightened.
3B: Resisted Side-steps:
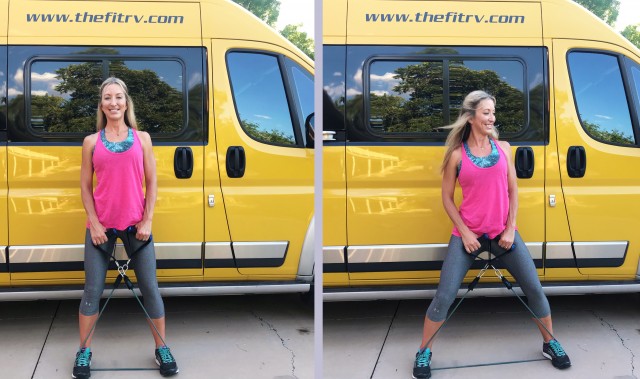
Stand on band with both feet, ensuring your feet are slightly wider than your hips. Hold the handles in your opposite hands so that the band forms an “x” in front of you. Slowly and carefully take sidesteps to your right. Continue doing all your reps to the right and then sidestep an equal number of steps to your left.
SUPERSET #4
4A: Triceps Extensions:
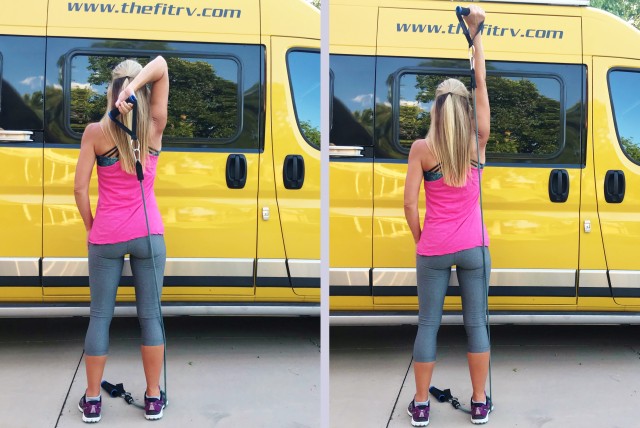
Stand on the band with one foot, holding the handle in the same side hand, and leaving the other handle loose on the ground. To figure out where to stand on the band, start by extending your arm straight up to the ceiling. There should be enough tension on the band that you are challenged, but are still able to get your arm up. From here, keep your elbow right where it is, and lower your forearm until the handle is behind your head. Don’t allow your elbow to wander out to the side (it will try) and instead make sure you work to keep it as close to your head as possible. The only part of you that should move in this exercise is your forearm, everything else stays still. Make sure you stand with good posture, and core is tight. Continue repeating the movement and then switch to the other side.
4B: Side-Plank Crunch:
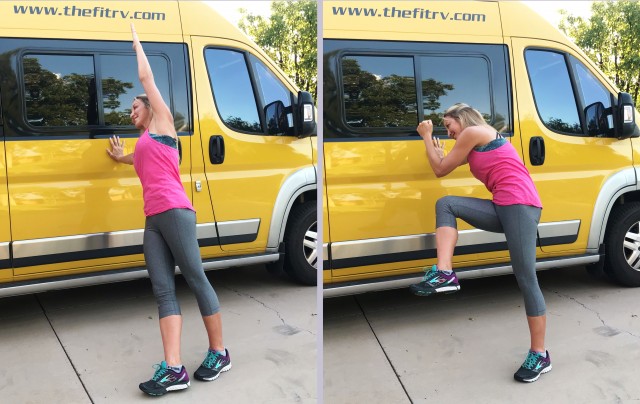
Stand sideways to a wall (or your RV) away from it enough that your fingertips are a few inches shy of being able to touch it (the further away you stand the more challenging the exercise). From here, put your hand on the wall and lean into it. (NOTE: People with shoulder issues, simply lean into the wall with the outside of your shoulder, with your arm down at your side). Align your feet so that your foot nearest the wall is directly in front of your outside foot with the toes of the front foot pointed. Your core should be extremely tight and your spine should be aligned with hips and legs. Crunch your outside elbow and your inside knee together while contracting your abs. Extend the outside arm up to the sky and return to leg to the start position (toe pointed, knee straight, and in line with outer foot). Continue doing reps and then repeat on the other side.




I appreciate the directions to complete a balance exercise while we are enjoying RV trips. I keep track of your recommendations!
Glad you found it useful Maria! Best of luck on your fitness journey, rooting for you! xoxo
Stef, can you recommend a set of reasonably priced resistance bands that won’t take too much space in our tiny travel trailer? Love your channel!
Yes! Definitely check out the Bodylastics sets: https://amzn.to/2vq9CuA
They pack down super small and have a safety cord in them so if they snap, they won’t snap and hit you! There are different sizes, the smallest is $30 and is sufficient, however, the $40 kit has an extra band plus you get a “small anchor.” I LOVE the anchors. They allow you to wrap around a post or fence or table leg, anything solid, and then thread the band through and use it more like a cable machine at a gym. It gives you tons more exercise options to have an anchor… you’ll see me using the anchor in this other resistance bands workout plan plus there’s links here to purchase the anchors individually: https://www.thefitrv.com/workouts/stefs-full-body-resistance-bands-rv-workout-video-printable-included/
And once you get them, hope you’ll give this workout a try! Stay strong, Henrietta! xoxo
This video and printable is fantastic! Need MORE MORE MORE!!!!!
Going on the road soon and will be using the bands. The moves are easy for those of us over 65.
Keep up your good work.
Thanks Gary! So glad the workout looks do-able for you… and I’m thrilled to hear you’ll be traveling with resistance bands… YES! Workouts on the road can be some of the best. xoxo
You are so good! Thanks Stef. I’ll definitely use this.
Do it, Tracy! I’ll be rooting for you!
Yay! Thank you SO SO much for helping me ‘break in’ my bands at GNR and thiese wonderful new resources. Our van is my new gym— even when it’s parked in the drivewy! ️♀️
You’re so welcome Rosie! So happy to hear you’re making the van your gym; in the driveway and on the road… good for you. Tell your mom THANKS for being my inspiration for building this workout; and both of you stay strong! xoxo